is there a problem with all the heat and igloo coolers close by? been brewing for a few years just now building a permanent brew stand. (Unistrut)I just did a major upgrade to my system. RIMS tube. Stainless Counterflow chiller. A pump. And push button igniters for the burners. Plus new camlocks for the tubing, and a new flow through thermometer. I also added another port to the brew kettle for whirlpooling.
The wet test will be done this week, and if it all checks out, I’ll be brewing on it next week.
You are using an out of date browser. It may not display this or other websites correctly.
You should upgrade or use an alternative browser.
You should upgrade or use an alternative browser.
Show us your sculpture or brew rig
- Thread starter Onescalerguy
- Start date

Help Support Homebrew Talk - Beer, Wine, Mead, & Cider Brewing Discussion Forum:
This site may earn a commission from merchant affiliate
links, including eBay, Amazon, and others.
There won't be enough heat hitting the mash tun to hurt but it should help to keep the mash temp where it should be.is there a problem with all the heat and igloo coolers close by? been brewing for a few years just now building a permanent brew stand. (Unistrut)
FillWholeWell
Member
- Joined
- May 23, 2021
- Messages
- 16
- Reaction score
- 49

Klarstein Maischfest, built a simple table at perfect height using the frame from a barstool !
The cooler did get hot being so close to the top burner, but I had a sheet of aluminum diamond plate that I made a shield with. The bottom burner isn't an issue, though I did put some diamond plate on the wood stand too. I've been brewing on it since 2010. I haven't burned it down yet.is there a problem with all the heat and igloo coolers close by? been brewing for a few years just now building a permanent brew stand. (Unistrut)
Thanks for the replies... ni e to know I can use my cooler, now to find a cheap source of diamond plate for the new single tier brew stand I have started.The cooler did get hot being so close to the top burner, but I had a sheet of aluminum diamond plate that I made a shield with. The bottom burner isn't an issue, though I did put some diamond plate on the wood stand too. I've been brewing on it since 2010. I haven't burned it down yet.
I’ve melted a cooler before. I use a 3 tier and I just spin the cooler if it gets too hot. I just added a second deflector plate. Looks kind of like a heat sink. I’m an exterior brewer so the cooler MT is my best option.
Thanks I was pretty sure you could melt a cooler maybe I should add a tier just to protect the cooler. I will still use the pumps I so I can run the wort through my herms coil in my HLTI’ve melted a cooler before. I use a 3 tier and I just spin the cooler if it gets too hot. I just added a second deflector plate. Looks kind of like a heat sink. I’m an exterior brewer so the cooler MT is my best option.
I run a HERMS as well. Adding the heat shield was my ticket. The 20 tip jet burners put out a ton of heat. My rig is hooked up to NG, glad no propane tanks. If I had it to do over, I’d build a 2 tier. I built the structure before I had my pumps.Thanks I was pretty sure you could melt a cooler maybe I should add a tier just to protect the cooler. I will still use the pumps I so I can run the wort through my herms coil in my HLT
martyjhuebs
Naked Gnome Brew Co

Orval
Well-Known Member
- Joined
- Apr 3, 2021
- Messages
- 93
- Reaction score
- 34

My BIAB set up in my basement. Using an SS Brewtech Brew Cube with a mounting plate I made for my pump and chiller.

My BIAB set up in my basement. Using an SS Brewtech Brew Cube with a mounting plate I made for my pump and chiller.
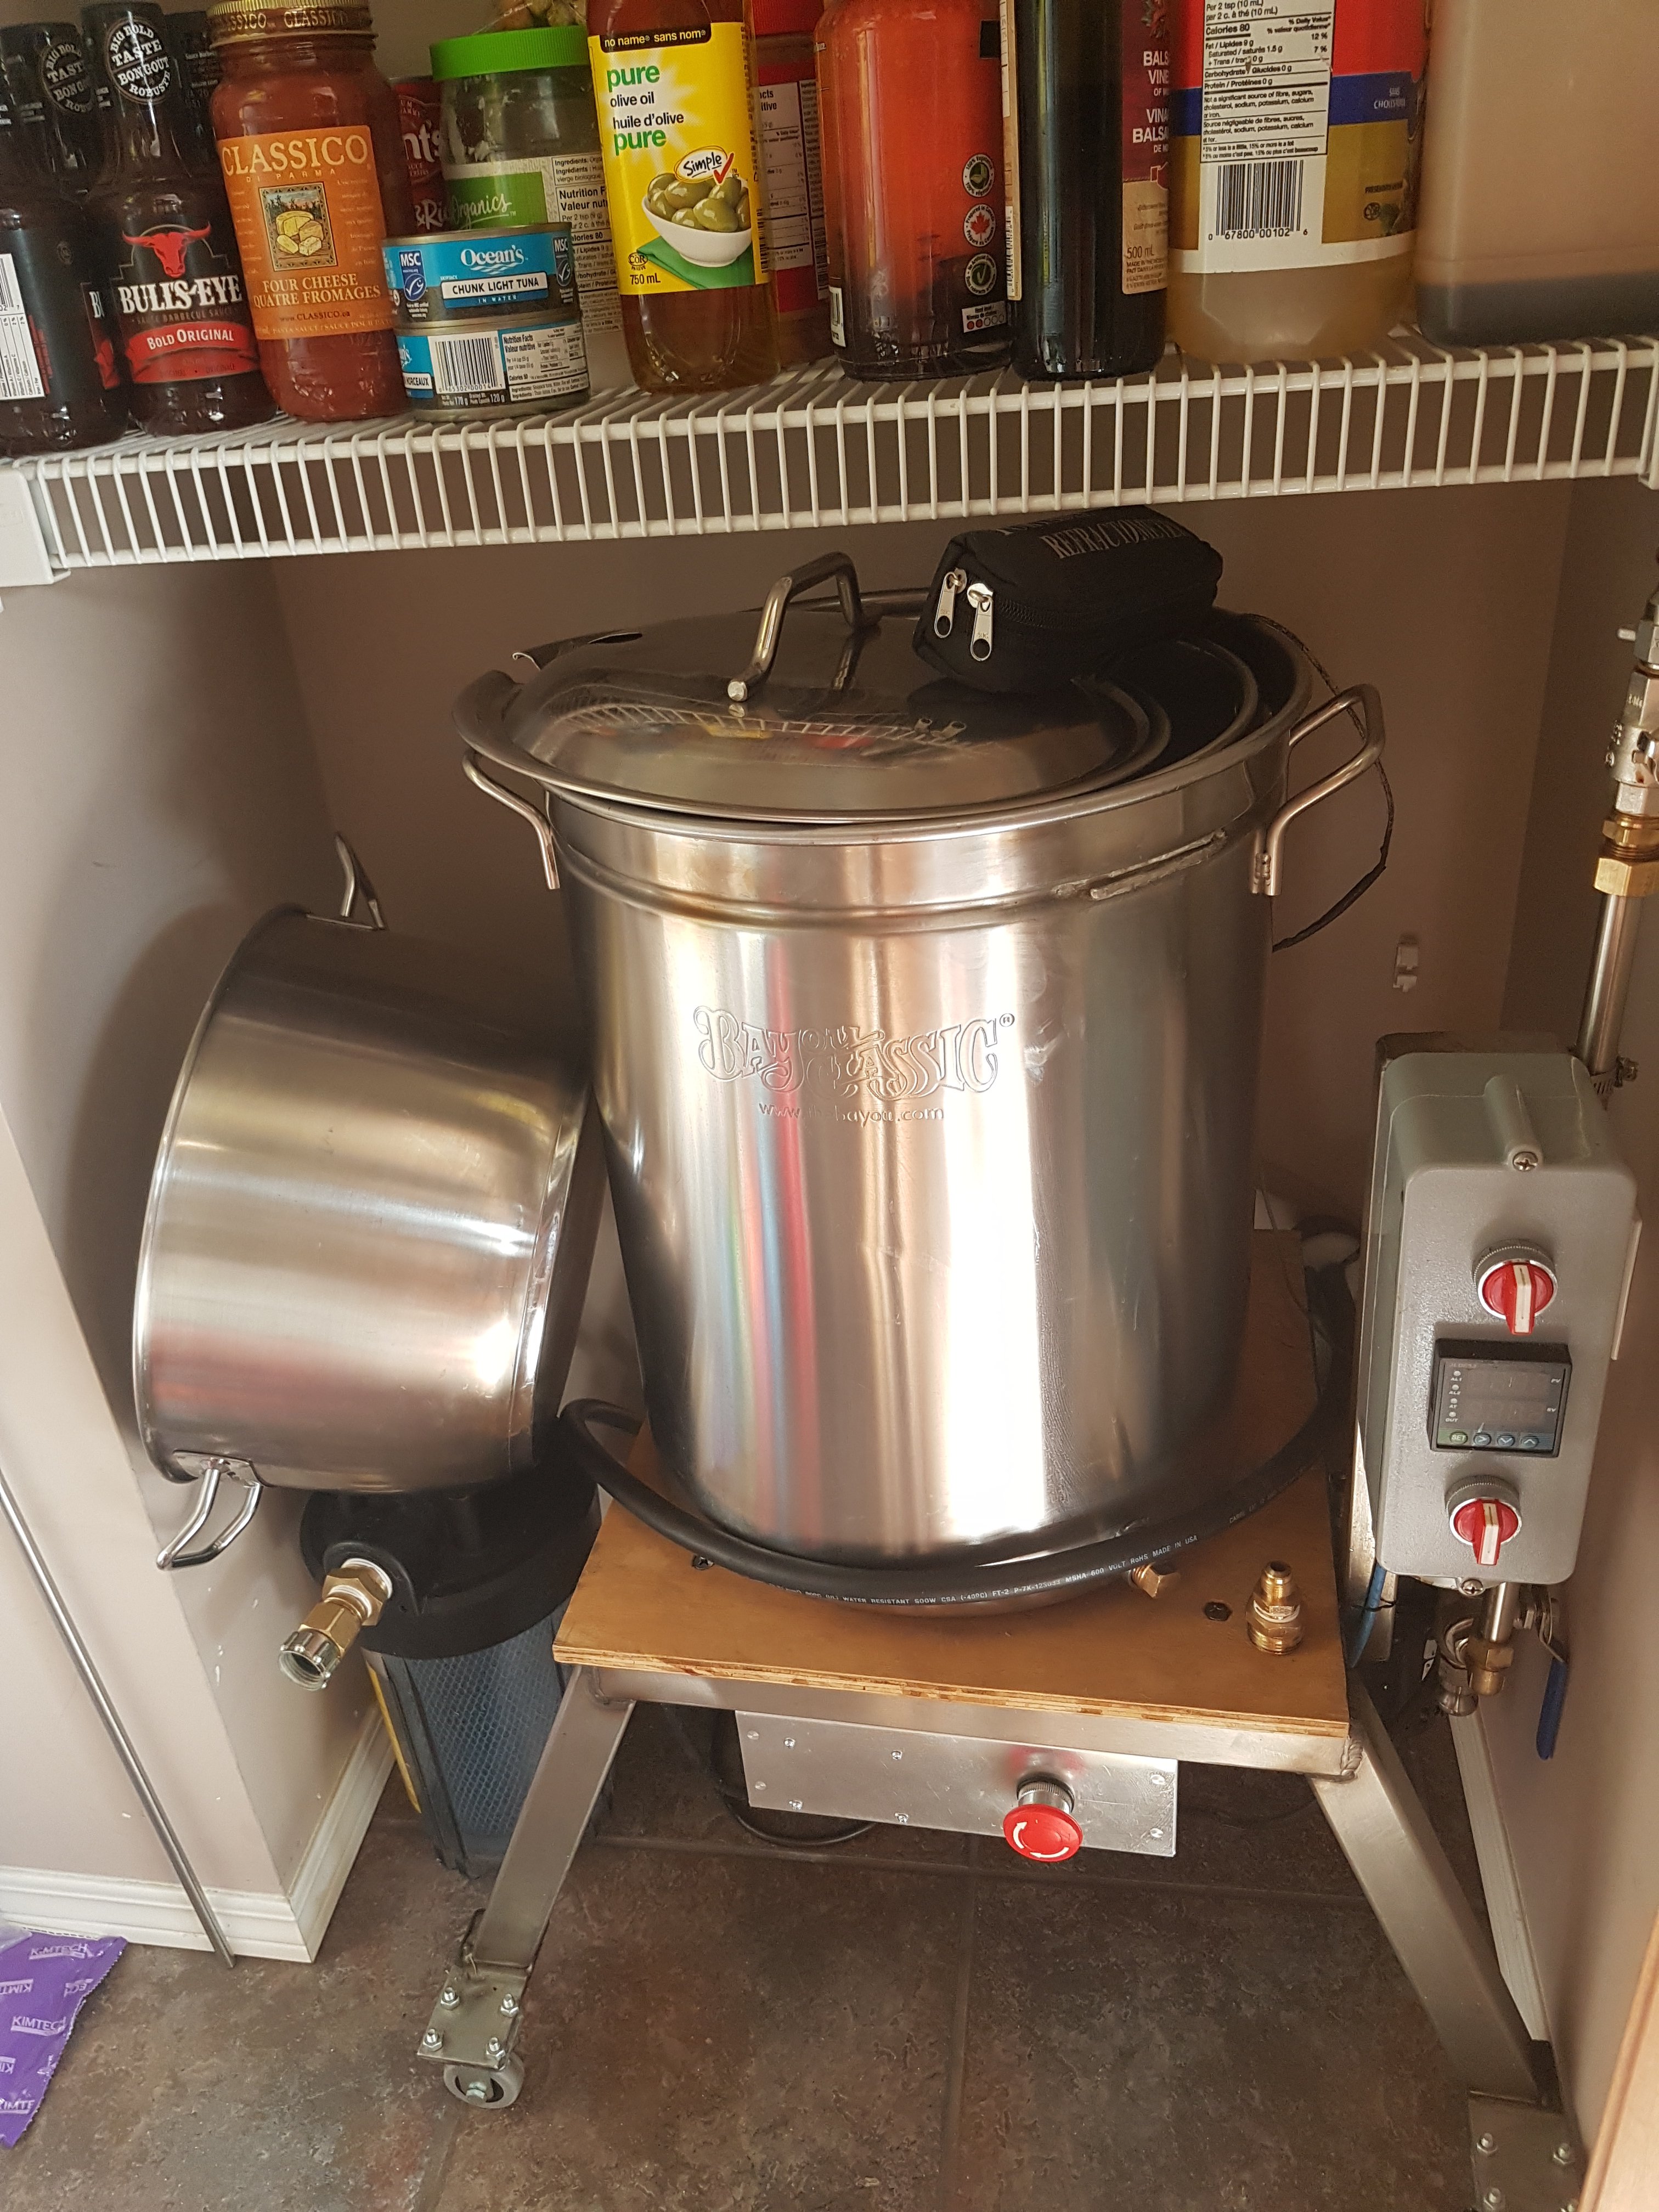
Finally someone picked up on the small wheeled all in one format ! Mine stores in our pantry. I can go from stored to heating mash water in 10 minutes.
I much prefer to put my chiller in the sink.
What are you using to old the heat band on your fermenter ?
Attachments
Last edited:
Finally someone picked up on the small wheeled all in one format ! Mine stores in our pantry. I can go from stored to heating mash water in 10 minutes.
I much prefer to put my chiller in the sink.
What are you using to old the heat band on your fermenter ?
I'm using these when I picked them up on sale. I don't think they're available from Tekton anymore though.
https://www.tekton.com/30-inch-red-adjustable-polyurethane-bungee-cord-62039a1
Throttle79
Cache Creek Brewing

BeerGeekInFL
Well-Known Member
- Joined
- Mar 23, 2021
- Messages
- 235
- Reaction score
- 36
Nothing permanent yet, but I also like that I can just take it all and put it away.

- Joined
- Dec 25, 2021
- Messages
- 86
- Reaction score
- 51


Just picked this up. Still need some fittings and hoses as well as a gas line run to the garage.

- Joined
- Jan 3, 2020
- Messages
- 2,297
- Reaction score
- 2,376
Nice wheels!Just picked this up. Still need some fittings and hoses as well as a gas line run to the garage.
View attachment 763877

Shes almost complete!
I can see a " Tom's Brew Shop" sticker behind that thermometer on the MT.
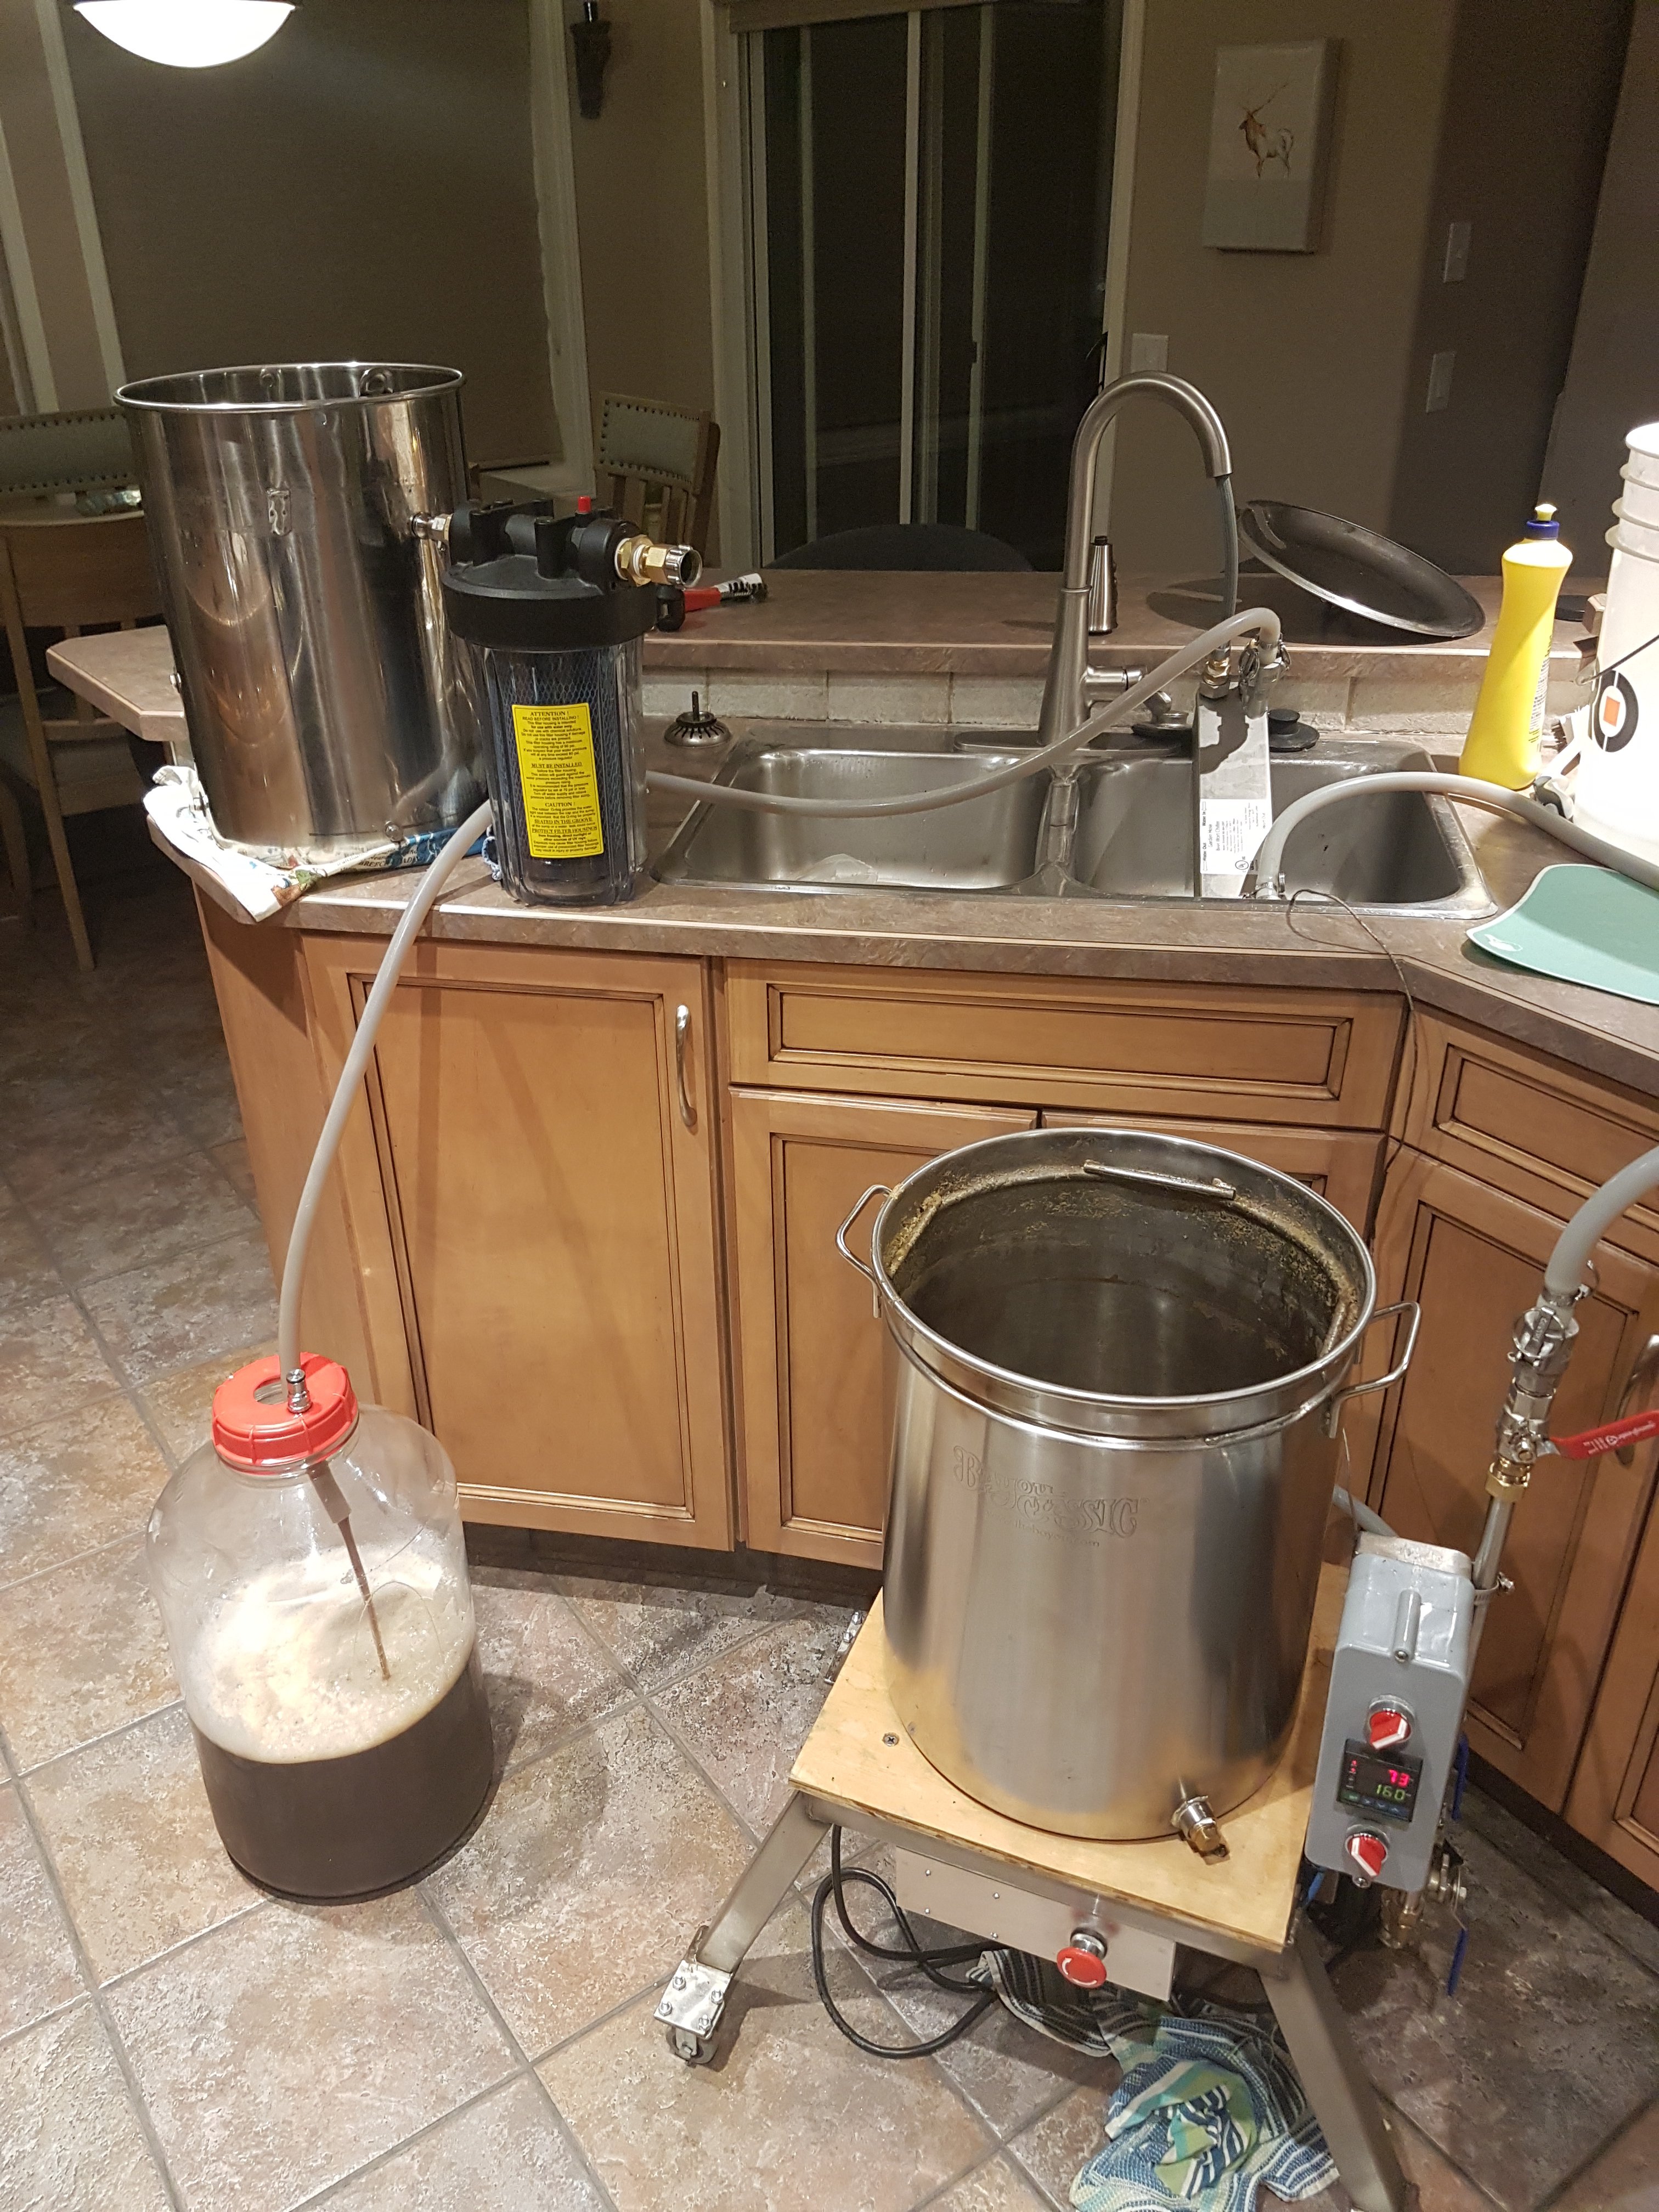
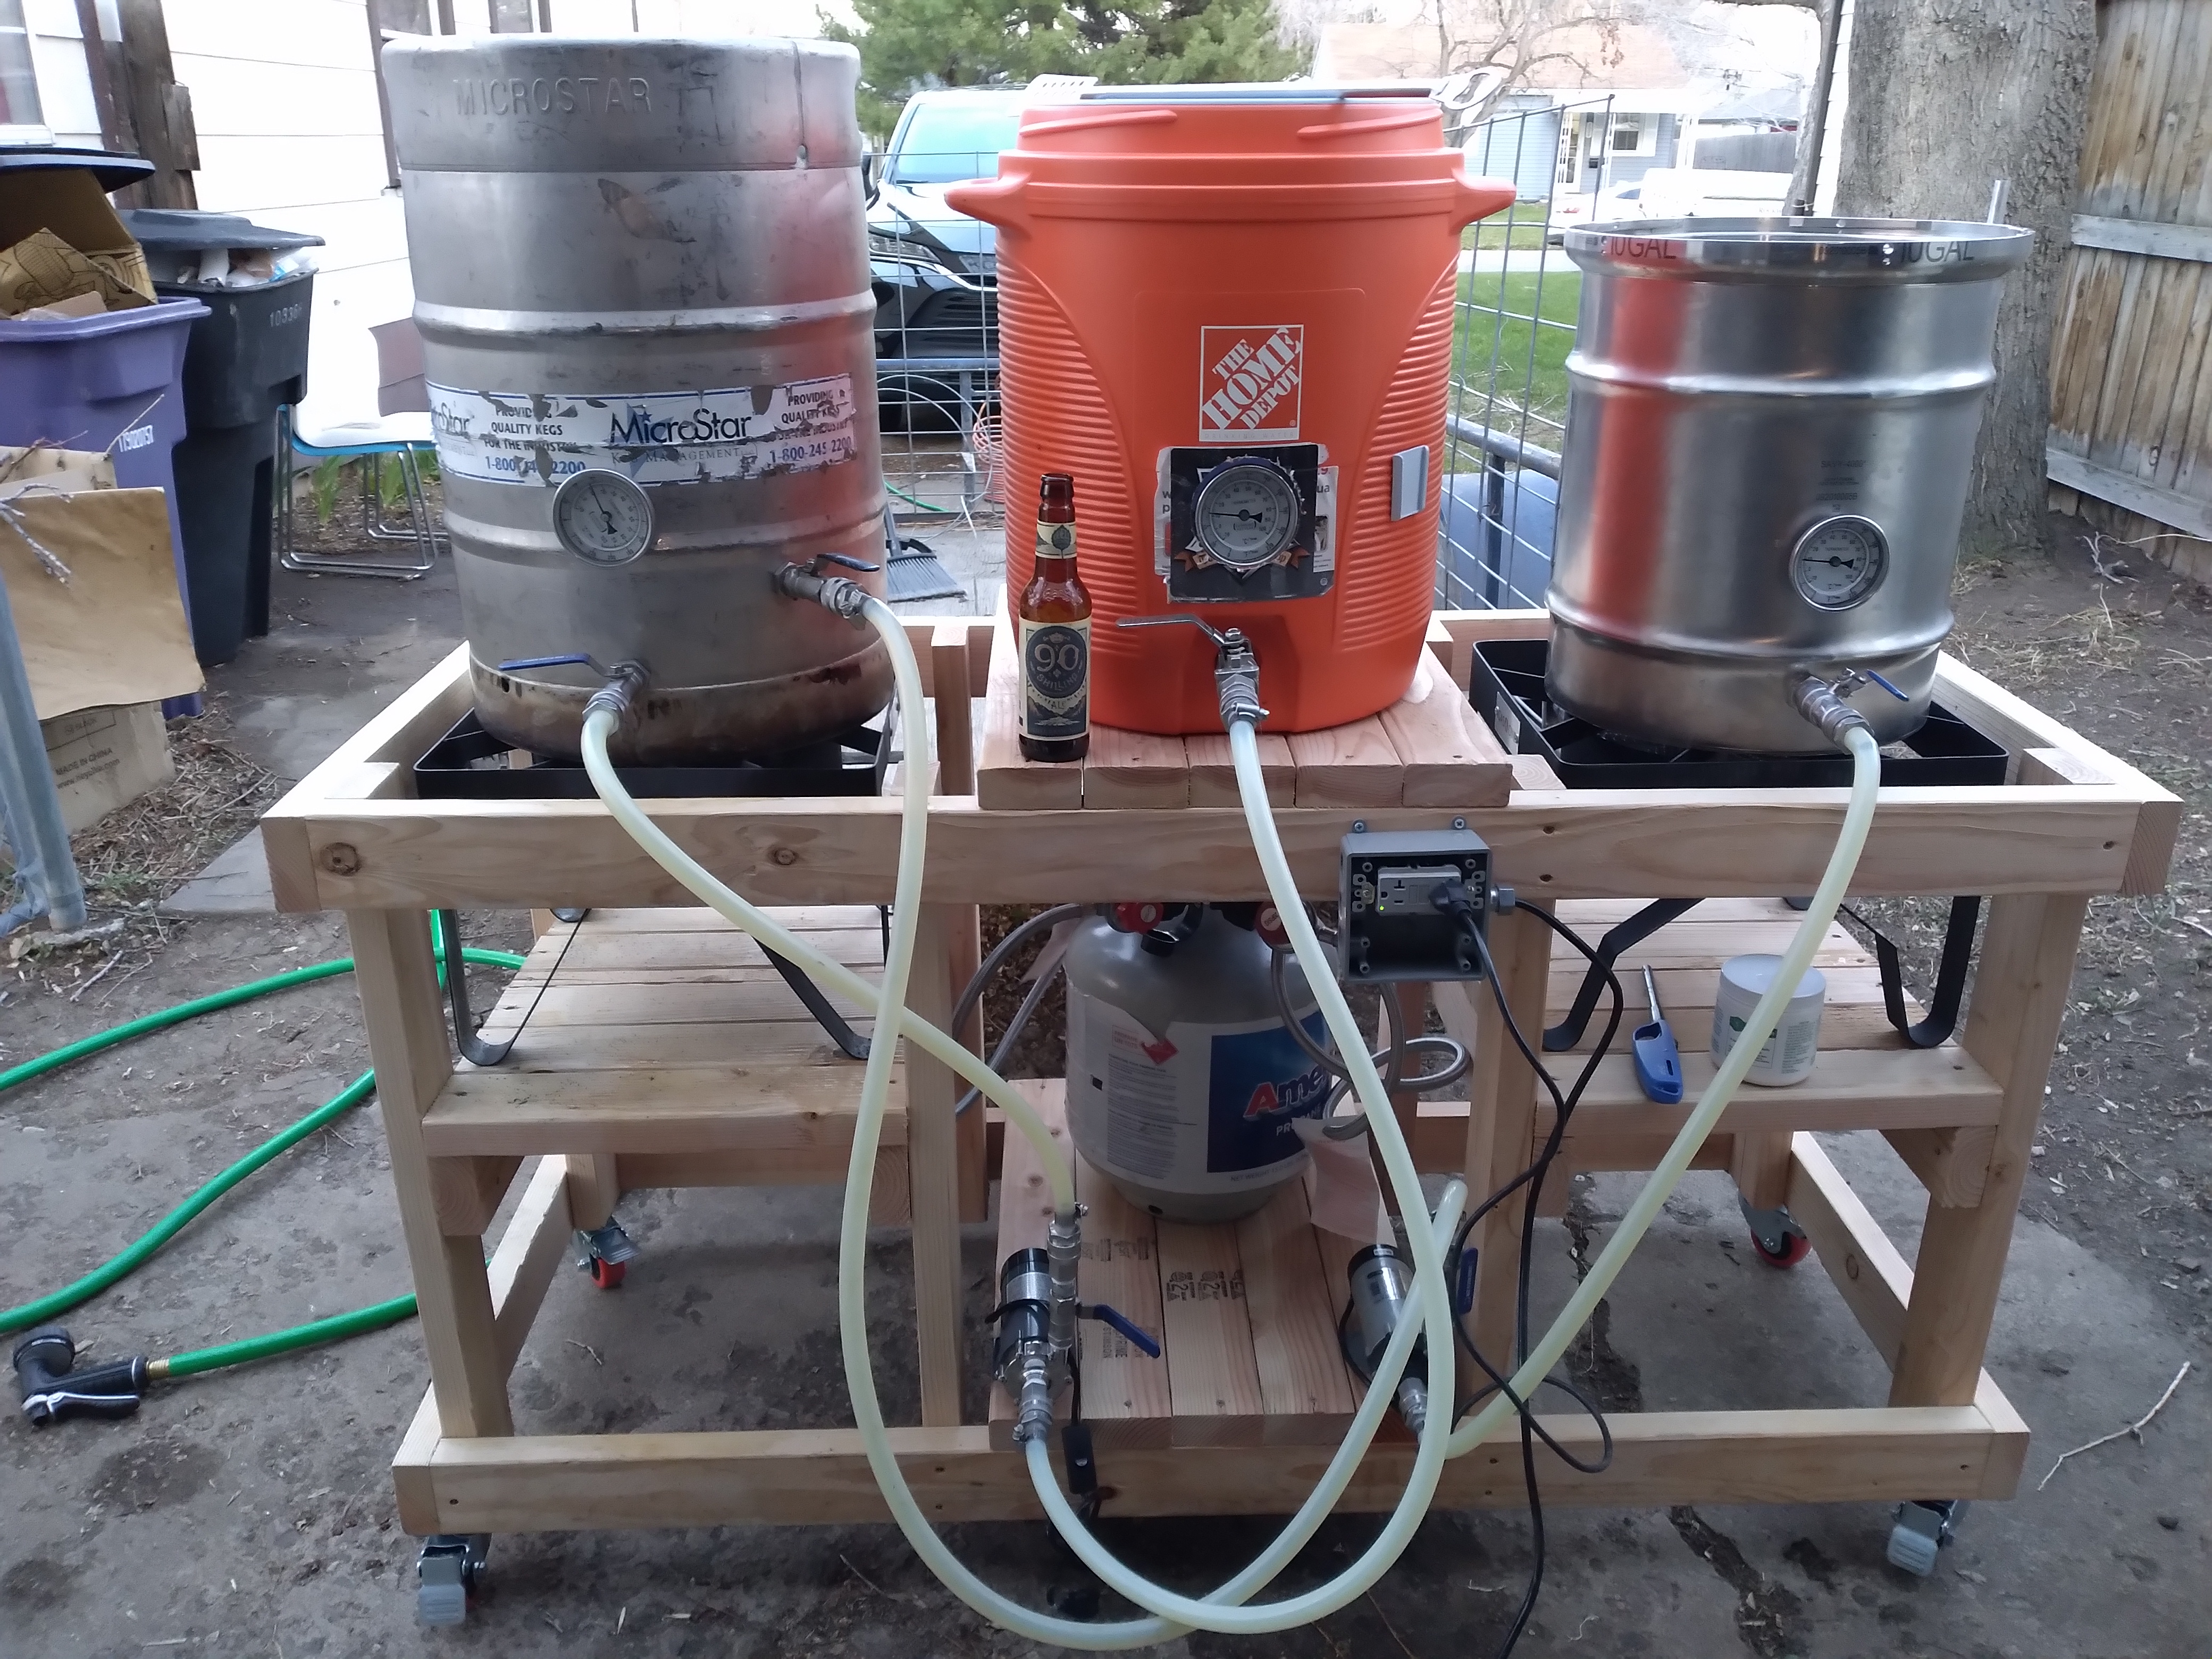
One kettle is 240V electric for boils and/or BIAB. When I direct-fire the other kettle for a mash I just roll this away from the wall and the propane burner lifts the MT up enough to directly drain into the BK. The FRP panel behind the cart and sink turned out to be a great idea to protect the wall. The cart was a CraigsList find several years back and I just shortened the legs with a hacksaw. It was a rolling food prep cart about 36” high from a putt putt center snack bar

Cameronl
Well-Known Member
- Joined
- Mar 10, 2021
- Messages
- 161
- Reaction score
- 482
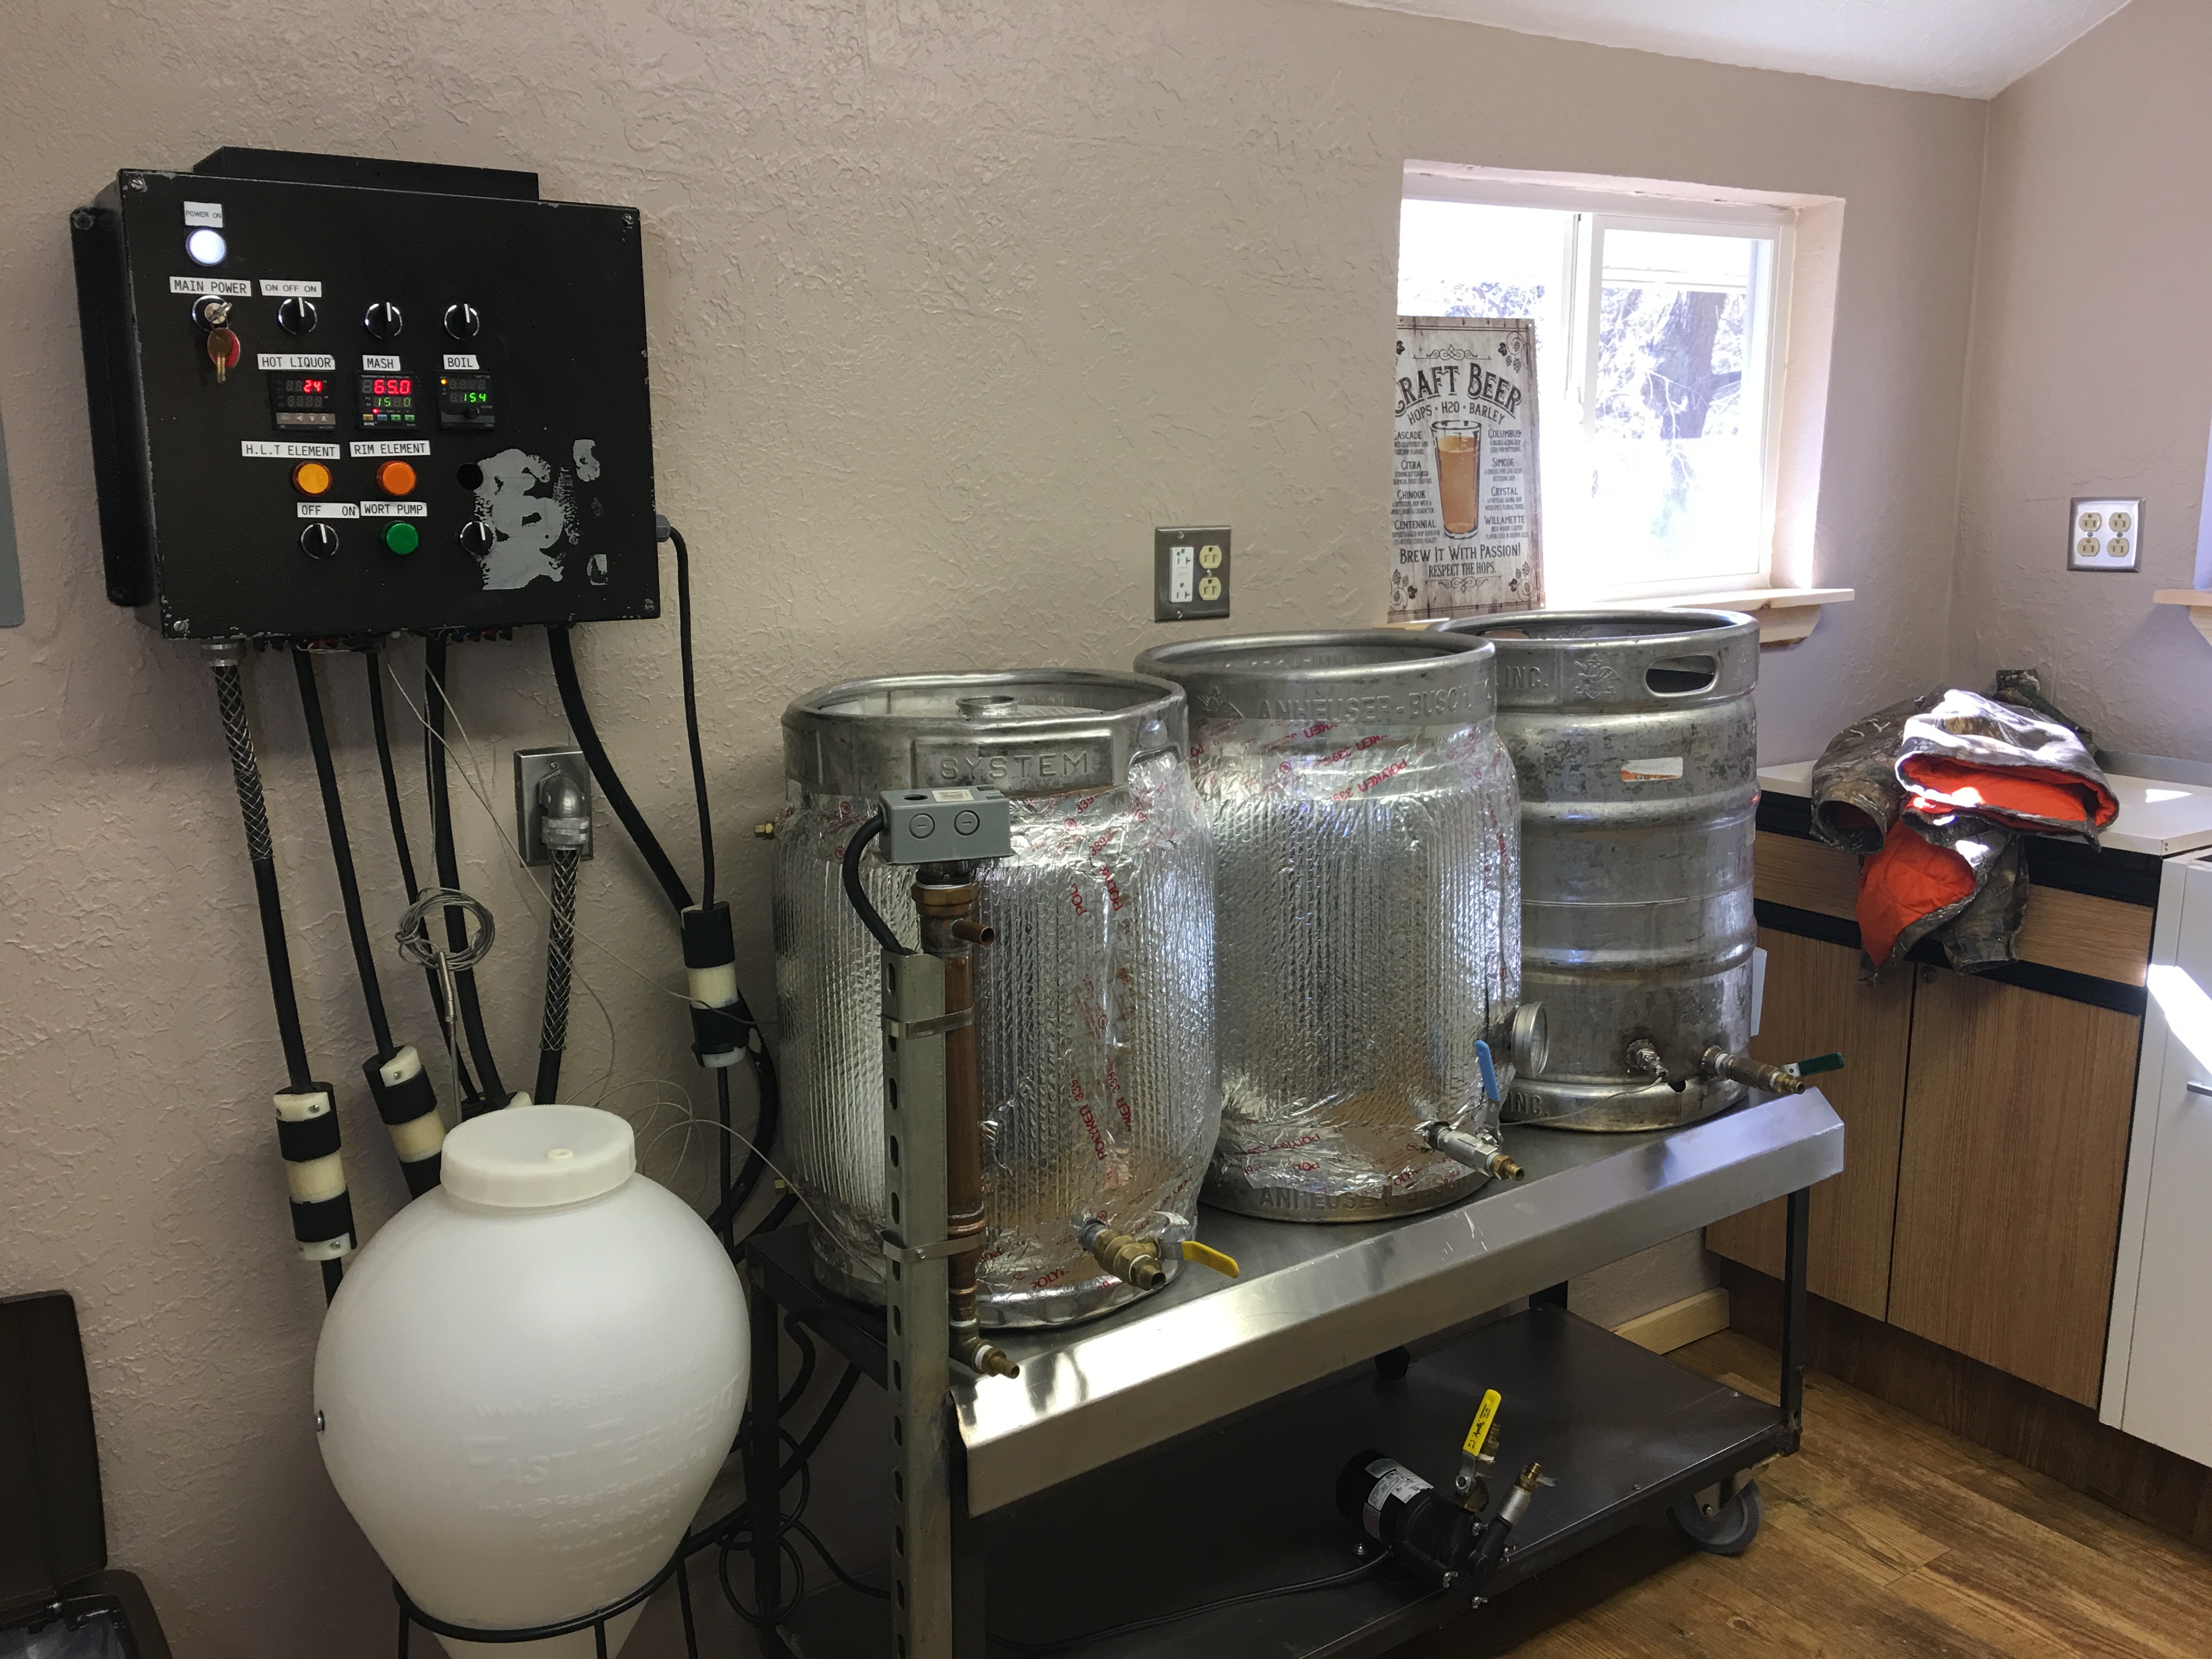
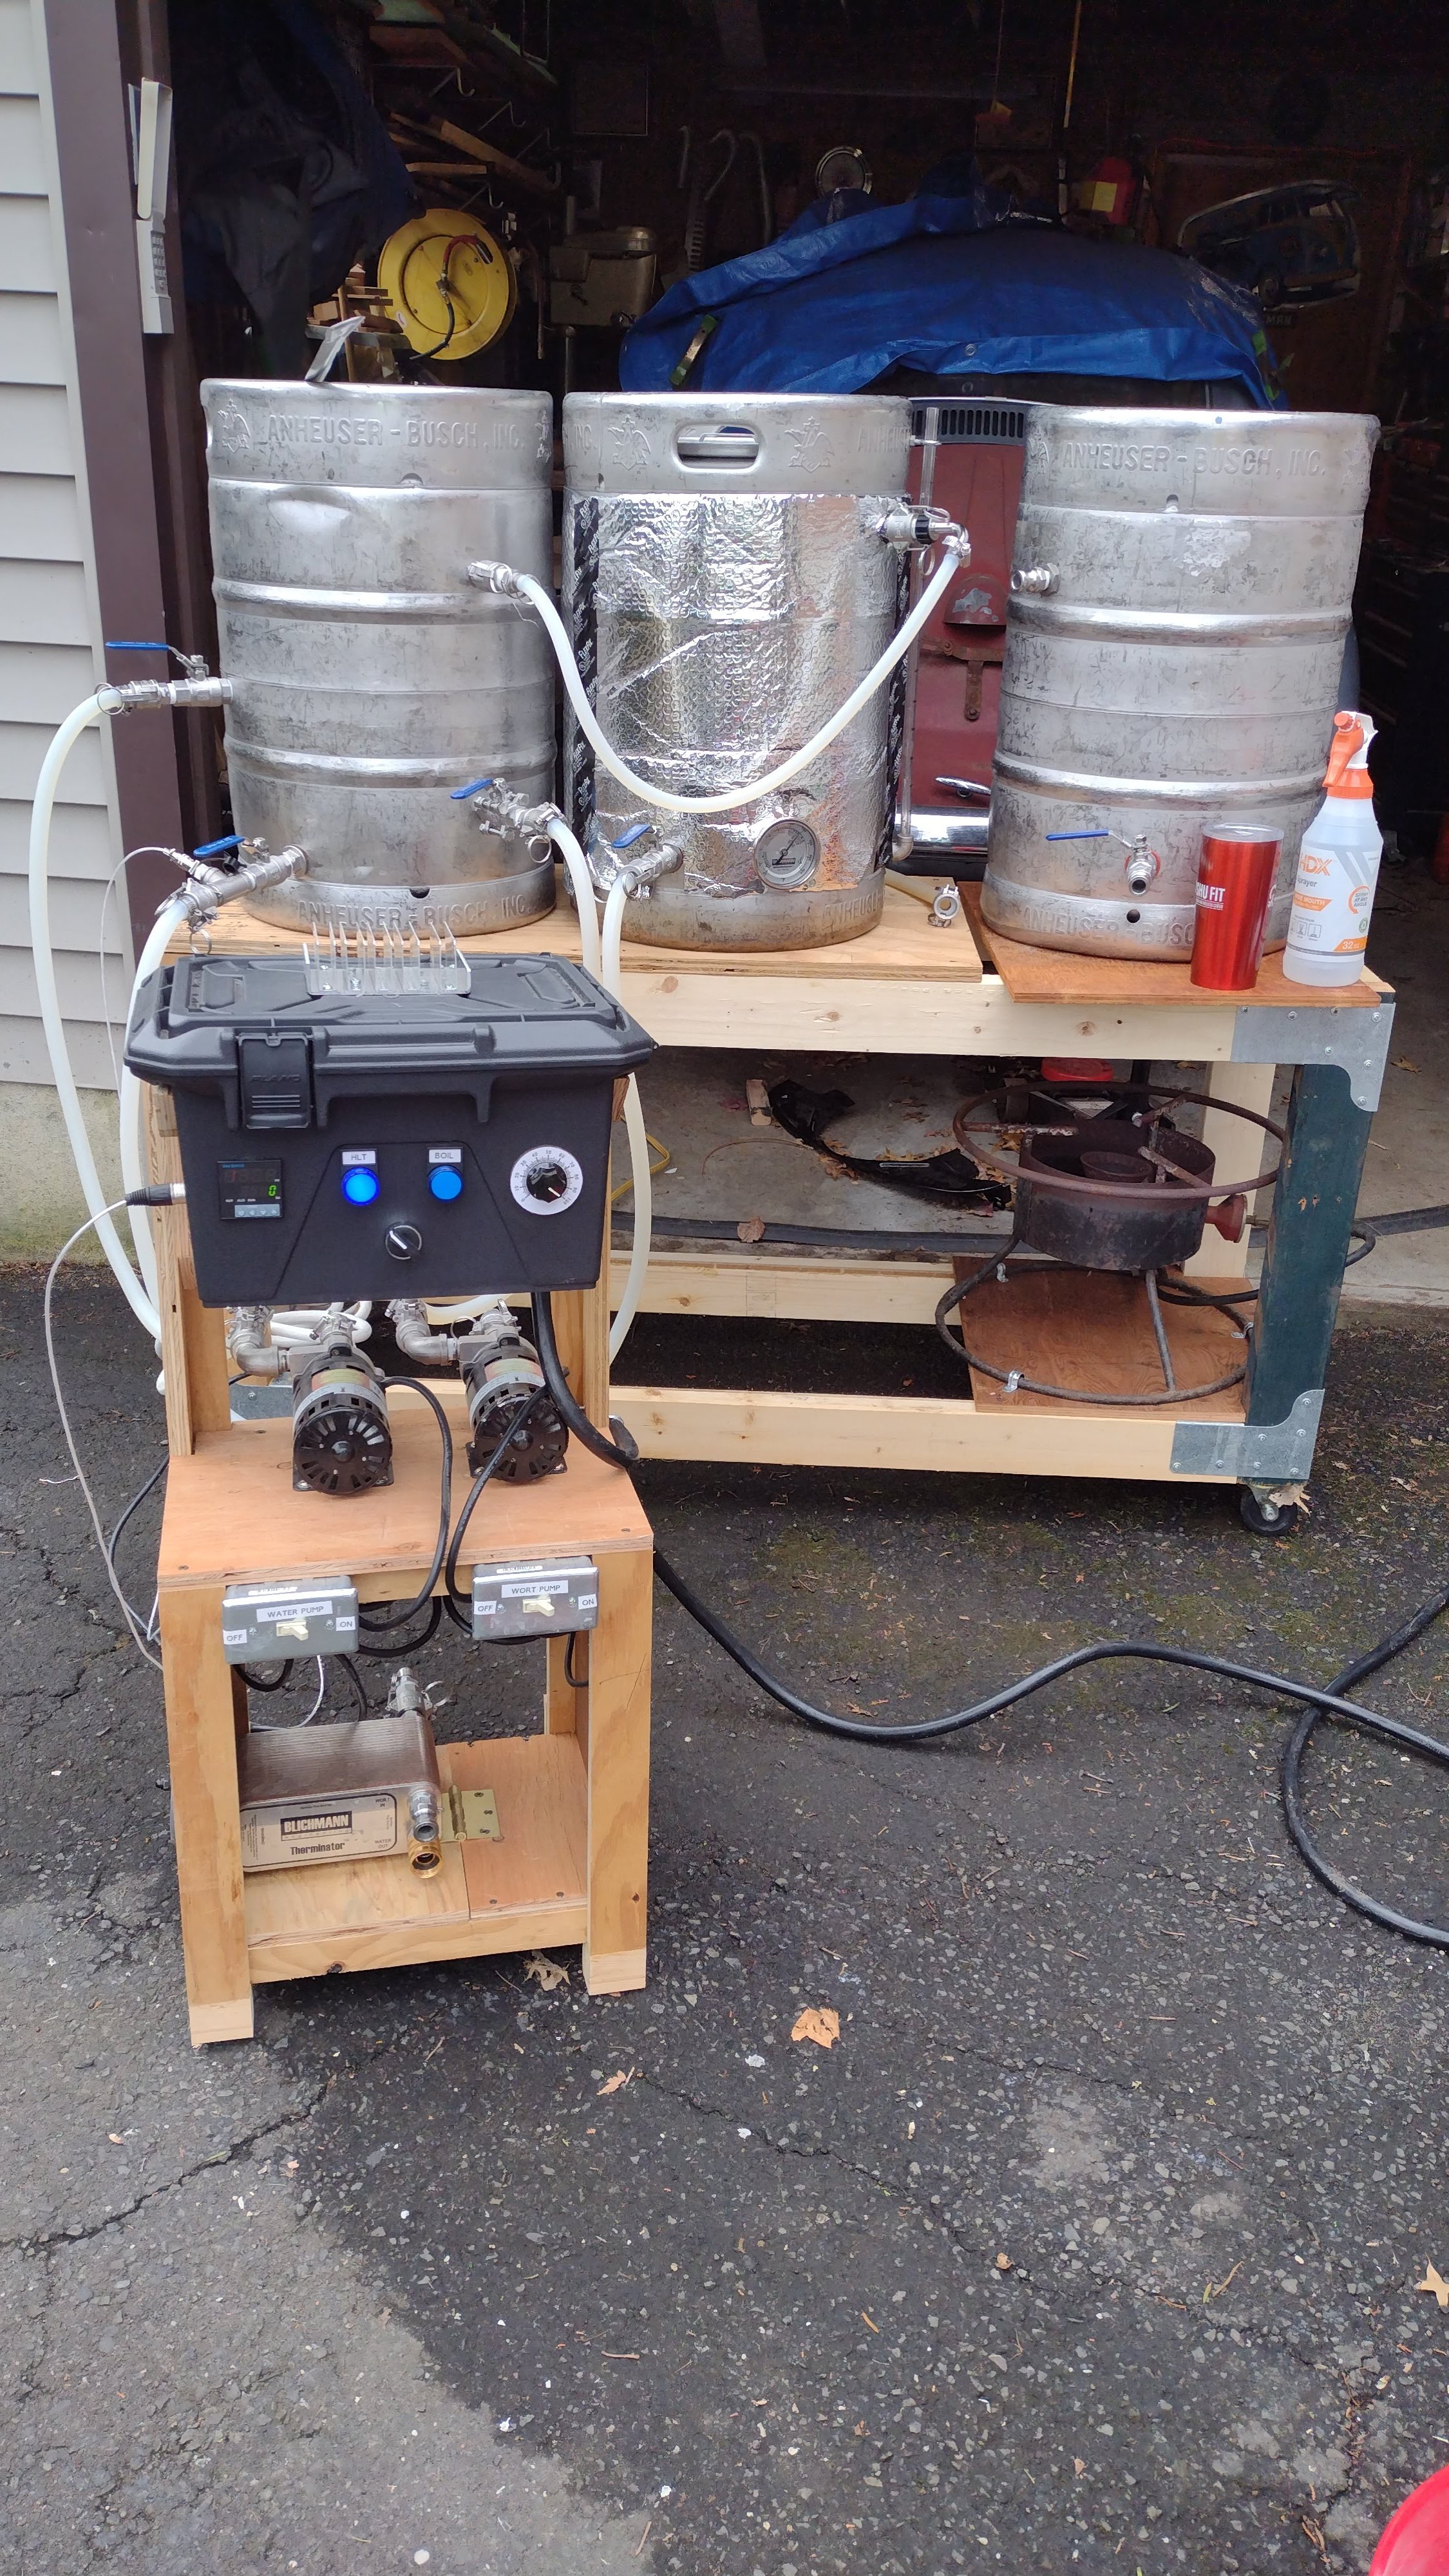
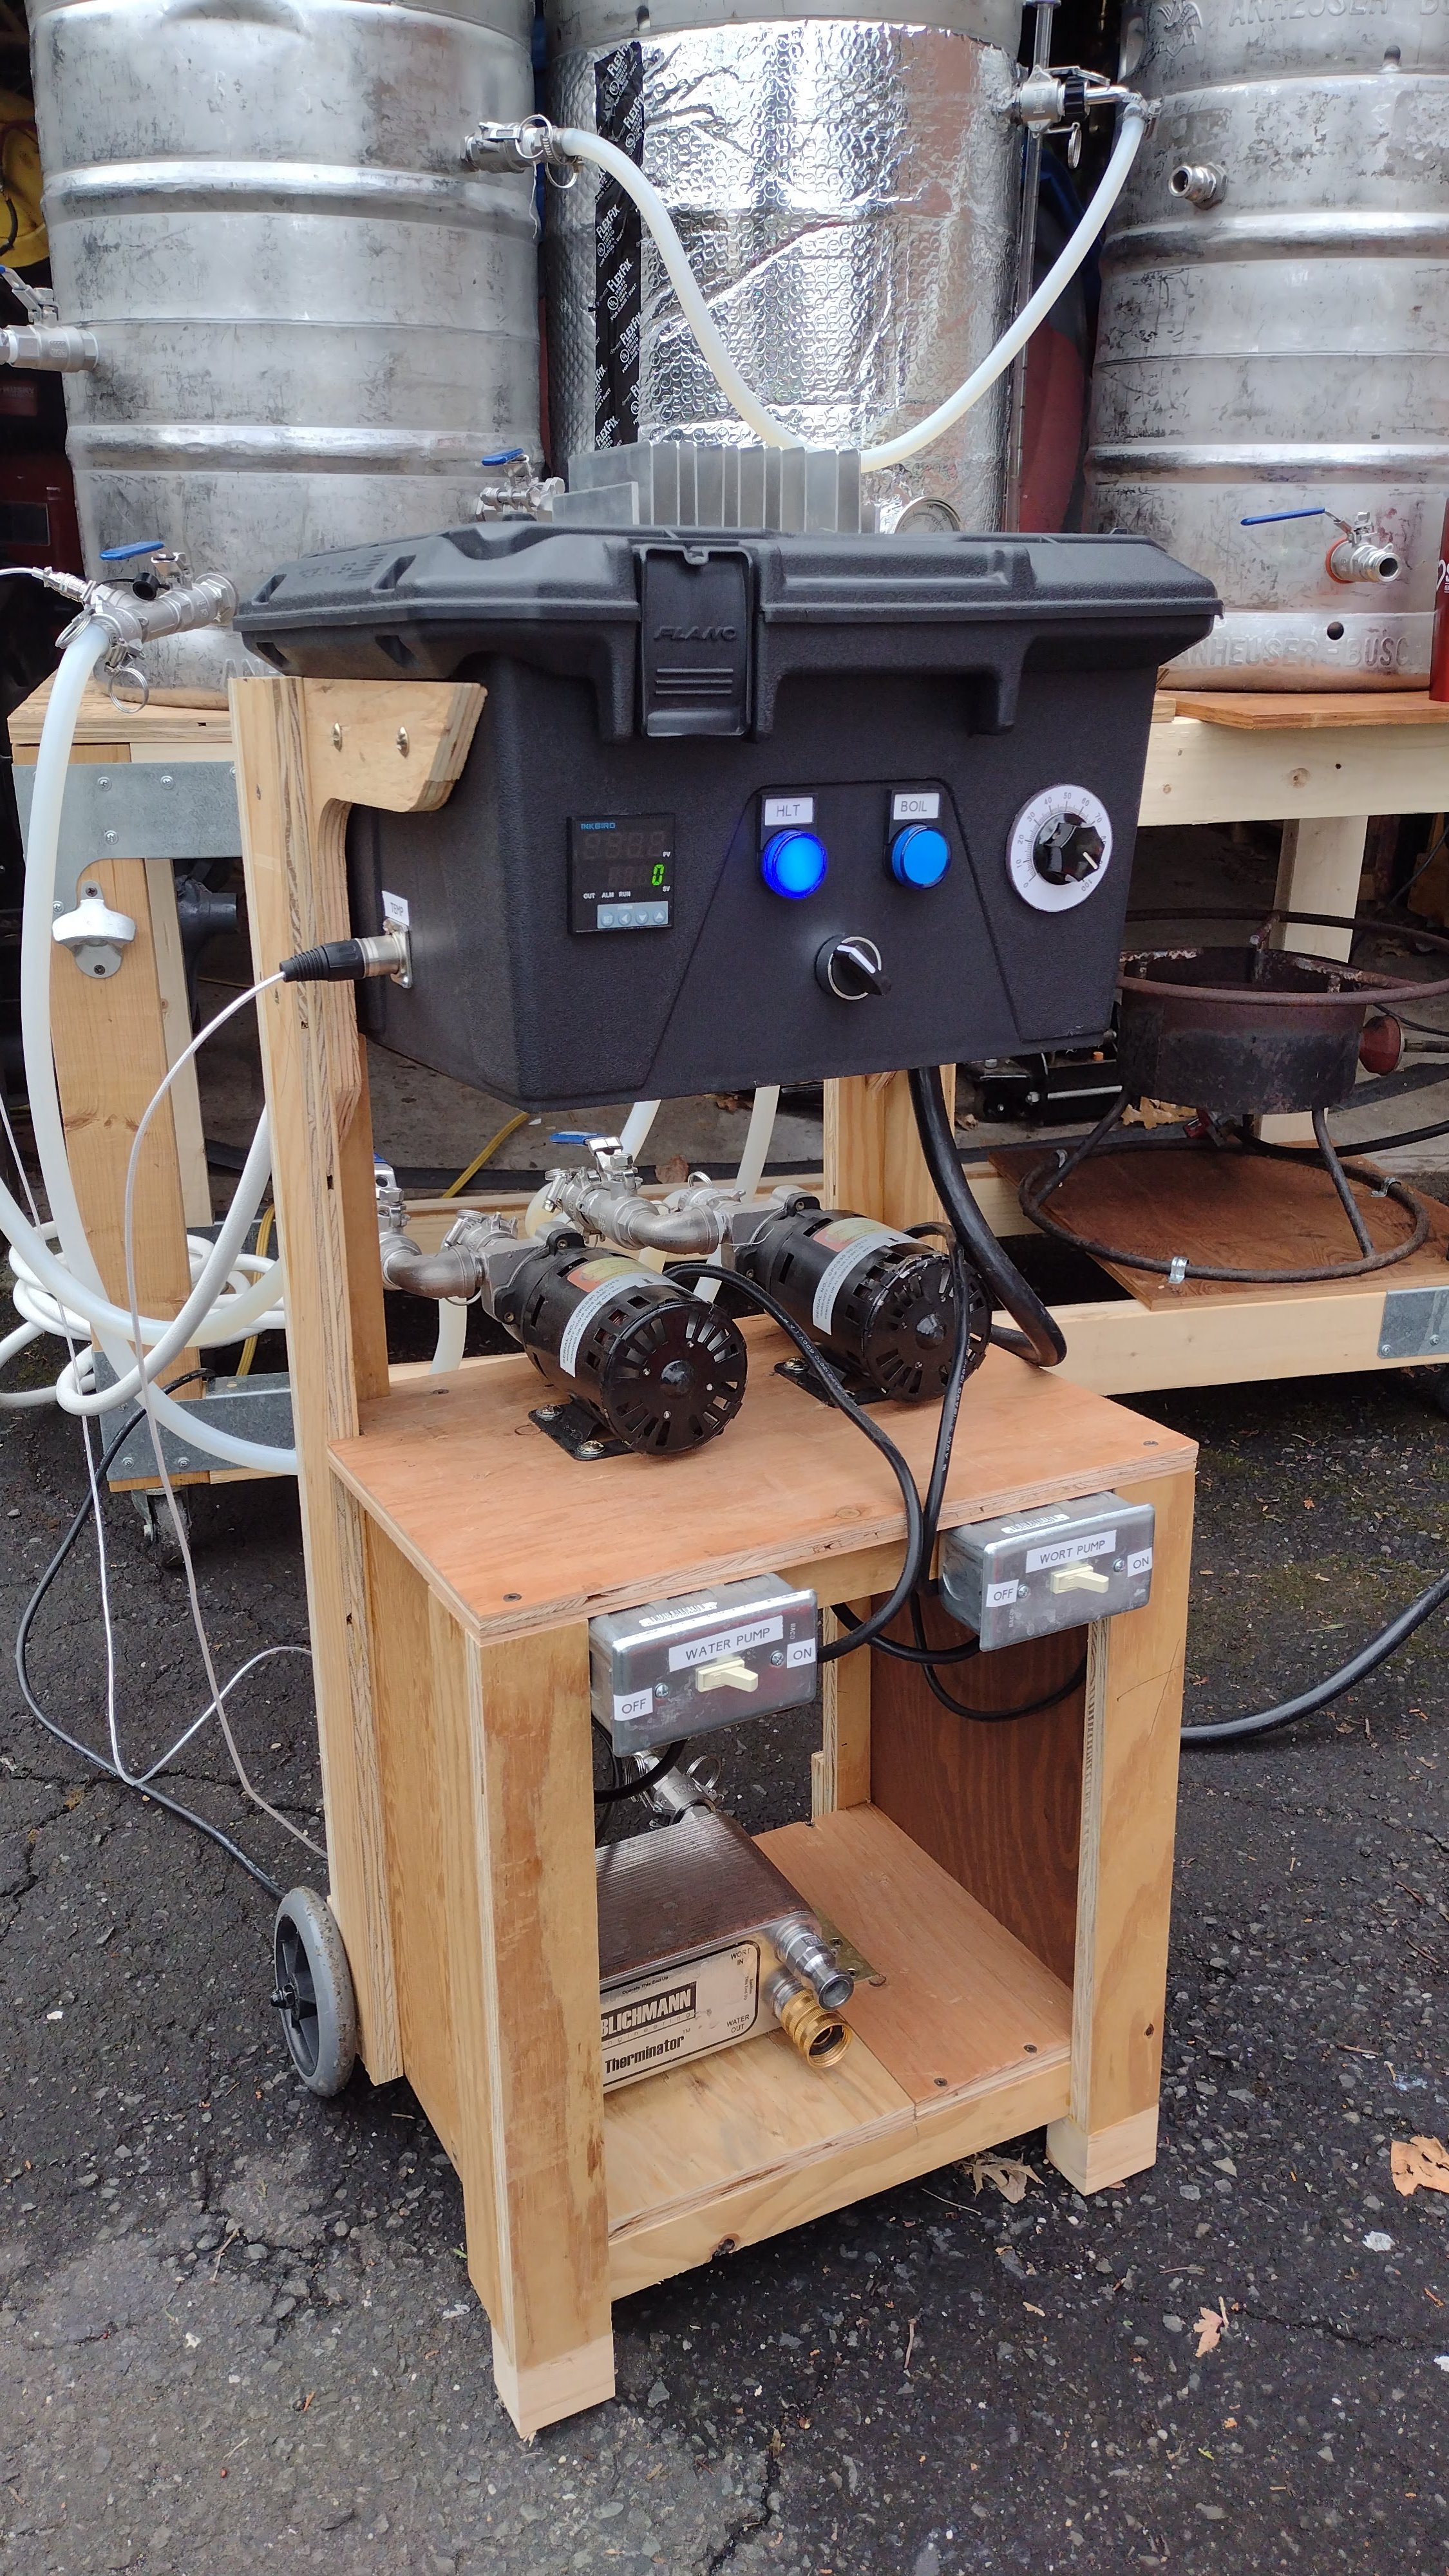
Here's my new e-herms setup. I still need to put some finishing touches on it. It needs a new cart top (have you price plywood lately?!?) Right now it's made of scraps I have lying around. The propane burner is leftover from my previous setup. It has since been removed. I had a bunch of insulating bubble wrap from Hello Fresh deliveries, so what the heck, I wrapped some around the mash tun.

I'm particularly pleased with the control cart I came up with. I wanted one unit that included the pumps and plate chiller that I can easily roll into the basement for the winter. I have to brew outside, and after destroying some garden hose attachments after a big freeze, I'm paranoid about leaving anything that might have water in it.
The plate chiller is on a hinge so I can tip it up to drain it. I also upgraded the dial on the BK's SSVR with a better quality knob and created an indicator dial from this website. I messed around with the inner diameter to fit the knob, laser printed on some cardstock, stuck it to some hardboard with spray adhesive, cut it out and sealed with a few coats of spray lacquer.
Attachments
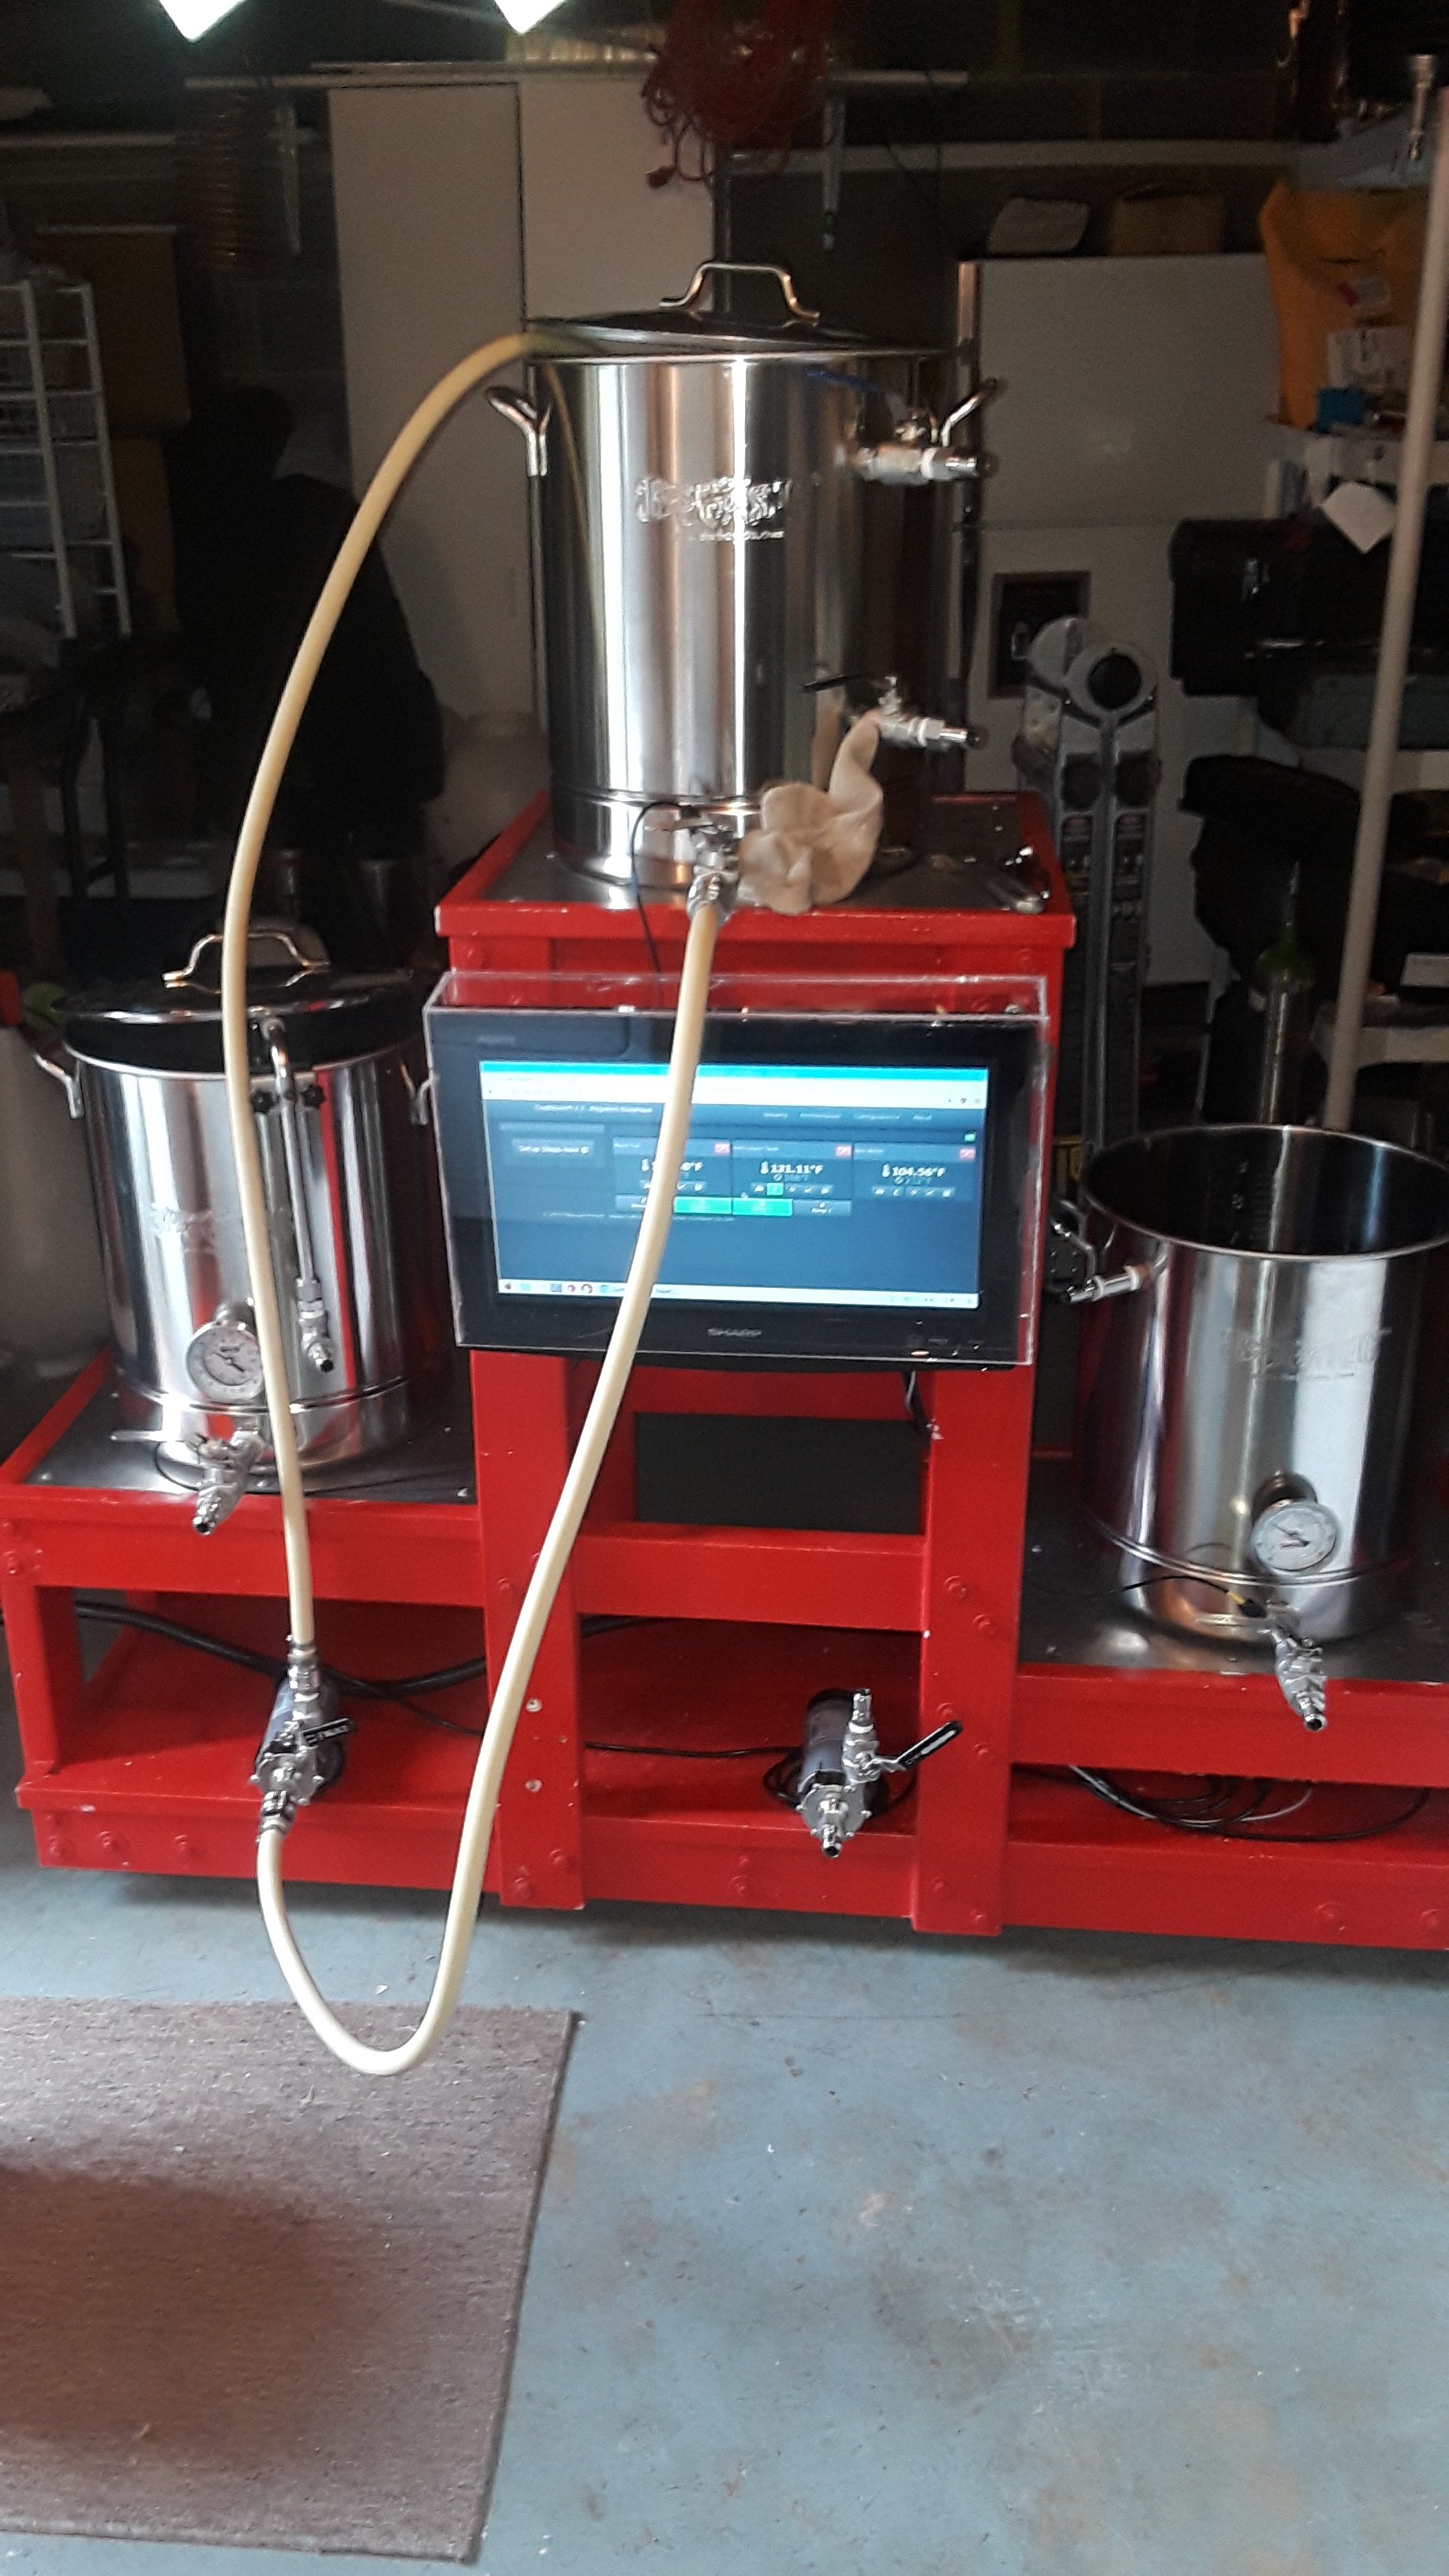
I got tired of only being able to brew in the warmer months in the garage, so I built an electric system in my basement. Well, I bought the control box and the vessels.
Introducing, The Copper Hood Brewpub:

Introducing, The Copper Hood Brewpub:
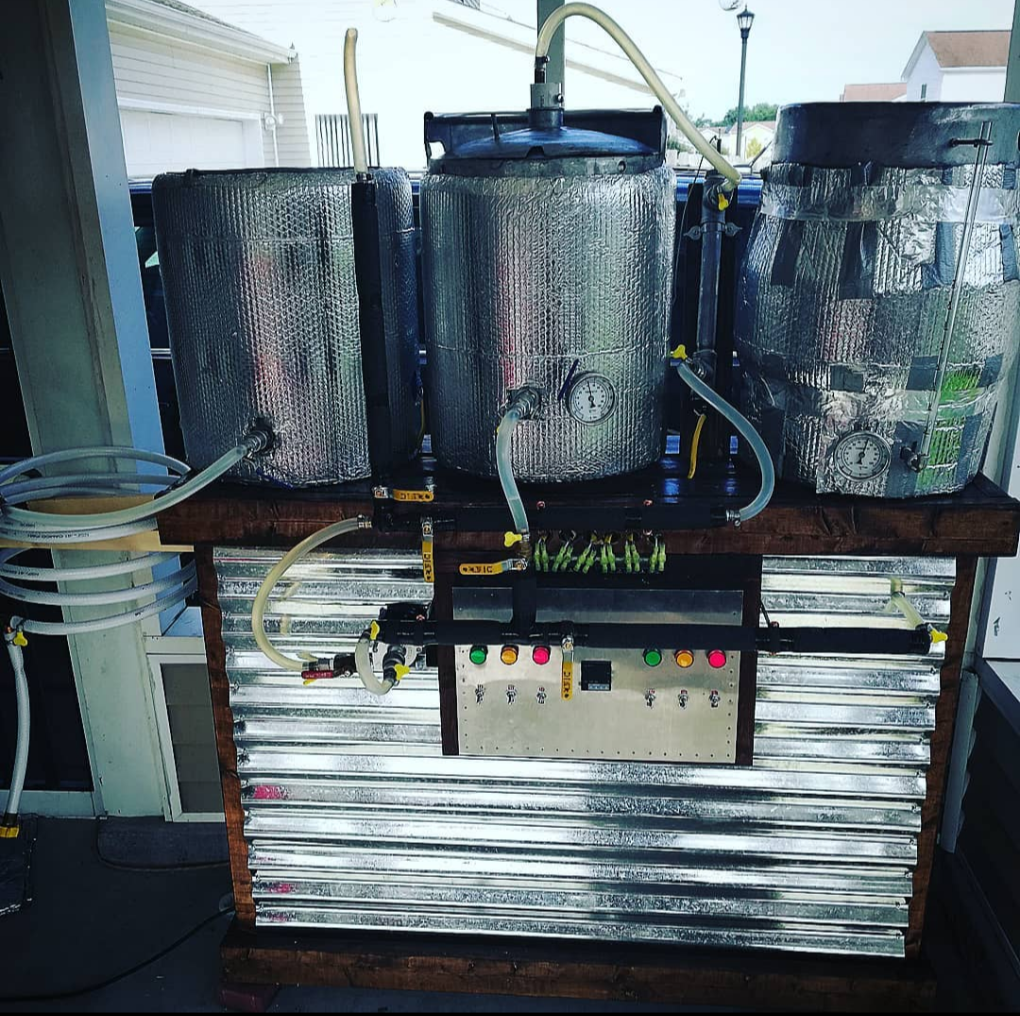
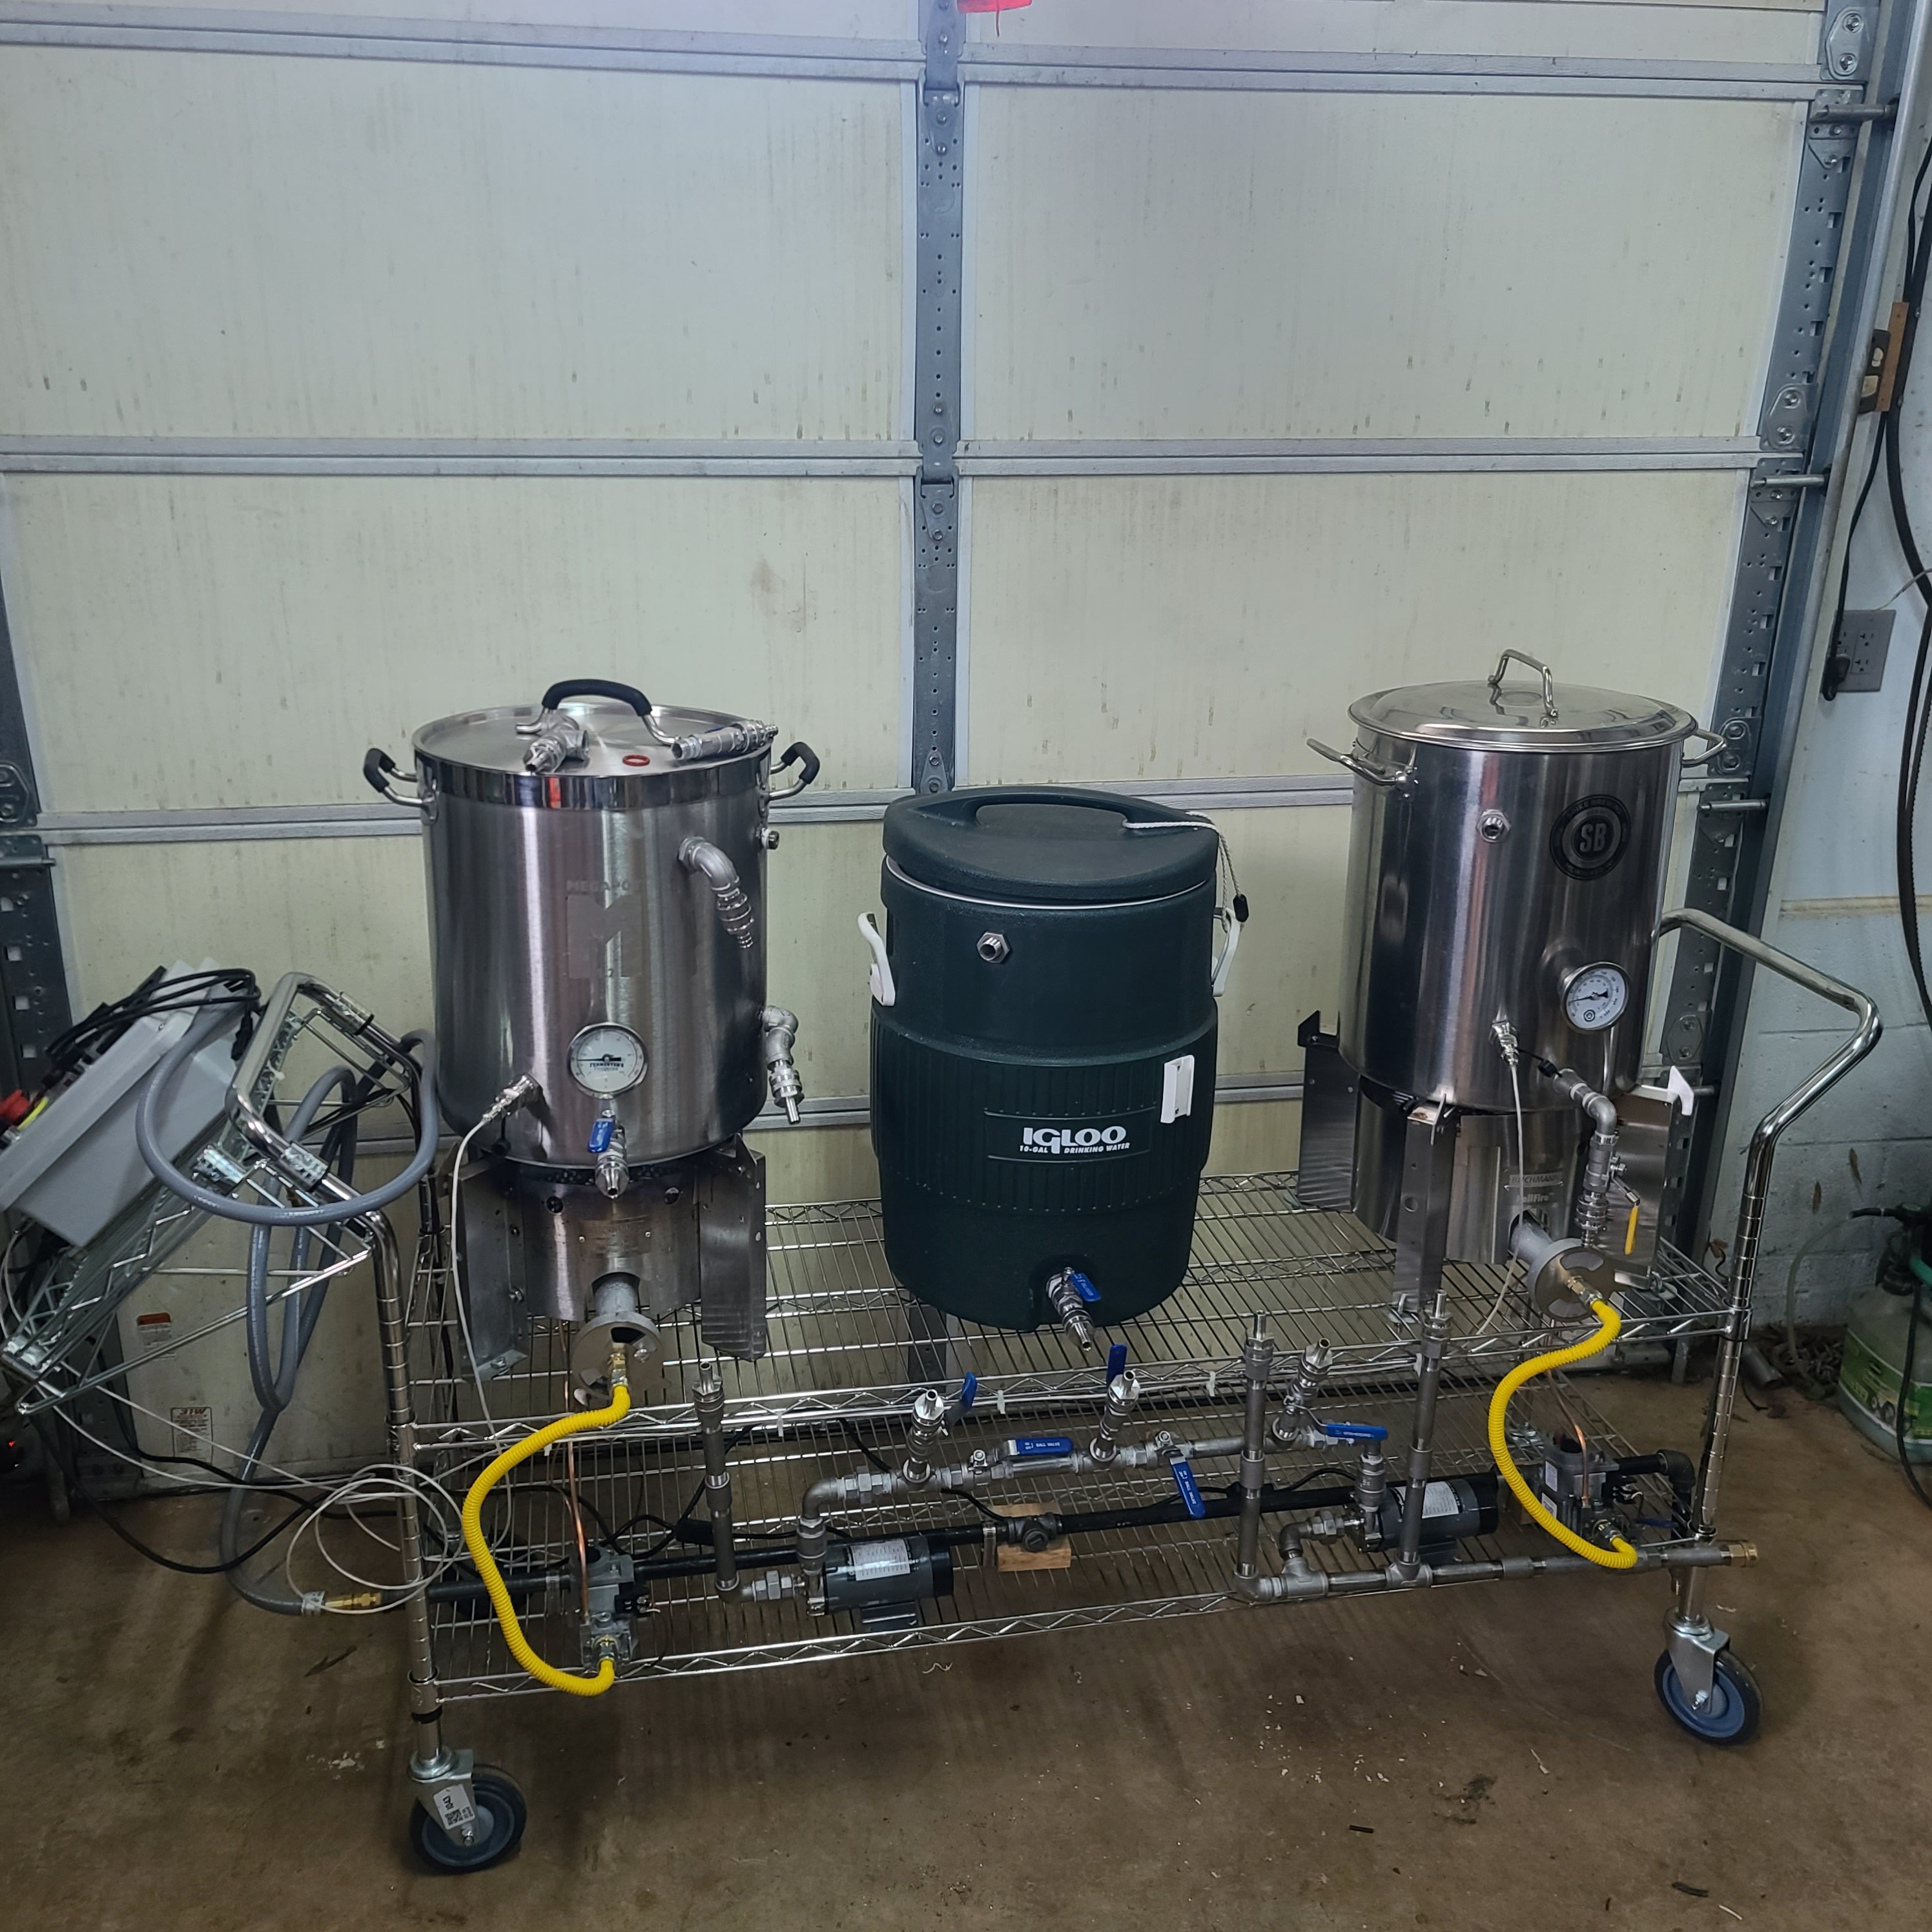
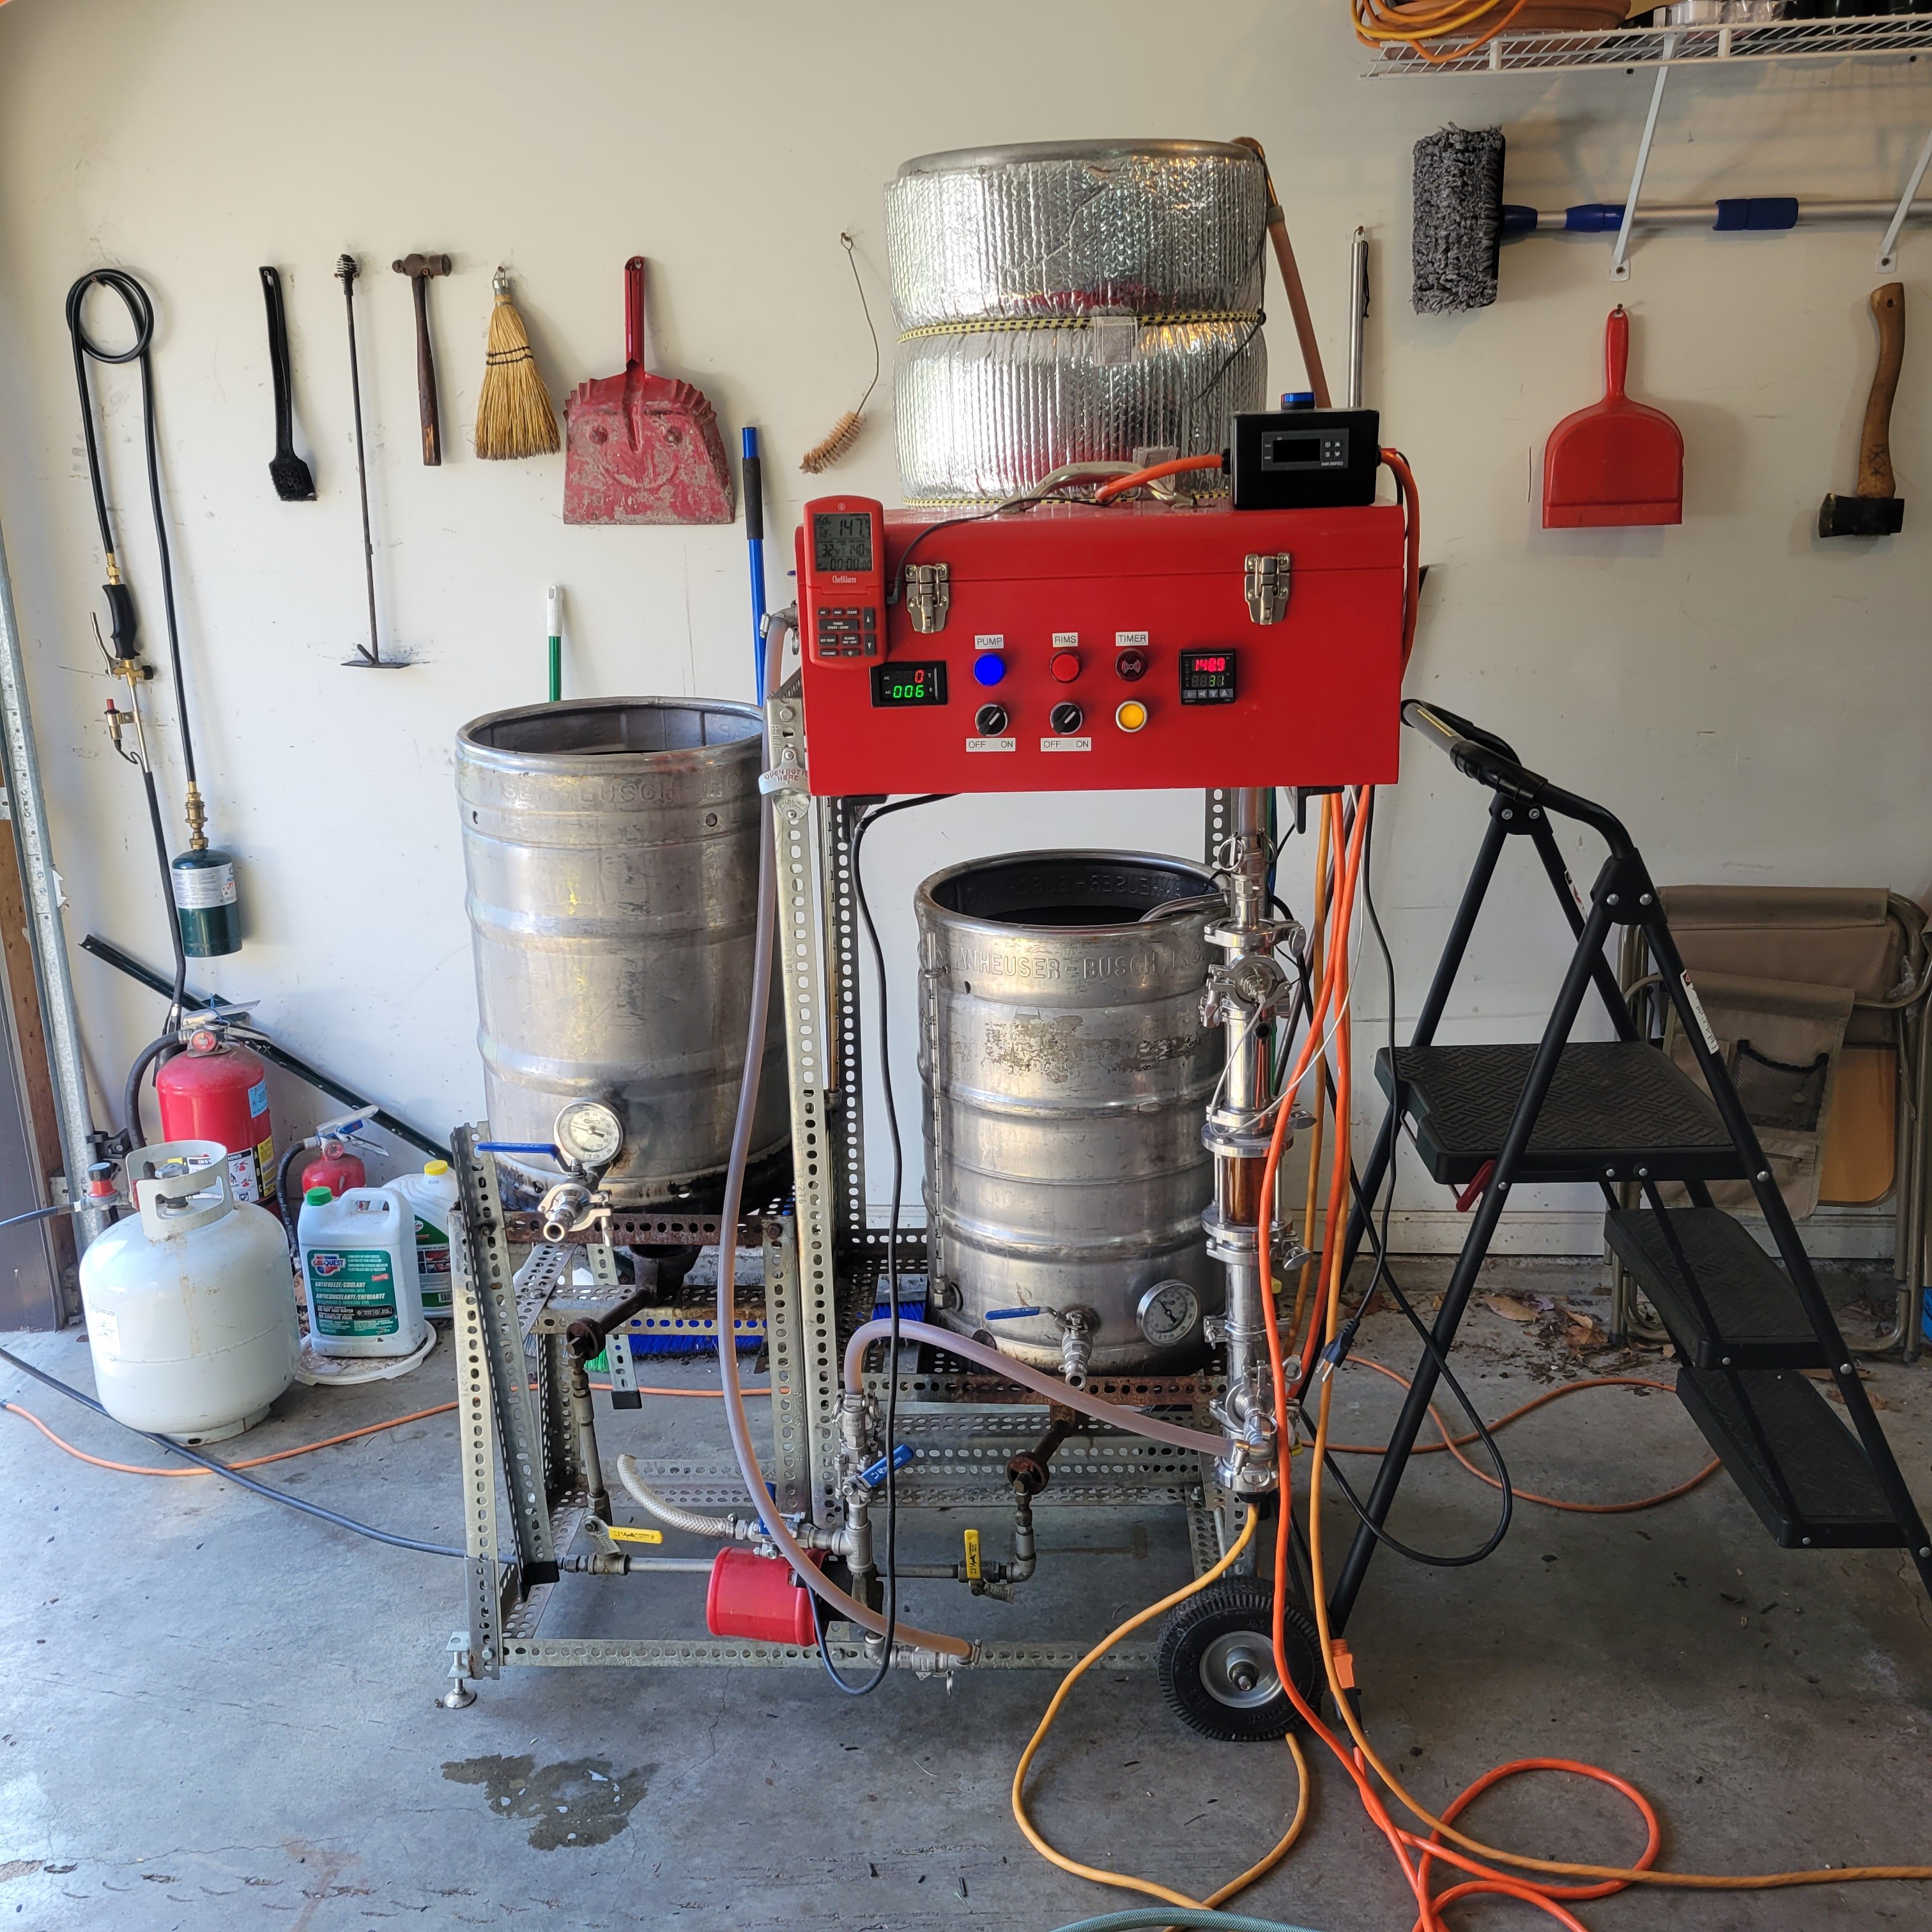
Here’s my brew table shown while sparging a batch of Raging Irish Red Ale:
.jpg")
The table is built on a restaurant equipment stand:
https://www.webstaurantstore.com/equip-stand-24x72-galv/600ES2472G.html
I attached a 6’ section of Unistrut horizontally to the front of the table to mount the pumps and home made valve manifold. There is a second section of vertical Unistrut on the right to mount the counterflow chiller. Not very visible is a Gladiator GearTrack rack mounted on the left side for hose and cord storage when the brew table isn’t in use and is rolled back against the garage wall.
The valve manifold, vertical Unistrut and GearTrak are all attached using custom 3D printed brackets.
 (Medium).jpg")
 (Medium).jpg")
Note: the digital thermometer in the thermowell of the mash tun is wildly inaccurate (reads way, way low). I need to calibrate it.
The table is built on a restaurant equipment stand:
https://www.webstaurantstore.com/equip-stand-24x72-galv/600ES2472G.html
I attached a 6’ section of Unistrut horizontally to the front of the table to mount the pumps and home made valve manifold. There is a second section of vertical Unistrut on the right to mount the counterflow chiller. Not very visible is a Gladiator GearTrack rack mounted on the left side for hose and cord storage when the brew table isn’t in use and is rolled back against the garage wall.
The valve manifold, vertical Unistrut and GearTrak are all attached using custom 3D printed brackets.
Note: the digital thermometer in the thermowell of the mash tun is wildly inaccurate (reads way, way low). I need to calibrate it.
My rig is a  I really love to look at these systems. I would love to be an inside brewer. I’ll tell my 3864 this weekend it’s riding in a Maybach on the way to the chamber! Love it!
I really love to look at these systems. I would love to be an inside brewer. I’ll tell my 3864 this weekend it’s riding in a Maybach on the way to the chamber! Love it!razzman
Member
Love the timer!Here’s my brew table shown while sparging a batch of Raging Irish Red Ale:
View attachment 846787
The table is built on a restaurant equipment stand:
https://www.webstaurantstore.com/equip-stand-24x72-galv/600ES2472G.html
I attached a 6’ section of Unistrut horizontally to the front of the table to mount the pumps and home made valve manifold. There is a second section of vertical Unistrut on the right to mount the counterflow chiller. Not very visible is a Gladiator GearTrack rack mounted on the left side for hose and cord storage when the brew table isn’t in use and is rolled back against the garage wall.
The valve manifold, vertical Unistrut and GearTrak are all attached using custom 3D printed brackets.
View attachment 846794
View attachment 846796
Note: the digital thermometer in the thermowell of the mash tun is wildly inaccurate (reads way, way low). I need to calibrate it.
Similar threads
- Replies
- 4
- Views
- 904
- Replies
- 2
- Views
- 1K
- Replies
- 33
- Views
- 2K
