Bottled for the first time... Damn, I hate bottling buckets!

Homebrew Talk - Beer, Wine, Mead, & Cider Brewing Discussion Forum

Help Support Homebrew Talk - Beer, Wine, Mead, & Cider Brewing Discussion Forum:

This site may earn a commission from merchant affiliate links, including eBay, Amazon, and others.

electrotype

Active Member
Joined
Nov 17, 2013
Messages
29
Reaction score
0
Location
Montreal
I bottled my very first brewing this morning! :ban:

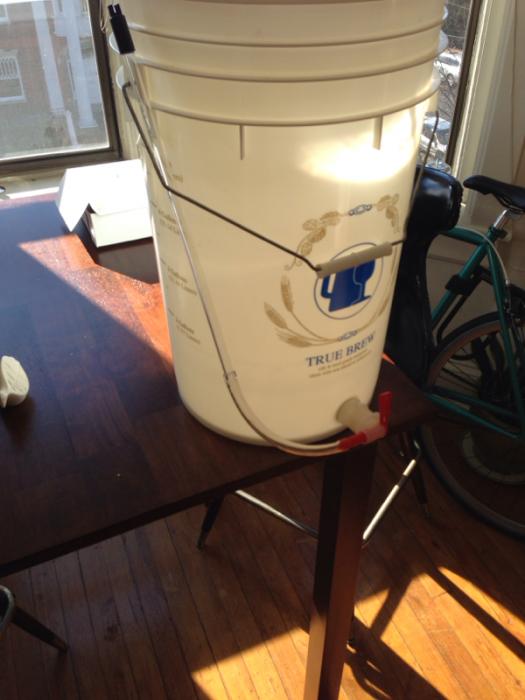
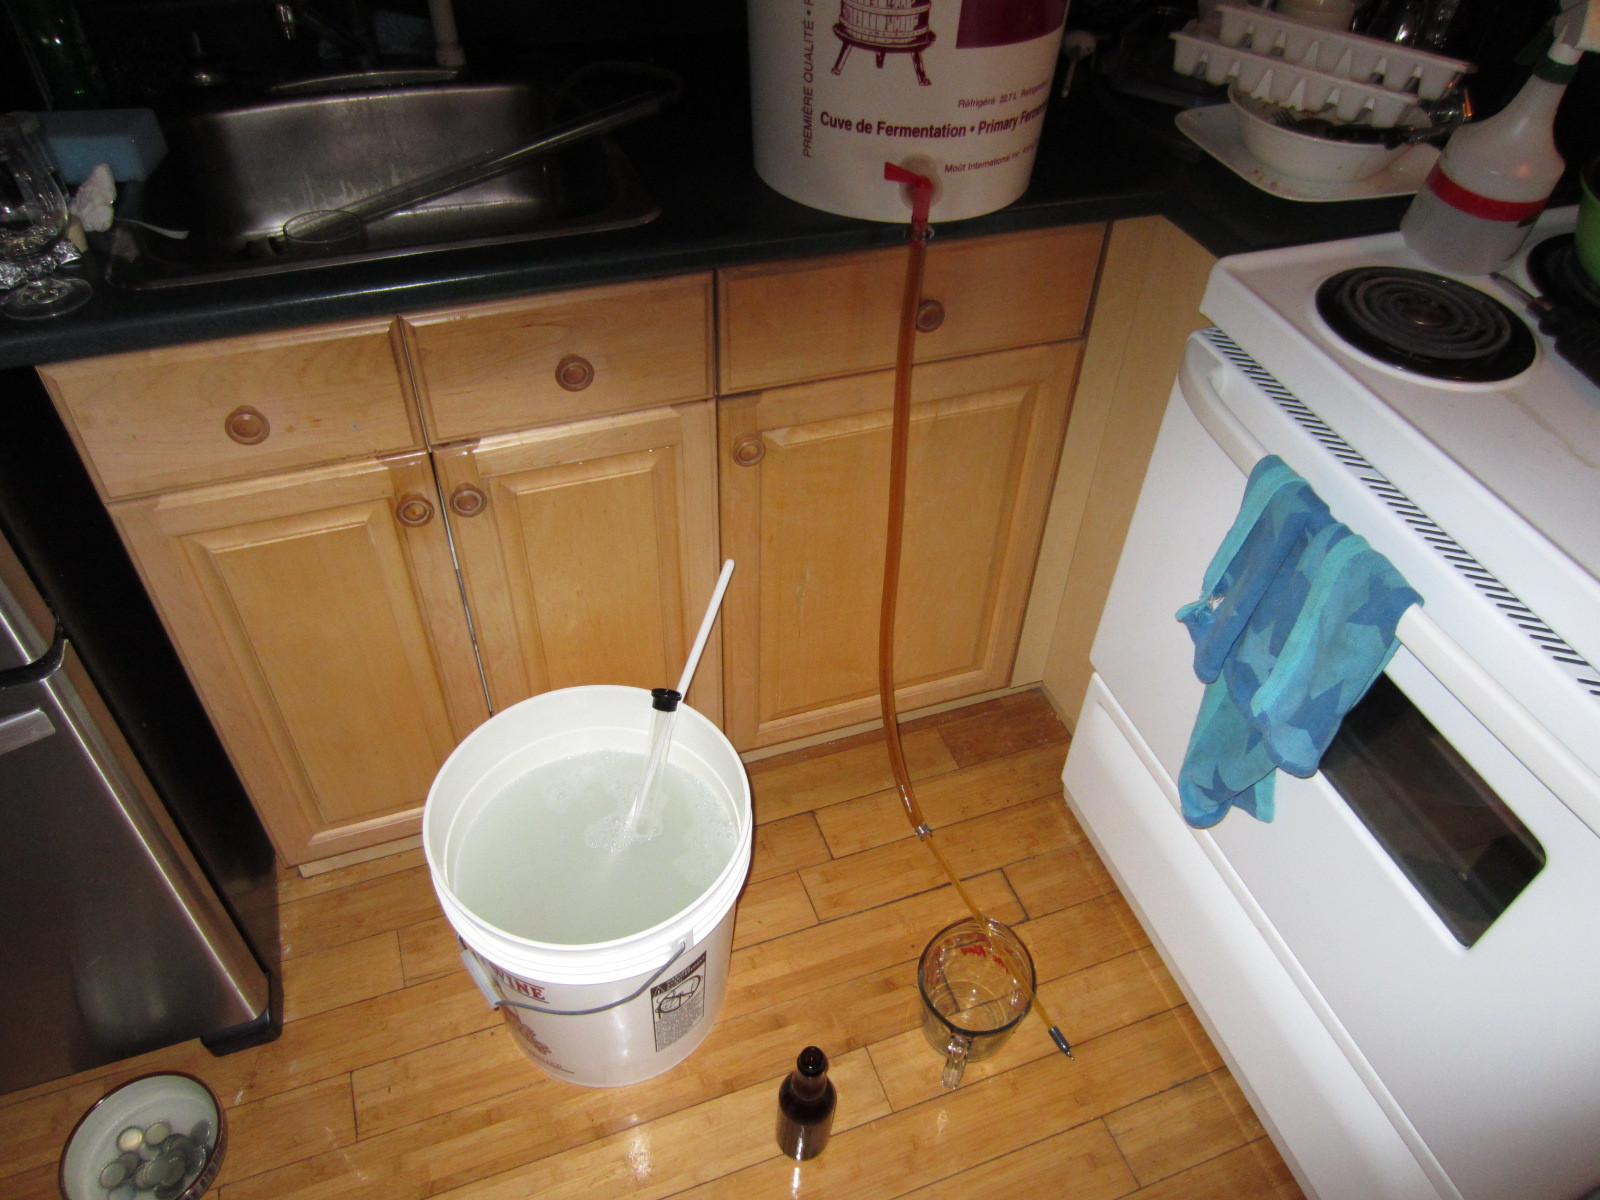
But I had to make contortions to be able to get the last 3-4 bottles from the bottling bucket! The spigot is too high so there is a lot of liquid below it. I had to lean the bucket to get it and it wasn't easy (I was alone).

Do you have some tips to help in that regard?

Are there some bottling buckets that are better designed?
QKUhS3F.jpg
 
My tube for my wand is a lot shorter than yours it looks like. Not sure but It looks like yours might be 6feet. This is mine in storage mode. Hangs down leaving about 3 feet from the floor on my bar table. When I get to the bottom I just balance on the edge or use a book.

image-1693639470.jpg
 
I'm with Adam. I just put about 3 inches of tube from spigot to wand and I put the bucket up on a shelf, or on a table and sit on the floor. This makes the bottling wand a no hands operation.
 
You're right... Next time (next sunday in fact), I'll use a shorter tube!

I may also try to build some kind of dip tube..

Thanks!
 
I use a CPVC elbow for a dip tube

not sure this is the exact same one, but it is similar. it has threads on one end that screws on to the spigot on the inside of the bucket. i had to shave some of the other side, so there was SOME space between the elbow and the bottom of the bucket for flow

4f85800e-4672-4aec-a01f-44e1024196ad_300.jpg
 
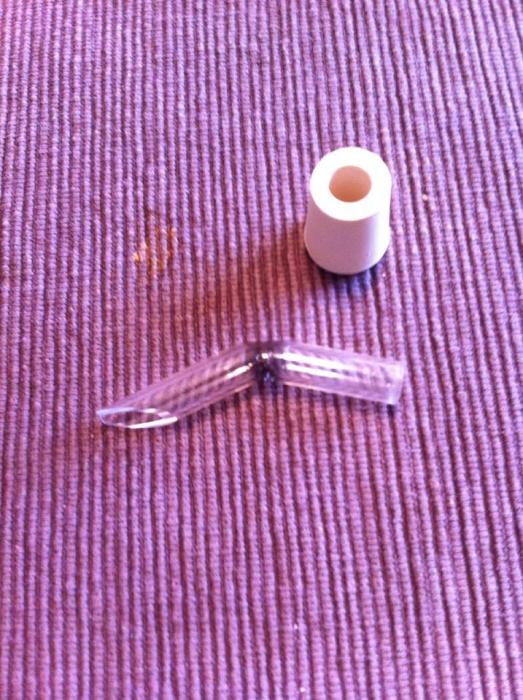
I have a diptube in my bucket. Get a #2 drilled stopper, cut a two or three inch piece off of your wand, gently heat it with a lighter (I did say gently, things happen fast), bend. Just remember to sanitize those parts and install in the bucket before you fill. Yes, I scorched the tube a bit... if I did it again I know to hold the lighter away further...

dip tube.jpg
 
One thing that makes my life easier is that my tube is fairly long, but shorter than yours, and I set my bottling bucket on the counter, and bottle my bottles on the dishwasher door. When I'm done, I close the dishwasher and the drops and mess stays contained. If you don't have a dishwasher, never mind! But if you have a stand or a stool, so that you don't kill your back trying to do this sitting on the floor and working on the floor, that will help alot. A tray (say, a lid for a big bin) to catch drips is great.
 
I use a short piece of 2x4 placed under the back of the bucket. Tips the bucket towards the spigot.
Do the same thing when racking from the carboy to get the most clean beer out of it.

Like Yooper, I use my dishwasher door. Saves clean up!
 
After seeing a thread on these forums (not sure what the name of it is) I went to my local hardware store and picked up an elbow bend that screws right onto my spigot. It was a little long so had to chop off a bit so that it is sitting about 1/8" above the bottom of the bucket. It worked great and was able to get almost every drop out of the bucket. It cost me $1 at the store.

DSC00007_zpsa8802895.jpg
[/URL][/IMG]

DSC00008_zps8ae8bba8.jpg
[/URL][/IMG]

DSC00011_zps7a7b3610.jpg
[/URL][/IMG]
 
One thing that makes my life easier is that my tube is fairly long, but shorter than yours, and I set my bottling bucket on the counter, and bottle my bottles on the dishwasher door. When I'm done, I close the dishwasher and the drops and mess stays contained. If you don't have a dishwasher, never mind! But if you have a stand or a stool, so that you don't kill your back trying to do this sitting on the floor and working on the floor, that will help alot. A tray (say, a lid for a big bin) to catch drips is great.

+1 on the dishwasher. It makes it much easier for me. I put my bottling bucket above the opened door and sit next to it on a chair. I also spray the bottom rack with star san and use the bottom rack for my sanitized bottles kinda like a bottling tree. Then when you bottle they're sanitized and right there ready to go. I may try the shorter hose and dip tube idea. I like that.
 
Sanitize a 4 cup glass measuring cup and a funnel. Pour the last of the beer from the bucket to the measuring cup and fill the bottles w/the funnel. If only 3 or 4 it's no sweat.
 
The only problem I find witha dip tube is air get caught in it and when you bottle air will get trapped in the bottle filler. So you have to tilt the bucket, angle dependant how close the dip tube is to the bucket floor.

I have been contemplating using a plastic barrel with C02 bulb injection for my bottling bucket. It has some advantages the biggest being that the solution is under C02 during bottling minimising the possibility of oxgenation and that you get better recovery from the vessel towards the end of filling because it is under pressure.

It of course cost more. I was thinking something like this
http://www.the-home-brew-shop.co.uk/acatalog/5_Gallon_Plastic_Barrel_Bulb_Co2_PIN_VALVE.html
 
Dip tube is the trick, and , I work in a small kitchen like you, but I can still put a chair on my work surface and then put my bottling bucket up on the chair, so bottle standing up ! Could do it for hours without discomfort, sometimes pour one bottle then cap one, easy, or batch say ten, then cap, don't need much room at all really.
 
I love that screw-on elbow, I must get one!

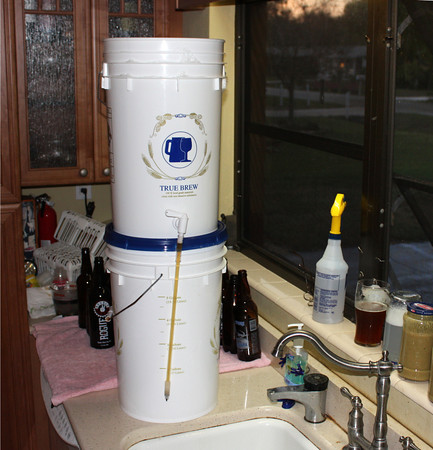
Here is how I currently bottle. I put my empty fermenting bucket under the bottling bucket:

bottle bucket.jpg
 
I just tip mine.I got two hands. Its pretty light. I never got around to making a dip tube but tipping it never seems to be a big deal to me.
 
You could always keg and avoid the problem of bottling. :D Or, if you're determined to bottle, you can carb in the keg and then bottle using a picnic tap and a bottling wand. That's what I do when I have something I want to send to competition or take a sample to the local home brew club.
 
You could always keg and avoid the problem of bottling. :D Or, if you're determined to bottle, you can carb in the keg and then bottle using a picnic tap and a bottling wand. That's what I do when I have something I want to send to competition or take a sample to the local home brew club.

Kegs don't fit on the back of an ATV ;) some must bottle :D
 
One thing that makes my life easier is that my tube is fairly long, but shorter than yours, and I set my bottling bucket on the counter, and bottle my bottles on the dishwasher door. When I'm done, I close the dishwasher and the drops and mess stays contained. If you don't have a dishwasher, never mind! But if you have a stand or a stool, so that you don't kill your back trying to do this sitting on the floor and working on the floor, that will help alot. A tray (say, a lid for a big bin) to catch drips is great.

+2 on sitting in a chair bottling over an open dishwasher door. Up on the counter sits my bottling bucket (wand attached with a 2" piece of tubing), a bunch of caps and the Vinator. Once you sanitize your bottles with StarSan in an Vinator you can stage them in the (sanitized) bottom rack of the DW for easy access. I usually do 10-12 bottles at a time, set a cap atop each one once it's filled, group them on a second chair within arm's reach and then cap that group before starting another bunch.

One other piece of gear that has made bottling much more pleasant is the Agata super bench capper. My wing capper was sometimes a PITA and didn't like certain bottles.

The bottling bucket. filling, capping part is the easiest part of bottling for me. The part I detest is soaking, de-labeling and cleaning the darn things. I've gotten into the habit of just kegging and force carbing everything and only bottling some of it using Biermuncher's filler - https://www.homebrewtalk.com/f35/we-no-need-no-stinking-beer-gun-24678/
 
I love that screw-on elbow, I must get one!

Here is how I currently bottle. I put my empty fermenting bucket under the bottling bucket:

I use the same bottling setup but when i bottle my wand doesn't get filled up with beer, the beer just slowly dripping down the walls of the wand, is that a problem? I think that could cause oxidation but i am not sure.
 
I've added a 2nd spiggot and dip tubes to my bottling bucket. Bottle 2 at a time. Really makes the process go much faster.... twice as fast I suppose. The dip tubes really made a difference.

Sanitize the bottles, line them up on a chair - about 30 or so, then bottle 2 at a time. Cap those bottles, then line up some more, and so on until the bucket is empty. With the dip tubes, I no longer have to tip the bucket at all and I lose maybe a tablespoon of beer when it's finished. I made dip tubes out of a bung and a short piece of clear tubing. The tubing is already bent, so it was extremely simple. The PVC elbow looks like a great idea though. I may have to upgrade.
 
I use the same bottling setup but when i bottle my wand doesn't get filled up with beer, the beer just slowly dripping down the walls of the wand, is that a problem? I think that could cause oxidation but i am not sure.

If your wand does not fill with beer the vent in the bucket lid is clogged. For beer to flow out the bottom air needs to get in from the top so a vacuum is not created.
 
I've added a 2nd spiggot and dip tubes to my bottling bucket. Bottle 2 at a time. Really makes the process go much faster.... twice as fast I suppose. The dip tubes really made a difference.

This sounds interesting. But right now, it seems the big time sink in bottling is the sanitizing beforehand and cleaning up and drying everything after. The actual filling and capping takes maybe 30-40 minutes.

Right now I drown all my bottles in a 5-gallon bucket of Starsan solution. I suppose a vinator would be a great expedient, but I feel better giving things a nice long soak in Starsan. My bottles are absolutely clean and sanitized and I am comfortable with the process, so hey, happiness trumps efficiency in my book.
 
Kegs don't fit on the back of an ATV ;) some must bottle :D


Actually they can. Bottles pop the tops on the back of a 4 wheeler. When I plan on a ride I used to use a tap a draft but came across a 2.5 gallon keg for cheap I now use.
 
Actually they can. Bottles pop the tops on the back of a 4 wheeler. When I plan on a ride I used to use a tap a draft but came across a 2.5 gallon keg for cheap I now use.

really? I never have this problem.. I do however, shake up the sediment.. but I don't mind... still tastes better than bud or miller light, which everyone else is drinking. :mug:
 
Yep, just like that. Over the open dishwasher door. Now that bottling has moved out of the kitchen, I bottle over a large plastic lid from a Rubbermaid bin. The hose between wand and spigot is only 2", it functions like a rigid unit. I sit on a chair while bottling.

Here are my experiences with two 3/8" ID bottling wands and a single 1/2" ID bottling wand. Why bother? Because it is physically uncomfortable for me to hold a bottle up to the wand 98 times, especially on the last dozen that flow very slowly. And I do not want to invest in at least 6 separate kegs. Personal preference.

The two 3/8" wands are definitely faster than a single wand. One always fills more quickly than the other - it is difficult to balance the flow exactly. It just means you have to watch them and be a little more dexterous. I gotta find some barb elbows from the aquarium store - the vinyl tubing points the wands outwards about 30 degrees from vertical.

The 1/2" ID wand is twice as fast as a single 3/8" wand. It is great. The only drawback is the larger wand causes more headspace when you remove it.

Dip tube - it depends on the clarity of your wort. I always manage to transfer some trub to the bottling bucket. A dip tube sucks all this up. I do not use a dip tube, let it settle, and tip the bucket when nearly empty and leave the crud behind.
 
Bottling buckets and primaries are often one in the same. It would not work well as a fermenter if the outlet were lower since it would suck out all the trub when transferring via the valve.
I too place a shim under the bucket and tip it for the last few bottles. No big deal to me, but you could pick up a food safe bucket@the home center and drill it out lower for the spigot.
I sanitize and place on the drying rack. When I am ready to fill I put them all on the floor and place a sanitized cap on all but one. I then purge all the bottles followed by filling. The bottling bucket goes on the counter. I fill the uncovered bottle.When it is full I take the cover off the next one and place it on the full one. Orderly, sanitary, and fast.
 
Bottling buckets and primaries are often one in the same..

Not if you like clear, properly primed beer. Primaries shouldn't have a spigot. Yeah, you *could* use a bottling bucket as a primary, but the spigot would be terrible for transfer. You still need to rack the beer into a clean bucket for priming anyway.

I use an Ale Pail for primary (no spigot hole), and a Lowe's food grade bucket drilled for a spigot and elbow diptube for bottling. Making the bottling bucket cost all of $10, works perfectly. The elbow nearly touches the bottom inside the bucket when empty, but the bottom pushes down about 1/4" when filled with beer.

If I used my bottling bucket as a fermenter the elbow would be completely buried in the trub. There would be no way I could use it to transfer beer without sucking up half the trub. If I put the spigot higher, maybe it would work, but the higher I put the spigot, the less beer I would be able to bottle.

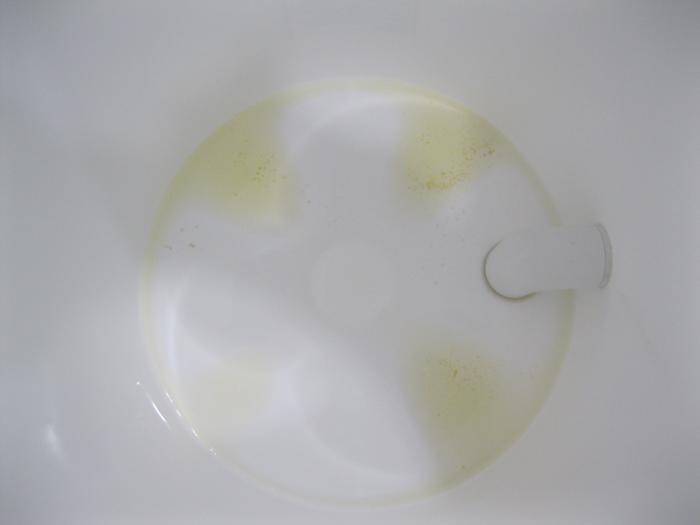
Here is a picture of how much beer is left in my bottling bucket without tilting it (~ 2 oz):

Bottling Bucket 004.jpg
 
really? I never have this problem.. I do however, shake up the sediment.. but I don't mind... still tastes better than bud or miller light, which everyone else is drinking. :mug:

You must ride on nice flat paved roads or only riding across the street. I've yet to see a bottle not pop the top after riding around in a cooler for more than 30 minutes on the back of a 4 wheeler in the woods. I remember my grandpa laughing while I put bottles in the cooler right after I turned 21, didn't take long to figure out why. He wouldn't drink beer from anything but a bottle unless we were riding.
 
You must ride on nice flat paved roads or only riding across the street. I've yet to see a bottle not pop the top after riding around in a cooler for more than 30 minutes on the back of a 4 wheeler in the woods. I remember my grandpa laughing while I put bottles in the cooler right after I turned 21, didn't take long to figure out why. He wouldn't drink beer from anything but a bottle unless we were riding.

hahaha i'm 43... been riding for years.. Washington pa is full of hills and trails... sorry. you must be doing something wrong. i'm just fine with my homebrew bottles on the trail
 
BTW.. do a search on you tube for Scooby.. and Wellsville, OH.. you will see its FAR from flat roads and pavement ;)
 
Not if you like clear, properly primed beer. Primaries shouldn't have a spigot. Yeah, you *could* use a bottling bucket as a primary, but the spigot would be terrible for transfer. You still need to rack the beer into a clean bucket for priming anyway.

I use an Ale Pail for primary (no spigot hole), and a Lowe's food grade bucket drilled for a spigot and elbow diptube for bottling. Making the bottling bucket cost all of $10, works perfectly. The elbow nearly touches the bottom inside the bucket when empty, but the bottom pushes down about 1/4" when filled with beer.

If I used my bottling bucket as a fermenter the elbow would be completely buried in the trub. There would be no way I could use it to transfer beer without sucking up half the trub. If I put the spigot higher, maybe it would work, but the higher I put the spigot, the less beer I would be able to bottle.

Here is a picture of how much beer is left in my bottling bucket without tilting it (~ 2 oz):

Use it without the elbow. Problem solved. I used a 6.5 gallon bottleing bucket for my only first ever 5 gallon batch as a small batch brewer it was a breeze to make 5 in this. I used priming tabs and it worked great and bottled straight out of it, being a last brewed kitchen sink brew it turned out awesome and a great idea. The spigot keeps it from adding the yeast because of it being an inch from the bottem.
 
If your wand does not fill with beer the vent in the bucket lid is clogged. For beer to flow out the bottom air needs to get in from the top so a vacuum is not created.

I bottle without a lid on the bottling bucket. I use a 5 gallon bucket but i brew only 1 gallon batches, is it possible that the pressure of 1 gallon liquid is not enough for a fast enough flow out of the spigot so the wand can't fill up? I am asking this because during cleaning when i have like 2gal water with sanitizer in the bucket it can fill the bottling wand.
 
I bottle without a lid on the bottling bucket. I use a 5 gallon bucket but i brew only 1 gallon batches, is it possible that the pressure of 1 gallon liquid is not enough for a fast enough flow out of the spigot so the wand can't fill up? I am asking this because during cleaning when i have like 2gal water with sanitizer in the bucket it can fill the bottling wand.

The photo in your original post shows a long length of tubing above the bottling wand. Does this tubing remained filled with beer after a bottle is filled? Or do you need to retilt the bucket to fill the tubing with beer to fill your next bottle?
If it is the latter then perhaps it is lack of pressure, from the volume of beer in the bucket, to displace all of the air in the tubing back up into the bucket.

Try using only 3 inches of the tubing to connect the wand to the bucket spigot.

Since you are only bottling one gallon batches a two gallon bucket would be easier to keep tilted with blocks or a rack to extract down to the last few ounces of beer.
I've found small food grade buckets at the grocery store for 50 cents apiece. These buckets also have an airtight seal with a removeable rubber gasket. The buckets had held frosting. Drill the bucket to put the spigot at the very bottom. Just leave enough clearance for the spigot flange and washer. You will just have to keep the bucket upside down for storage or during use up on blocks to protect the spigot from damage.
Hope this helps. Bottling should be relaxing.
 
This sounds interesting. But right now, it seems the big time sink in bottling is the sanitizing beforehand and cleaning up and drying everything after. The actual filling and capping takes maybe 30-40 minutes.

Right now I drown all my bottles in a 5-gallon bucket of Starsan solution. I suppose a vinator would be a great expedient, but I feel better giving things a nice long soak in Starsan. My bottles are absolutely clean and sanitized and I am comfortable with the process, so hey, happiness trumps efficiency in my book.

I use a 2 handed method there as well. I run the bottles through the dishwasher the night before, or the day of bottling. I then use a bottle tree with a bottle wrinser full of sanitizer.

http://billybrew.com/beer-bottle-tree

I place the tree between two counters on the floor. I place the wrinser on top of the bottle tree. I then place the bottles in cases on either side (counter). Pull one from the left, sanitize, place on the tree... pull one from the right, sanitize, place on the tree... etc... until I've got the bottles sanitized and ready for bottling. I'm pulling my next bottle as I'm sanitizing the current bottle. Left hand sanitizes, right hand is getting another bottle...

During that process, I'm bringing my priming solution to a boil... Once the boil starts, I set the timer for 10 minutes. The bottles are sanitized and hanging on the tree before the 10 minutes are up.

I use a chair covered with a towel below the counter level. I set in a chair just in front of that one so that the bottles are right in front of me. The bottling lines/canes, are immediately in front of me. I place the appropriate number of bottle caps in a bowl with sanitizer on the chair. As I'm filling a row of bottles, I place a cap on the top of each bottle. When I have 20-30 bottles filled, I move them to the counter where my bottle capper is. Finish capping and crating the filled bottles, and move more bottles to the bottling chair, repeat until finished.

I used to bottle 5 gallons in one evening. With a bit of efficiency, I'm able to bottle 10-15 gallons in the same time period.
 
I know this will not be popular, but I simply use the spigot. No tube. No wand. I do not ever detect any ill affects from aeration. I rack with a tube and auto-ciphon, then use the spigot.

I pour it carefully. Very easy to get the timing down for the perfect head space.

The last 2 to 3 bottles, I keep the spigot open and tip the bucket. Easy.

Sometime I mess up and get a lot of floaties in the last 2 bottles. No big deal. I set those 2 aside for sampling after each week. I hid those from my "customers".
 
My personal preference is the spring loaded wand. Not only does it give the same headspace each time, but I can float the remaining Starsan bubbles out of the bottle.
 
Not if you like clear, properly primed beer. Primaries shouldn't have a spigot. Yeah, you *could* use a bottling bucket as a primary, but the spigot would be terrible for transfer. You still need to rack the beer into a clean bucket for priming anyway.

I use an Ale Pail for primary (no spigot hole), and a Lowe's food grade bucket drilled for a spigot and elbow diptube for bottling. Making the bottling bucket cost all of $10, works perfectly. The elbow nearly touches the bottom inside the bucket when empty, but the bottom pushes down about 1/4" when filled with beer.

If I used my bottling bucket as a fermenter the elbow would be completely buried in the trub. There would be no way I could use it to transfer beer without sucking up half the trub. If I put the spigot higher, maybe it would work, but the higher I put the spigot, the less beer I would be able to bottle.

Here is a picture of how much beer is left in my bottling bucket without tilting it (~ 2 oz):

Ok...different strokes for different folks. I get more clear beer out of my primary with a spigot than I could with a tube. The siphon requires the.5 in tube be full through its diameter while the liquid falls at the speed dictated by gravity. With the spigot I can allow the beer to flow slowly as I tip the bucket. The siphon pulls up the trub while the spigot lets me get everything out without trub.

Whatever works for you is great.I'm glad for you. I've done it both ways and this works best for me. It easy and works well.
 

Latest posts

Back
Top