Fermentation Chamber Built...now how to manage temperature (STC-1000)

Homebrew Talk - Beer, Wine, Mead, & Cider Brewing Discussion Forum

Help Support Homebrew Talk - Beer, Wine, Mead, & Cider Brewing Discussion Forum:

This site may earn a commission from merchant affiliate links, including eBay, Amazon, and others.

mister704

Well-Known Member
Joined
Feb 5, 2014
Messages
299
Reaction score
34
Location
Centreville
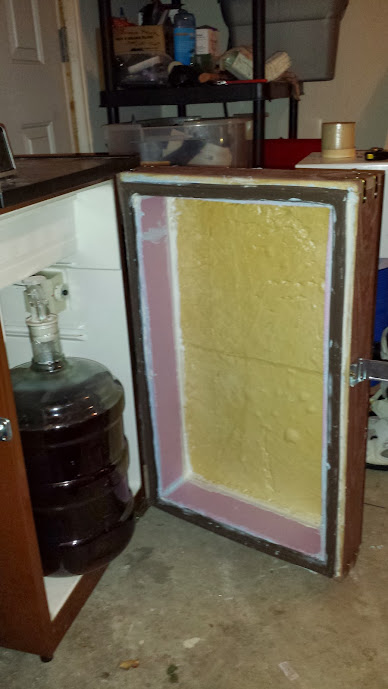
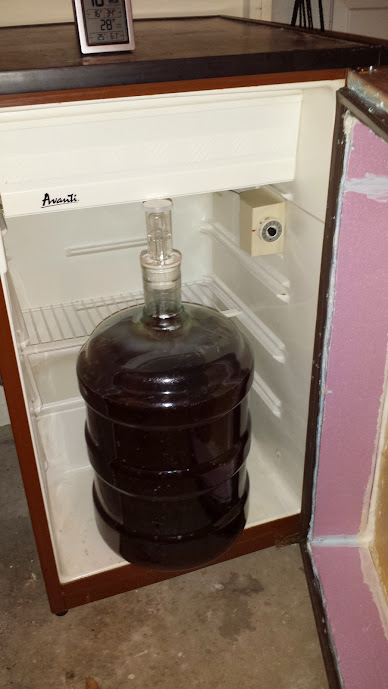
So I finally got around to building my fermentation chamber because I was so worried about keeping my carboy down to lagering temperatures.

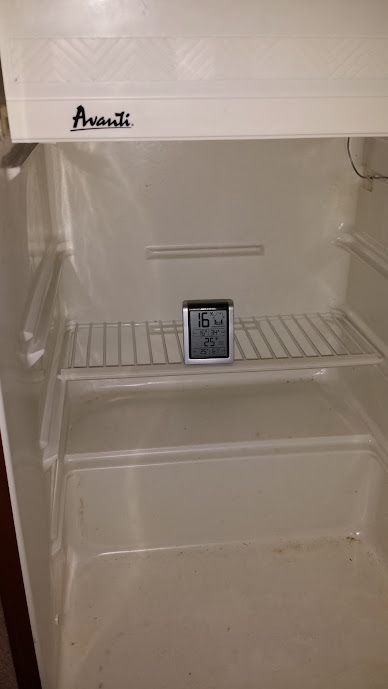
Looks to be maintaining 28F pretty good. I am in secondary so I am just waiting for the it to finish up.

20140216_121731.jpg

20140216_121720.jpg

20140216_121351.jpg


Now my question...how can I manage the temperature inside. I know I can use the STC-1000 for cooling but how for heating? Reason I ask is because I want to know can I hardwire to the temp setter inside the fridge and then add a junction box for me to be able to plug something like a small black heat light for when I need to warm it up.

Is this possible or what would you all suggest? I want to be able to run the STC from outside the fridge so I would love to cut a section on the front through the foam on the door and mount a junction box with outlet in the back. Then I could just easily plug in a heating source.
 
Been just starting to think about doing one of these myself. I'm going to model against this YouTube tutorial: https://www.youtube.com/watch?v=7I-iwFLykxs

My plan is to just toss in one of the carboy blanks, loose / not rapped around the carboy for heat and use the normal system of course for cooling. Hope that helps.
 
Right....that video is 100% what I am wanting to create but is it possible to run from the inside, seeing that the outlets will be exposed to the internal temps?

Plus being inside, you still need a power source to run it.
 
Right....that video is 100% what I am wanting to create but is it possible to run from the inside, seeing that the outlets will be exposed to the internal temps?

Plus being inside, you still need a power source to run it.

I'm going to guess the temp wouldn't be an issue. What I'm unsure of is moisture, it's a somewhat sealed system where you'll get prolonged exposure to moisture. I think if you want it inside, maybe hardwiring and just dealing with sealing the wire into your project box would give you greater control keeping dry. Why do you need it inside? Are you worried about drilling? As you noted, still going to have to run the power / ground / neutral.
 
No not at all worried about drilling. So what are you thinking? Create the junction box and mount it to the outside of the fridge and drill holes for the sensor to fit through and heating source when needed?

Trying to make sure I follow you
 
I think it would just come down to personal preference, moisture may or may not be an issue, just food for thought. You could mount the box to the frig, either inside or out, or could just leave the box loose outside. Think my preference would be to drill two holes through the new door to avoid cooling lines. One hole would be to run the probe and the second hole for the heat line; the cooling is of course already on the outside. Then I'd just leave the box loose, in case I have another application for it I can easily move the box or say down the road I what a bigger frig / freeze.
 
Instead of just loose, maybe glue magnets to project box to keep attached to side of fridge? Not sure if they could interfere with the electronics...
 
Makes sense. Thanks for that breakdown.

Basically mount to the outside(what I will probably do). Most likely on the side closest to the compressor. From there basically drill 2 holes like stated. One for sensor and one for heat. From there just take the other from the back which controlled the thermostat and override it.
 
I've got a setup very similar. Run the probe and cable for a heating element through a small drilled hole sealed with clay. Velcro'ed the project box to the top of the chamber.


Sent from my iPad using Home Brew
 
What I want to know is how that dorm fridge can get to 28F.

Sent from my DROID RAZR using Home Brew mobile app

I dunno man but it is hanging there tight. I would like to think that like most things...older products were made better than new.

Its actually sitting at 25F with the settings inside at level 7. It goes down to 10. I have no idea how cold it can really get. Its sitting in my garage with has been roughly 45-50F every day.
 
It's a fridge that is at 28? That's below freezing, so it's a pretty crappy fridge!

I don't think moisture is a concern in a fridge - the air is super dry to prevent mild and bacteria.

Do be careful when drilling the sides though. There are probably cooling lines and if you poke one then the fridge won't work at all.


Sent from my iPhone using Home Brew

Huh? Are you saying its crappy because the temp is that low or because it should be able to regulate it to no lower than 32F? As well its a fridge with the freezer attached inside so I am assuming the inside temp is 100% based on the temp from the freezer/ice box.

And yes the cooling lines are at the top of the fridge that attach to the ice tray liner inside it.
 
.....As well its a fridge with the freezer attached inside so I am assuming the inside temp is 100% based on the temp from the freezer/ice box.

And yes the cooling lines are at the top of the fridge that attach to the ice tray liner inside it.
The freezer compartment refridgerant lines are essentially, the evaporator coil. There will also be a condensor coil somewhere on the exterior, or under the sheet metal.
 
Why drill holes? You can just run the sensor and heat source wires through the door seal. If you have a rubber or foam strip it will seal around the wires. I built a chamber by putting a wood collar on a chest freezer. Then put a rubbery foam strip of insulation on the bottom of the collar. I just lay my sensor wire and heater wire in and close the lid. If there is any temp loss it is minimal but the door seal makes a pretty tight seal around the wires.


Sent from my iPhone using Home Brew
 
ImageUploadedByHome Brew1392756249.125891.jpg
Here is a picture of mine. STC is dual temp. Freezer plugs in to one side of outlet on back of the project box. The heater plugs into the other side. Then just lay the wires in and close the lid. Easy as pie.


Sent from my iPhone using Home Brew
 
If you turn a refrigerator up to max it very well may turn into a freezer, as in temps below 32F. This is even more of a possibility with those mini-fridges that have the cooling element at part of the freezer all in the same compartment.

My chest freezer on the other hand will go below 32F even on the minimum (highest temp) setting. Meaning I need to use the external controller to prevent it from freezing during cold crashing or lagering.
 
All makes sense. Thanks for the photos too. I do well with seeing what I am needing. So let me ask this last question. I am going to build me a ferm wrap using the Flexwatt Heat Tape so I have the heating element down. So for the cooling element, I just need to tap into the lines in the back of the fridge the are near the compressor right. That way I have both configured?
 
For the cooling you just plug the freezer or fridge right into the outlet that is wired to the temp controller. No splicing required to the freezer.


Sent from my iPhone using Home Brew
 
I think I would drill down through that overhanging lip that's over the top edge of the door (cant imagine there are coils there) and have the heater power cord and the temp sensor cord go down through there, maybe carve form fitting channels in the door gasket so it can close tightly over the wires, hold them in place with silver aluminum tape. As noted, just plug the fridge power into the cold circuit. That way your potential source of air leakage is up top.
 
ImageUploadedByHome Brew1392839342.474336.jpg

FYI here is the exact picture I used to wire my STC 1000. I found it in one of the other build threads but I forget which one. I felt it was the best and easiest way to wire it because you only need to use one outlet. I just got a replacement power tool cord and receptacle at Lowes and a project box from Radio Shack. The other wires and wire nut I had laying around at home.


Sent from my iPhone using Home Brew
 
Thats the one I used also, but I cheated and got a power cord from a local Habitat for Humanity ReStore for $1. They had a whole box of old power cords, brick power supplies, remote controls, what have you. Even scored a 500 foot box of brand name Cat5E cable for $10.
 
I am going to suggest BrewPi. Get out your geek hat and build one.

www.brewpi.com - EDIT - Fixed the link.

Keeps my beer within .15 degrees of set temp. You can use a lamp for heat, 60-100W is fine. I built mine and used an old SmartUPS to house it, allowing me to use the built in outlets.
 
Waiting for the Controller to get delivered today. I have all the components to put it together. As well the ferm heat wrap got delivered so I am basically ready to go on the next brew.
 
It's now a for profit, and so is a .com


http://www.brewpi.com/


Someday when the budget is larger, I do plan to play with such.

I fixed the link.

Yes it is about $52 US - This is for the shield. You still need and Arduino, Raspberry PI, and at least an 8GB SD card. I had most of these in the first place so it brought my cost down.

It's a great little system, and (hopefully soon) will support multiple chambers.
 
Back
Top