What have you built with the HD copper tubing?

Homebrew Talk - Beer, Wine, Mead, & Cider Brewing Discussion Forum

Help Support Homebrew Talk - Beer, Wine, Mead, & Cider Brewing Discussion Forum:

This site may earn a commission from merchant affiliate links, including eBay, Amazon, and others.
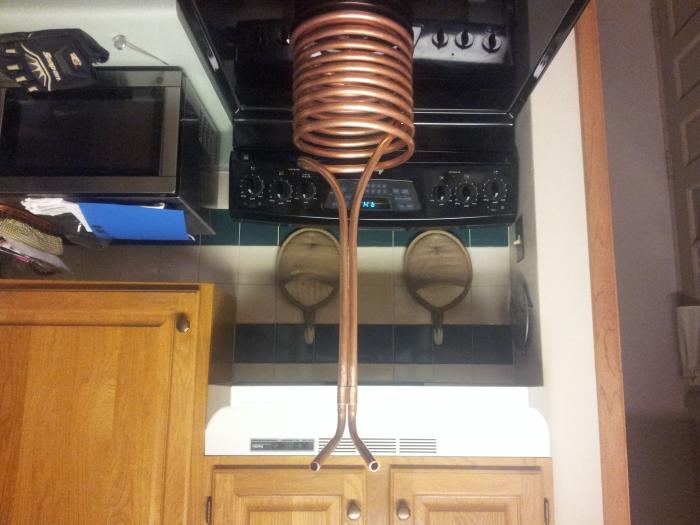
Yup opposite directions, They were the same length but the inner coil ended up being slightly taller. I just spaced out the outer rings a bit so they would be the same height. I'm wasent sure how to measure out the lengths, but I'm happy the way it turned out

Is there anyway to measure it or should I just eyeball it? I guess I could measure a piece of twine or something and do it that way.
 
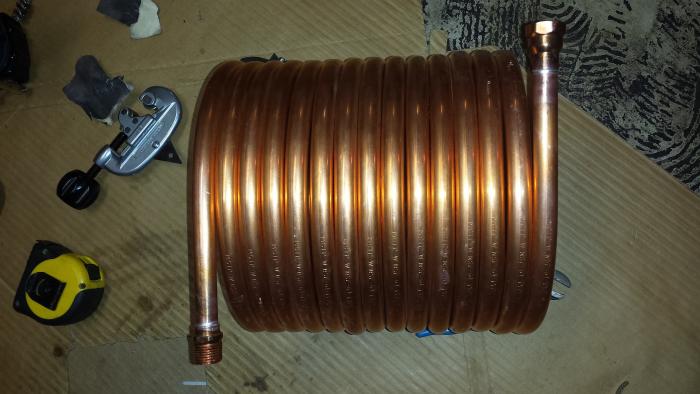
heres a 30 footer, made 2 of them from a 60ft roll.

20131202_073204.jpg
 
shlept my arse to 4 HD's and not a one had reduced priced copper. I hate u guys....

What I would have made was and add-on IC AND a CounterFlow chiller.

That's all I have no pics as I have no discounted copper. :(
 
Here's mine! 60' 1/2" double coil next to my old 20' 1/2" can't wait to take it for a test run!

Just finished my 50 ft dual coil chiller!! Now if Santa just brings me the new pot I designed this for I will be able to go all grain!

Looks great!

Quick question for either of you, going to solder for the first time some copper pipe. How are you cleaning you post-solder assembly? I saw a guy use carb cleaner, but that stuffs pretty harsh. My work will be small enough to go into the dishwasher, so was thinking about a Dawn soak and then into the dishwasher.
 
I bought 60 foot of the 3/8 because they had it and I figured I could use it for something. I am trying to upgrade to a herms system and really want to go with 1/2 throughout. So any suggestions for a use or anyone wanna trade 1/2 inch for 3/8?
 
Quick questions about coiling copper ics.

How do you get the feed tube on the inside to be so straight? When I tried to coil some smaller copper with the feed tube on the inside as I coiled. The transition from straight to coil was rough and got a small link. The coil was lopsided as the feed tube changed how close I could coil against the paint can. What do you do?
Just buy a piece of straight copper pipe and solder it on with a 90 elbow

Looks great!

Quick question for either of you, going to solder for the first time some copper pipe. How are you cleaning you post-solder assembly? I saw a guy use carb cleaner, but that stuffs pretty harsh. My work will be small enough to go into the dishwasher, so was thinking about a Dawn soak and then into the dishwasher.
I use the little scuff pads they sell in the soldering section then just cover everything with a generous amount of flux
 
RADMAD - please share how you made your chiller. What did you use for the inner and outer coils? How did you measure the length of each?
 
I just used a little simple geometry to figure out how many wraps i could make

Total_Length = ( Pi * Dia-InnerCoil + Pi * Dia-OuterCoil ) Wraps

in my case
Total_Length = 55 ft = 660"
Dia-Inner =8"
Dia-Outer = 13"

This gives a Wraps = 600/((3.14 * 8 ) + (3.14 * 13 )) = 10.01

I used some straight pipe to make the vertical risers from.

Of course the Inner and outer dia you use need to match your boil pot so adjust acordingly
 
In_Vino_Veritas said:
Looks great! Quick question for either of you, going to solder for the first time some copper pipe. How are you cleaning you post-solder assembly? I saw a guy use carb cleaner, but that stuffs pretty harsh. My work will be small enough to go into the dishwasher, so was thinking about a Dawn soak and then into the dishwasher.

When you get done sweating (soldering) both joints on a fitting, give it a 5-10 seconds to cool/solidify then wipe it down with a damp clean rag. Be careful as it's obviously still extremely hot! Once fully cooled, if you feel it still needs additional cleaning, use dish soap and a scotch brite pad.
 
i posted mine already but cant figure out why the pics are always sideways when using my phone, so i took a pic using a method mentioned by another member. lets see if it works...lol

20131211_212109.jpg
 
i posted mine already but cant figure out why the pics are always sideways when using my phone, so i took a pic using a method mentioned by another member. lets see if it works...lol

LMAO!!! How did your inverted chiller work out?? I don't see how it is very efficient.

Sorry...I couldn't resist :fro: it still didn't work.

Edit: poislb removed it while writing my post! Dang it! Lol.
 
LMAO!!! How did your inverted chiller work out?? I don't see how it is very efficient.

Sorry...I couldn't resist :fro: it still didn't work.


lol...i fixed it, so the phone has to be turned to the left, not up or to the right when taking a pic..lol
 
Here is the herms I made with my copper.

ForumRunner_20131229_201103.jpg

Still working out some kinks but it works pretty well.
 
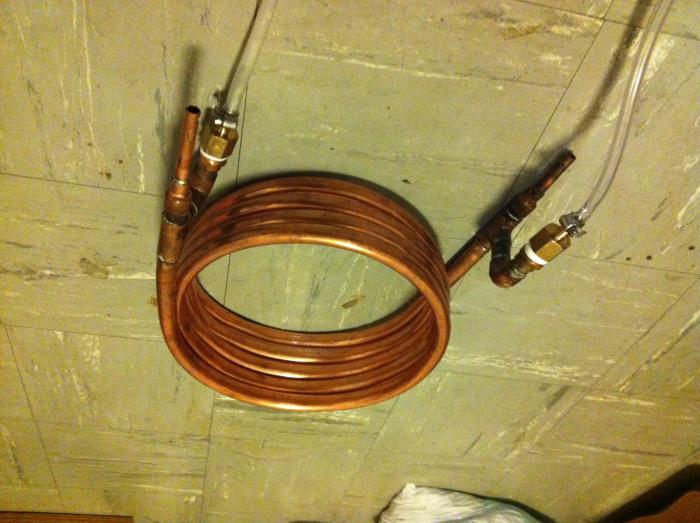
So recently I upgraded my kettle. So for the old kettle I've made a new chiller with the intention of hard mounting it to the kettle and using it for a manual at first maybe auto later HERMS, whirlpooling when desired and chilling of course. So here's my new chiller.
abp5.jpg

p715.jpg


I'm going to solder in two 1/2" NPT bulkheads when time allows.
 
Finally got mine finished last night. Both coils are about 25' long with about 1/4" between turns in the inner coil. Looking back I should have done 20 on the inner, and 25 on the outer. This is the 1/2" copper tubing, and 3/8" fittings and risers (1/2" tubing and 3/8" hard copper are same size). The feed hose has a quick connect to fit the pump from my carboy washer ('Toms Keg Washer' - awesome washer), and the outlet goes to a bucket to capture the hot water for cleanup later.

The 'stirrer' in the drill is part of another brewery accessory that I'm still working on - it will be a mounted to a small motor and a custom pot lid used to circulate my BIAB mash, then will sit on the pot again when chilling.

With that stirrer in the drill during the chiller test I was able to get 10 degrees per minute per gallon of tap water (~55F). The pot had 6 gallons of hot tap water at about 120 to start. Real world from 212F should be even better, and I may even restrict the flow to see what difference it makes as the carboy washer pump puts out significant flow. Can't connect to the faucet as it's a hand held sprayer head, but could add a fitting just for this on the cold line (dedicated brewery sink) and skip the pump. My old chiller was 25' of 3/8 tubing, and I would bucket about 8 gallons then recirculate another 6 or so with ice, so the pump was critical. It took a good 20 min to get the temps down. I may stick with it just to avoid plumbing another fitting.

cooler.jpeg
 
Back
Top