Welding a brew stand

Homebrew Talk - Beer, Wine, Mead, & Cider Brewing Discussion Forum

Help Support Homebrew Talk - Beer, Wine, Mead, & Cider Brewing Discussion Forum:

This site may earn a commission from merchant affiliate links, including eBay, Amazon, and others.

fusa

Senior Member
Joined
Feb 18, 2010
Messages
392
Reaction score
55
Location
Blacksburg
I am planning on welding a brew stand sometime soon. It will be used to brew 5 gallon batches. I’m currently using 3 converted keggles.

Is 2 inch square 14 gauge steel sufficient for this?

It’s possible I will do some 10 gallon batches. I may also purchase 20-25 gallon pots.
 
2" square 14ga will certainly work but it's overkill for a keggle rig. I've seen single tier keggle rigs using 1" square 14 gauge (though I wouldn't recommend that :))

Consider dropping down to 1-1/2" 14ga square mild and save money and weight, that's what I used under three 20 gallon kettles.
It's plenty rigid and likely could handle twice the load...

P9030039.JPG


Cheers!
 
Thanks.

Will flux core 0.030" wire work ok?

Just bought a Hobart Handler 140 MIG welder. Will be teaching myself welding soon. Haven't welded in about 25 years.
 
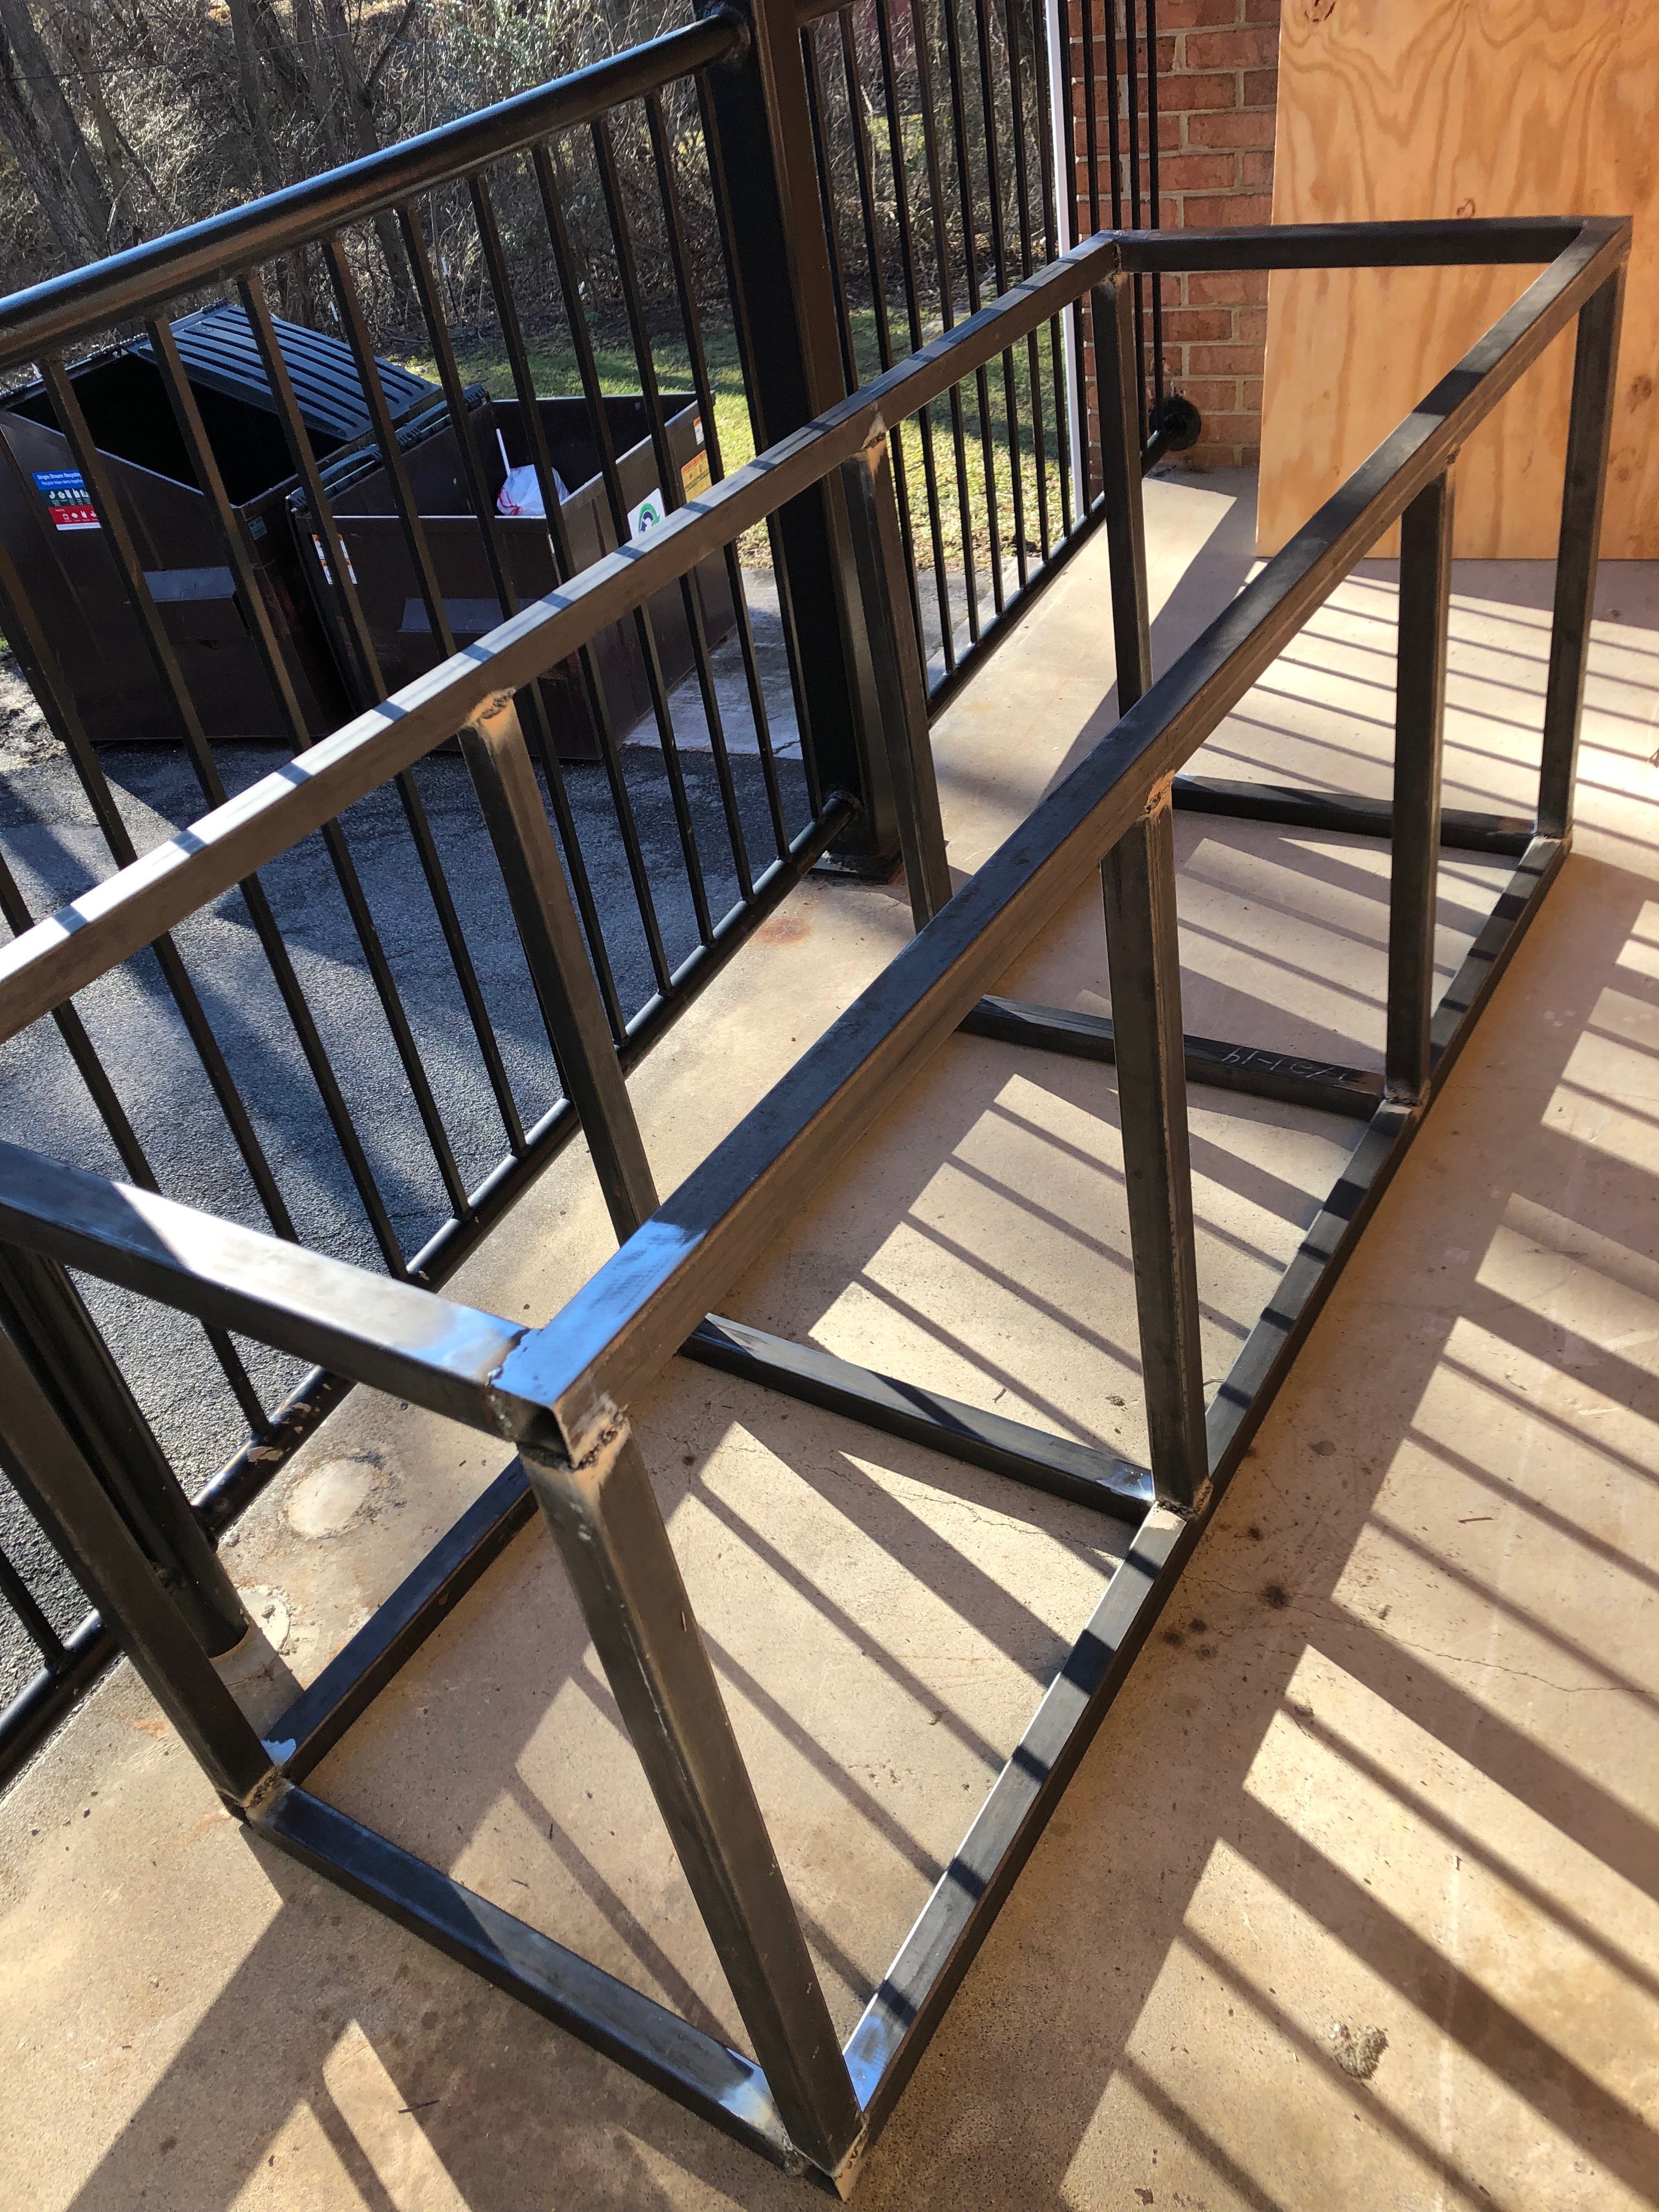
Finally made some progress today.

IMG_0404.JPG


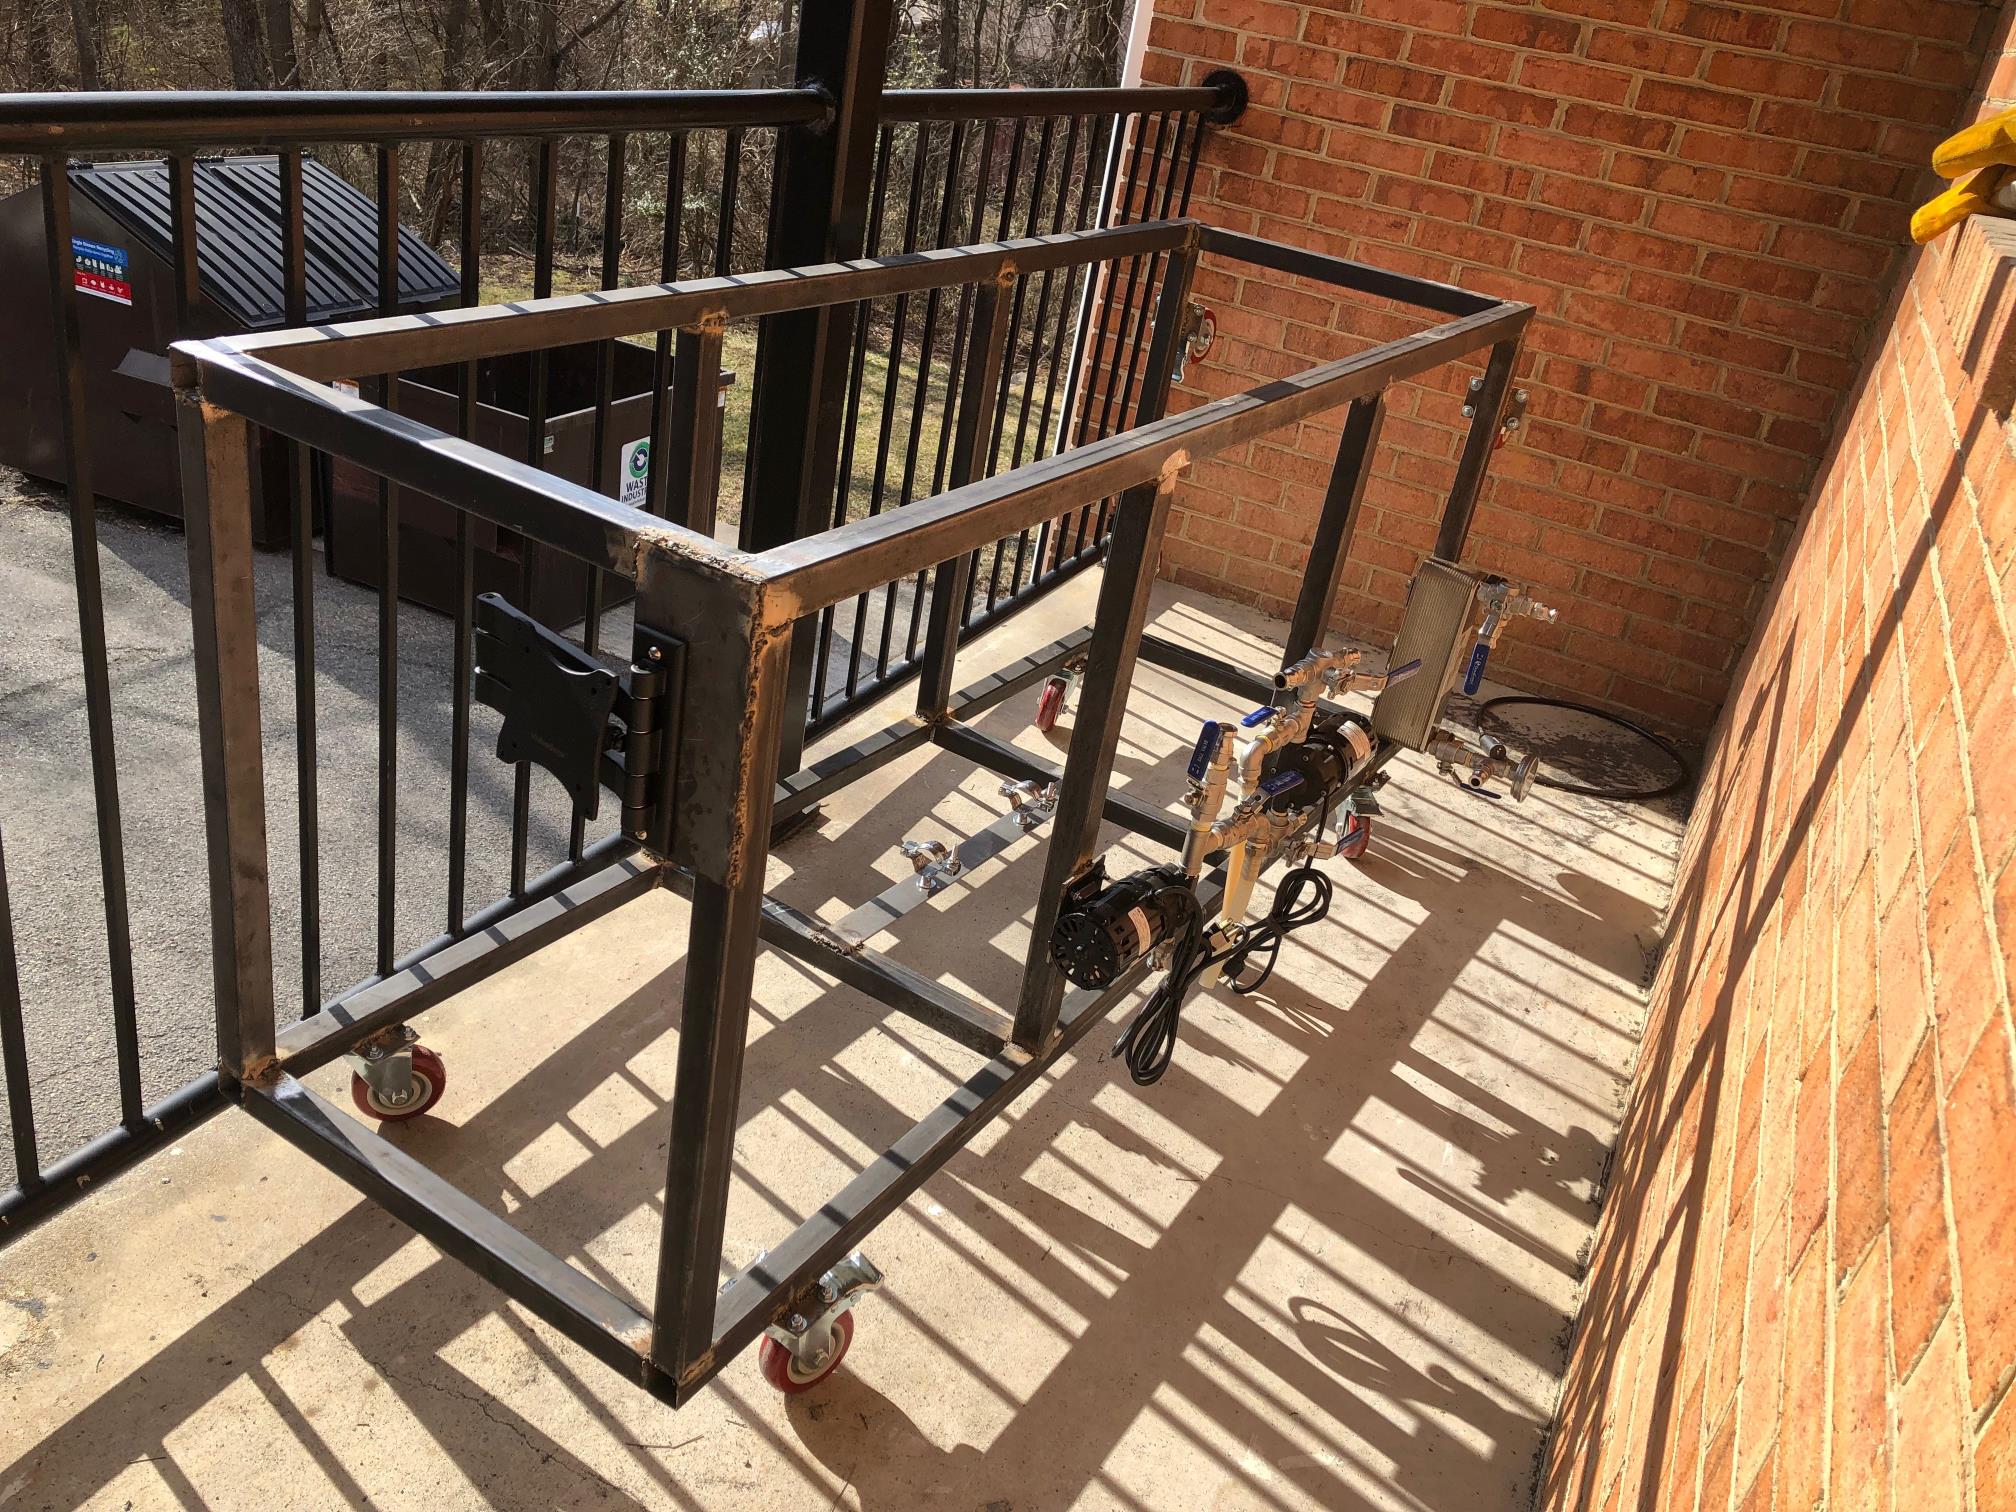
The frame is mostly done, now to do mounts for the 2 pumps, plate chiller, rims tube, 2 burners and support for mlt, plus wheels on bottom and one end.
 
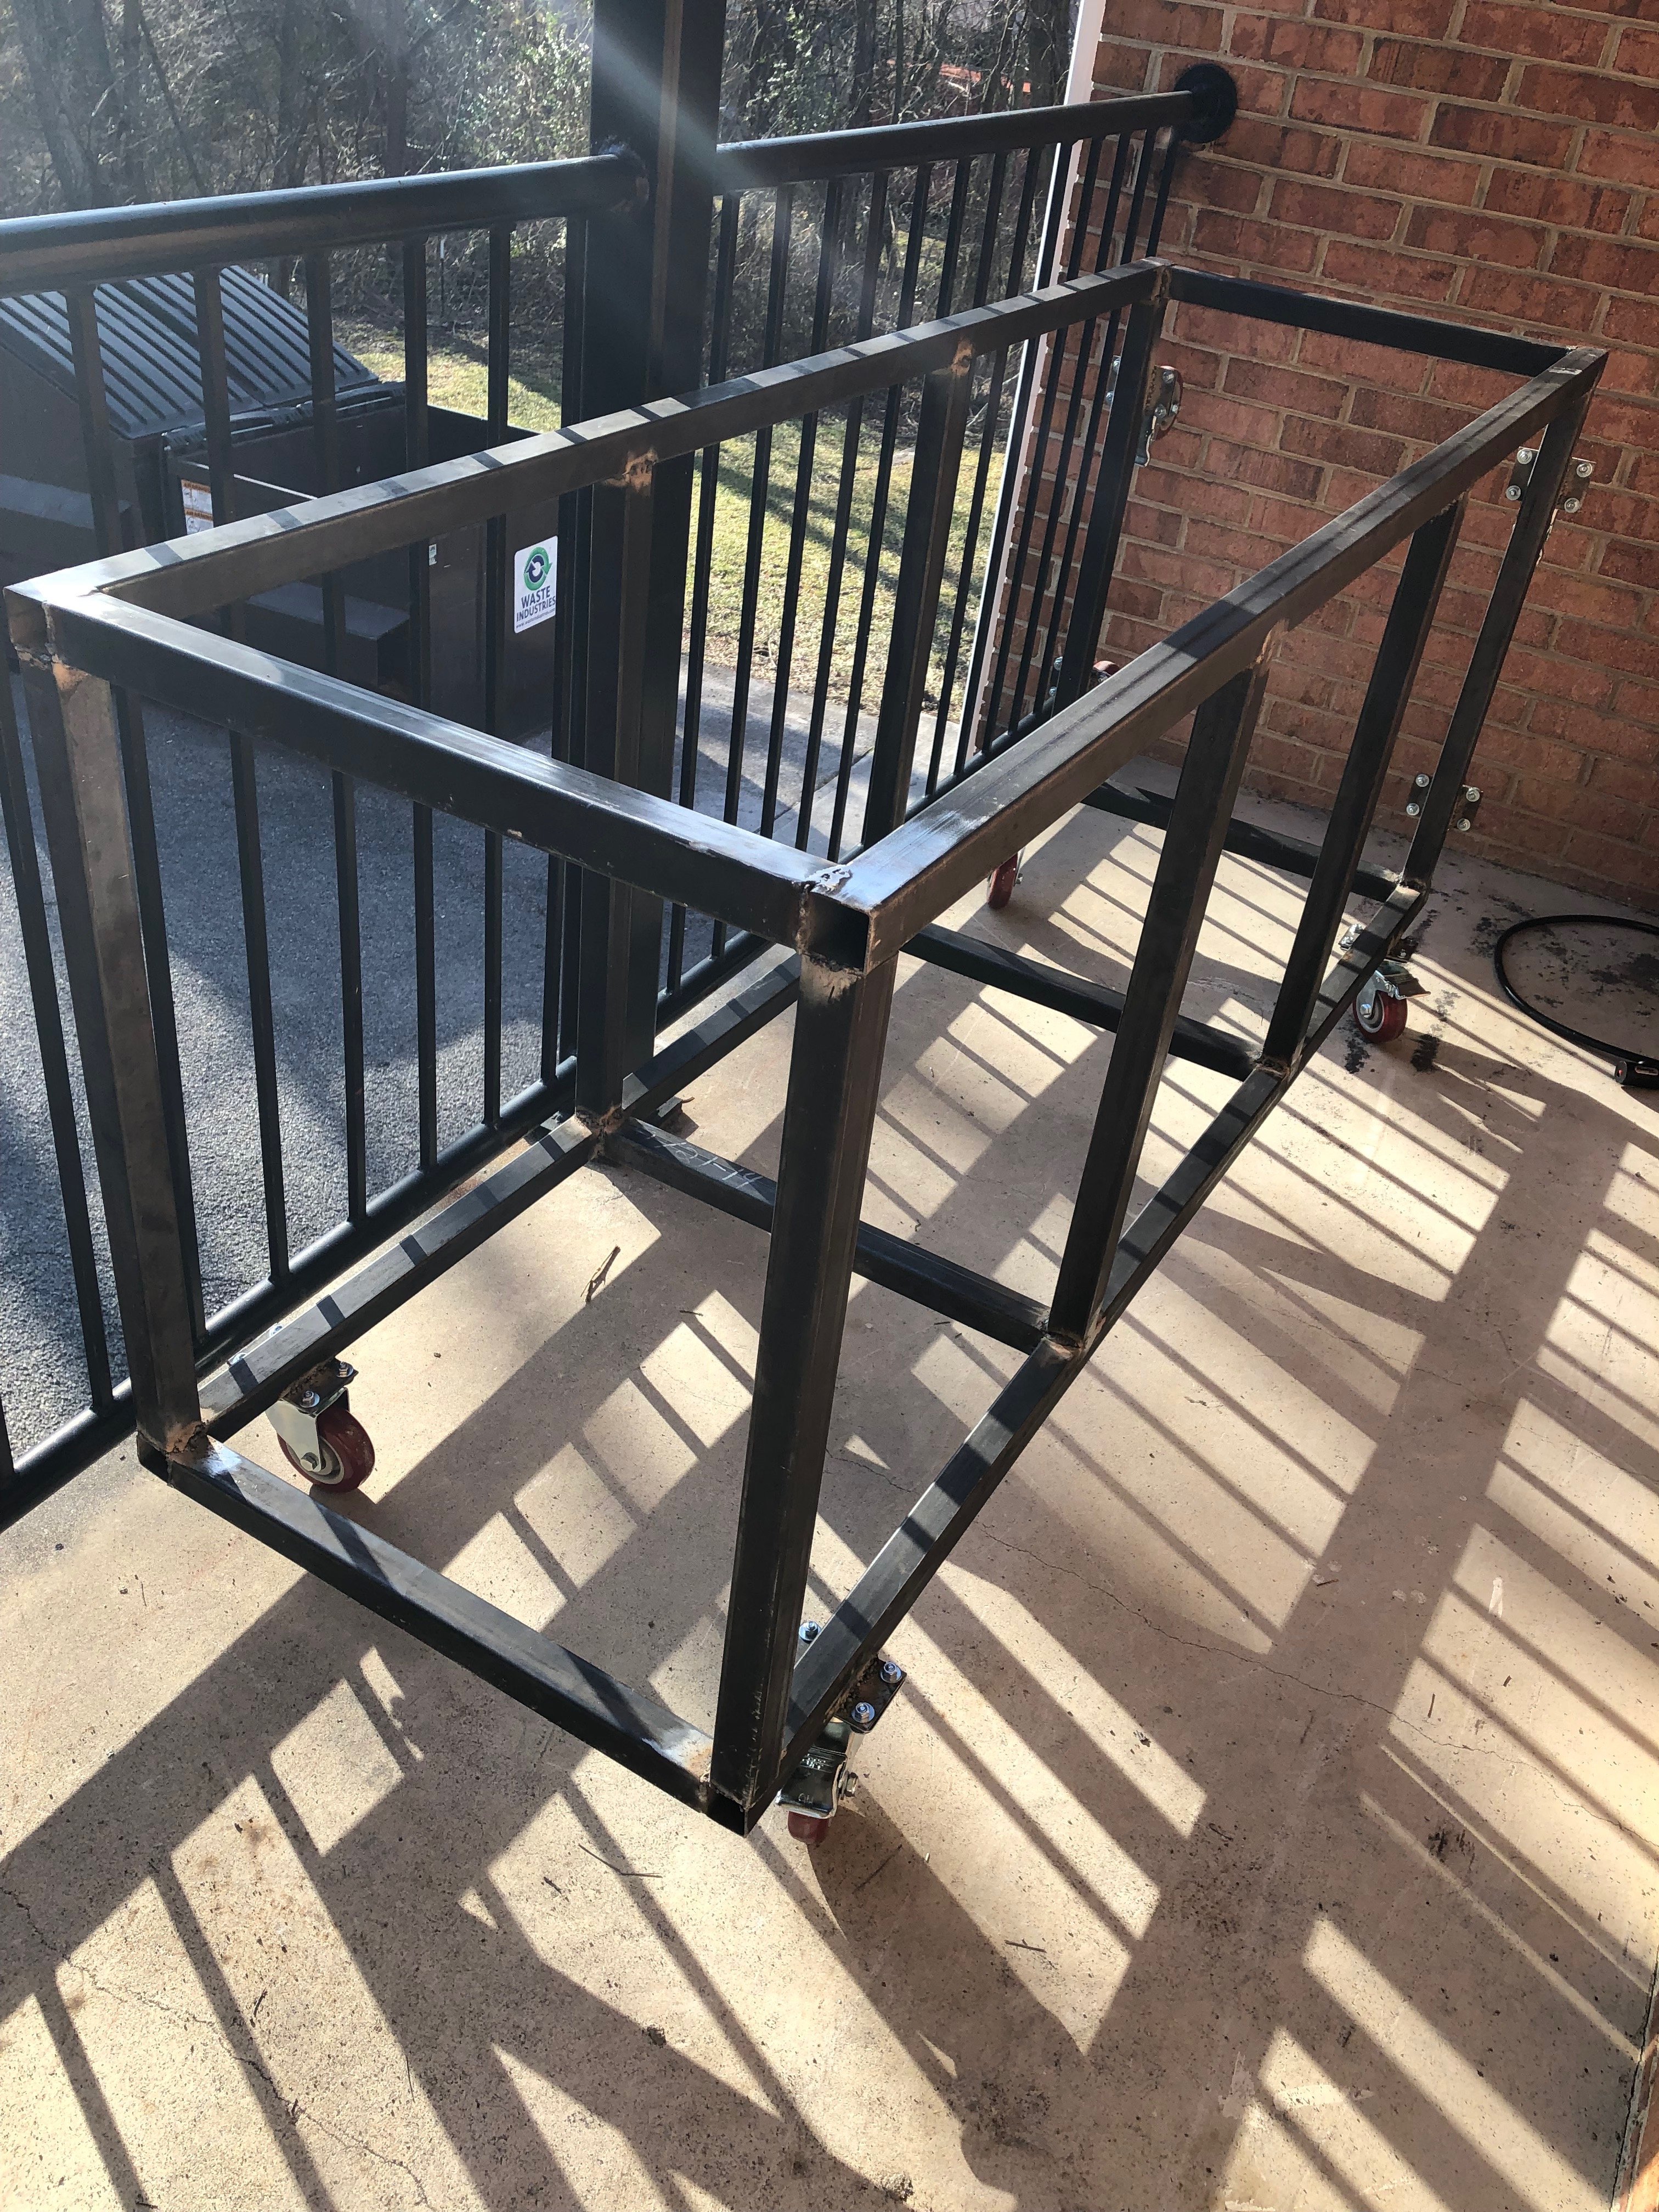
Some more progress today. Added wheels on bottom and one end for storage.

IMG_0483.JPG
IMG_0485.JPG
 
2" square 14ga will certainly work but it's overkill for a keggle rig. I've seen single tier keggle rigs using 1" square 14 gauge (though I wouldn't recommend that :))

Consider dropping down to 1-1/2" 14ga square mild and save money and weight, that's what I used under three 20 gallon kettles.
It's plenty rigid and likely could handle twice the load...

View attachment 589966

Cheers!
Hey, I really like your build! Nicely done! Do you happen to have any more photos of your build? Also would you mind explaining what the box you have down on the far left? Some sort of water distribution?
 
Thank you for the kind words, they're appreciated. I actually have a ton of pics, from the first chunks of scrap I started learning on through the last artful touch with the grinder ;) If there's a particular detail you're interested in I can likely find a close-up.

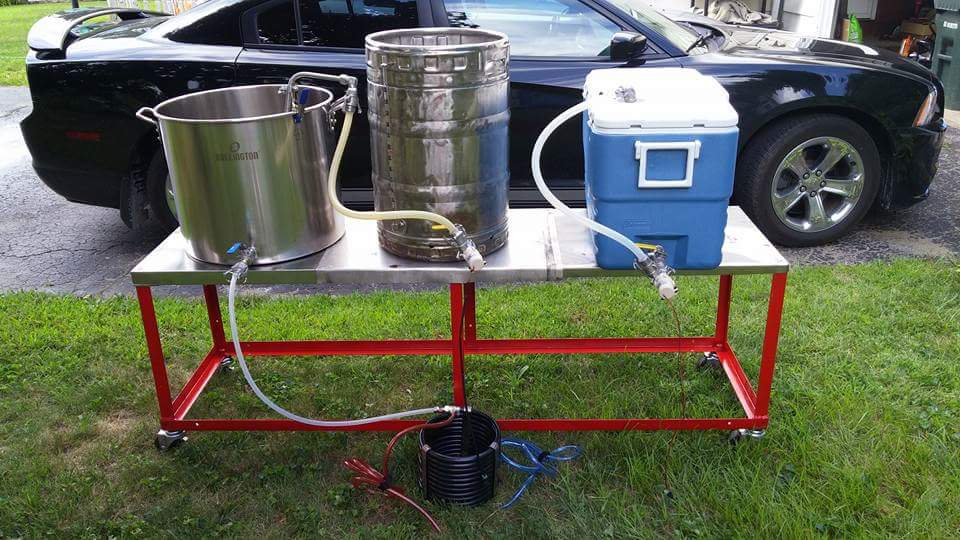
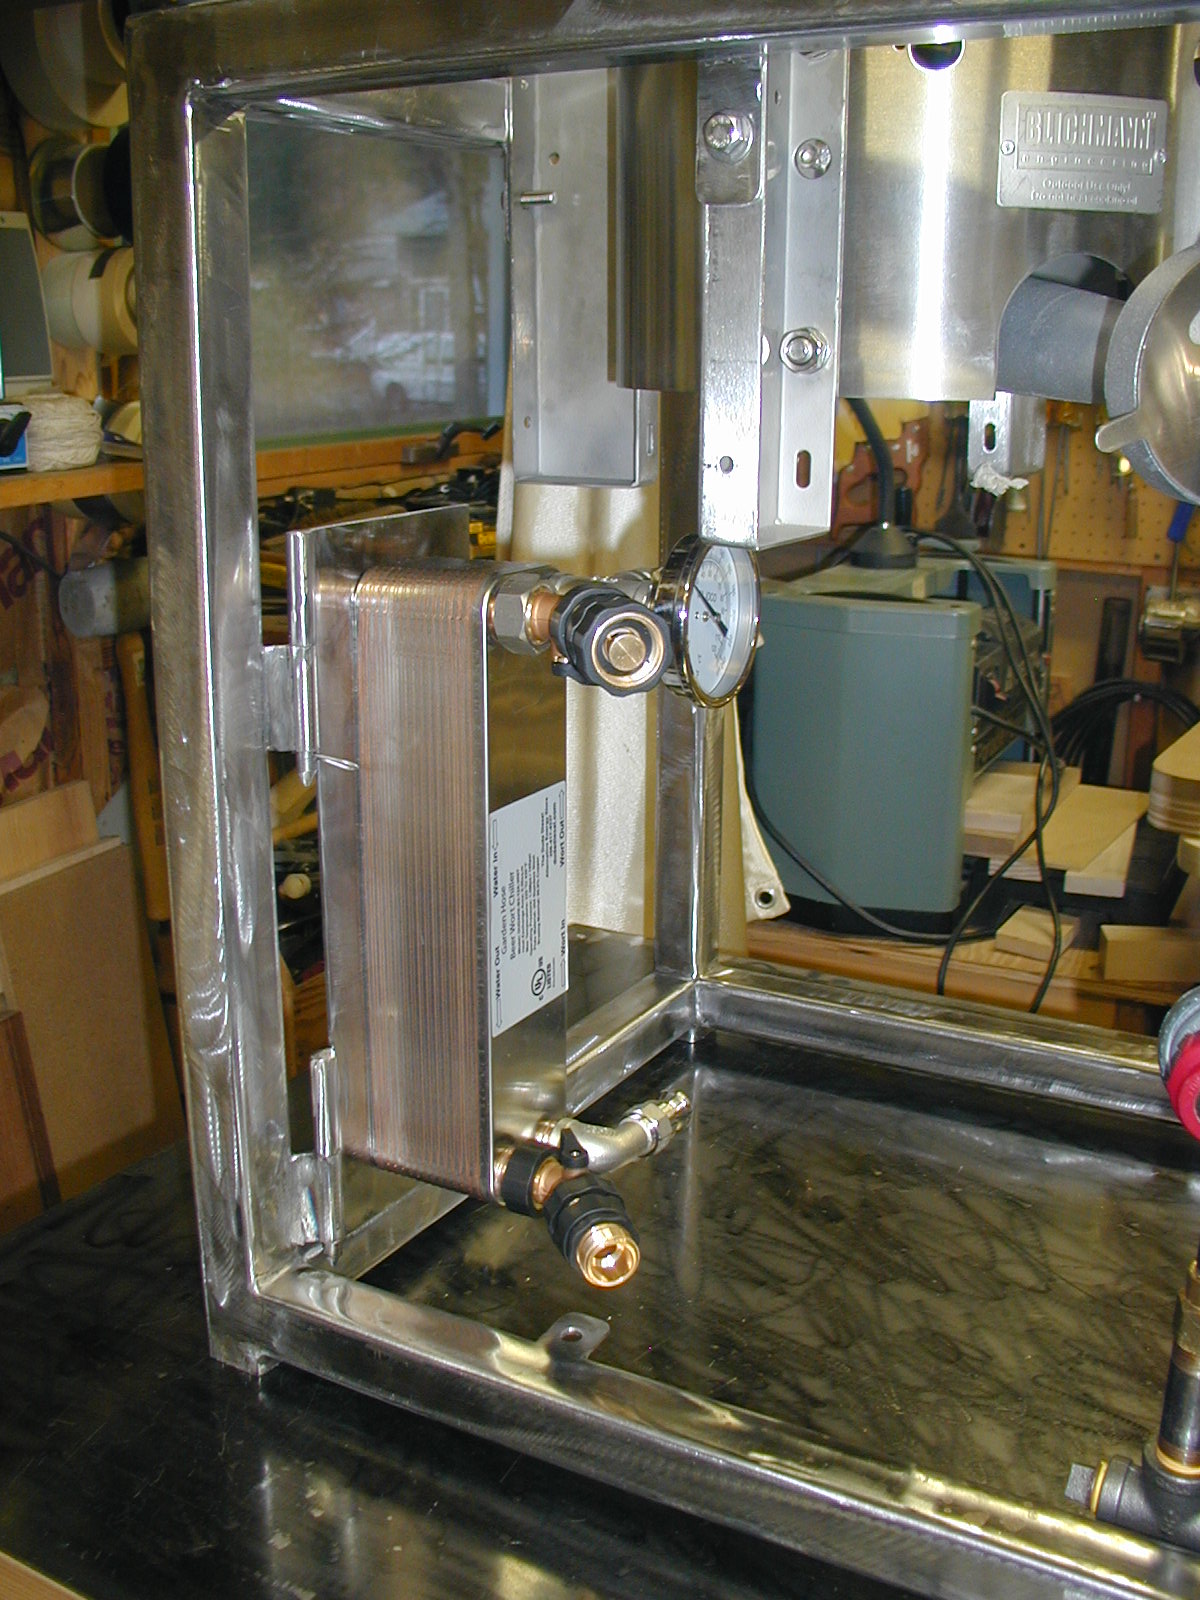
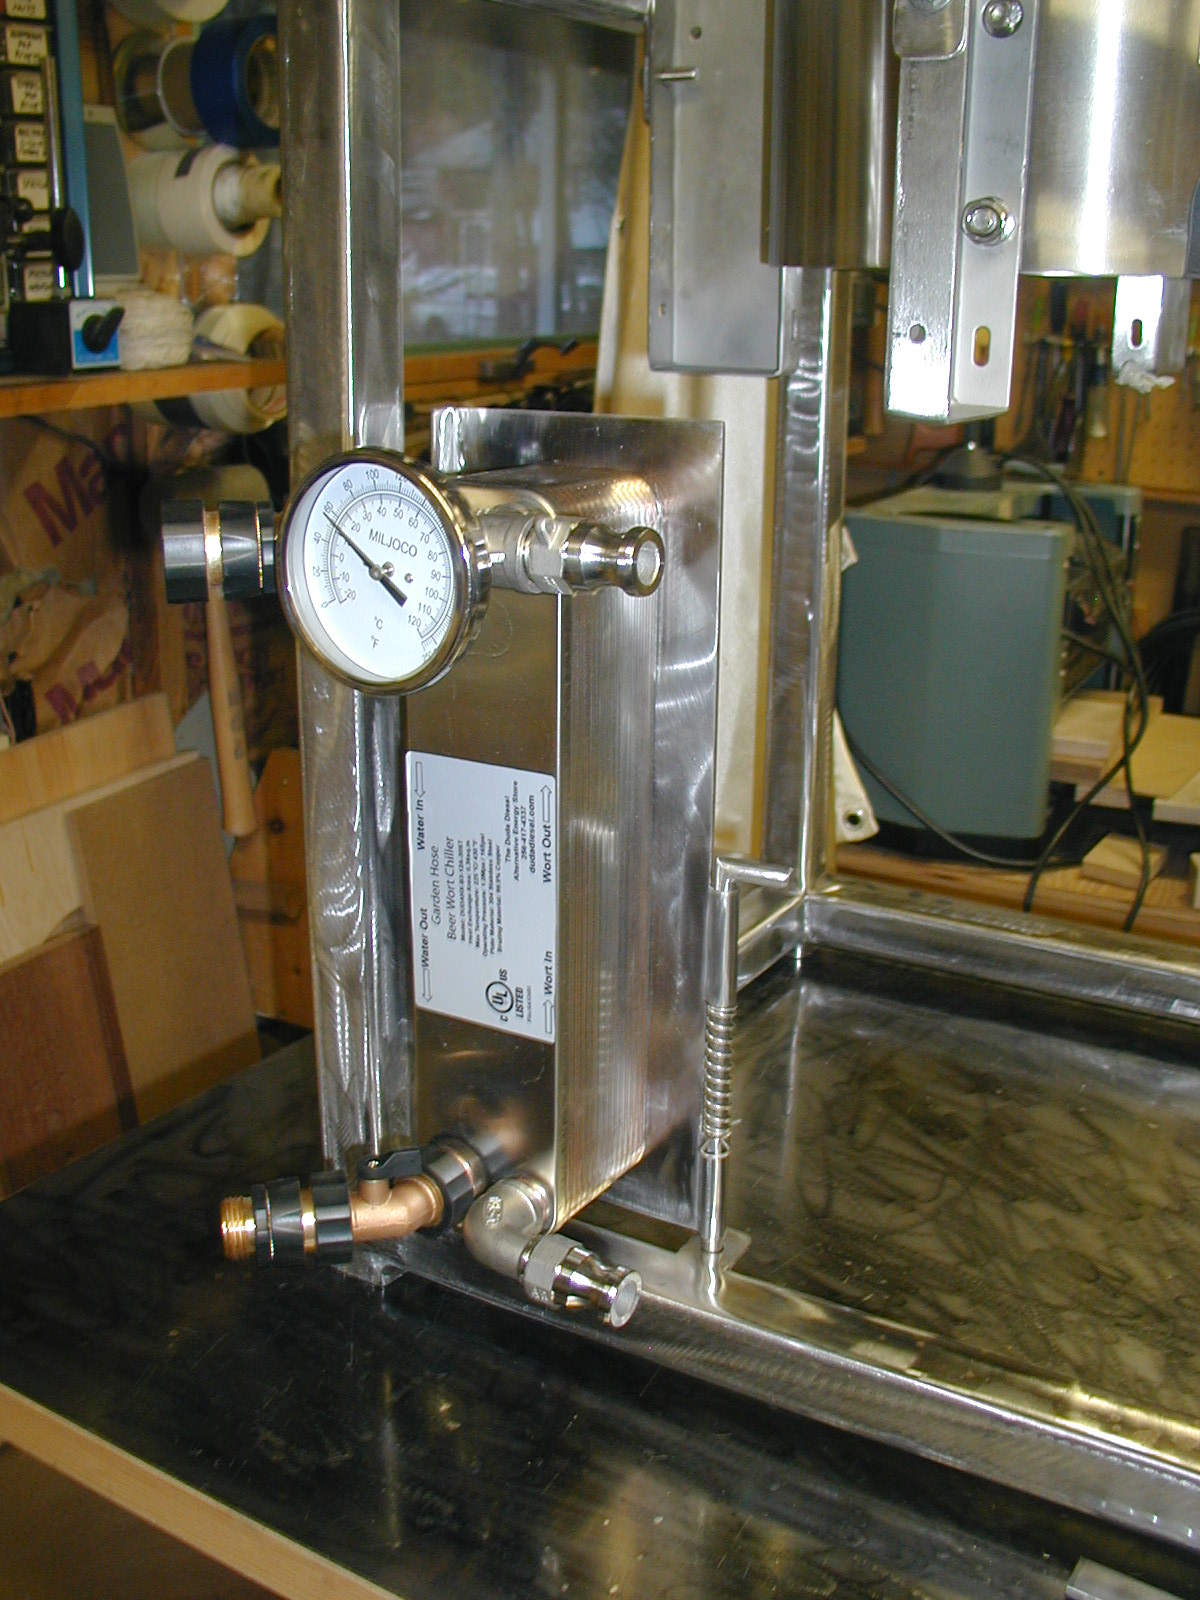
The "box" at the left-front corner is a Dudadiesel 30 plate 12" plate chiller, mounted on a swinging plate that can be latched tucked in away from shins (or for laying on its side in the back of my Durango) or deployed out for chilling to the fermentors...

P3310042.JPG


P3310043.JPG


Cheers!
 
Thanks for the quick response! Cool, so thats what it is. Good idea with the swinging plate. I'm leaning more towards a two tier system, but liked how you attached your blichmann burners to the stand. Looks like you have brackets welded to the tubing that drop down and attach to the existing holes on the legs? I'd love to see more pictures of the burner mounts if you have any.

Haha a world class grinder huh? Thats cool you taught yourself to weld for this project. Its been 5 years since I've welded but I think with a couple test welds I should be fine.
 
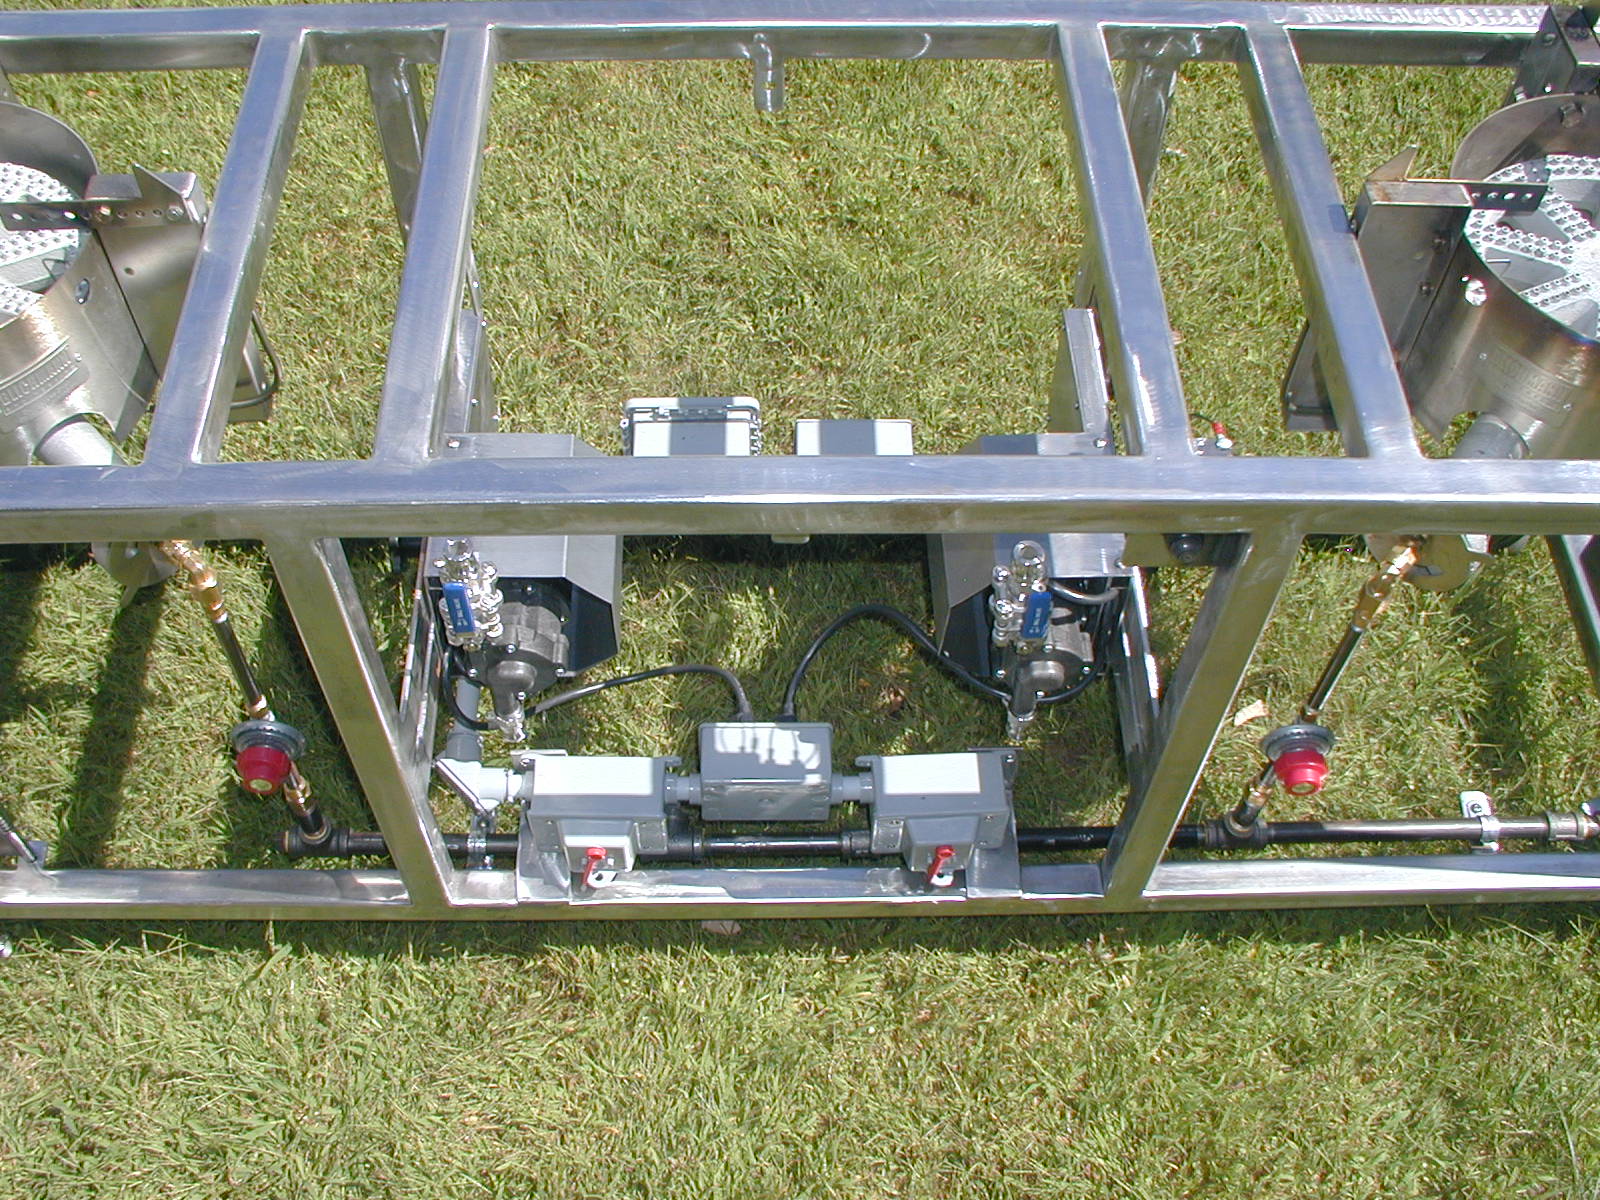
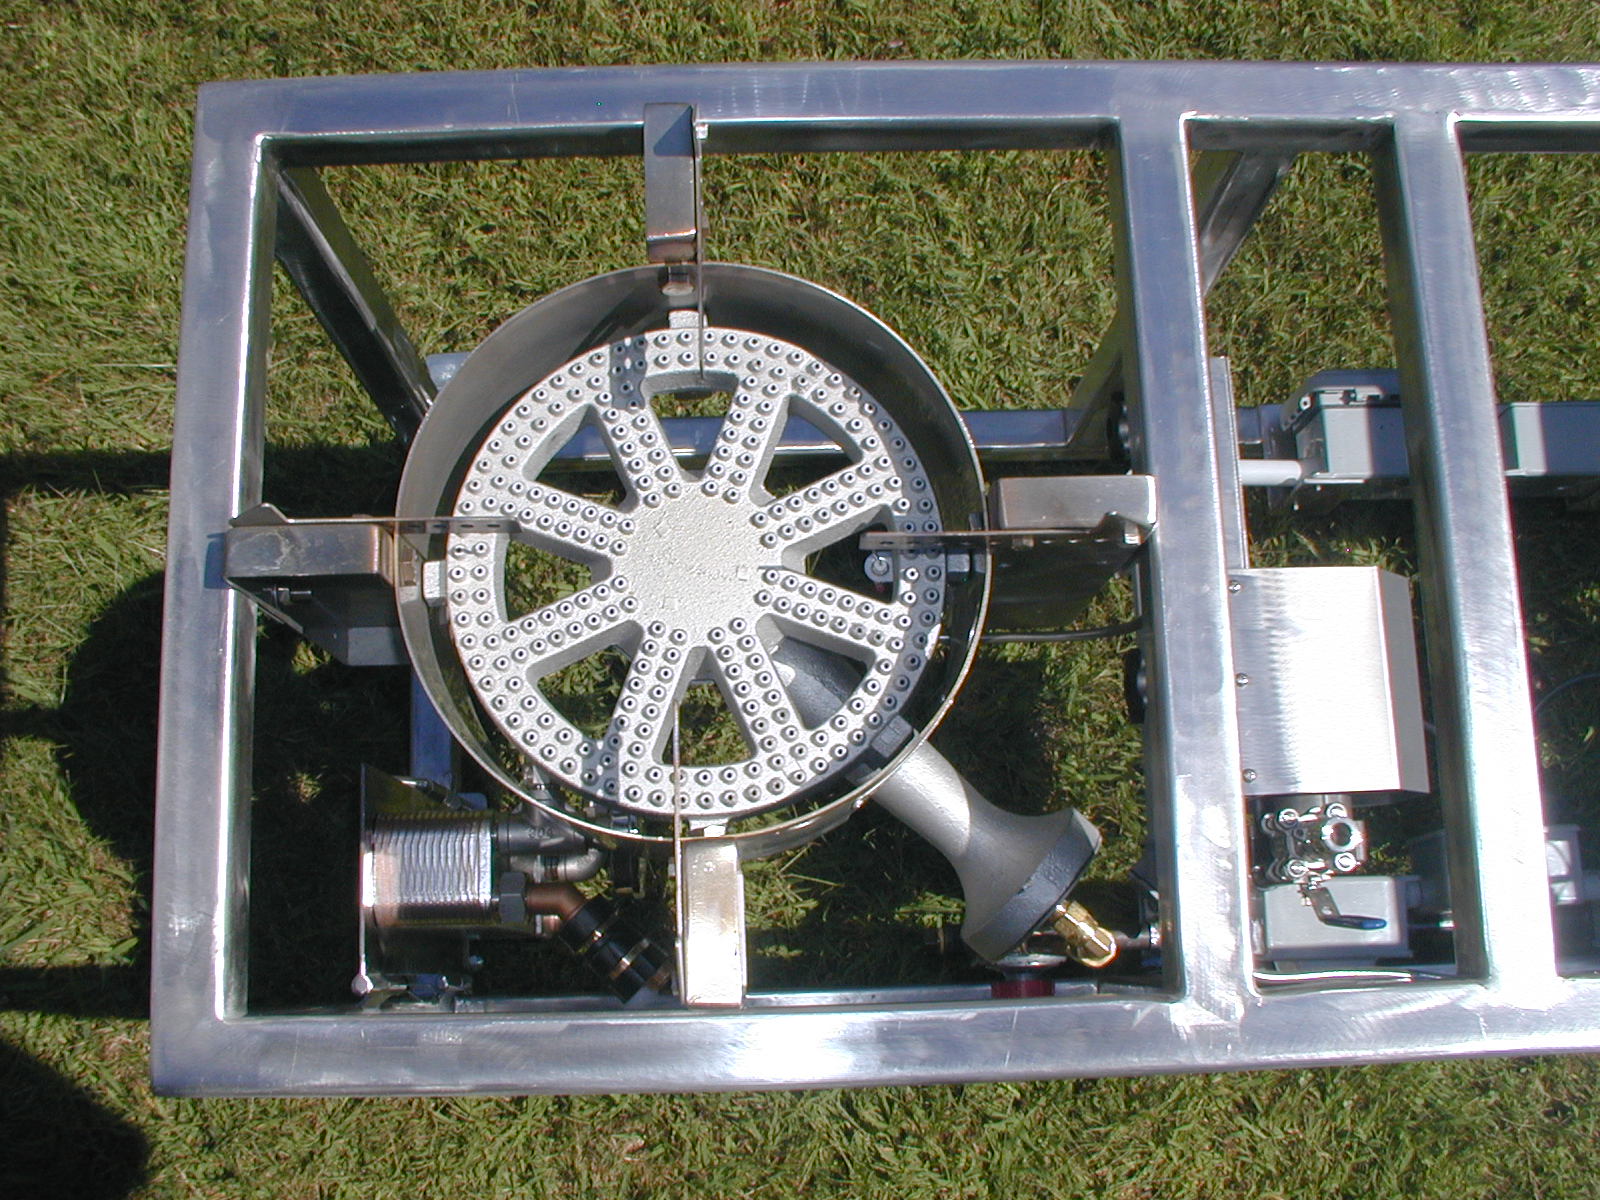
I designed my rig around the Blichmann Floor Burner chassis and with the frame openings sized for a near press-fit I just had to weld four mount points in each bay with their inside faces flush to the inside of the frame members. I installed a set in the middle bay as well to hold the platform for the MLT.

There are no holes anywhere in the tubing. I didn't want to go down that path, so everything mounted to the frame is via hard points.

I don't really have a single good picture so here are three. And, yes, the pumps slide out for use. Nothing protrudes outside the frame when it's packed up so it slides (on its side) into the Durango without snagging the carpeting (all up the frame is a few inches too tall to go in castors-down)...


P9030056.JPG


P9030047.JPG


P9030043.JPG


Cheers!
 
Thanks for the additional pictures, those were helpful. I'll be sure to post what mine looks like once its finished!

What made you decide to go with the single tier system? Still trying to decide whether I want a 2 tier or not. Originally wanted a 3 tier so I wouldn't need a pump, but I realized I didn't want to have to go up and down on a ladder either.

My thoughts were to have the MLT and HLT on the same level. So I would pump my sparge water to the MLT, gravity feed to the BK, and gravity feed to the fermenter. I know its probably personal preference, but see anything wrong with this setup, or any suggestions?
 
Love my two-tier :)

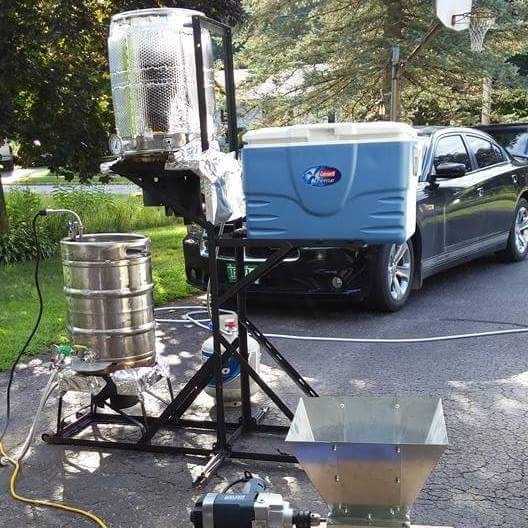
1.5" square tube .060" wall. .030 wire with argon/co2 shielding gas. $75 to powdercoat. Solid as a rock. My 3rd build. Dimensions plagiarized a little from the old Sabco systems.

Fully electric HERMS system but I put adjustable height burners on it thinking I could use them someday (speed things up, rotating batches, take it to a friends place without 220V power, whatever). Has about 30 batches on it and i've never even lit the burners to see if they work. Have no clue where my heat/flame shields went. Hmmm.

Side note on two-tier... There are still reasons you *might* need a 2nd pump. (1) whirlpooling. I just use a giant spoon, works fine. (2) chilling, if not using a immersion style. (3) your fermenter is too tall to drain into.

I have conicals on stands so draining into the fermenter is out of the question. I built a counterflow chiller with a pump on a separate little wheely cart. Solved (2) and (3) at the same time. I might incorporate the 2nd pump and chiller into frame on the next revision

rig.jpg
 
Last edited:
That's a nice looking build as well! So I don't whirlpool (currently) but I'll keep that in mind in case I decide to in the future. So I don't know much about pumps, so is it not possible to be able to use only 1 pump and be able to do everything? I've gathered it just has to be lower than what you are pumping from to get a prime.
 
In my case I favored a single-tier 3v2p rig but the over-riding factor was transportability in the back of my Durango with three 20 gallon kettles and there's no way anything other than a single tier would work back there.

I think SoCal-Doug's configuration makes the most sense for a two-tier single-pump system (sweet looking rig btw)...

Cheers!
 
Nice build! Congratulations when do you get to brew on it?

I’ll add a couple thoughts on 2 tier vs single. I’ve got HLT elevated above MLT and BK and still find I use 2 pumps. First reason I needed was for double batch brew day. The mash tun pump is busy recirculating second batch while I’m whirlpooling and chilling first batch. Second reason was I added rotometer to the mash tun to monitor recirc and lauter flow rate. It’s not rated for boiling wort and even if it was it is not able to handle any amount of circulating hop material....plugs instantly.

Just out of curiosity, what made you want to have the HLT elevated over the MLT vs what SoCal-Doug did with the HLT and MLT on the same tier?

I'm getting close on my design, I'll be posting it sometime soon for some input.
 
I wanted
Just out of curiosity, what made you want to have the HLT elevated over the MLT vs what SoCal-Doug did with the HLT and MLT on the same tier?

I'm getting close on my design, I'll be posting it sometime soon for some input.

I wanted MLT and boil kettle to be at waist height. This makes them easy to see into, easy to stir and permits gravity drain from kettle to fermentor. The HLT elevated allows me to gravity drain from HLT to MLT. When we designed this I was trying to get away with only one pump and that worked vs the single level system requiring 2 pumps. In the end I added a second pump anyway as described above. If I was doing a rebuild I'd probably just go with a single tier system about 18" off the ground with 3 pumps as the gravity feed on the sparge water slows down too much when the sparge is almost done but the kettle is just too far away from my pumps to bother trying to do anything about it.
 
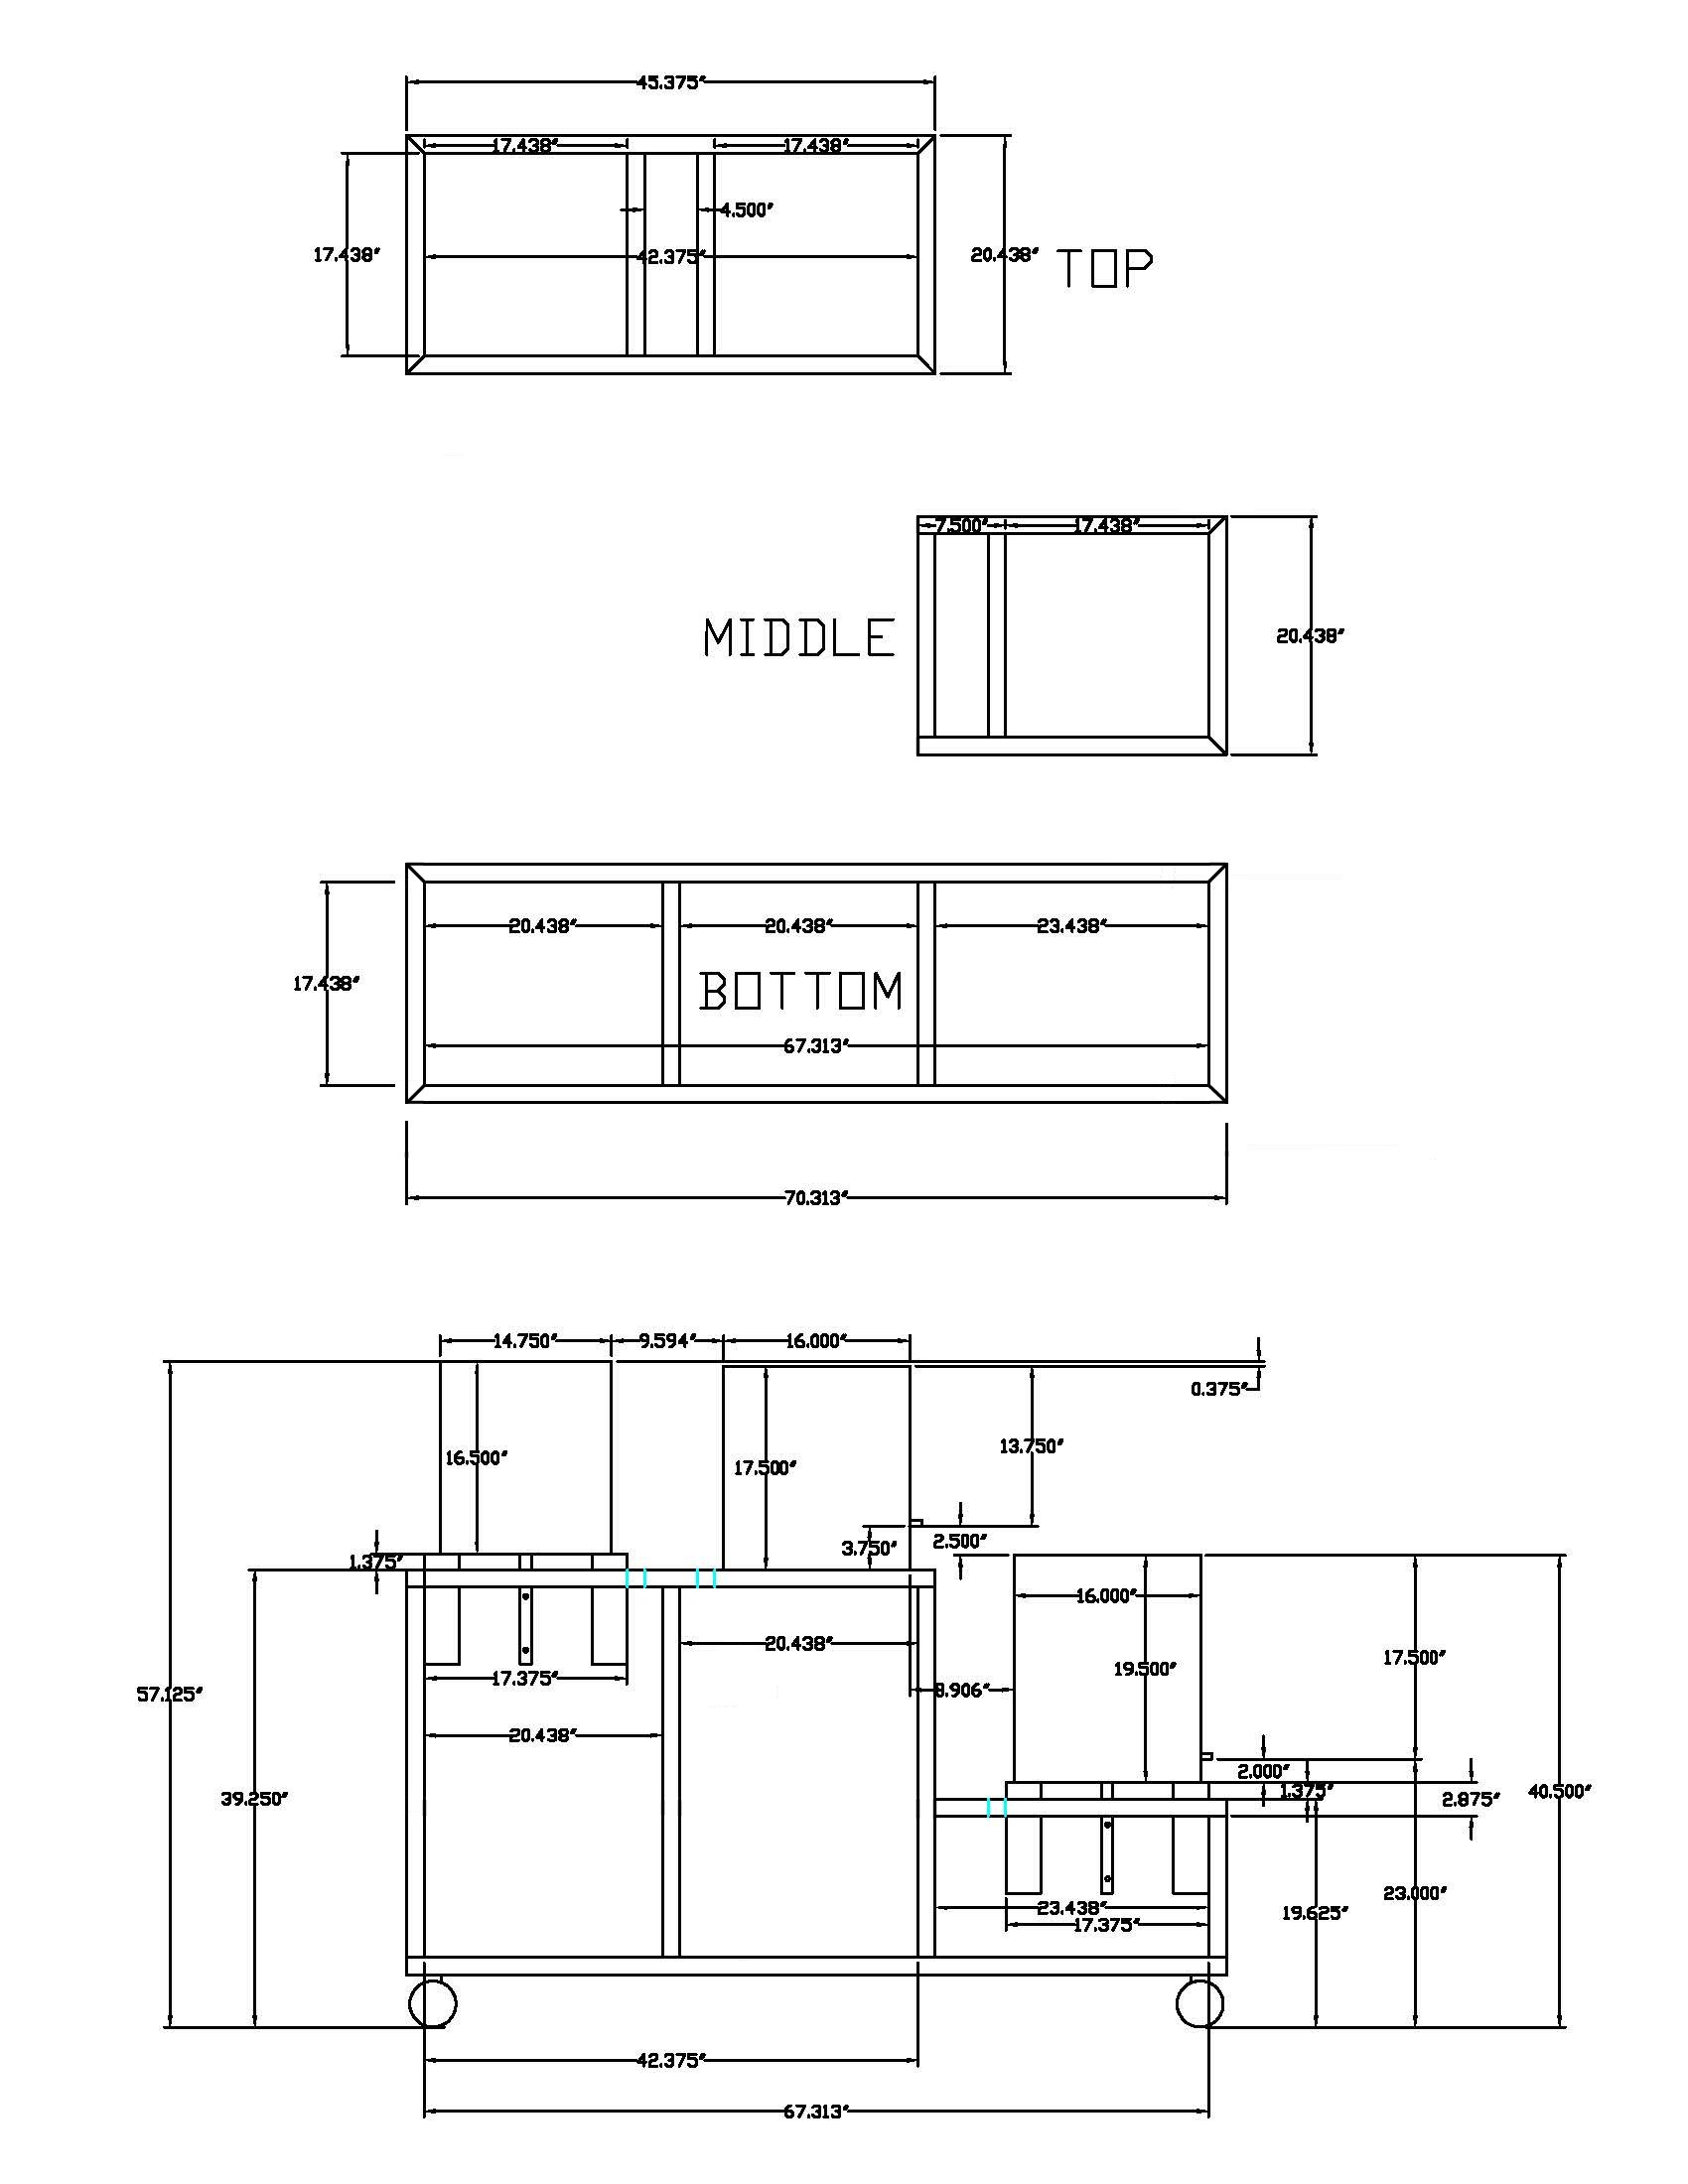
Attached is a drawing of my welded brewstand. Planning on making it out of 1.5 x 1.5 square tubing, 304 14 GA.

The pot on the left is my HLT. I will have a pump below that I will use to pump the strike water, and sparge water to my mash tun in the center.

Then gravity feed from the mash tun to boil kettle. The boil kettle will be high enough that I will be able to gravity feed to the fermenter.

Planning on welding triangle pieces in the inside corners on the bottom section that I can attach my casters to. The base of the stand is 29” deep for stability purposes. Was originally thinking 20-7/16” deep, but was concerned with stability. Does anyone know of a safe height to width ratio?

I will be designing some sort of a step that will fold down and be about 6 inches off the ground making it easy to stir and reach my HLT and Mash tun.

I was hoping to get some feedback on my design, any comments appreciated! I'm wondering if I will need to worry about making a heat shield between the HLT and the Mash tun or not. Also wondering if I will be okay gravity feeding between the mash tun and boil kettle or not with the 2-1/2” from the bottom of the valve and the top of the boil kettle.
 

Attachments

  • Brewingstand-R4-3.pdf
    16.4 KB · Views: 76
Why is the bottom so much wider than the other two levels? And is all that steel necessary on the middle level?
I think this could be greatly simplified. For example:

Brewingstand-R4-3.jpg

Cheers!
 
Why is the bottom so much wider than the other two levels? And is all that steel necessary on the middle level?
I think this could be greatly simplified. For example:

View attachment 616937
Cheers!

Thank for your input and especially the modified sketch. I like your idea, you're right I don't need those extra pieces on the middle section. My thought was to incorporate a shelf on the middle level but I wouldn't need those pieces to accomplish that.

I have the extra width on the bottom for stability, plus I'm adding the step to it.
 
fwiw, including the lift from the 4" castors my rig (shown earlier) is 20.25" deep and 30" tall, so your upper tier is only 9.25" taller, and a scoche deeper. My rig is super stable, I think it'd take two people on a mission to tip it over once the day's grain and brewing liquor has been loaded.

As for the step, with that space opened up you could easily fabricate a step that could fold up and in out of the way - use some of the steel removed from the middle tier :)

Cheers!
 
You've convinced me to reconsider the depth. I've kind of made a compromise between your idea and mine. On the bottom portion, I've modified it to about 25" wide by removing one of the extra 70.313" portions off the drawing I posted. Still have two long sections parallel, so the burners are offset. What is the overall length of your brewstand?
 
Love my two-tier :)

1.5" square tube .060" wall. .030 wire with argon/co2 shielding gas. $75 to powdercoat. Solid as a rock. My 3rd build. Dimensions plagiarized a little from the old Sabco systems.

Fully electric HERMS system but I put adjustable height burners on it thinking I could use them someday (speed things up, rotating batches, take it to a friends place without 220V power, whatever). Has about 30 batches on it and i've never even lit the burners to see if they work. Have no clue where my heat/flame shields went. Hmmm.

Side note on two-tier... There are still reasons you *might* need a 2nd pump. (1) whirlpooling. I just use a giant spoon, works fine. (2) chilling, if not using a immersion style. (3) your fermenter is too tall to drain into.

I have conicals on stands so draining into the fermenter is out of the question. I built a counterflow chiller with a pump on a separate little wheely cart. Solved (2) and (3) at the same time. I might incorporate the 2nd pump and chiller into frame on the next revision

View attachment 614859
Do you mind telling me the depth and height of your brew stand? You have a similar setup to mine so just curious. Thanks in advance!
 
You've convinced me to reconsider the depth. I've kind of made a compromise between your idea and mine. On the bottom portion, I've modified it to about 25" wide by removing one of the extra 70.313" portions off the drawing I posted. Still have two long sections parallel, so the burners are offset. What is the overall length of your brewstand?

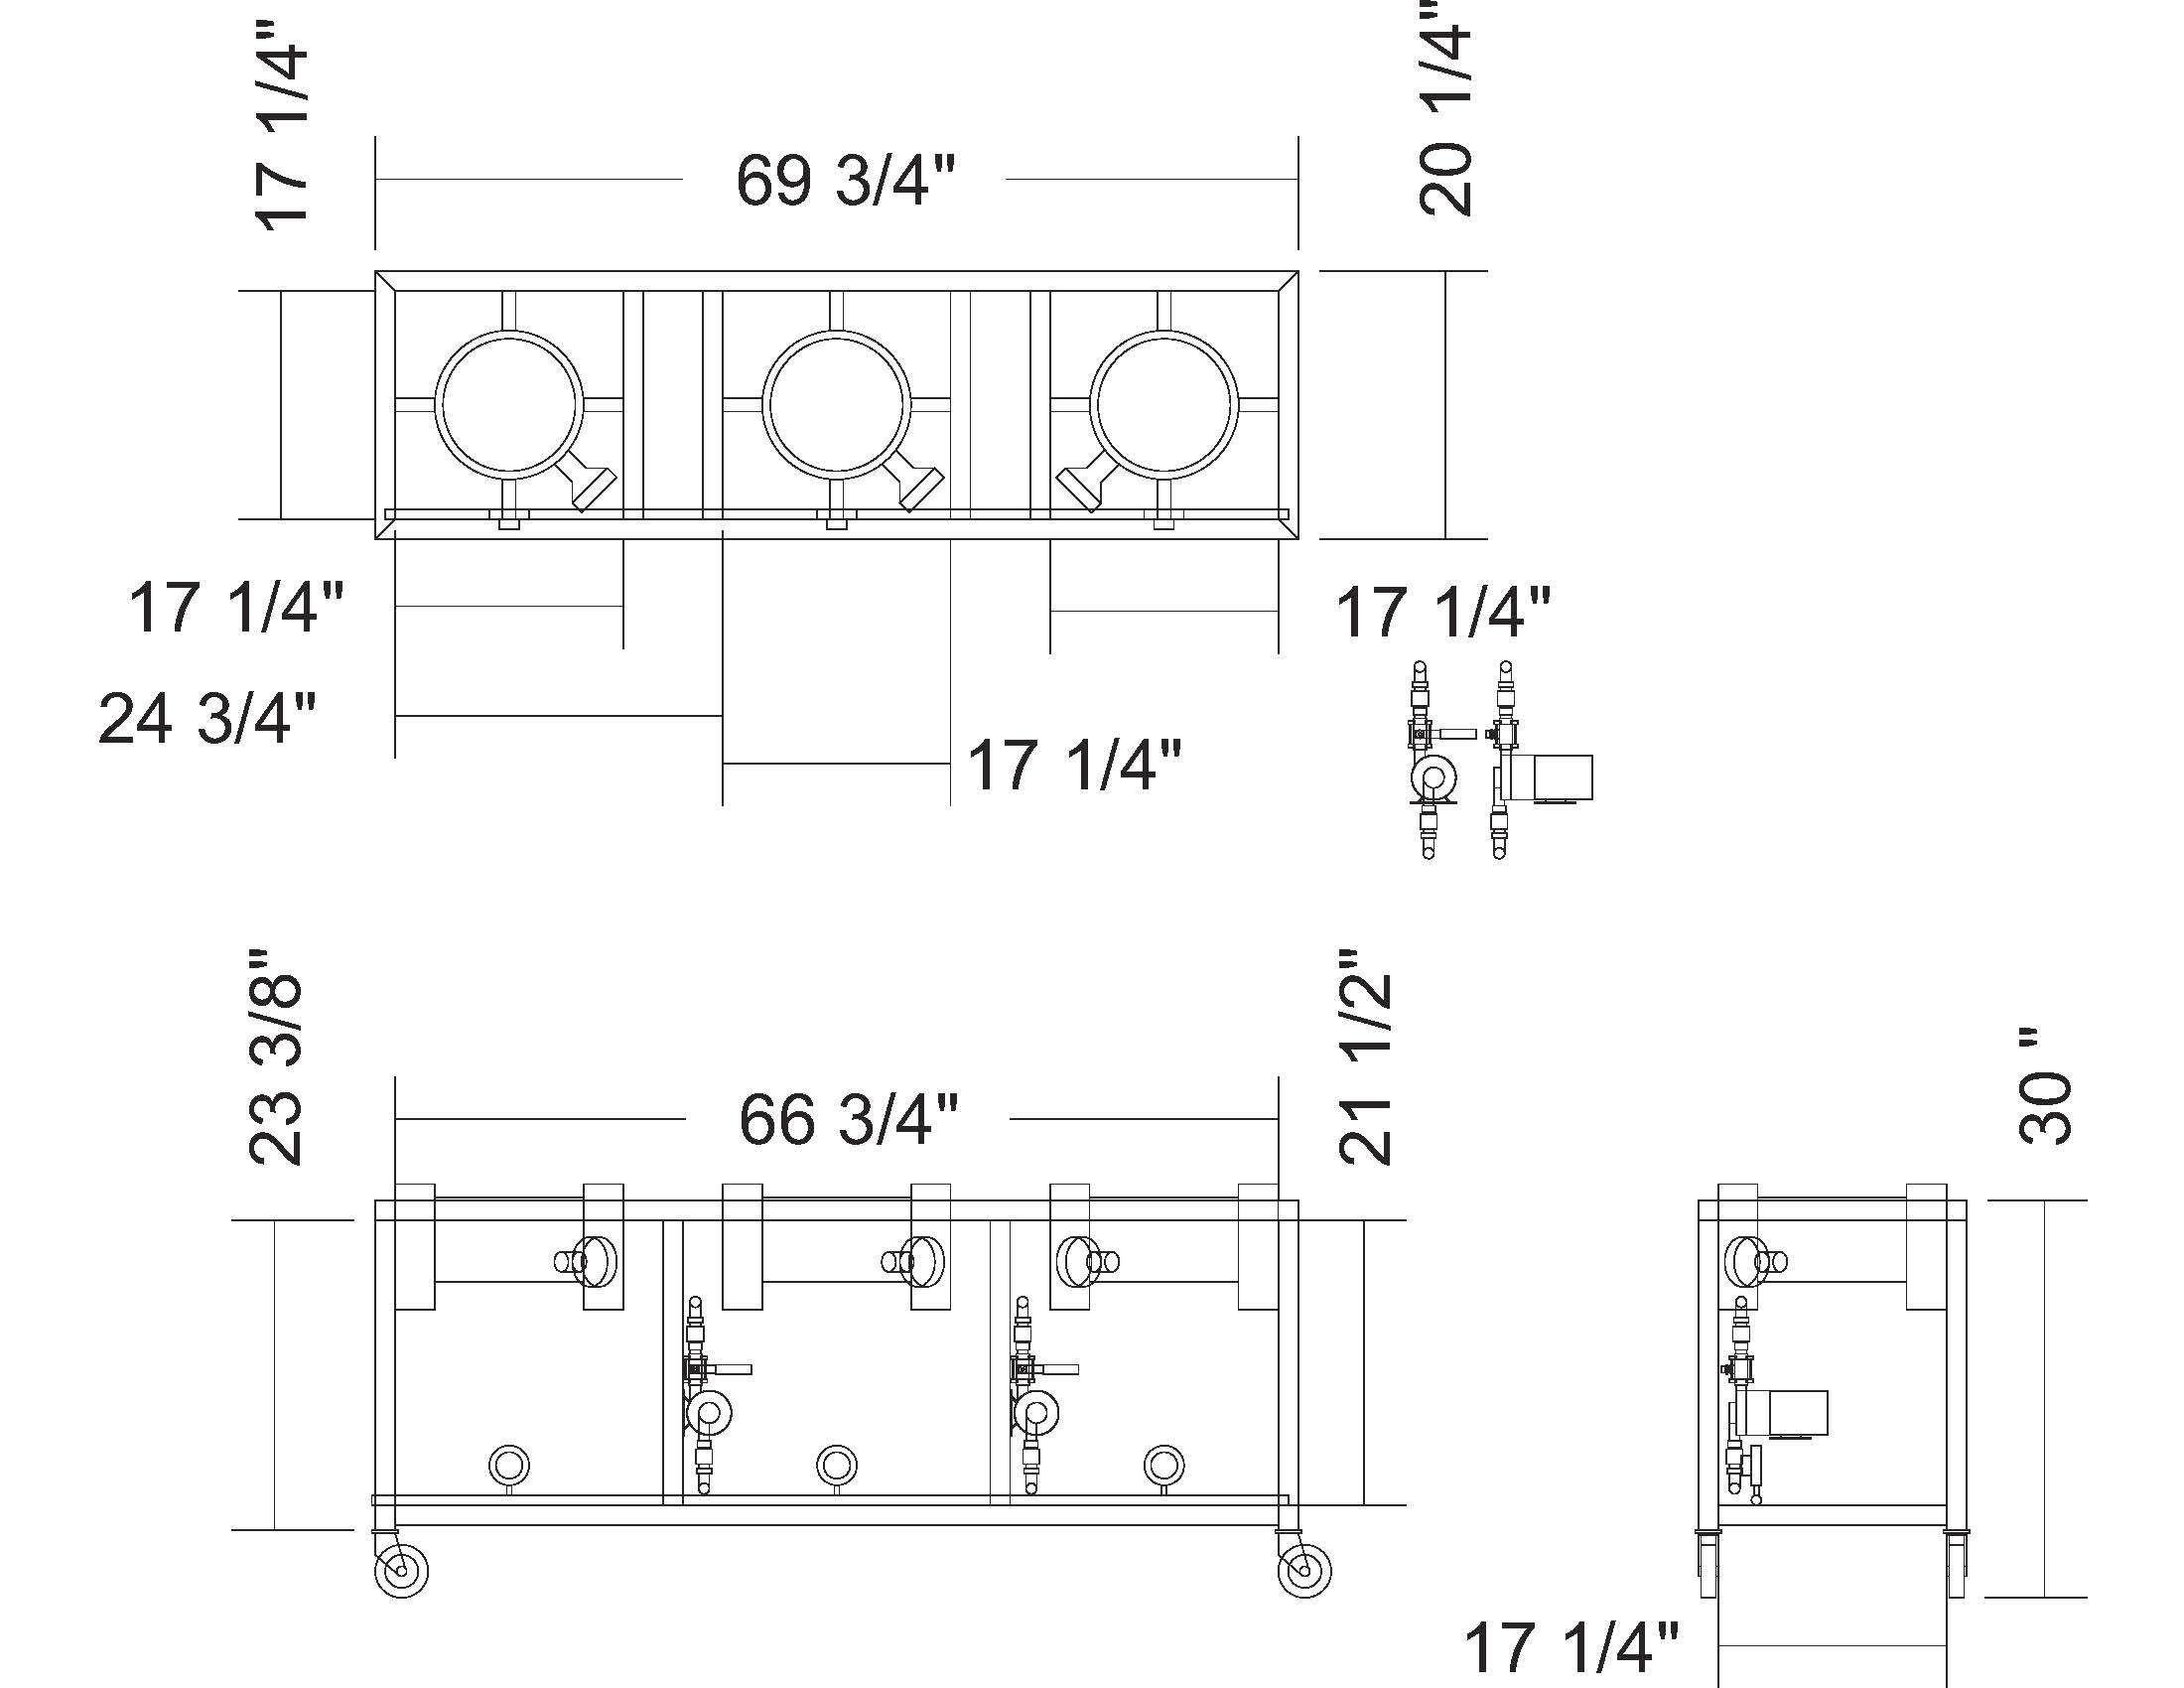
Just a scosche under 70 inches. Here's a 3-view of my rig. Note the middle burner was planned for but not implemented...


brew_stand_v2.jpg


Cheers!
 
Do you mind telling me the depth and height of your brew stand? You have a similar setup to mine so just curious. Thanks in advance!

Don't mind at all. Including the wheels, low tier height is 19", high tier height is 40". Overall width is 68" (frame. not including electrical box). Depth is 20". Very close to day tripper's but a higher tier for the MLT and HLT and slightly lower for the BK.

Width could be decreased if plumbing is not run between the MLT and HLT. Height can be less as long as a pump is available to run wort from the BK to the chiller/fermenter. I'm planning another build for a friend that will implement both of those. With a gravity feed from the MLT to the BK, its one of those things where you either bend over to see in your BK, or tippy toes to see into the MLT/HLT. I'm 6-2 so I opted for a few inches higher. My buddy is altitude challenged so i'll go low for his rig.
 
Last edited:
Thanks Day tripper for posting your drawing and thanks to Socal for sharing your dimensions. Fusa your brewstand is coming along great, thanks for posting the pic.

I have my tubing ordered so I'm hopping to start building it in the next couple weekends.

Where did you guys get your casters from? That is one thing I still have yet to figure out.

Also, does anyone have any tips on pump placement?
 
"Casters R Us" :D

No, actually I got mine from Caster City.
I went with 4" total-locking casters with expansion stems to fit my 1-1/2" tubing.

As for pumps, just make sure the heads are oriented optimally (output at 12 o'clock) and the pumps are located somewhere below your lowest kettle valves...

Cheers!
 
Mcmaster Carr, but harbor freight has a few that might work also. I needed a shaft mounting style rather than a plate. Hard to explain in words, but I took a 1.5" square plate and drilled a hole in it. Then welded a nut over the hole. Then welded the hole plate onto the bottom of each leg with the nut upward. This way the caster bolt screwed right into the bottom of the leg.
 
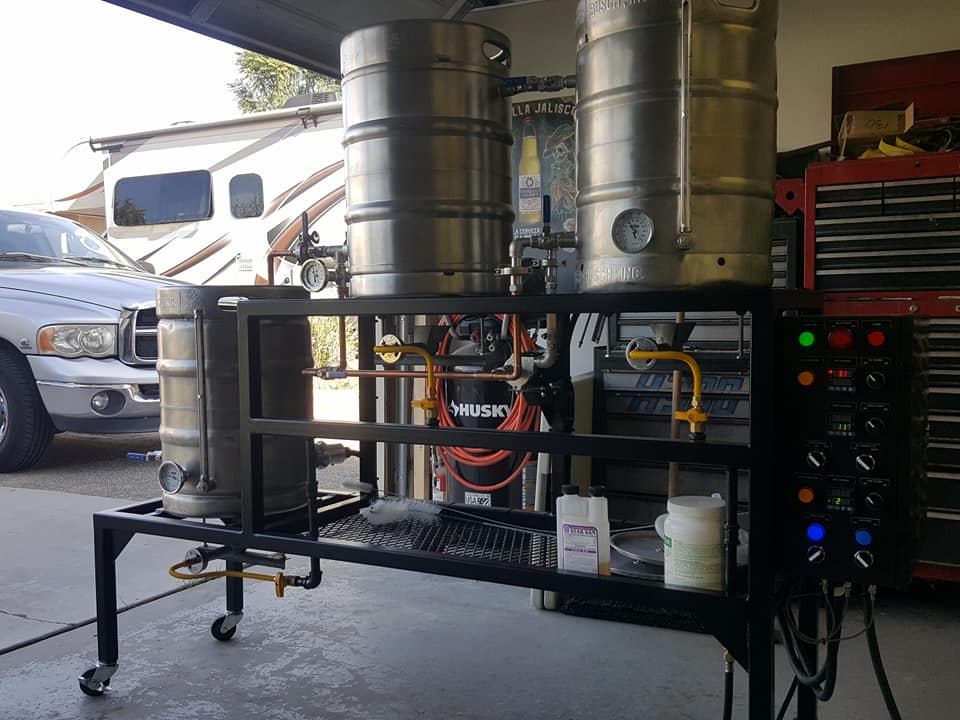
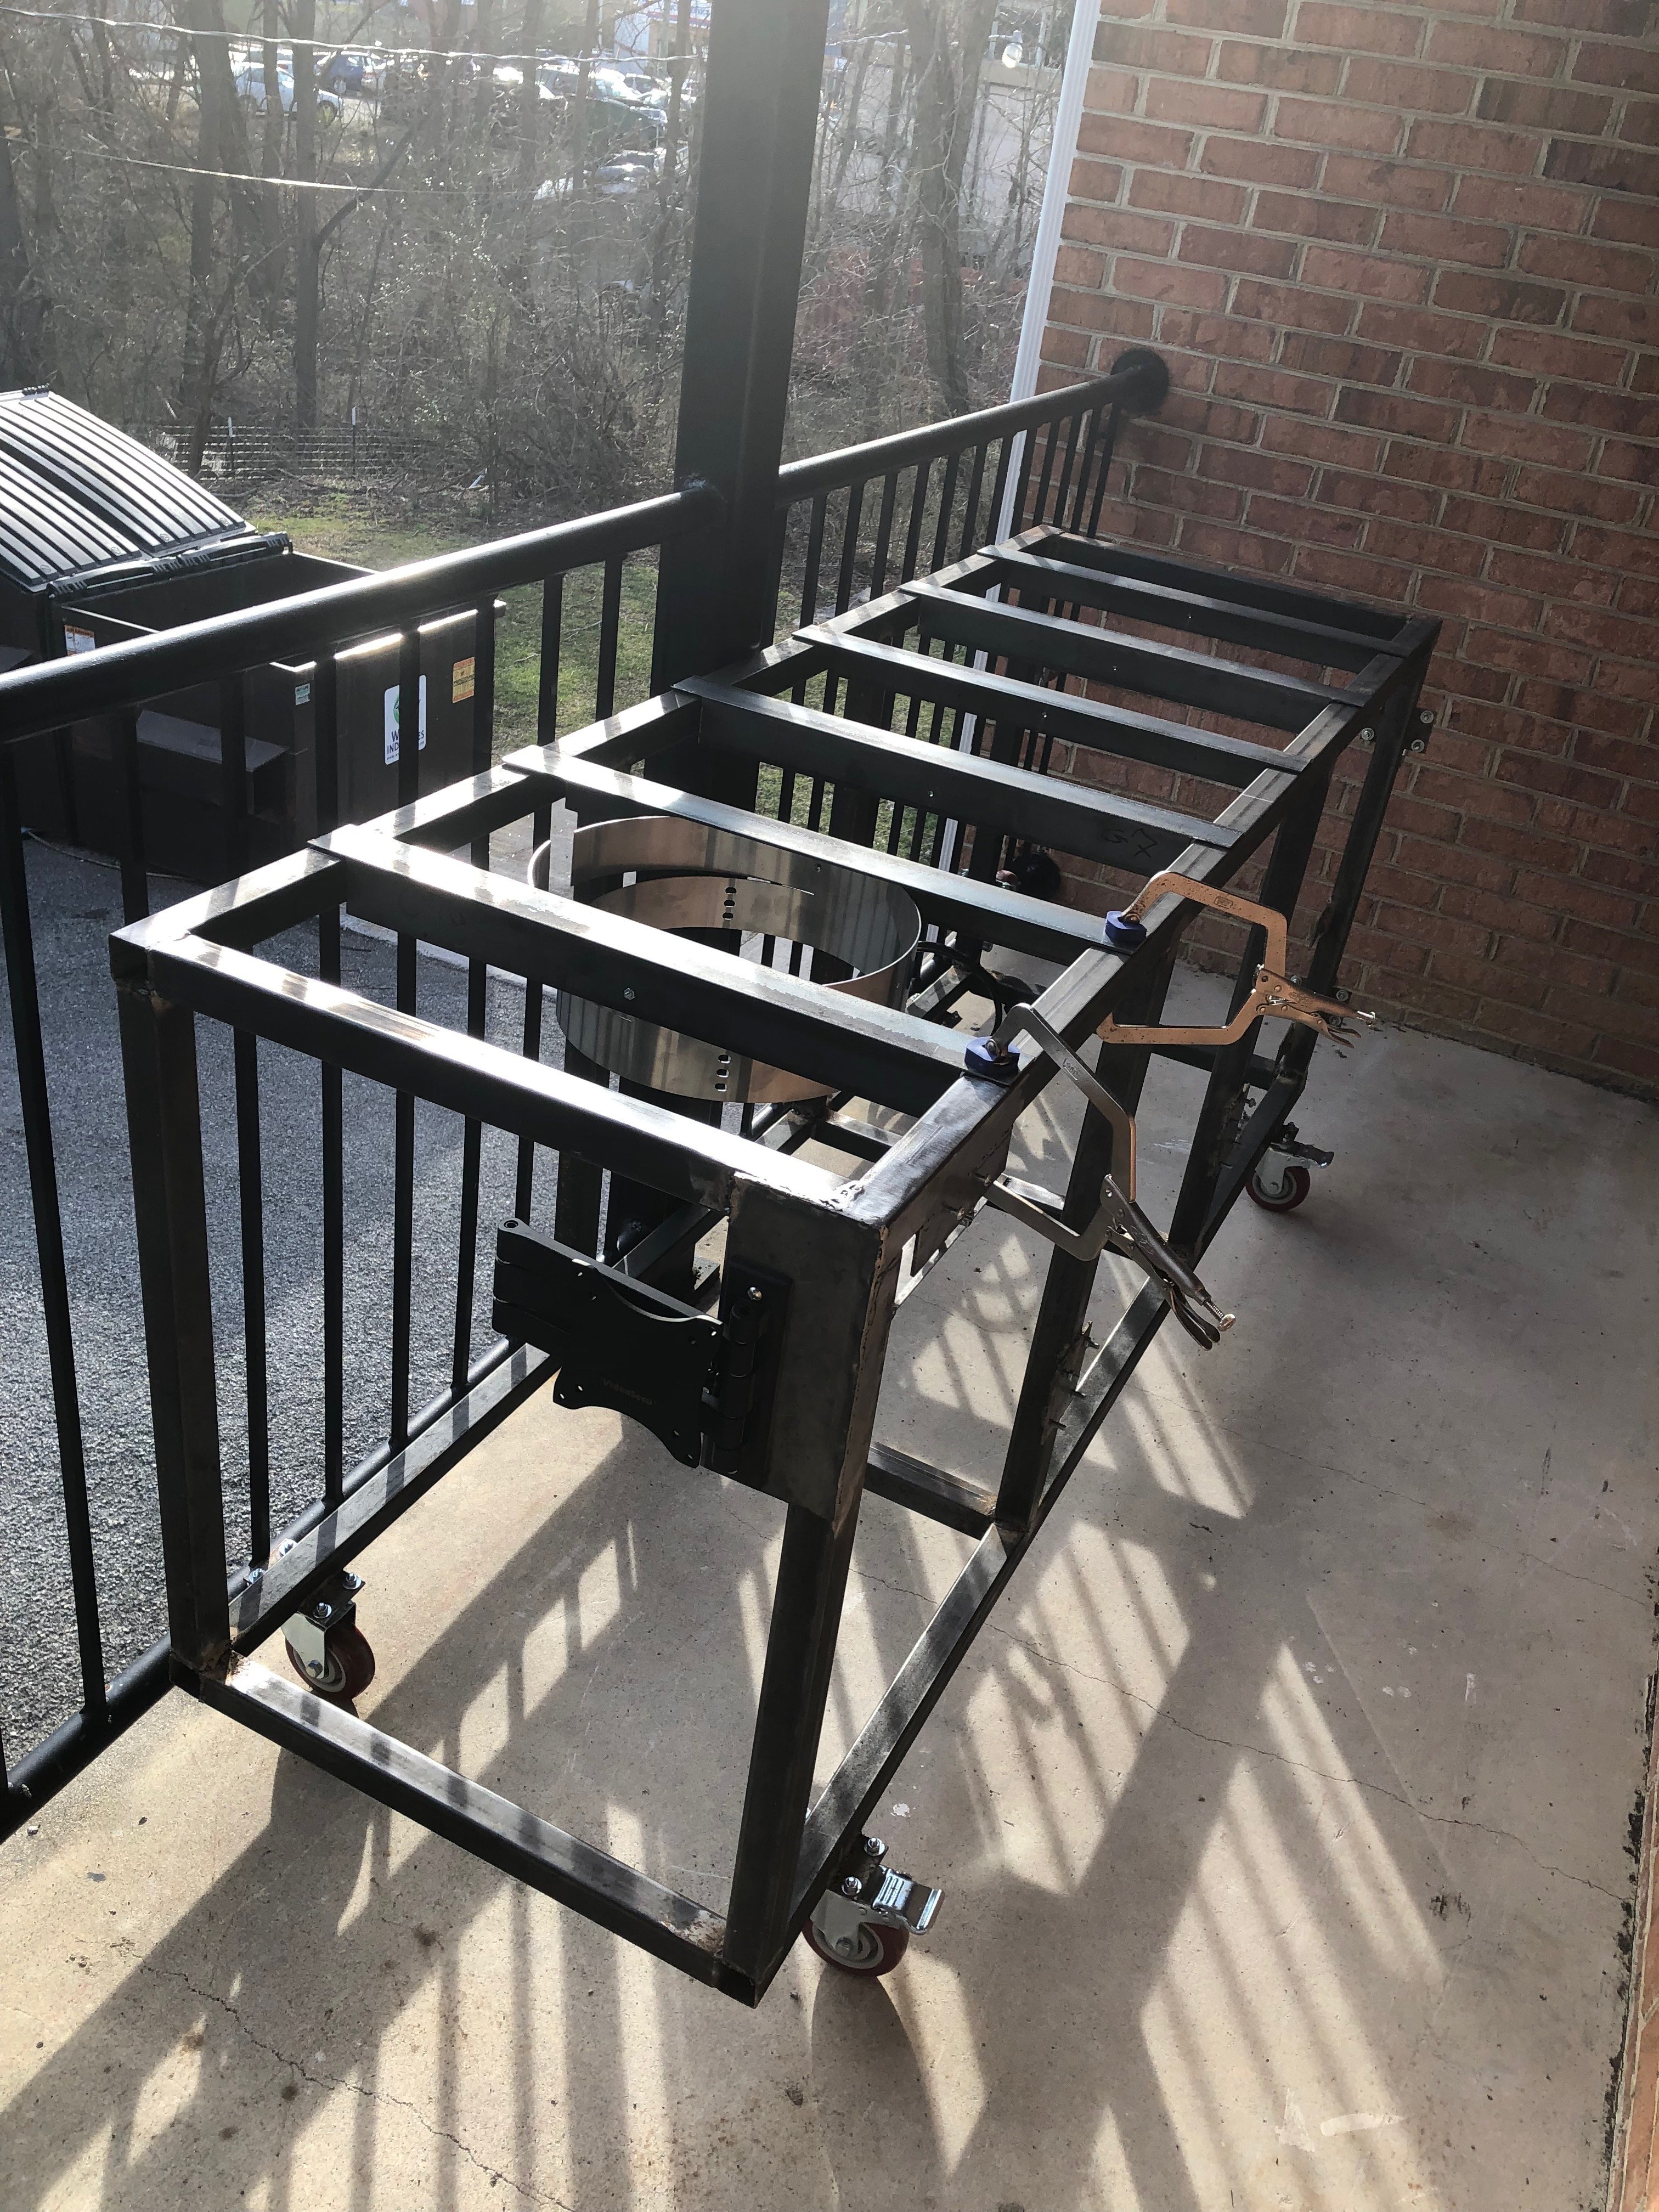
Thanks for all your help! I ended up buying some expanding casters from castercity. I talked to the owner on the phone, he was very helpful. Its coming along. We had some warping going on because of the stainless pulling from the heat but I think it will be fine. Unfortunately had to make a design change halfway through, but it worked out fine. Here is a picture of the progress we made yesterday:
upload_2019-4-1_10-49-20.jpeg
 
How much of a gap will there be between your kettle bottoms and the top edge of those wind screens?
And will both wind screens be full height for their entire circumference? (it looks like the far end one has a gap that was filled on the near one).

Point being, burners need some breathing space (see Charles's Law) and from the view provided it looks like the gap from the screens to kettle bottoms is quite tight and with no other space for heat/exhaust to escape.

And what's going on the VESA mount? :)

Cheers!
 
The top part of the wind screens move back (did that right after I took the picture). The VESA mount holds my control panel. There's a few minor adjustments like tightening the VESA mounts etc but that will be done this weekend hopefully.

IMG_0677.JPG
 
Back
Top