RecruitNBrew
Well-Known Member
JCarson,
Your design is great! This will be perfect for keeping my brew cool during the 90+ summer days in Southern California.
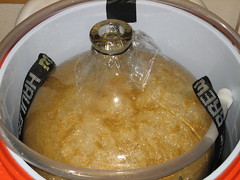
I built my system much like yours and I've noticed a couple issues during the trial run. First of all, the pump is putting new cold water in the water cooler faster than the old stuff can run out the drain tube. If I left it running for a long time (4-5 hours) while I was trying to really drop the temperature, it would definitely overflow.
My pump is rated at 400gph, what kind are you using? (maybe I need to downsize?)
Also, I turned the spigot to the inside of the water cooler like you mentioned and pushed the button in hard until it stayed stuck in the open flow position. I'm afraid that there is a chance that it might pop out and stop the flow of water (causing a flood). How do you ensure that yours stays open?
I was thinking of upgrading this piece to a metal pass through shank used for draft cooler boxes, but I don't want to spend the cash if I don't have to.
Your thoughts (and other peoples' thoughts) would be appreciated!
Your design is great! This will be perfect for keeping my brew cool during the 90+ summer days in Southern California.
I built my system much like yours and I've noticed a couple issues during the trial run. First of all, the pump is putting new cold water in the water cooler faster than the old stuff can run out the drain tube. If I left it running for a long time (4-5 hours) while I was trying to really drop the temperature, it would definitely overflow.
My pump is rated at 400gph, what kind are you using? (maybe I need to downsize?)
Also, I turned the spigot to the inside of the water cooler like you mentioned and pushed the button in hard until it stayed stuck in the open flow position. I'm afraid that there is a chance that it might pop out and stop the flow of water (causing a flood). How do you ensure that yours stays open?
I was thinking of upgrading this piece to a metal pass through shank used for draft cooler boxes, but I don't want to spend the cash if I don't have to.
Your thoughts (and other peoples' thoughts) would be appreciated!


![Craft A Brew - Safale BE-256 Yeast - Fermentis - Belgian Ale Dry Yeast - For Belgian & Strong Ales - Ingredients for Home Brewing - Beer Making Supplies - [3 Pack]](https://m.media-amazon.com/images/I/51bcKEwQmWL._SL500_.jpg)


")