• Please visit and share your knowledge at our sister communities:
  • If you have not, please join our official Homebrewing Facebook Group!

    Homebrewing Facebook Group

Vissani Fermentation Chamber

Homebrew Talk

Help Support Homebrew Talk:

This site may earn a commission from merchant affiliate links, including eBay, Amazon, and others.

ingchr1

Well-Known Member
Joined
Aug 23, 2009
Messages
555
Reaction score
110
Location
Orange County NY
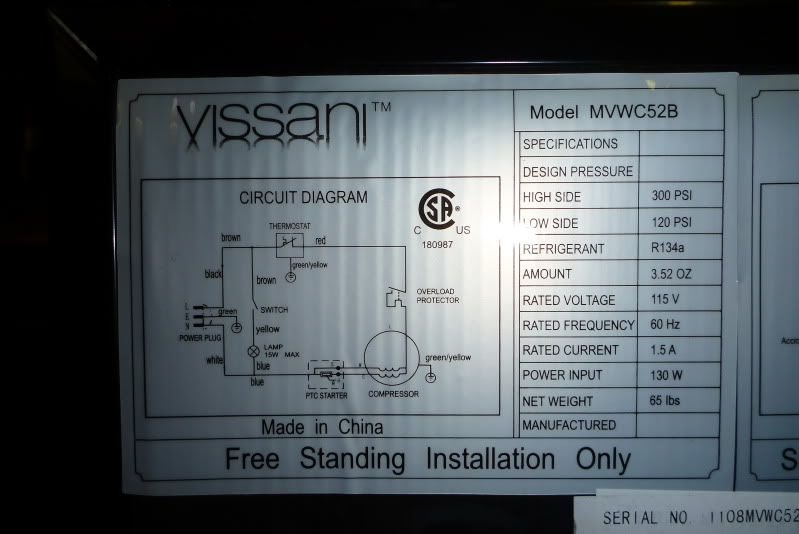
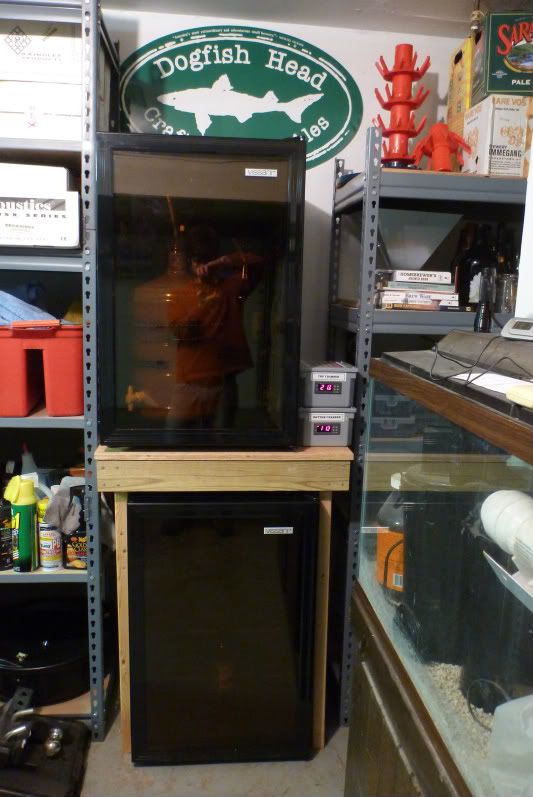
Just wanted to share my Vissani fermentation chamber build with the forum. It’s the 52 bottle model MVW52B. The nice thing about this wine fridge is that you don’t have to modify the interior to fit a bucket or carboy. And at times HD has these on sale for around $150.

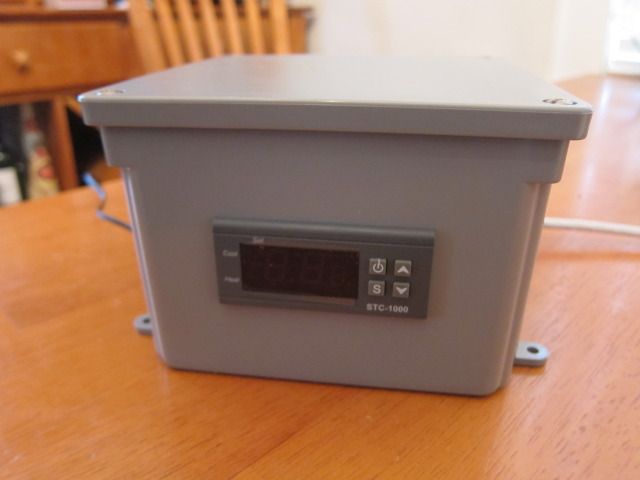
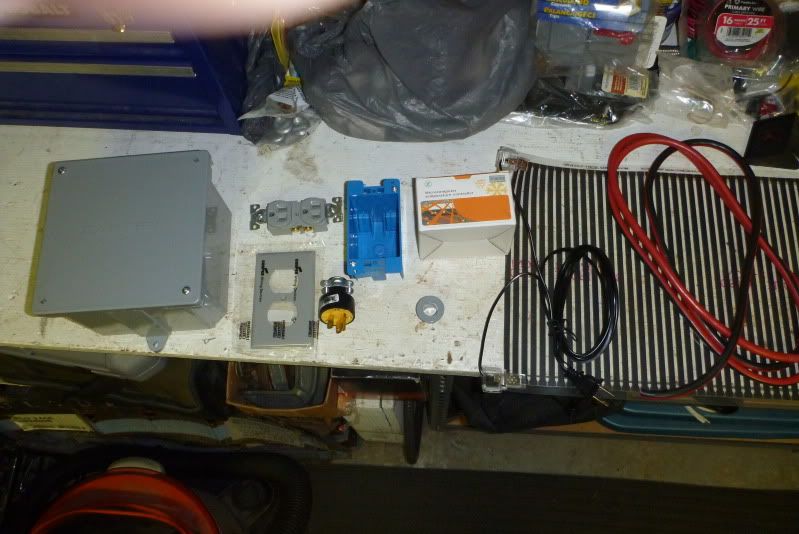
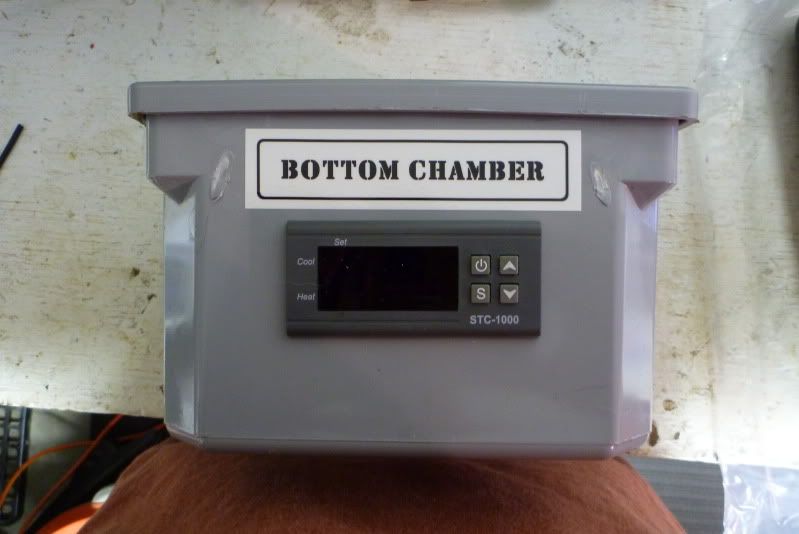
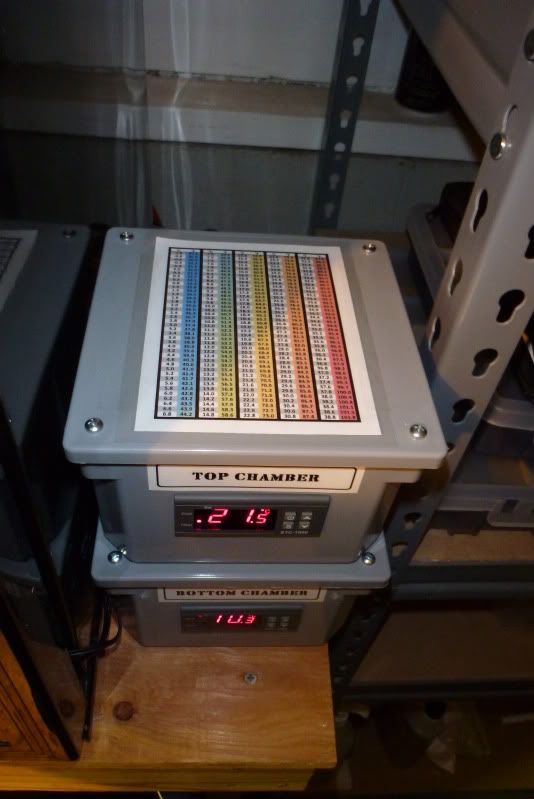
Here are the parts I used to make an EBay aquarium controller. The electrical parts cost $20, the controller was $23 shipped and the flex-watt heat tape was $16 shipped (Flexwatt Heat Tape). The extension cord was extra I had from my keezer build, so I just needed to put a plug on the end.

P1000283.jpg


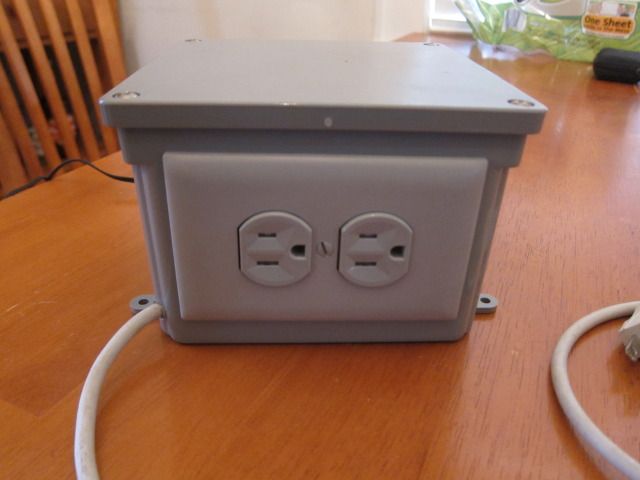
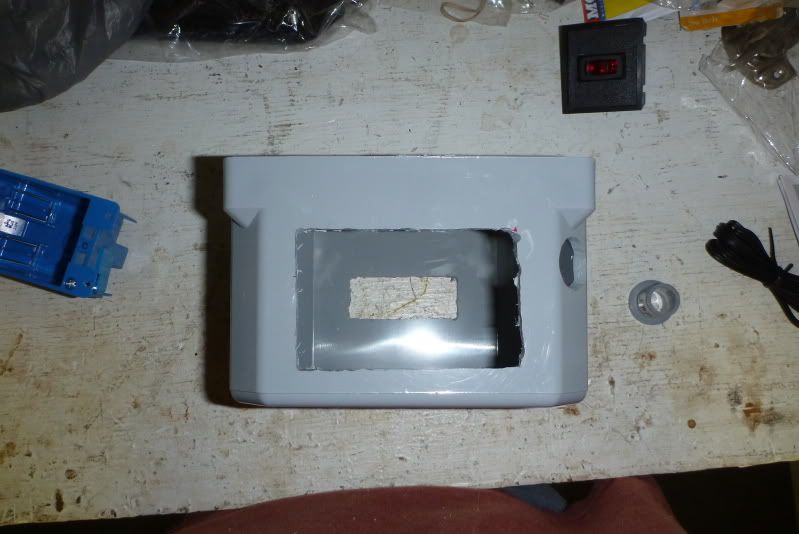
Using a Dremel I cut out the plastic:
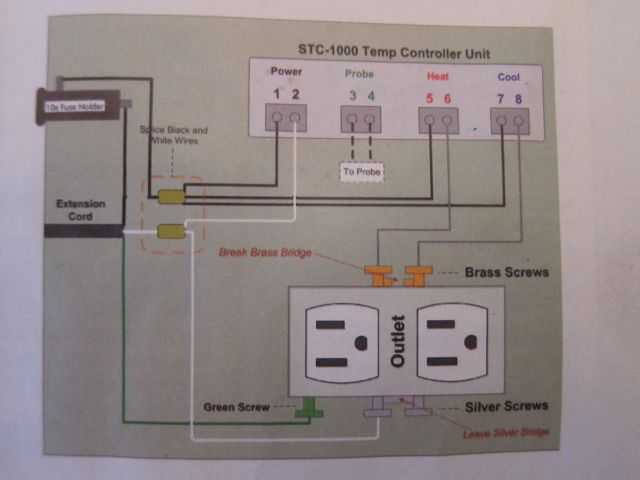
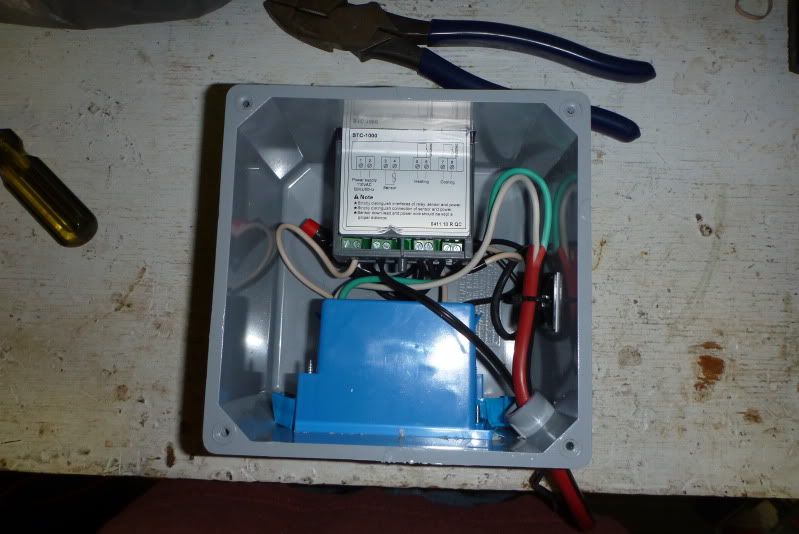
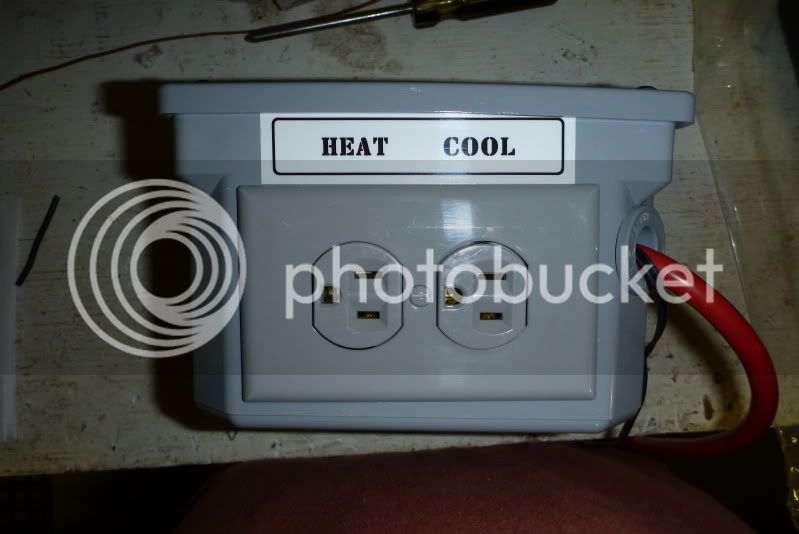
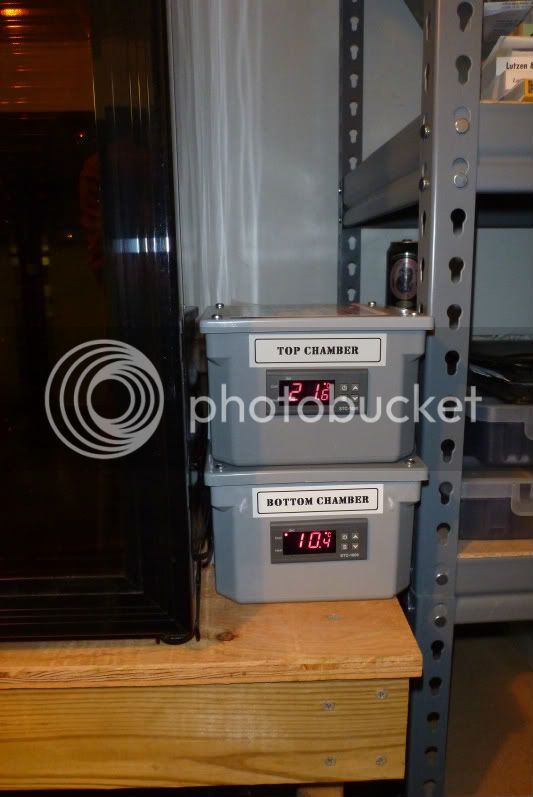
P1000285.jpg


Wired it up:

P1000287.jpg

P1000296.jpg

P1000294.jpg


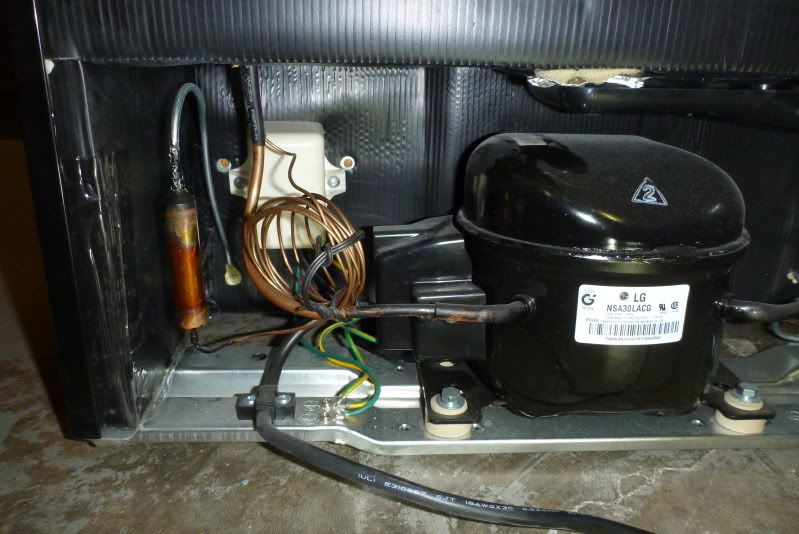
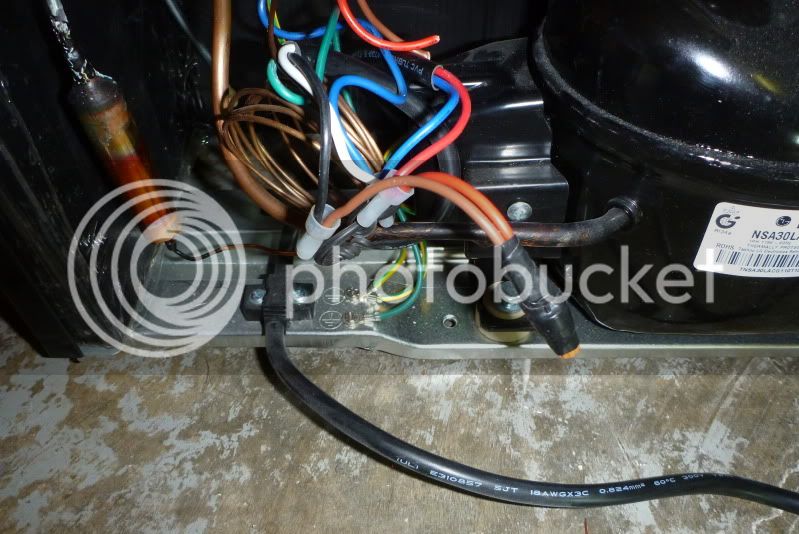
For the fridge I bypassed the thermostat by splicing the brown and red wires together. The wiring is behind the white plastic cover:
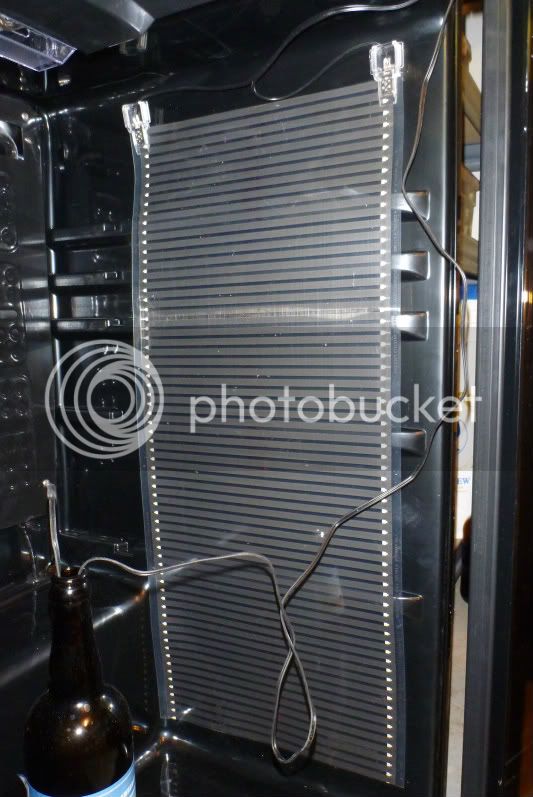
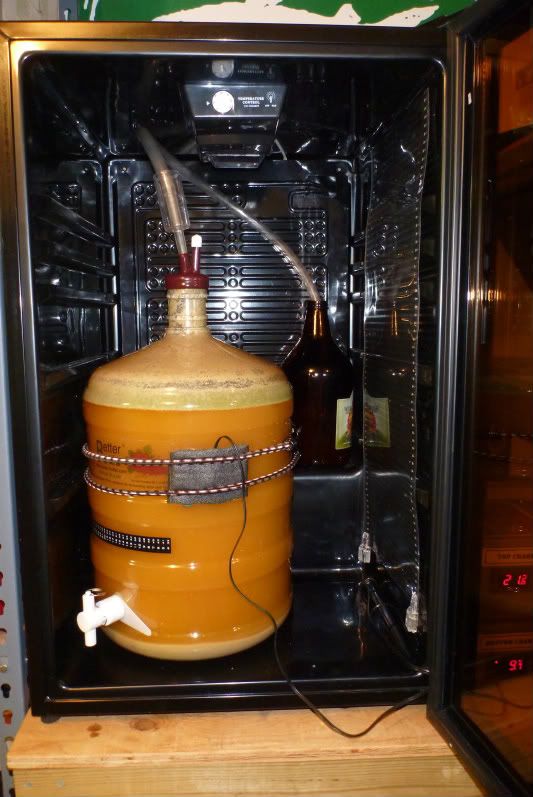
P1000290.jpg

P1000288.jpg

P1000289.jpg


I attached the 11” wide 2’ long heat tape to the wall using industrial strength Velcro:

P1000303-1-1.jpg
 
These fridges seam to work fine for a fermentation chamber. Right now I have Belgium Golden Ale going where over a week I have ramped up the temperature from 68 to 72F. I also tested the cooling by running it down to 35F, with the chamber empty. With out the temperature controller the fridge only went down to between 45 and 50F with it set on the coldest setting. These are in my garage where the temperature is currently between 45 and 50F.
 
Chris,

Your build has motivated me! :mug: I had already bought the same controller and heat tape and have been trying to find a used cooler on craigslist. HD has these at $148 right now, so I went over and bought one. I'll need it for summer ale brewing.

Can you tell me where you got the project box?

Can you share an idiots guide to wiring the power in there?

What are you using up against the sensor?

John
John,

I got the project box from Lowes, they are over in electrical PVC conduit fittings section. Junction Box

For the sensor I'm just using a piece of foam pipe insulation. Pipe Insulation

For the wiring there is a lot of good information over in this thread:Ebay Aquarium Controller Thread
 
Do you really need to modify the controller to use this for ales?

I don't know. I guess it would all depend upon the room temperature where the fridge is at and what the highest temperature it can maintain. For example the highest it can maintain may only be in the 50's possibly low 60's, I didn't really check that out before modifying it. I have these in my garage where temperature is anywhere from 40F to 80F, so I have to have both heating and cooling with a controller.
 
Great build! Have you tried any lagers with his set up? I see you ran the temp down to the 40's. Just wondering how well it held over a few weeks and if these wine coolers have the cooling capacity and insulation to hold cold temps in the 40's. It seems like it should work after bypassing the thermostat.
 
I currently have a lager going right now. I fermented at 54F but since my garage is colder than that (around 50F); the chamber really only heated. I also brought it up to 66F for a d-rest. I'm currenty bringing it down to a lager temp of 36F. I'll post up how it goes, but no issues so far.
 
Hey Chris,

Just got my controller built this weekend and wanted to ask:

1. Once you bypass the t-stat, if you were to plug it into the wall without the controller, would it just run all the time and never stop? I'm planning on just using it for fermenting ales, so if I just crank the built-in temp control dial all the way up, I should be OK, right?

2. Did you do anything special to pass the heater power cable and temp sensor into the fridge, or did you just let the seal close on top of them?

Thanks,
John
 
dyneq said:
Hey Chris,

Just got my controller built this weekend and wanted to ask:

1. Once you bypass the t-stat, if you were to plug it into the wall without the controller, would it just run all the time and never stop? I'm planning on just using it for fermenting ales, so if I just crank the built-in temp control dial all the way up, I should be OK, right?

2. Did you do anything special to pass the heater power cable and temp sensor into the fridge, or did you just let the seal close on top of them?

Thanks,
John

1. Yes, once bypassed the fridge would run all the time if plugged straight into the wall.

2. I didn't do anything special for the heat or sensor wires.
 
ingchr1 said:
I currently have a lager going right now. I fermented at 54F but since my garage is colder than that (around 50F); the chamber really only heated. I also brought it up to 66F for a d-rest. I'm currenty bringing it down to a lager temp of 36F. I'll post up how it goes, but no issues so far.

As an update the fridge maintained just fine at lager temp. Enjoying one of those lagers right now.
 
Awesome build! Any idea if you can fit a 6.5 gallon glass carboy in there? If so I might pick a couple of these up.
 
jborgy said:
Awesome build! Any idea if you can fit a 6.5 gallon glass carboy in there? If so I might pick a couple of these up.

I would think so, I know a 6 gallon one fits with three piece airlock.
 
It's funny this thread came back to life today because I'm doing my first fermentation with it (brewed on Sunday) even though I've had it for a while. I'm using the ebay aquarium controller and it's been working great.

Until now, I was using it to chill my finished brews. I had it on the max setting (7 I think) and set the controller. When I had it on 7 and it was operating more than it is now, it would occasionally make a loud thwack sound. Anyone else heard this fridge do that?
 
That is awesome!
I ordered my controller. I have this same exact fridge, and I'm going to copy this to the T.

Care to post a diagram of the wiring or would I be able to figure this out?
 
You should be able to figure it out, but if not there are plenty of threads on how to wire the Ebay controller.
 
Thanks for the idea. I pretty much copied it and since I have a Vissani cooler just like that I will proceed with bypassing the thermostat on that thing and use the controller.

IMG_3580.jpg


My wiring Not the neatest but it's good.
IMG_3581.jpg


Front
IMG_3585.jpg


Back
IMG_3583.jpg


This is the diagram I used (from Brew Magazine)
IMG_3586.jpg
 
Guys who have built these... It looks like the controller completely moderates power to the fridge--so either the fridge is energized and the compressor is running, or the fridge is totally powerless, with no light or temp display active. Correct?

Thanks to everyone for the great pics and details. This is exactly the kind of thing I need to better enable my 5 gal bucket habit.

That is correct
 
Would it be possible to use a Ranco Two Stage Controller to achieve the same results. I don't really trust myself electrically but like the idea of the wine fridge.

Also, where can I learn more about bypassing the thermostat?

What do I need to do to splice the wires and reconnect them?
 
dunrooz said:
What do I need to do to splice the wires and reconnect them?

Cut the two wires, strip them, splice them together using a wire nut and cover in electrical tape as shown in the photo. Nothing needs to be done with the other end of the wires that go into the fridge to the thermostat. I would just cover the ends of those with electrical tape.
 
I also recently completed an ebay temp controller, but also made a thermowell out of a corny dip tube. Cut the tube in half, crimped one end with a hammer and used a vise to crimp tight, followed by rolling the steel over three times with pliers. This seals the dip tube up without the need for glue or soldering. I don't think I would have done the thermowell with glue/solder.

Now with the ebay temp controller and thermowell, reading from the center of the carboy has provided much better temp control than my Johnson A419 with the probe stuck to the side of the carboy. I think it is also better because in my chambers, the fan blows air that seems to trick the surface temp controller even with a medium covering the actual probe.
 

Latest posts

Back
Top