Thanks to everyone who has posted on this Forum. I got a lot of help and insights that were helpful to build my Keezer.
I decided to get a new Freezer as I wanted to make sure I could maximise the life of the build. I found a new Frigidaire upright Freezer/Fridge on Craig's list for $600. The benefits were: (1) I could set the unit to Fridge and set the temp to 45 degrees, avoiding the need for a temperature controller. I have been monitoring the temp with a separate digital unit and it seem accurate. (2) It has its own recirculation so I did not need to install a fan. (3) The internal lighting system is not bypassed. (4) I have enough room for 11 kegs if I decide to put the Co2 on the outside or about 9 kegs if I keep internally and keep the footprint minimal vs a chest freezer.
I removed all the glass shelves and the bottom door shelves.
I bought a Heavy duty office utility cart from Amazon. With the wheels on, that was the perfect size to fit kegs on the bottom and top. I used a rubber self sticking mat to protect the plastic floor of the fridge.
I used an Eva Dry dehumidifier. Not sure that I would need it, but...
For the time being, I am keeping the co2 inside the fridge as I have the room right now and I can avoid further drilling.
I ordered all the parts from Keg Connection. They were extremely helpful in putting together all the parts I would need and the price is good. Certainly much easier than trying to put everything together myself.
I attached the manifold using liquid nails and one of the existing screws holding the rear vent flat to hold it in place while the glue cures.
The regulator attached to the co2 tank is a little side heavy, so I am going to mount the regulator the fridge wall and use a high pressure hose from the tank to the regulator. That will make the regulator more secure and keep it at a height that I can easily see it above the kegs.
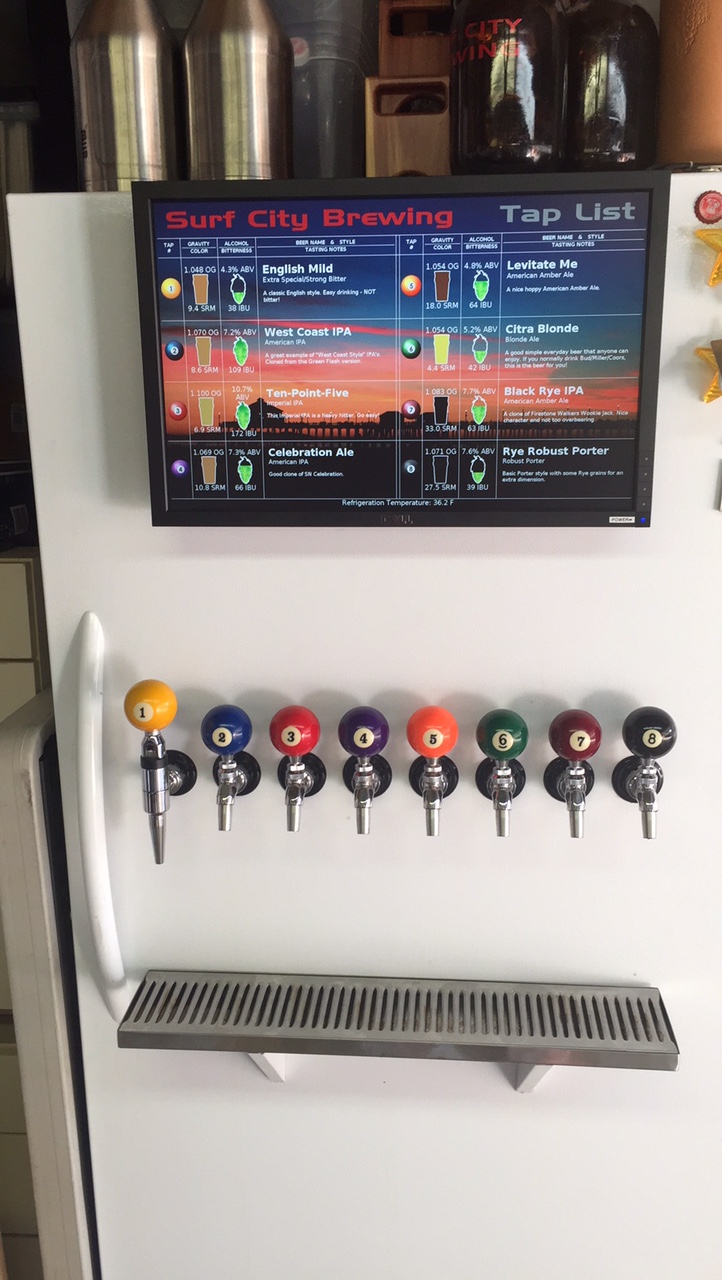
I used the 6 hole drip tray as a template for drilling the shank holes. Drilled through the door with a small titanium drill bit to help guide the larger drill bit and create a matching hold on the plastic side of the door.
For now, I have a six tap configuration. 5 CMB V3S forward seal taps and one stout tap. I have room to add 4 more taps above the existing 6 taps as I expand.
On the door side I drilled out the shank holes using a 15/16" bit. That created the perfect sized hole for the shanks. I then drilled out a 1" hole on the plastic inner side using the whole made by the small bit as my guide. I inserted PVC piping with a slight lip into the hole. That created a more robust structure for when I tightened down the Hex Nut on the inside of the Shanks. I bought stainless steel shank collars for the front to match the appearance of the fridge and drip tray and used the plastic ones that came with the shanks on the inside to give the Hex nut something stronger to bite into.
Really happy with how this turned out. I have an Ale going in today and will be kegging a Plinian IPA, Bourbon Porter, a Golden Ale and a Black Ale in the next couple of weeks.


I decided to get a new Freezer as I wanted to make sure I could maximise the life of the build. I found a new Frigidaire upright Freezer/Fridge on Craig's list for $600. The benefits were: (1) I could set the unit to Fridge and set the temp to 45 degrees, avoiding the need for a temperature controller. I have been monitoring the temp with a separate digital unit and it seem accurate. (2) It has its own recirculation so I did not need to install a fan. (3) The internal lighting system is not bypassed. (4) I have enough room for 11 kegs if I decide to put the Co2 on the outside or about 9 kegs if I keep internally and keep the footprint minimal vs a chest freezer.
I removed all the glass shelves and the bottom door shelves.
I bought a Heavy duty office utility cart from Amazon. With the wheels on, that was the perfect size to fit kegs on the bottom and top. I used a rubber self sticking mat to protect the plastic floor of the fridge.
I used an Eva Dry dehumidifier. Not sure that I would need it, but...
For the time being, I am keeping the co2 inside the fridge as I have the room right now and I can avoid further drilling.
I ordered all the parts from Keg Connection. They were extremely helpful in putting together all the parts I would need and the price is good. Certainly much easier than trying to put everything together myself.
I attached the manifold using liquid nails and one of the existing screws holding the rear vent flat to hold it in place while the glue cures.
The regulator attached to the co2 tank is a little side heavy, so I am going to mount the regulator the fridge wall and use a high pressure hose from the tank to the regulator. That will make the regulator more secure and keep it at a height that I can easily see it above the kegs.
I used the 6 hole drip tray as a template for drilling the shank holes. Drilled through the door with a small titanium drill bit to help guide the larger drill bit and create a matching hold on the plastic side of the door.
For now, I have a six tap configuration. 5 CMB V3S forward seal taps and one stout tap. I have room to add 4 more taps above the existing 6 taps as I expand.
On the door side I drilled out the shank holes using a 15/16" bit. That created the perfect sized hole for the shanks. I then drilled out a 1" hole on the plastic inner side using the whole made by the small bit as my guide. I inserted PVC piping with a slight lip into the hole. That created a more robust structure for when I tightened down the Hex Nut on the inside of the Shanks. I bought stainless steel shank collars for the front to match the appearance of the fridge and drip tray and used the plastic ones that came with the shanks on the inside to give the Hex nut something stronger to bite into.
Really happy with how this turned out. I have an Ale going in today and will be kegging a Plinian IPA, Bourbon Porter, a Golden Ale and a Black Ale in the next couple of weeks.


![Craft A Brew - Safale S-04 Dry Yeast - Fermentis - English Ale Dry Yeast - For English and American Ales and Hard Apple Ciders - Ingredients for Home Brewing - Beer Making Supplies - [1 Pack]](https://m.media-amazon.com/images/I/41fVGNh6JfL._SL500_.jpg)


")