You are using an out of date browser. It may not display this or other websites correctly.
You should upgrade or use an alternative browser.
You should upgrade or use an alternative browser.
The adventures of a complete noob and a brew rig
- Thread starter Tomtanner
- Start date

Help Support Homebrew Talk:
This site may earn a commission from merchant affiliate
links, including eBay, Amazon, and others.
[...]But the experience of building your own is invaluable.
We couldn't agree more
Cheers!
Tomtanner
Well-Known Member
mxpx5678 said:Awesome Thread, great work on the brewstand. However it confirms my suspicions that it would be cheaper to buy a prefabbed one.
But the experience of building your own is invaluable.
You are probably right. If you don't already own the tools then you are definitely right. It's been a lot of fun though.
Tomtanner
Well-Known Member
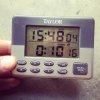
I bought a timer to put on my ultra low tech "control panel" and I use that term loosely.

Just doing a quick mock up it should look something like this.
Since this is my first attempt at a project like this I am just going to stick with the two switches for the burners the timer and if I can figure out a way to make them reach I would like to add igniter switches. That will probably be the extent of that part of my stand until I get an itch to learn the automation peace of all this.
Tomtanner said:You are probably right. If you don't already own the tools then you are definitely right. It's been a lot of fun though.
Yup. I have been trying to price this out for myself. And it always fun to build stuff.
Tomtanner
Well-Known Member
mxpx5678 said:Yup. I have been trying to price this out for myself. And it always fun to build stuff.
I can say it has taken me a lot longer to build than I ever expected too, but I also feel bada$$ when my neighbors see me in my garage being manly wielding an angle grinder or my welder..... And yes they all hate me now because of all the noise. Oh well I never liked them anyways.

$479.00
$559.00
EdgeStar KC1000SS Craft Brew Kegerator for 1/6 Barrel and Cornelius Kegs
Amazon.com

$159.99 ($26.66 / Count)
3M High Flow Series System BREW120-MS, 5616001, For Brewed Coffee and Hot Tea, Valve-in-Head Design
SpaceCityProviders

$7.79 ($7.79 / Count)
Craft A Brew - LalBrew Voss™ - Kveik Ale Yeast - For Craft Lagers - Ingredients for Home Brewing - Beer Making Supplies - (1 Pack)
Craft a Brew

$44.99
$49.95
Craft A Brew - Mead Making Kit – Reusable Make Your Own Mead Kit – Yields 1 Gallon of Mead
Craft a Brew

$22.00 ($623.23 / Ounce)
AMZLMPKNTW Ball Lock Sample Faucet 30cm Reinforced Silicone Hose Secondary Fermentation Homebrew Kegging joyful
无为中南商贸有限公司

$176.97
1pc Commercial Keg Manifold 2" Tri Clamp,Ball Lock Tapping Head,Pressure Gauge/Adjustable PRV for Kegging,Fermentation Control
hanhanbaihuoxiaoshoudian

$76.92 ($2,179.04 / Ounce)
Brewing accessories 1.5" Tri Clamp to Ball Lock Post Liquid Gas Homebrew Kegging Fermentation Parts Brewer Hardware SUS304 Brewing accessories(Gas Hose Barb)
chuhanhandianzishangwu

$10.99 ($31.16 / Ounce)
Hornindal Kveik Yeast for Homebrewing - Mead, Cider, Wine, Beer - 10g Packet - Saccharomyces Cerevisiae - Sold by Shadowhive.com
Shadowhive

$58.16
HUIZHUGS Brewing Equipment Keg Ball Lock Faucet 30cm Reinforced Silicone Hose Secondary Fermentation Homebrew Kegging Brewing Equipment
xiangshuizhenzhanglingfengshop
![Craft A Brew - Safale S-04 Dry Yeast - Fermentis - English Ale Dry Yeast - For English and American Ales and Hard Apple Ciders - Ingredients for Home Brewing - Beer Making Supplies - [1 Pack]](https://m.media-amazon.com/images/I/41fVGNh6JfL._SL500_.jpg)
$6.95 ($17.38 / Ounce)
$7.47 ($18.68 / Ounce)
Craft A Brew - Safale S-04 Dry Yeast - Fermentis - English Ale Dry Yeast - For English and American Ales and Hard Apple Ciders - Ingredients for Home Brewing - Beer Making Supplies - [1 Pack]
Hobby Homebrew

$53.24
1pc Hose Barb/MFL 1.5" Tri Clamp to Ball Lock Post Liquid Gas Homebrew Kegging Fermentation Parts Brewer Hardware SUS304(Liquid Hose Barb)
yunchengshiyanhuqucuichendianzishangwuyouxiangongsi

$28.98
Five Star - 6022b_ - Star San - 32 Ounce - High Foaming Sanitizer
Great Fermentations of Indiana

$719.00
$799.00
EdgeStar KC2000TWIN Full Size Dual Tap Kegerator & Draft Beer Dispenser - Black
Amazon.com

$53.24
1pc Hose Barb/MFL 1.5" Tri Clamp to Ball Lock Post Liquid Gas Homebrew Kegging Fermentation Parts Brewer Hardware SUS304(Gas MFL)
Guangshui Weilu You Trading Co., Ltd

$33.99 ($17.00 / Count)
$41.99 ($21.00 / Count)
2 Pack 1 Gallon Large Fermentation Jars with 3 Airlocks and 2 SCREW Lids(100% Airtight Heavy Duty Lid w Silicone) - Wide Mouth Glass Jars w Scale Mark - Pickle Jars for Sauerkraut, Sourdough Starter
Qianfenie Direct
Tomtanner
Well-Known Member
I am going to have a local sheet metal company make some burner shields for me soon.
Due to my current design I have some inherent limits to what I can use so I'm thinking of just asking these guys to give me three 16 gauge stainless steel cylinders at 2-4 inches in height and roughly 12-13 inches in circumference and taking my dremel and cutting out slots for the burner protrusion. Does this plan sound viable to you guys?
The only thing holding them in place would be the form fitting cutouts on the bottom of the shrouds. Anyone have any thoughts before I call in the order? Will the burners still gave enough air to breath?
PunkinDrublic
Member
Should be fine, we used aluminum flashing about 6 inches in height with two extra inches in diameter than the burners and they work fine.
On another note, are you still planing on using the switches without a ground?
On another note, are you still planing on using the switches without a ground?
Tomtanner
Well-Known Member
PunkinDrublic said:Should be fine, we used aluminum flashing about 6 inches in height with two extra inches in diameter than the burners and they work fine.
On another note, are you still planing on using the switches without a ground?
Well I'm not sure. I haven't found another configuration yet that's simple enough for me to comprehend that offers a ground option.
OneHoppyGuy
Well-Known Member
On another note, are you still planing on using the switches without a ground?
Why does he need a ground on the switches?
OneHoppyGuy
Well-Known Member

These switches do not even have a place for a ground.
Assuming the panel is powered by plugging it in, the cord should be 2 conductor with ground and plugged into a GFCI outlet. The box the cord goes into should be grounded to the cord. From there, anything you want to ground can be tied back to that point.
I have a harbor freight welder. It runs perfectly fine for the price. Ive seen videos of the hf welder compared against the 4-500 brand models and there isnt much difference. I agree that the wire sucks though! Its twice as expensive as the lincolin brand. And sucks ass
Just priced out wire. I came to the conclusion that it is preaty close to the same price per pound. HD has lincolin brand for $12 for a 1 lb spool and HF has there brand for $24 for a 2 lb spool. Now I could have misread something. But to me it looks to be the same price.
Tomtanner
Well-Known Member
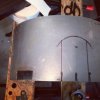
Just put a deposit down on 3 stainless steel cylinders that I'll be using for shrouds. 20 gauge stainless 12.5 internal diameter and six inches high. I'll be using my dremel to make the cutouts. Hope to have some pics for everyone soon. Price for the cylinders is $45 for all three
Tomtanner
Well-Known Member
Question for the pros.
If I have ball valves on my keggles Is it really necessary to also put them on my two pumps or my plate chiller? Can I just control my flow rate from the ext ball valve on the keggle?
If I have ball valves on my keggles Is it really necessary to also put them on my two pumps or my plate chiller? Can I just control my flow rate from the ext ball valve on the keggle?
Tomtanner
Well-Known Member
wncbrewer said:I'm certainly not a pro, but you are definetly going to want ball valves on the out flow side of your pumps. That's the way I have mine and it seems to be the convention among others
Ok I guess I just am inexperienced and fdont understand the dual need. How does it help you? Do you skip need one on your plate chiller?
barryfine
Well-Known Member
Ok I guess I just am inexperienced and fdont understand the dual need. How does it help you? Do you skip need one on your plate chiller?
You don't need one on your plate chiller, but you definitely want one at least on the output of your pump. The march and chugger pumps are designed so that you should only restrict the output and not the input of the flow so you want to keep the valve on your kettle full on and then adjust your flow rate after the pump.
It's also a good idea to have a valve on the input side of the pump with a T to use a priming valve. I also use it to pull my hydrometer readings. Otherwise, you can get an air bubble stuck in the hose prior to the pump that is a pain to try get out.
Tomtanner
Well-Known Member
barryfine said:You don't need one on your plate chiller, but you definitely want one at least on the output of your pump. The march and chugger pumps are designed so that you should only restrict the output and not the input of the flow so you want to keep the valve on your kettle full on and then adjust your flow rate after the pump.
It's also a good idea to have a valve on the input side of the pump with a T to use a priming valve. I also use it to pull my hydrometer readings. Otherwise, you can get an air bubble stuck in the hose prior to the pump that is a pain to try get out.
A priming valve? Can elaborate?
barryfine
Well-Known Member
A priming valve? Can elaborate?
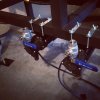
Sure, I let some wort run out of the valve in front of the pump to get all of the air out of the hose before I open the output valve and turn on the pump. I also grab my sample for my hydrometer reading out of this port as well. You can see it at the lower right of the below pic. Before adding this, I had a lot of trouble with an air pocket getting stuck in the hose in front of the pump. The $20 spent on this addition has made my brew day so much better.

Tomtanner said:Here is what I will use for my burner shrouds. They are stainless steel and cost $40 total for all three to be tacked up and cut.
That is a good price, I would pay twice that if it meant not having to bend my burner shrouds again.
philrose
Well-Known Member
Tomtanner-
Way to have the gumption and willingness to learn! You are the man!
Great thread too, excellent photos and insight.
PROST.
Way to have the gumption and willingness to learn! You are the man!
Great thread too, excellent photos and insight.
PROST.
Tomtanner
Well-Known Member
Tomtanner
Well-Known Member
wncbrewer said:That is a good price, I would pay twice that if it meant not having to bend my burner shrouds again.
It was actually not bad at all. It only took about 20 minutes to cut out the holes for the cross bar and the burner. We will have to see how well it works.
Tomtanner
Well-Known Member
philrose said:Tomtanner-
Way to have the gumption and willingness to learn! You are the man!
Great thread too, excellent photos and insight.
PROST.
Wow thanks man! It's been fun to work my way through this thing.
OneHoppyGuy
Well-Known Member
Tom - You might have to cut vents on the top of the rings. We have to modify our design because the burners weren't getting enough air.
We're already at version 5 with out new pilot mount and I just came up with another mod...
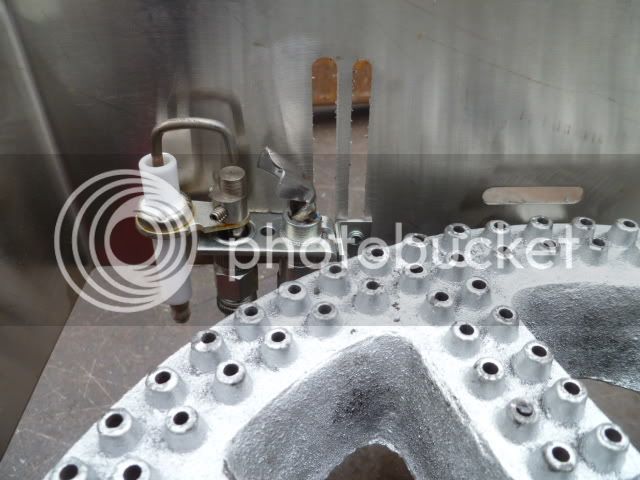
We're already at version 5 with out new pilot mount and I just came up with another mod...

Tomtanner
Well-Known Member
OneHoppyGuy said:Tom - You might have to cut vents on the top of the rings. We have to modify our design because the burners weren't getting enough air.
We're already at version 5 with out new pilot mount and I just came up with another mod...
I thought I might have to do some mods, how much space are you finding is necessary for the vents?
Tomtanner
Well-Known Member
OneHoppyGuy said:Tom - You might have to cut vents on the top of the rings. We have to modify our design because the burners weren't getting enough air.
We're already at version 5 with out new pilot mount and I just came up with another mod...
Also I love the way you set those igniters up!
OneHoppyGuy
Well-Known Member
One inch is what we use. We added a scallop and that cured the problem.

Here's a barbeque ignitor.


Here's a barbeque ignitor.

Tomtanner
Well-Known Member
Tomtanner
Well-Known Member
OneHoppyGuy said:One inch is what we use. We added a scallop and that cured the problem.
Here's a barbeque ignitor.
So sharp. Very inspiring!
A little out of order but I add the pieces as I get them. I could find any Teflon for the picture so I just did a mock up with me holding it.
View attachment 66352
Thermometer for my chiller
View attachment 66352
View attachment 66353
Assembled to look like this
View attachment 66355
Install will look something like this.
Really like this addition

Keep going Tom. You are doing FLA proud!
Tomtanner
Well-Known Member
passedpawn said:Keep going Tom. You are doing FLA proud!
Thank you sir! Hoping to meet up with some Tampa home brewers soon.
Tomtanner
Well-Known Member
Valis said:Really like this addition
Thank you!
Similar threads
- Replies
- 27
- Views
- 2K
- Replies
- 35
- Views
- 3K
- Replies
- 45
- Views
- 3K
- Replies
- 0
- Views
- 755


