Storage build

Homebrew Talk - Beer, Wine, Mead, & Cider Brewing Discussion Forum

Help Support Homebrew Talk - Beer, Wine, Mead, & Cider Brewing Discussion Forum:

This site may earn a commission from merchant affiliate links, including eBay, Amazon, and others.

tlucarelli

Well-Known Member
Joined
Aug 21, 2014
Messages
177
Reaction score
47
Location
Cincinnati
So I started homebrewing about 5 months ago and just kept buying more stuff with each new batch. Eventually there was literally nowhere for it all to go. So I convinced the wife that we should turn the basement into a brewery! I'm not sure if I can actually get ventilation to be able to truly brew down there, but I can at least bottle, ferment, store, etc.

So first things first I had to make some cabinets. I made these 96" long and 28" deep. Most cabinets are 24" so I have to get creative with my counters. I'm going to use a 3/4" sheet of plywood and some low quality tiles with adhesive backing. I don't have that part done yet but most of the rest is done.

To recap, I built the frames with 2x4s and a rented nail gun. Lined the inside with 1/2" MDF (this one I had the guy from lowes do all the cuts and tipped him haha - the 2x4s I cut myself though). Then I cut some 1x4s at 45 degree angles and stapled them together to make doors. Beat the hell out of those and the exterior of the frame with chains, a hammer, a wrench, and chiseled it. Chiseled part of my hand too. Whoops. Then lightly sanded and stained. Coat of poly. Used some wire cage I got at Home Depot, unrolled it and tried to get it as flat as possible. Staples into the doors to complete. Heated up the hinges and beat the hell out of them, then attached the doors. Then built shelves...

I'm exhausted just typing it all. But I think it came out pretty good so far! What do you guys think?

Edit: I posted on page 2 more of the specs if anyone is interested.
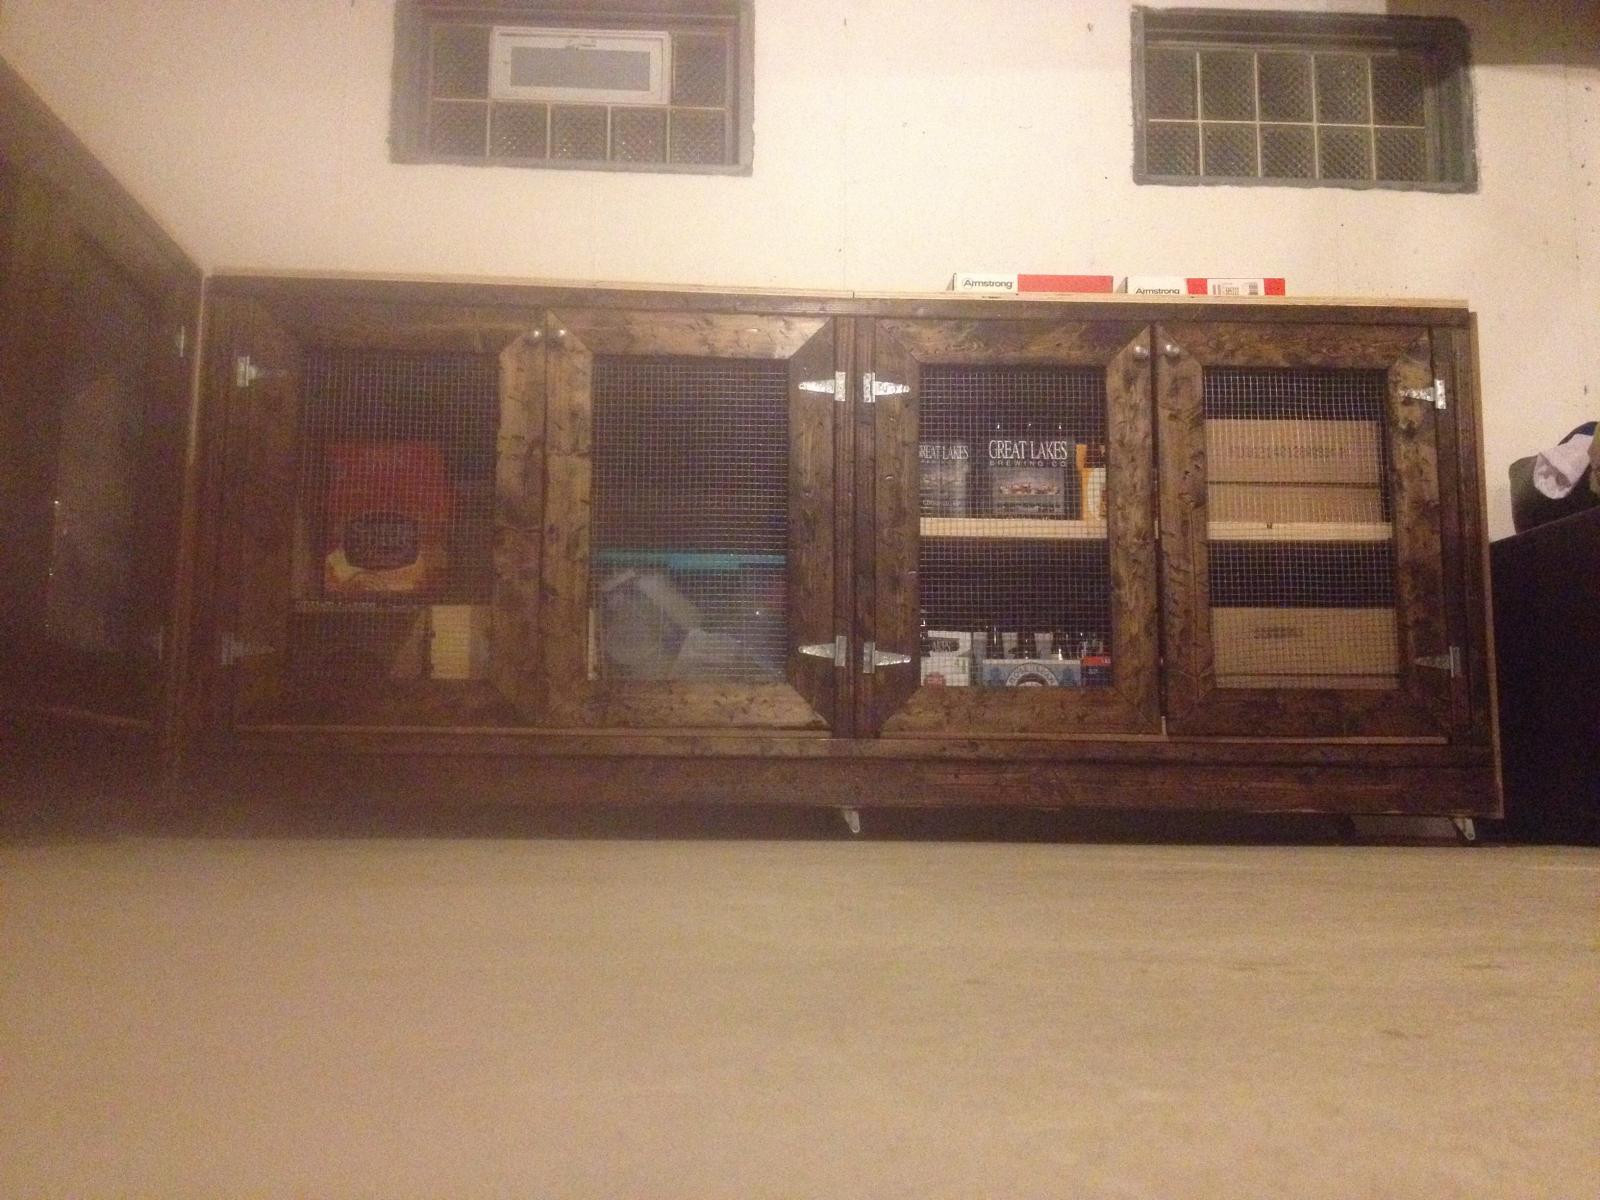
image.jpg
 
Haha too many clappers off the bar getting a little too close for comfort to the TV! I like your style though
 
Looks like some good storage there.

I need to get some better storage in my brewery as well, probably shelving of some sort though.

:mug:
 
I'm taking woodworking classes and I'm learning how to build this kind of stuff. Do you have any plans you could post? Those cabinets look awesome!
 
I actually just kinda had it all in my head and went. I could draw up some plans for you though, it'll just be a week or so. Heading to Minneapolis tomorrow for a pond hockey tourney and binge drinking I'm sure!

Where I started was I built the cabinets just like you would build a framed wall. So the bottom was two 96" 2x4s with blocks 16" on center. Then I built the back and put it on top, the sides, the front, etc. My idea was to build a 96" long cabinet, 28" deep, and 39" tall. After building I realized I needed casters to move it around (heavy as hell) so that raised it higher than I wanted but oh well. Also I stapled plywood to the sides which made my countertop longer than 96" which is awkward. I should've built the counters 95" or so instead of 96".

Like I said though, I'd be happy to post more in terms of actual plans later. I just kept tinkering as I went though.
 
Yah, the tops of these, where you're temporarily storing your tools, will get filled up too. Very soon you'll not be able to see the tops AND may have to put storage on the walls too.

Been there...done that.:D

Nice job though...
 
Thanks guys. I really like how it's come out so far. I wish I could take some more time off work and focus on it, but now that I got as far as I did, I was able to brew a couple batches instead, and let's be honest - that's the real prize. :mug:

@DNKDUKE, completely agree. I am already thinking how I can put some wall storage up...those cabinets filled up so damn fast!
 
I'm taking woodworking classes and I'm learning how to build this kind of stuff. Do you have any plans you could post? Those cabinets look awesome!

Sorry for the delay in posting specs, but here is what I've got. Remember, this is just something that was in my head that I ran with, so I know that as I went through the project, I had to make changes on the fly. I'll try to list out anything that I can remember, but I'm going off of my notes that I had, so if something turns out wrong, you may need to adjust accordingly. My advice is always measure yourself too and you will be fine.

With that being said too, my other disclaimer is I used a lot of heavier duty wood in 2x4's and 1/2" MDF. I probably spent way more than I should have as a result, so if you want to go with some cheaper and lighter materials, by all means go for it. The list below is for two cabinets, so if you only want one, you could reduce everything by half.

Frame:
Frame produces two 96" long, 28" wide, and 39" tall. I ended up needing to add caster wheels which took it up to 41 3/8" before I added counters. That's taller than I wanted, so if you want it a bit shorter, adjust accordingly (reduce the 32 1/4" studs).
Cut list:
12 - 96"
14 - 25"
12 - 21"
42 - 32 1/2"

Bottom:
Use two of the 96" and frame with seven 25" studs (16" on center). If you're new to framing, just lay out the 96" studs and put studs in every 16" from one side to the other. Your tape measure should highlight in red every 16" interval so you don't need to count it. I used 16s for my nails.

Back:
Use two 96" and frame with seven 32 1/2". Attach the back to the bottom with nails, making sure that the back is flush.

End/Sides (3 per cabinet):
Use two 21" studs and use three 32 1/2" studs to attach (one each on the sides and one in the middle is fine). Make three of these per cabinet, then attach one on each end, and one right in the middle.

Front:
Use two 96" studs and attach with six 32 1/2" studs as such - two on far left (side by side), two on far right (side by side), and two in middle (side by side). You can refer to the second pic I attached to see what this looks like.

Plywood lining: For this, I used 1/2" MDF, which is both expensive and probably too heavy duty, but it is much cleaner than the basic plywood and I wanted to be positive that I didn't have to worry about anything. I actually wrote out my cut list, found a younger kid at Home Depot who spent a long time cutting everything for me, and I tipped him $10. Hell of a lot easier than doing everything on my table saw at home. Make sure you measure your opening's to get it right!

Cut list:

Ends: 4 - 28 1/2 x 39" (this covered the frame perfectly, but add some extra if you want it to go up as high as your countertop - I should've added enough for 3/4" plywood to sit on top)
Back: 2 - 96 x 39
Bottom insides: If you framed very well, you should have 2 measurements here and not 4. I made a couple mistakes so I had to adjust on the fly.
1 - 24 3/4 x 42 1/2
1 - 24 3/4 x 43
1 - 24 1/2 x 43
1 - 24 5/8 x 42 1/2

Inside sides: 8 - 20 1/2 x 31 3/4
Inside back: 2 - 31 3/8 x 43
2 - 31 3/8 x 42 1/2
Top: 2 - 96 x 29 1/2

So, after getting all of this together, I attached these using a brad nailer (staple gun). I put the bottom down first, then attached the back, then the two sides. If you're not sure what you're doing, it helps to lay out the plywood first and make sure everything is a good fit. It's a hell of a lot harder to move things around after you've already stapled them in place.

Doors: I cut and re-cut these things a few times. As with everything on here, just measure your own to double check.
4 - 32 1/2 x 21 1/2
4 - 32 1/2 x 21 5/8

I used 1x4 for these, and cut them with 45 degree angles, attached with wood glue and the staple gun again. After I cut them, I distressed them, which included beating them with a ball hammer, a wrench, and chains, then chiseling the sides and body (I just watched some youtube videos for tips). Then I used Minwax Espresso stain. One layer and a coat of poly was all I needed.

For the backing, I found this wire at Home Depot that you can buy (mine came rolled up), so I unrolled it, cut it to size and stapled it with a regular staple gun to attach to the doors. I also found some distressed chrome knobs to use, and attached those accordingly. I bought normal silver hinges, heat them up with a heat gun, pounded them with a ball hammer and scrubbed with a wire brush to distress them. I've seen others spray paint black at this point which probably would've looked really good, but I already had the chrome knobs.

Attach the doors to the cabinets and you're getting pretty close! All I did next was screw in some 3/4" plywood on top, and I will add some cheap tiles with adhesive on the back.

If anyone decides to go for it, let me know how it turns out! :mug:
 
Back
Top