• Please visit and share your knowledge at our sister communities:
  • If you have not, please join our official Homebrewing Facebook Group!

    Homebrewing Facebook Group

Stc-1000+

Homebrew Talk

Help Support Homebrew Talk:

This site may earn a commission from merchant affiliate links, including eBay, Amazon, and others.
I haven't had a chance to try the latest commit with the change to the setting acceleration. Looking forward to it.

I'm out of town this weekend, but I did set up a 10 step program to cover a 72 hour period. BrewPi is logging it in a dorm fridge.

Daredevil. I hope your fridge is still functional when you get home.... :)
And I think you'll like it when you try it. Perhaps there somw tweaking of the acceleration and speed left. But oh yeah, I pretty satisfied with the solution.
 
Don't know how I missed this thread, but this is great!!! Going to open up my STC and add a 5 pin header tonight.
 
Yes, I'd say go for for work branch.
It's the latest changes, but I think they are good.
 
Daredevil. I hope your fridge is still functional when you get home.... :)

And I think you'll like it when you try it. Perhaps there somw tweaking of the acceleration and speed left. But oh yeah, I pretty satisfied with the solution.


I can shut 'er down remotely if I have to. Web accessible relays are nifty. ;)

So far it looks perfect. I'll post the data when it finishes.
 
Alpha, this is incredible. I hope you're proud...this is a game changer for many homebrewers. Can't wait to try it out!

What's the difference between the work branch and the master?
 
Alpha, this is incredible. I hope you're proud...this is a game changer for many homebrewers. Can't wait to try it out!

What's the difference between the work branch and the master?

Thanks!

Well, I push the changes I make to work branch first. I then merge the changes to master when I think the changes are good.
We're still in development, so there's no guarantee master is exactly stable either.
 
Maybe I missed it, but how many sequences can be programmed with this? Is ramping up a few deg a day over a week possible?
 
Maybe I missed it, but how many sequences can be programmed with this? Is ramping up a few deg a day over a week possible?

There are 6 profiles with 10 steps each.
No, no ramping. If you need to ramp, then set a profile that will do the ramping. It will at least save you 10 trips to fiddle with thermostat settings.
 
Here is what I've logged so far (looks great!):

2014-03-22%2009.30.07.jpg
 
That does indeed look beautiful!
Looks like you got around 3 cycles per hour. I don't know much about cooling compressors, but I guess that you wouldn't want much shorter cycles than than.
That is cool. It actually works!!
Thanks!
 
I have it set to 0.5*F hysteresis so it is working the compressor a bit. Last time I looked the total run time on the fridge was about 24 minutes per hour. But, that is a cheap dorm fridge that isn't insulated very well and has no fan at all, so the cool air just has to radiate away from the coil. I may try again later with a fan in there to see how it does.

But those are all fridge issues. Looks like the controller is doing perfectly so far.
 
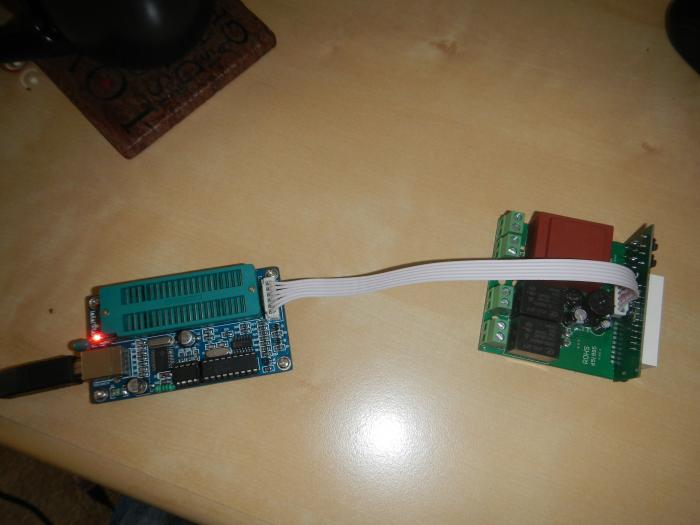
Soldered a 5 pin header on there and hooked up the programmer. Tried to read it but it came back all zeroes.... Must be that protection bit you were talking about...

First try - display's flashing - heat indicator is on but the relay didnt pick up. Bringing it back for more testing.

DSCN1069.jpg
 
Programmed with the Arduino and seems to be working much better.

Hooked back up to the instrumented ferm chamber - https://xively.com/feeds/2140417376

SP is 72f - I'll try some steps later.

I flashed with the arduino and it seems to work well - I read the file back out with my PIC programmer and saved it to a different hex file. I think the reason my pic programmer wants to program the fuses, etc..
 
On a scale of 1-10, how confident are you that we are good to go with using this for a real batch? I know, disclaimer yada yada, but I'm not the litigious sort.
 
That sort of depends.
I'd say I'm about 80% sure it works good enough.
If all you have to lose is the beer, then it could be worth a shot. I'd try to keep än eye on it though, just in case it should lock up. (It really shouldn't, it's got watchdog reset).
However, i'd run without heater OR a heater with very low wattage that just can't start a fire (which you really should use from the beginning).
 
That sort of depends.

I'd say I'm about 80% sure it works good enough.

If all you have to lose is the beer, then it could be worth a shot. I'd try to keep än eye on it though, just in case it should lock up. (It really shouldn't, it's got watchdog reset).

However, i'd run without heater OR a heater with very low wattage that just can't start a fire (which you really should use from the beginning).


Well I mean I am using a ceramic bulb so I don't really see that being an issue. I think I'm about to give it a go on a real batch.
 
Well, ceramic bulbs can get extremely hot as well in an enclosed space.
It's all about wattage (or rather wattage per area).
I wouldn't use anything above 25w. Ideally half of that.
But I won't preach, to each their own.
Good luck, let us know!
 
Just started a program on it - starting temp 65, every two hours ups three degrees until 73, then goes back down to 72.... Lets see how it works! :)
 
Ok. I've come to accept that I am the worst solderer in the history of mankind. I can't do it. The effing solder always sticks to the damn tip. I have used flux, no flux, rosin core, large diameter, small diameter, and it doesn't work. I thought it was the iron so I bought another one with excellent reviews. NOPE.

Clearly the problem is me. How the hell can I flash this damn thing without soldering?

You'd need to create some sort of contact block for the five pads. I thought about this, but in the end I soldered a pin header in. I first heated the exsisting solder up that was in the holes and blew it out, cleaning the holes out. after the holes are open, its not too hard, even for my fifty year old eyes, to solder wires/header/etc into the board.
 
You'd need to create some sort of contact block for the five pads. I thought about this, but in the end I soldered a pin header in. I first heated the exsisting solder up that was in the holes and blew it out, cleaning the holes out. after the holes are open, its not too hard, even for my fifty year old eyes, to solder wires/header/etc into the board.


Well, three of mine didn't have any solder in them. Only the outside ones did. It still doesn't work for me.
 
all five of mine were full... Try a solder sucker?


Yes I have one. That's not the issue though...I cannot get the solder to stick to the board. It sticks on the iron. Nothing I can do will stop it.


Sent from my iPad using Home Brew
 
are you soldering wires or (for instance) solid header pins to the board's spots? Pre-tin any wires and mash the suckers to the board's solder pads until the pad solder melts to the wire's pre-tinned solder. If I'm saying something you already know, my apologies.
 
Yes I have one. That's not the issue though...I cannot get the solder to stick to the board. It sticks on the iron. Nothing I can do will stop it.


Sent from my iPad using Home Brew

There is some sort of sticky substance on the bottom of the board - I wiped it off with brake cleaner on a rag first.
 
are you soldering wires or (for instance) solid header pins to the board's spots? Pre-tin any wires and mash the suckers to the board's solder pads until the pad solder melts to the wire's pre-tinned solder. If I'm saying something you already know, my apologies.


I think that will work with the new controller I ordered. I wasn't able to do solid pins because I couldn't melt and suck the original solder out of the two outside pins..I have ordered a finer tip, so maybe that will help. I was attempting to fill in the empty holes in the middle and then solder tinned wires to the solder I added, but it wouldn't ever suck into the hole.


Sent from my iPad using Home Brew
 
There is some sort of sticky substance on the bottom of the board - I wiped it off with brake cleaner on a rag first.


That's good to know. I did notice a white film forming as I was attempting to solder the tinned wires.


Sent from my iPad using Home Brew
 
Back
Top