• Please visit and share your knowledge at our sister communities:
  • If you have not, please join our official Homebrewing Facebook Group!

    Homebrewing Facebook Group

Speidel Braumeister (brewmaster)

Homebrew Talk

Help Support Homebrew Talk:

This site may earn a commission from merchant affiliate links, including eBay, Amazon, and others.
I'm hoping mine arrives in thenext couple of weeks. I've got a trip I'm taking and hope it's here when I get back. I have a Citra Pale Ale, American Wheat, Strawberry Blonde, and Schwarzbier to brew!
 
Would one of you kindly post the diameter of the spigot on the 50L model? I'm trying to determine what ID hose can be attached to it. I'm guessing .5" but I can't tell for sure.

Thanks in advance.

Are you wanting to add a hose to the inside or outside? If outside, I use a 3/8" ID braided line on mine.
 
Are you wanting to add a hose to the inside or outside? If outside, I use a 3/8" ID braided line on mine.

On the outside. I would want to use a .5" ID hose on the output. Thorsten told me it's only 10mm but it's threaded and can be replaced. What's unclear is the thread size and diameter.
 
beradthefish said:
On the outside. I would want to use a .5" ID hose on the output. Thorsten told me it's only 10mm but it's threaded and can be replaced. What's unclear is the thread size and diameter.

Ahhh. I can't help you with that as I don't know how to measure thread size. Are you thinking of removing the spout and adding a hose and pump?
 
I've been thinking about getting a pump and a plate chiller (kind of a DIY chill wizard) for my current setup and was hoping if I upgraded to this I would still be able to use it. Seems most plumbing sold for brewing is 1/2". I wonder if it's possible. By the way, awesome, very helpful videos and discussion.
 
Ahhh. I can't help you with that as I don't know how to measure thread size. Are you thinking of removing the spout and adding a hose and pump?

Right. Optimally it would be a 1/2" hose barb off the spigot. All academic, I don't own one of these as of right now :)
 
See post #552 back in this thread hfk2 has a pic of his with a hose and pump hooked to it. He should chime in here shortly with your answer.
That's what I'm looking for, thanks. Hopefully he'll chime in because I can't quite make out how the connection is made.
 
Beradthefish, sorry for the delayed response, I've been away for a bit. I have the 20L BM so I'm not sure if the spigot is the same size, however all I did was use a length of 1/2" reinforced silicon tubing with 2 hose clamps. Don't over tighten the clamps because the the spigot is tapered and it will try to slide the hose off. It doesn't leak and is easy to take off and clean. I used regular thick walled silicon tubing first but found the material was very soft and the clamps would dig into the silicon, so I was concerned that after a few times removing the hose the hose would be too chewed up and have to be replaced. So far it has worked just fine. On the pump end of the hose I use a heat resistant quick connect with a 1/2" barb. Hope this helps.
 
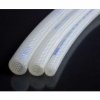
I used 1/2" reinforced braided silicone silbrade hose rated for 350 degrees F. It's expensive ($7.99 at Midwest Supplies) but I only needed one foot.
http://www.midwestsupplies.com/1-2-reinforced-braided-silicone-silbrade-hose-per-foot.html
1-2-reinforced-braided-silicone-silbrade-hose-per-foot_1.jpg

I originally used 1/2" thermoplastic tubing rated for 275 degrees F.
http://www.northernbrewer.com/brewing/1-2-id-thermoplastic-tubing.html
tube.jpg
 
Both tubes work well. You will get many uses out of the cheaper tube and if you're careful about tightening the clamps it will last the life of the tube. I tighten the clamps too much the first time I used it which chewed up the outer tubing. It still worked, but I like to take it off after every session to completely clean and sanitize the spigot and tubing. The expensive tube has a reinforcement molded into it, so even if you clamp down too much you will chew up the outer covering but it wont go past the reinforcement. You will also need to use some sort of quick connect on the pump end to allow the hose to swivel. The spigot when turned rotates the spout 90 degrees, so because the tubing is solidly attached to the spout it will rotate the whole tube therefore the pump end needs to be able to rotate or you will twist the tube which might recoil to keep closing the spigot on you. This was a cheaper and easier method than trying to find a metric sized valve to fit the BM opening.
 
If only the bottling day was as easy going and effortless as the brewing day...have to say my esb and ipa are getting better every day. I actually prefer my esb to Fullers one. I recently joined CBA in the UK (Craft Brewing Association) and I was asked to write a piece on BM. Apparently not that popular in the UK. This thread will be valuable when I put together my concise review. Thank you.
 
Brewing my first beer on the Braumeister today.

10 gallons of Bee Cave Haus Pale Ale.

Good on you! Have fun and enjoy your special day.

(I'll be brewing the 4th time on Monday or Tuesday. I'll probably go for ~1.042 bitter with amarillo twist...)
 
I'm brewing my dogs, which means I'm doing all the work. You guys were right, pulling that malt-pipe out was a pain in the ass. Once you get past the suction created by the pipe, it gets easier but I need to rethink the height of my brew table, it was on the edge of being too high, even with a step ladder.

On a very positive note, this has been a very quite and relaxing brewing experience. I've been kegging other batches and generally doing other things, while I'm brewing.
 
Everything went great with the Braumeister but my march pump is a whole different story. It took forever to prime and then one of the hoses blew off my plate chiller, scalding my fingers.

Also, my ground water is a balmy 83 degrees right now, so I had to just dump it into my conical and chill it down in it's fermentation chamber. I should be able to pitch later today.

Cleaning wise, how do you get the pumps apart?
 
Pump cleaning is nice and easy. Just flush water through the inlets and outlet then turn the whole unit upside down and unscrew the pump's brass end covers. The inside can then be inspected. These should only be on hand-tight, not need to force them. :)
 
I've been kegging other batches and generally doing other things, while I'm brewing.

I sanitise and clean while mashing and boiling, after having pitched the yeast I only have to clean the BM and mop the floor.
 
Well I took the plunge! After reading this thread and some rearranging of finances, I placed my order Friday for a 20l system with thermal jacket! I'm so excited! :ban: Now the two week wait... And I thought waiting for a Russian Imperial to finish was bad!
 
rlhvegas said:
Well I took the plunge! After reading this thread and some rearranging of finances, I placed my order Friday for a 20l system with thermal jacket! I'm so excited! :ban: Now the two week wait... And I thought waiting for a Russian Imperial to finish was bad!

Congratulations Vegas!
 
Just got back from my trip and my unit is sitting at my brothers house. Can't wait to brew this weekend!
 
Received my 20l Braumeister last week and had "First Brew" on Sunday.

Went with the 70200x45 from International Configurations for power. A little pricey but nice - gives me GFI, a switched outlet and no need to mod the cord.

Brewed in the kitchen which I haven't done since my extract days. So nice to be indoors (it rained all day) with a sink and hot water. Day went without a hitch. Hit ~80% efficiency with a quick sparge after lifting the malt pipe, no stirring just poured over the top plate. Going to try including the sparge water in the initial mix and see what that gets me.

Purchased the insulating jacket and copper hood based on comments that the heating on the 20l unit is a little anemic. Jacket is a _tight_ fit but nicely made. The copper hood is built like a brick - really thick gauge copper. With both in place I got a really solid rolling boil. Measured the max heat output at 1 degree C per minute (1.8F/min) with 25 liters.

I'm very impressed and one happy camper. Overall the most pleasant brew session I have had in years.

-Chris

Chris - opened up my 20L unit with the intent of cutting the cord and modifying but cant bring myself to do it! Would taking the 7200X45 and placing in a box wired to the drier plug work as an interface that can be moved? Thinking about future locations and possibly tying this switched box to a future stand build.

SB to 7200X45 in box wired to drier cord to drier outlet

That should work. The surface mount version would make it even easier. I hard wired mine into an existing junction box tied to my electric cooktop. The wiring was pretty straight forward once I got my head around it.

My main goal with the 70200X45 was GFI protection. If that's not a concern there are cheaper options. You could get a female Schuko plug and fashion an extension cord similar to what wreals did a few pages back. You could also toss the original cord in the box and make a new cord with an IEC C-13 plug (double check me on the pinout).

-Chris
 
Thanks Chris. I'm very interested in GFI as well so think I'll move forward with this option. Thanks for the suggestion of the surface mount box, but I may end up doing what you did once we build our new house and will buy with the intent of using an in wall solution down the road. I can get an electrical box cheap and future proof that way.

How are things going for you on the wort clarity front?
 
How are things going for you on the wort clarity front?

Just took time, finally cleared out after a couple months.

Used my Therminator on the last batch and things are clear out of the fermenter. I suspect I wasn't getting a good cold break with the Speidel chiller. It's a thing of beauty but it's not much of a chiller. Not sure if the walls are too thick or there isn't enough length but it's going to be replaced. Haven't decided if I'll stick with the Therminator or build/buy another cooper immersion chiller. The plate chiller is just a pain to deal with compared to an immersion chiller IMHO.

-Chris
I agree with you there Chris. If you are fanatical about getting all the crud out of it anyway. :mug:
 
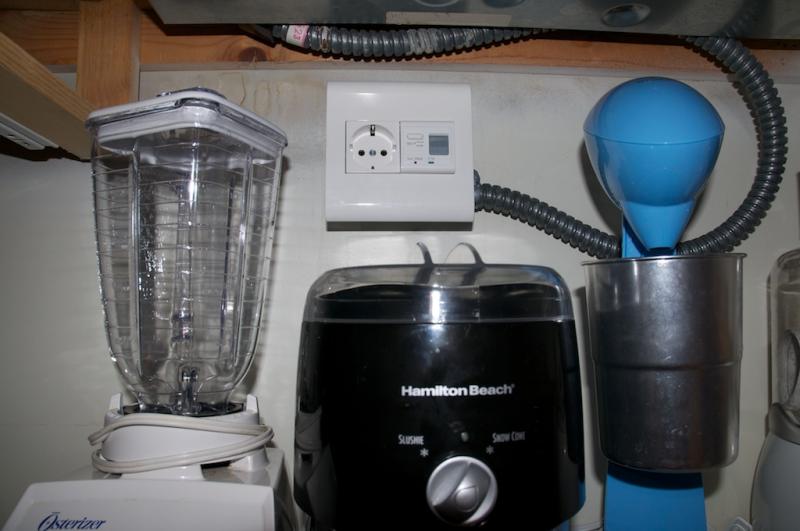
Here's a couple picts of my install of the 70200X45 from International Configurations. The components are actually made by Legrand. There's a green led that lights up when the receptacle has power. I keep it switched off unless I'm brewing.

-Chris

DSC_0010.jpg


DSC_0023.jpg
 
Hello-

I know that there has been a lot of discussion on keeping the filters in place. It seems the two best situations are to use ss wire to "sew" the filter to the false bottom piece or to use ss paperclips to cli the two together. I used the SS wire trick on my last brew, and while it was effective it was a complete PITA to set up and take apart. SS paperclips are rather difficult to find and I wonder if the added clips would make the false bottom just a touch too wide to fit easily into the malt pipe. (I have a small dent in my malt pipe from shipping and the false bottom piece always hits that on the way in and out. I can't help but wonder what would happen if I have six or eight clips attached to the false bottom.)

Anyway... has anyone tried using small magnets to hold the filter and false bottom together? I think this solution would have the advantages of being quick to set up and take apart, not adding to the circumference of the false bottom, as well as not trashing the filter from repeatedly sewing the filter in place. Possible downsides to this solution that I see are: potential to knock the magnets off whilst stirring the grain, not using enough magnets and allowing grain to slip by the filter around the edges, and whether or not magnets are food safe.

Can anyone see a downside to this solution? Has anyone tried it? What type of magnets would be food safe?
 
Stainless steel, is generally non-magnetic....

Michael

Hello-

I know that there has been a lot of discussion on keeping the filters in place. It seems the two best situations are to use ss wire to "sew" the filter to the false bottom piece or to use ss paperclips to cli the two together. I used the SS wire trick on my last brew, and while it was effective it was a complete PITA to set up and take apart. SS paperclips are rather difficult to find and I wonder if the added clips would make the false bottom just a touch too wide to fit easily into the malt pipe. (I have a small dent in my malt pipe from shipping and the false bottom piece always hits that on the way in and out. I can't help but wonder what would happen if I have six or eight clips attached to the false bottom.)

Anyway... has anyone tried using small magnets to hold the filter and false bottom together? I think this solution would have the advantages of being quick to set up and take apart, not adding to the circumference of the false bottom, as well as not trashing the filter from repeatedly sewing the filter in place. Possible downsides to this solution that I see are: potential to knock the magnets off whilst stirring the grain, not using enough magnets and allowing grain to slip by the filter around the edges, and whether or not magnets are food safe.

Can anyone see a downside to this solution? Has anyone tried it? What type of magnets would be food safe?
 

Latest posts

Back
Top