• Please visit and share your knowledge at our sister communities:
  • If you have not, please join our official Homebrewing Facebook Group!

    Homebrewing Facebook Group

Soldering Stainless steel

Homebrew Talk

Help Support Homebrew Talk:

This site may earn a commission from merchant affiliate links, including eBay, Amazon, and others.
Everbody has a different take on this, so I thought I throw out mine.

I'm way to cheap to buy anything, so I built a dimple maker out of 2 sockets and bolt.

Drilled a 1/2" hole with a step bit, pulled the dimple, and ran 3/4 ridged copper pipe through and soldered.

Attach fitting of your choice to pipe.

13mm kobalt 1/2 drive socket makes the dimple

24mm socket, bolt, washers, nut yada yada yada

don't pull it all the way through it will be too loose

IMG_7613.jpg

I'm a cheap ass so I'd probably stick with my step bit when I do my third keg. The holes became slower to cut when I got closer to the final size I needed for some reason. I'd say the first coupling took about an hour an a half while I was figuring it out as I went and being extra careful. Once I knew what I was doing I flew through the next hole in about half an hour. I haven't read the part about the sockets. I do however think the tapered coupler is a more gradual way to open the steel and ward off any tearing in the metal. I'm not even sure if this is something to be concerned about but whatever. Cheers.

This is a quote of post #1044 on page 105. I thought this was a pretty good idea when cbherrington3 first posted it but no one has commented on it...

And I may be more of a cheap ass than you - if I can avoid blowing the bucks on concentric couplers and still get a good dimple, I'd rather spend that cash elsewhere... How much did you spend on fittings for your dimple tool?

And thanks for the clarification on time - so an hours learning curve up-front and then about a half an hour per joint - not bad!

-fafrd
 
I have a few pinhole leaks on two of my holes. Has anyone done this on both the inside and outside? Pool the solder on one side then plain solder the other side. Kind of double protection.
 
I have a few pinhole leaks on two of my holes. Has anyone done this on both the inside and outside? Pool the solder on one side then plain solder the other side. Kind of double protection.

I would clean everything up, re-flux, re-heat & re-flow the solder. It should wick through the joint a bit and seal those holes.
 
OK - thanks. I guess if I ever knock one of these of I can always dimple and re-solder, right? For a temperature probe, I like the idea of a minimum-sized hole in the vessel wall if it can be strong enough...

The thing about drilling a smaller hole in the wall after the coupler is soldered onto the outside is that you would end up with liquid trapped inside the fitting.
The hole for the temp probe would be smaller than the coupling, correct? Just big enough to get the temp probe through?

So when the water/wort/liquid level is above that hole, it will naturally flow into the fitting - into the area between the kettle wall and the temp probe threads.
However, when you drain the kettle not all of that liquid will be able to drain out, a small amount will be trapped in the fitting below the temp probe hole.
It won't be a huge amount of fluid, but maybe something to consider

DustBow, this is a good point and thanks for the heads-up. The half-coupling I am considering

(shown here: http://www.mcmaster.com/#cadinlnord/4464k222/=l2sxkm)

has an unthreaded portion against the weld/solder surface, so it should be possible to drill out a full-size hole without damaging the threads (or in the worse case, drill a plot hole from the outside of the vessel and a full-size hole from the inside).

This would result n a hole matching the OD of the 1/4" pipe (closer to 1/2") but probably better that than having trapped fluid.

I suppose another idea could be to weld on a compression nut facing out - you could then drill out a precise 1/4" hole (tube OD), thread in a 1/4" compression-to-compression coupler, and you would be golden.

Has anyone tried this? Any reason it would not work? Are the threads on a compression nut so fragile that they would be damaged from soldering?

-fafrd
 
I think you are making things more difficult than they have to be - if you are planning on soldering anyway, just use a welding spud.
Perfect for "one-sided" connections like a temp probe - and they don't require a dimple.
 
Thanks Dustbow - I have not used any of these fittings before, so if a welding spud will work well for a temp probe and is easier because no dimple is needed, that is all I need to hear. I am trying to avoid to avoid any protrusion into the vessel cavity so I need a spud that has a nipple/protrusion no thicker that the keg wall thickness - where can I find these (the 'full height' spuds appear to have a 1/4" nipple/protrusion, so I will want 'low height' stainless spuds with only a 1/8" nipple/protrusion)??

-fafrd
 
I've been having more fun soldering stuff with my Staybrite. This time I soldered stainless pipe thread joints from the inside to get a semi-sanitary seal. I created a new thread, take a look, but I figured I'd mention it here in this legendary thread of all things stainless steel soldering.
 
Ok I got all the parts in to start learning how to solder these fittings (minus the solder/flux). I used a greenlee 1/2" conduit punch then I used my dimple tool. I'm going to post some pics to let everyone see and make sure I am doing this correctly. I am testing on an old sanke lid so I am not 100% sure the fitting is going through straight. Any advice on how to keep the fitting straight? I also didn't sand/deburr the hole so it scratched up the outside of the fitting pretty badly.

IMG_20130124_113159.jpg


IMG_20130124_113109.jpg


IMG_20130124_111622.jpg
 
If anyone is willing to sell their keg tool, I'd buy it ! I live in canada and mcmaster don't ship here so it's impossible for me to build one !
 
slakwhere said:
phil, i use my sight glass setup to thread into the fitting and pull the fitting till it's square.

Have any pictures? Thanks for the input, just want to visualize your set up better.
 
i dont' have any pics of that process. basically i pulled the fitting through the dimple, then before applying flux/solder i attached the exterior device (ball valve, sight glass, heat element) i was going to use. i pull/push/twist on the fitting until it seems straight in the keg using that fitting, and then remove the exterior device carefully, apply flux/solder and add heat.

make sense?
 
slakwhere said:
i dont' have any pics of that process. basically i pulled the fitting through the dimple, then before applying flux/solder i attached the exterior device (ball valve, sight glass, heat element) i was going to use. i pull/push/twist on the fitting until it seems straight in the keg using that fitting, and then remove the exterior device carefully, apply flux/solder and add heat.

make sense?

Yea I figured that's what you meant. Thanks for clearing it up.
 
If anyone is wondering (I know I was before doing this) here's a couple things I have learned from soldering my kegs:


  • You can make a nippling tool by tightening a coupler on the end of a bolt with some washers and nuts, putting the bolt in a drill press, and using an angle grinder with a grinding wheel to make the coupler into a cone (while its spinning in the drill press).
  • You can pull the tool into the keg with no problems making the valley, and the solder on the outside, not the inside.
  • Three rings of solder from the harris stay brite flux and solder kit is the perfect amount to make a nice bead of solder in the valley.
  • With two of the stay brite liquid flux and soldering kits you have the perfect, to the mm, amount of solder to put three rings of solder on a total of 14 fittings including:
    10 - 1/2" Couplers
    2 - 1/4" couplers for sight glasses
    2 - 1" NPT welding spuds for heating elements
  • You can successfully solder with an oxy-acetylene torch, just make sure you have a nice long inner flame, heat the fitting about 80% of the time and the keg 20% of the time with the outer flame only and never stop moving the torch.
  • Leave the keg level until the solder has completely cooled, even if it looks solidified, it can still run and will pool on one side if you rotate the keg to work on the next fitting.
  • Screw your fittings together and mark what side of the coupler should be up for your valves to be in the right orientation after you solder it. You should also give yourself about a 1/4 to a 1/2 turn extra to tighten it

Thanks for all that have come before me, this is much better than the weldless variety.

Alex.
 
Couple of questions...

1. Is a jewelers torch a better fit to use for this application, like this one? http://www.amazon.com/dp/B000VML7KO/?tag=skimlinks_replacement-20

2. I have weldless fittings now and was hoping to repurpose them by soldering them in. Being weldless they are FNPT. Is there any reason I wouldn't or shouldn't just use the FNPT so I can thread a ball valve on from the outside and a coupler on the inside?
 
Last edited by a moderator:
Couple of questions...

1. Is a jewelers torch a better fit to use for this application, like this one? http://www.amazon.com/dp/B000VML7KO/?tag=skimlinks_replacement-20

2. I have weldless fittings now and was hoping to repurpose them by soldering them in. Being weldless they are FNPT. Is there any reason I wouldn't or shouldn't just use the FNPT so I can thread a ball valve on from the outside and a coupler on the inside?
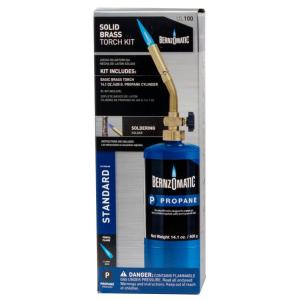
Just go to Home Depot and buy a basic propane torch. It'll cost you about $15 complete with a propane tank.
BernzOmatic UL100 - Basic Propane Torch Kit
 
Last edited by a moderator:
Thanks that will save some money! My mistake that should have read MNPT not FNPT. Thanks again for the help
 
SpartyParty said:
Thanks that will save some money! My mistake that should have read MNPT not FNPT. Thanks again for the help

Splurge the extra few bucks and grab a torch rated to use MAPP/Pro. It will burn propane which costs less when you don't need as much heat but will burn MAPP/Pro when you need do. I have a Bernzomatic TS8000 that I like. Trigger ignition with adjustable flame and flame lock.

image-2470925214.jpg
 
Not a pencil torch. Follow the link I posted.

123f04af-144c-4c37-b482-a4c9fc007d50_300.jpg


It has more than enough power for Silver Soldering SS.

But - do what ever you want.

geeze....

Sorry dude, but that is what they call a pencil torch...

"The Bernzomatic UL100 basic propane torch kit contains 14.1 ounces of propane fuel. Kit includes a basic brass pencil flame torch head. Ideal for basic soldering jobs or general heat applications"

I have one. They are great for soldering copper in tight spots when you don't want a big flame. I've not soldered my kettles yet, which is why I'm still reading here, but I would have never guessed that was enough torch to get a keg hot. It seems the walls of the keg would sink the heat away.
 
jeepinjeepin said:
Sorry dude, but that is what they call a pencil torch...

"The Bernzomatic UL100 basic propane torch kit contains 14.1 ounces of propane fuel. Kit includes a basic brass pencil flame torch head. Ideal for basic soldering jobs or general heat applications"

I have one. They are great for soldering copper in tight spots when you don't want a big flame. I've not soldered my kettles yet, which is why I'm still reading here, but I would have never guessed that was enough torch to get a keg hot. It seems the walls of the keg would sink the heat away.

The pencil torch works. I did the majority of my kegs with one before I splurged and bought the nicer MAPP/Pro torch with the push button start.
 
+1

Stainless does not conduct heat all that well at all. Heat one end of a copper tube and the other end gets hot. But, heat a keg in one spot and the heat pretty much stays there.

I soldered locknuts on my keg with a propane torch and a low flame. I pretinned the locknuts.
 
krazydave said:
The pencil torch works. I did the majority of my kegs with one before I splurged and bought the nicer MAPP/Pro torch with the push button start.

Thanks. I was wondering. I have no less than 4 different torches for work and home. The push button is indispensable when you may end up using it all morning. It's good to know the pencil torch has enough grunt to get it done. They are a quite a bit more adjustable than the swirl tube style. They warn not to throttle those down because it will overheat the tube.
 
Back
Top