• Please visit and share your knowledge at our sister communities:
  • If you have not, please join our official Homebrewing Facebook Group!

    Homebrewing Facebook Group

Single Vessel, All Electric, NS, NC Brewery

Homebrew Talk

Help Support Homebrew Talk:

This site may earn a commission from merchant affiliate links, including eBay, Amazon, and others.
Huh, sub-5 gallons?!! Blasphemy!!!

It would be cool to be able to do 4 gallon batches all the way up to 12.

I have also been toying with the idea of making THIS rig for 5-10 gallon batches and run it off of 220v, then making an ultraportable single vessel unit that will do 2.5-4 gal batches on any 110v outlet. :rockin:
 
My first brewday was a 10 gallon batch, I usually 11 or 12 depending on whether it's a hop-heavy beer or not. The 5's are for things that I'm experimenting with.

So you calling the smaller one the "Itty-Bitty-Brewery"?
 
For names I was thinking:

Unibrew 110 & 220
Unibrew 1000 & 2000
Porta-Pot (For the miniature)
Scuba One & Two
ScubaSystems Mini & Macro
Scuba Silver, Gold Editions

etc., etc......but I gotta build it before I can name it :D
 
So many ideas, but so little time and money to bring them in to the world! At least in my case...
 
So, I tried to use a dremel tool cut off the rim of the basket so it would fit down into the kettle....but it took FOREVER. So, I slipped a hacksaw blade into the hole I had made, and went to town. It was exhausting, my shoulder is killing me and my goggles literally had sweat sloshing around in them.....but you can see the finished product. Not too bad if I say so myself!

P1020090.jpg


P1020091.jpg


P1020093.jpg


P1020094.jpg


P1020098.jpg
 
Hacksaw Steve's WonderBrau

Looks pretty good, I wouldn't have had the patience to do it either way you tried.
 
Is that a basket in a kettle in a kettle? If I am seeing this correctly, and this is how you plan to run this system, then I am very confused, lol.
 
It's just THAT shiny!

Are there other baskets available that you coulda bought, that are deeper and could have left the lip on?
Weren't you doing this electric, and recirculating, like that German dealy. Just WAY cheaper. (I mean cost, not quality) ;)
So having the basket suspended by the lip would be good, leaving space for the element at the bottom.
 
I still plan to go electric and recirculate, including a rims for hot strike and sparge water. I already had the Italian kettle so I couldn't justify buying a megapot or blichmann...i like that it doesn't have handles, it's more of a tank and less of a pot...

The basket was as wide and large as I could get for this kettle. I think I could have bought the 82 qt basket and fit it in the 80 qt megapot, with only 4 inches of height difference...but it would have cost $250 more.

So I admit, I didn't read the whole thing.

Can you tell me what your final plan is on the basket? Your gonna line it right?
 
C'mon man, it's only 5 pages :) I plan on lining it with 30 x 30 316 mesh...but I have no experience soldering or brazing screen like materials...i think it may wick away too much filler metal but we'll see. I was going to use a winch to lift with, but I think i'm going with small pegs on the outside of the basket like the Spiedel's Braumeister.....
 
Is that a basket in a kettle in a kettle? If I am seeing this correctly, and this is how you plan to run this system, then I am very confused, lol.

Nope, just reflection. BUT, I had considered doing that, placing insulation between the 2 kettles. I'm not a fan of reflectix on the outside of vessels....I think stainless looks so much better. In my case, I think I'll put reflectix on the outside then use vertical wood slats all around the perimeter, like a barrel. I think it'll look pretty classy.
 
C'mon man, it's only 5 pages :) I plan on lining it with 30 x 30 316 mesh...but I have no experience soldering or brazing screen like materials...i think it may wick away too much filler metal but we'll see. I was going to use a winch to lift with, but I think i'm going with small pegs on the outside of the basket like the Spiedel's Braumeister.....


The good thing about soldering is it wont go anywhere there isn't flux. The bad thing about that in this case is your dealing with SS. If it doesn't have flux on it for protection, its gonna be bad on the mesh. I am sure you know this I am just thinking out loud.

It might be a lot of work but, have you thought about making a separate basket out of the mesh that just fits inside of the big heavier basket. You would have a 2 piece basket, but you could solder the seam and it wouldn't matter as much as too what the solder did.

I don't really know. As you mentioned before, there are a hundred different ways to build this. I will be waiting to see what you do and how it turns out. Stay greasy.:mug:
 
That thought did cross my mind...I figure it'd be easier to construct it outside of the basket, then slide it in and secure it. I'd like to braze it for better durability, as this would be the most roughly used component...but I figure soldering would be better because I could keep the temp lower and not damage the stainless steel. For the low mass of wire mesh, I bet I'd have to move FAST or it'd be glowing bright yellow.....which is way too hot.

I dunno. :confused:


Its gonna be tricky.
 
Aside from aesthetics, why can't you wrap the mesh around the inside of the basket; screw it down in a few spots with stainless hardware, either through the existing holes or make new ones and cut a round piece on the bottom?

Sew it together with stainless wire?
 
This build is all about aesthetics...I won't be able to sleep at night if I don't have something I can be proud of. I'm pretty close to saying screw it and using a nice tight bead of JB Weld where I need it...it'll be less permanent than drilling holes or soldering/brazing/welding the screen in.

As for the fittings in the bottom and side, I'll probably braze because I like the strength and appearance of silver solder.

Speaking of aesthetics, what do you guys think I can get away with in terms of square tubing size? I'd like 1.5" square SS tubing for that sturdy industrial look, but I don't need that kinda strength for a single 15 gallon kettle and it's really expensive. I've seen 1/2" SS bar for a pretty affordable price, and then there's mild steel tubing and angle which I would have to paint......
 
Well, it's all about aesthetics. It therefore MUST be stainless and diamond plate. :D
Guy on HBA welded his out of 1" SS tube and said it's still plenty beefy.
Me, I've got two chrome nsf kitchen carts on wheels.

How about two pieces of flat stock stainless, and you sandwich the ends of the mesh in there and you can fasten that all together with stainless, or weld it. (braze?)
You can probably bend a circle out of the flat stock too, to hold the bottom in place, but now you're making a basket within a basket.
 
I still plan to go electric and recirculate, including a rims for hot strike and sparge water.

FWIW, in my single vessel, no-sparge setup, I don't use my RIMS anymore. The element in the kettle works just fine. I was worried about scorching the mash, but if it doesn't scorch the wort when boiling, then it should be fine, right? I've done 2 batches this way: really dark stout and really light wheat and both came out fine.
 
IIRC, you're using a 15g vessel/basket, right? Any regrets? I think I remember you saying you wish you went up 80qts for the 10 gallon no sparge batches. I still want to be able to do on demand sparge water. I guess I could do what your saying, then sparge with water off the stove and see how I like it. I can add the RIMS later if I want....

But an all triclover RIMS would be sweeeeeeet.......:mug:
 
Well, it's all about aesthetics. It therefore MUST be stainless and diamond plate. :D
Guy on HBA welded his out of 1" SS tube and said it's still plenty beefy.
Me, I've got two chrome nsf kitchen carts on wheels.

I hear ya :p

I actually have some aluminum diamond plate I'm going to throw on top....
 
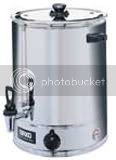
Steve. Hi Michael from Queensland Australia, I'm a BIAB brewer using an electric 40 Liter electric urn and have great results doing 23 Liter batches - I guess 5 or 6 US Gallons? I'm going to do (within the next 4 weeks - currently moving house or I'd be on to it right now) - a smaller version of what you propose. I'd been planning it for about a month now and was delighted to come across your thread. Great parallel thought streams trans Pacific haha.

My system will have:
PHOTO1URN.jpg

The hot water urn which is 2400 watts
An inner 'pot' but solid sided with a false bottom
Lifting gear - just a double pulley attached to skyhook.

The current urn tap will be replaced with a three way ball valve which will direct wort either to a march pump positioned alongside the urn, or to a silicone tube into a plastic 'cube' for collecting the wort to cool to ferm temp.

From the march pump will run a silicone hose to run to the top of the urn / inner pot. It will just be hand held at this stage.


Method:
Do a normal full-liquor volume BIAB mash in exactly the same way as using a fabric bag.
At the end of the mash, start to hoist the inner pot
Turn on the March Pump and play the recirculating wort onto the top of the goods in the pot
Keep going till a grain bed forms and wort starts to run clear.

Now as you will realise the urn has a bottom element in the 'void' beneath the pot, which will now be switched on. As the wort recirculates over the element and continues to be played onto the surface of the goods, the temp of the goods will be raised to mashout.

PHOTO3EXPOSEDELEMENT.jpg


At that point the March Pump is turned off and a manual sparge with some pre prepared liquor is undetaken to sparge out as much sugars as possible, to raise the level of wort in the urn to correct preboil volume.

Remove the pot, boil as normal, whirlpool and direct the wort through the other side of the 3 way ball valve into the cube (or chiller if I ever get one :))


Notes:
I'm not going for pretty just yet. There is no real need for the inner pot to be SS and I'm just going to use food grade plastic bucket with a 'rosette' shape carved out of the bottom and a false bottom laid on top. The pot only needs to withstand mashout temperature at most, and many UK brewers not only mash but boil in food grade plastic buckets such as their bruheat electric masher / boiler.

The reason for the solid sides on the pot is that I want to get a grain filter bed happening. One of the criticisms of Brew in a Bag BIAB is the question of wort clarity going into the kettle, which it is claimed can introduce a lot of unseen polyphenols etc into the beer leading to unclean flavours and excessive chill haze. I looked at the crab cooker idea as well but a commercial brewer from Fosters critiqued the system and said that the fully - perforated inner vessel of the crab cooker would probably lead to wort finding a path of least resistance through the sides of the basket and would not lead to effective grain bed formation or sparging.

Anyway still early days and I'll post pics as I go.

Edit: the Fosters guy meant 'a fair bit of the wort' and not 'all of the wort' of course. He's actually one of the guys who wrote the BIAB article in the US BYO magazine last year, he got his ugly plastered over the page ;-) and he's a great source of all things BIAB.

Cheers
Michael
 
Wow, that's pretty cool. I've spent a little time over at AussieHomeBrewer.com, and saw that those urns are pretty popular.

If you look closely at the Spiedel's Braumeister: http://www.speidels-braumeister.de/index.php/language/en/XTCsid/pgm4hl7h5ao90719bimj6a3is2 you can see that it uses a similar heating element. I really dig how it sits under the basket, it's so much more stable than the straight elements we use. For the life of me, I couldn't find one that was affordable or powerful enough.

So could you boil in an urn like that? I'd really be interested in one of those for counter top small batches.....
 
One of the criticisms of Brew in a Bag BIAB is the question of wort clarity going into the kettle, which it is claimed can introduce a lot of unseen polyphenols etc into the beer leading to unclean flavours and excessive chill haze.

This is what people say when they have all sorts of extra equipment they need to justify having (you know, the "it won't work" crowd)....there is little to no evidence that clarity is an issue, especially after recircing, using whirlfloc, and cold crashing.:mug:
 
BribieG raises a good point. One I haven't asked yet.

Your plan is to recirculate right? The wort is going to take the path of least resistance and is not going to flow down through the grain bed like you want/need it too. A straight sided vessel is the best option, using the kettle kinda as a grant.
 
There were a few folks who theorized this a bit earlier in the thread...I think we chalked it up to just giving it a whirl and seeing what happens.

It's all just theory at this point....I kinda think the screen is going to provide enough resistance along with the grain that it will need to be recirced at a slow rate, or it will just spill over the top. Yes, I think the holes at the top of the basket will have a higher flow rate than the ones on the bottom, but not so much that the grain at the bottom isn't getting rinsed. Make sense?

I also have a 15" diameter perforated SS disc that should fit right in the bottom of the basket if I'm wrong. The 30x30 mesh will provide more resistance on the sides than the FB material, so the wort should flow top to bottom with some lateral flow. Also when I boil I should still have max contact with the hops because the screen would still allow circulation.

Just a theory at this point, though. :D

Hey man I am all for it.

Sooooo, when can I expect a running setup???????

Ha, Ha, just joking. :mug:
 
So, here's the newest addition to the build...yes, I realize it's not actual progress, but it is a frickin' sweet part:

450802.jpg


It's a sight gauge that has a magnetic readout....you're not actually seeing the liquid, it's more of an analog display. There's a floating magnetic ball inside that flips small flags over as the liquid level rises or falls. Here's the writeup: http://www.gemssensors.com/content.aspx?id=2146

These things are REALLY expensive, like >$1000.....I got one for $40.....couldn't resist it.
 
These things are REALLY expensive, like >$1000.....I got one for $40.....couldn't resist it.

Looked like a column for a still to me. Then I thought it was your rims tube. So how does one go about getting a $960 discount on such an item?
 
Back
Top