CreeDakota
Member
Levels or mold and bacteria counts are typically 100-1000 higher concentration INSIDE than inside your home. I have the my wort open to the breeze during my cooling step and have had no problems.

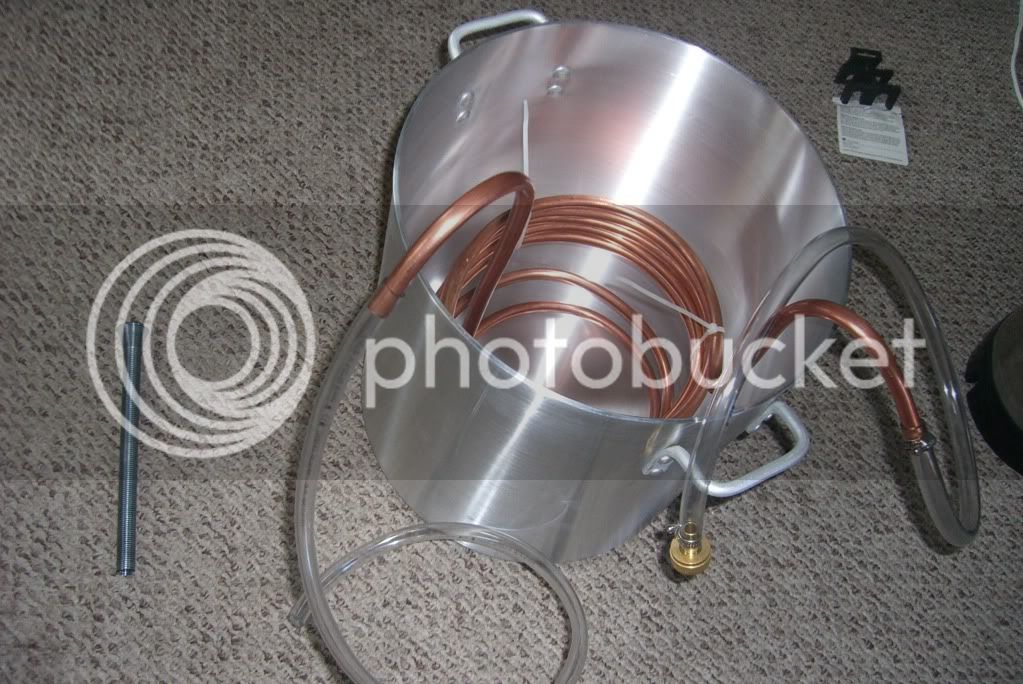
I've been researching making one also but was planning on using 25' of 1/2" copper. Is this too short? Will it still have high enough efficiency?
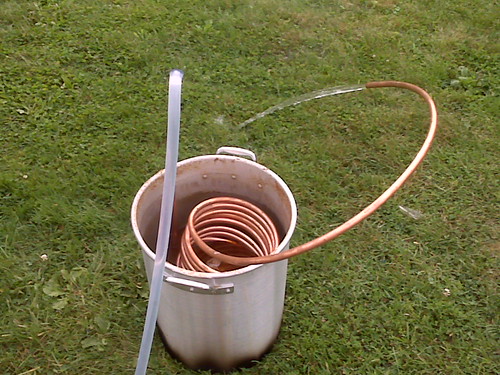
i made mine out of 20' of 3/8'' copper and it cools just fine
anyhoo anymore opinions on using zip ties to hold it together? i hope im not sabotaging my own brew


![Craft A Brew - Safale S-04 Dry Yeast - Fermentis - English Ale Dry Yeast - For English and American Ales and Hard Apple Ciders - Ingredients for Home Brewing - Beer Making Supplies - [1 Pack]](https://m.media-amazon.com/images/I/41fVGNh6JfL._SL500_.jpg)


")
I'm going to look into swapping the input and output, since I think I have the cold water going into the bottom of the IC, where it isn't as efficient because it essentially gets preheated before it starts working through the coil...
Thanks a lot for posting this, it was really quite helpful as I now have a (25' mind, being slightly less prolifigate) wonderful immersion wort chiller to use.
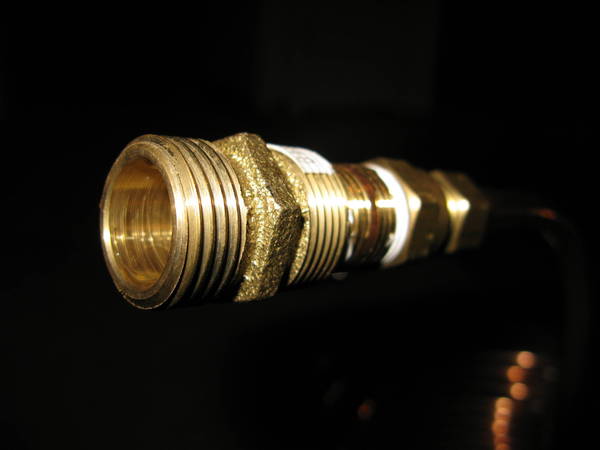
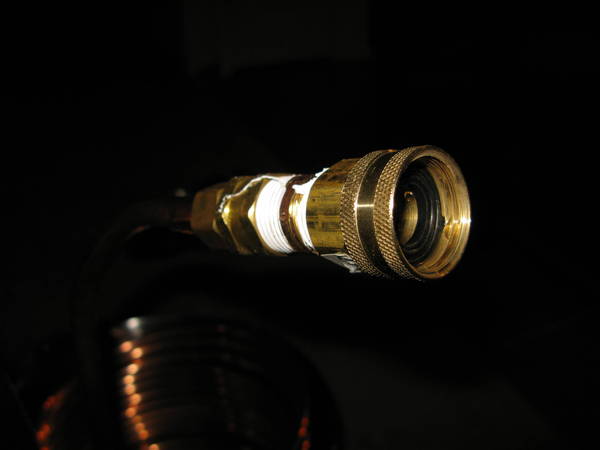
But as a slight modification to the OP, this might be self-evident, but you need two (2) Watts A-668 (1/4" to 3/4") Hose Adapters. The OP doesn't mention quantity, and it looks like only one is required. Although, I suppose that you don't really need a washing machine hose for the outflow--any plastic tubing will do, right?
Well, I got the hoses anyway, for symmetry and wear. It looks great: simple, elegant and effective. Thanks again for the post!

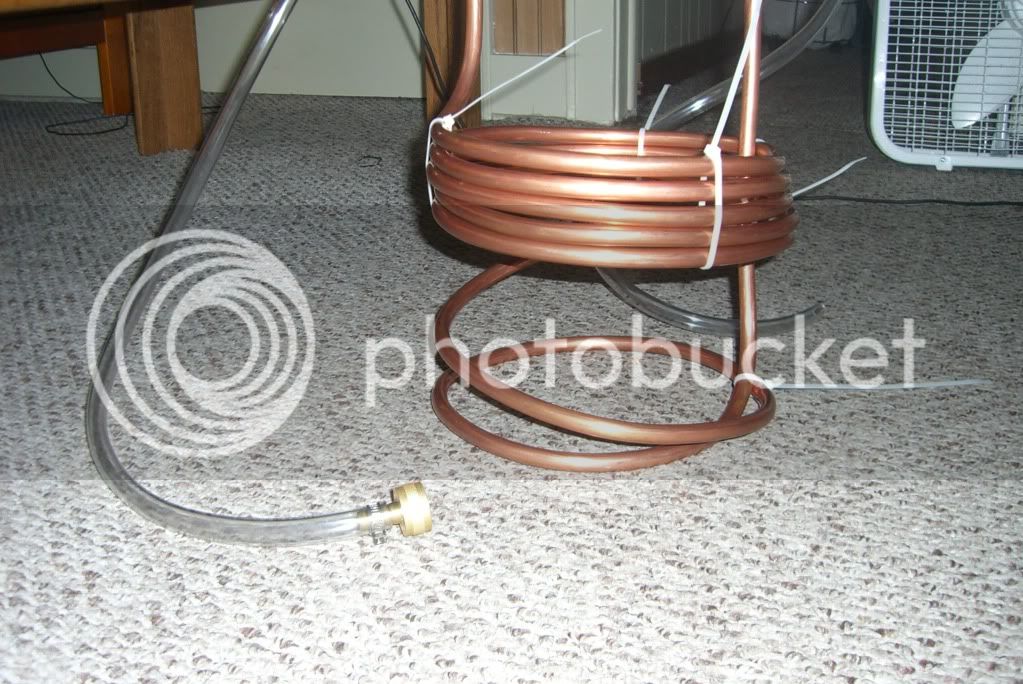
nice looking chiller tidehouse, one suggestion - throw a hose clamp on the outbound side of your chiller -- I made the mistake of not doing that and got blasted with hot water when the tubing popped off during chilling...
Nice Job!!! :rockin:
nice looking chiller tidehouse, one suggestion - throw a hose clamp on the outbound side of your chiller -- I made the mistake of not doing that and got blasted with hot water when the tubing popped off during chilling...
I need some advice what size (length of copper) I should make that can handle 5 gallon all grain batches. I'm currently doing 3 gallon partial boils. My tap water runs pretty hot -- probably around 80F. I'm planning on first running tap water through, then using an aquarium pump to cycle ice water.
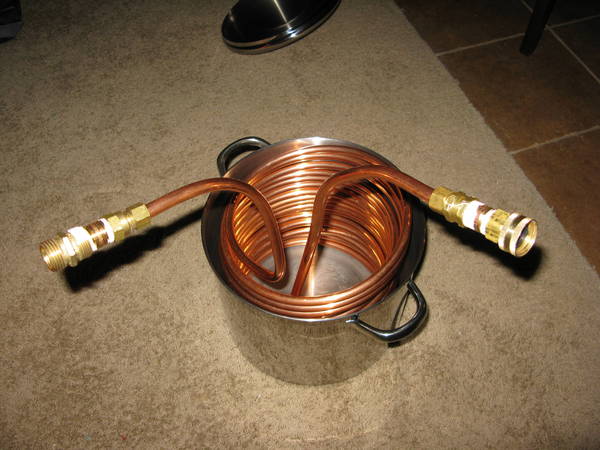
OK--hoping someone can help out with a bit of a problem. I purchased the parts for the chiller, bent my copper (20', I only brew 3 gal. batches at a time) into a fancy looking coil and all, but couldn't figure out the attachments? I thought it'd be pretty self explanatory but I tried every which way but couldn't come up with a connection from the copper to the connectors.
Because I couldn't figure it out I took some extra vinyl tube and rigged up a chiller with the vinyl tubing over the copper coil. But when I hooked up the chiller to the faucet, I couldn't turn the faucet on past half power or it would blow the vinyl off the copper tube (Yea, I think I went through two rolls of paper towels tonight). After 1 hour, the wort was finally down to 80 degrees. After another 30 minutes it'd only dropped to 75, so I threw the wort into the fermenter and angrily pitched.
Any suggestions???

Ok...but one of my problems is that I built it and it simply leaks terribly--water spraying everywhere. I tried to tape the leaky spots but it doesn't really work and i don't want water dripping into the wort. The compression fittings are as tight as they go and I can just pull them right off the ends of the copper? Any ideas?