• Please visit and share your knowledge at our sister communities:
  • If you have not, please join our official Homebrewing Facebook Group!

    Homebrewing Facebook Group

Scuba's Rig Build 2: Judgment Day

Homebrew Talk

Help Support Homebrew Talk:

This site may earn a commission from merchant affiliate links, including eBay, Amazon, and others.
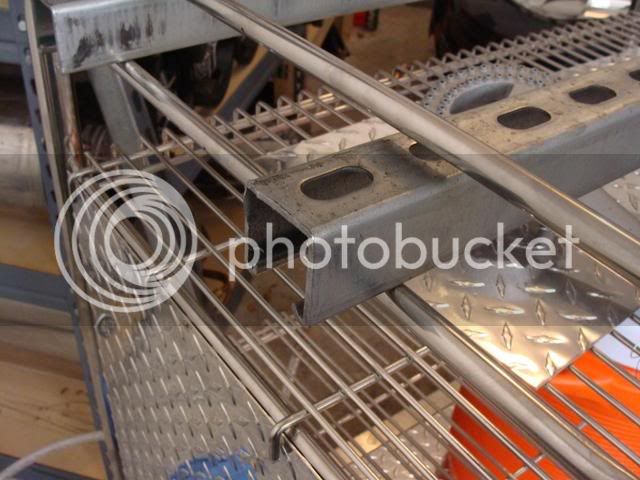
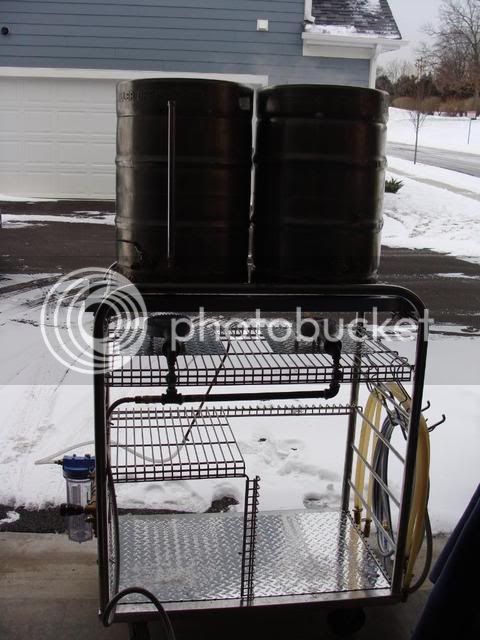
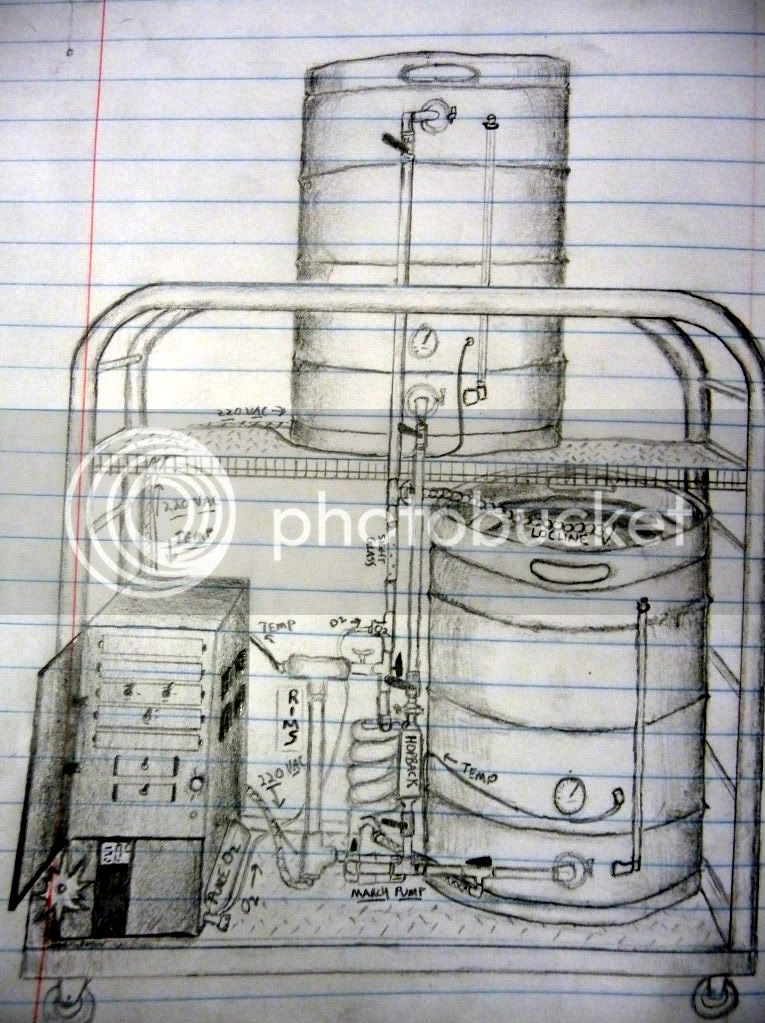
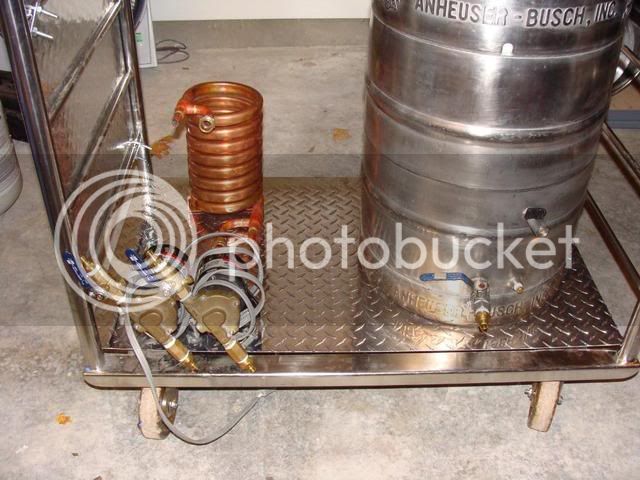
On the outside of this panel, I fastened my plumbing:

DSC02552.jpg


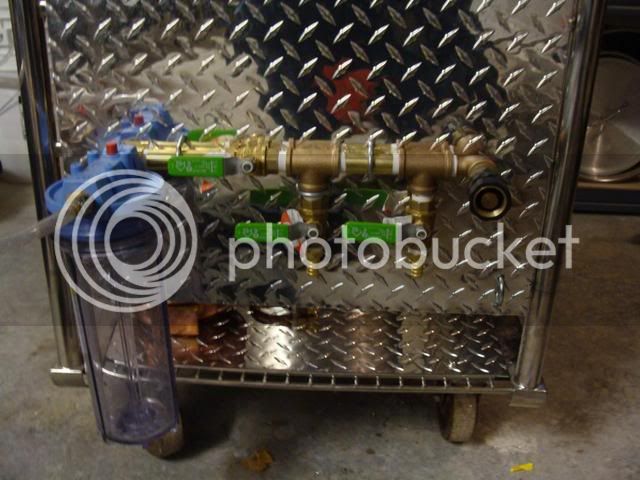
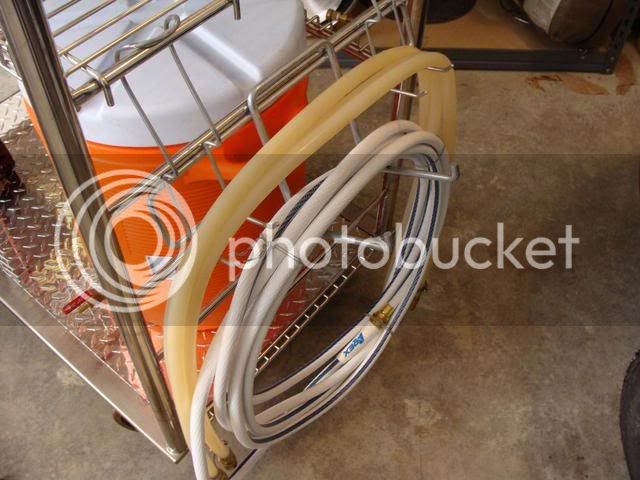
I chose to make it low so I could put my electronics high and avoid any dripping. I plan to run braided hoses from the barb fittings to my chiller, as well as a multi-purpose hose for quickly connecting to and blowing out clogs/flushing/cleaning the chiller, BK, and HLT.

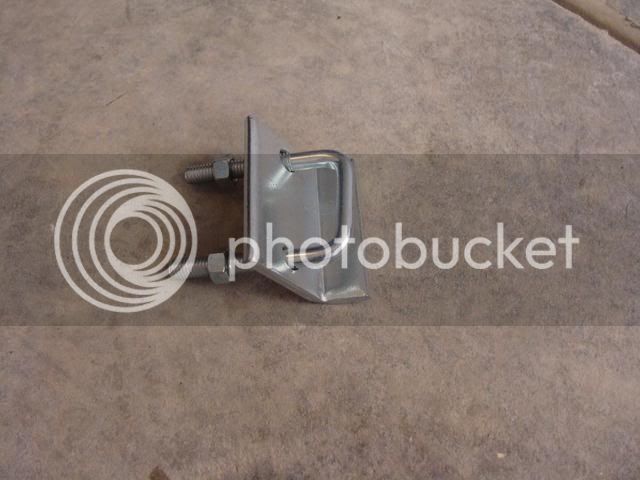
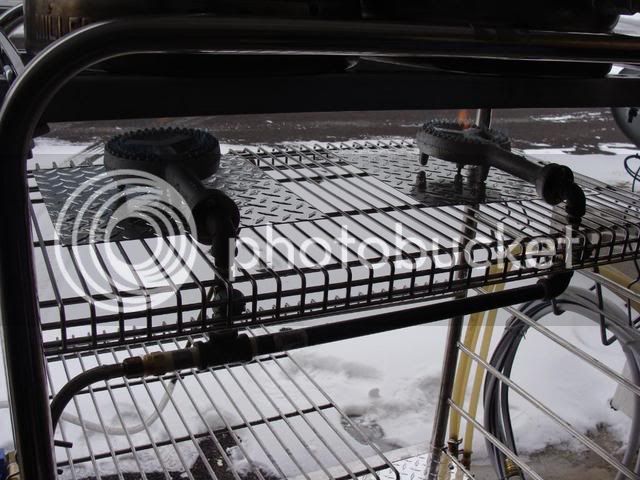
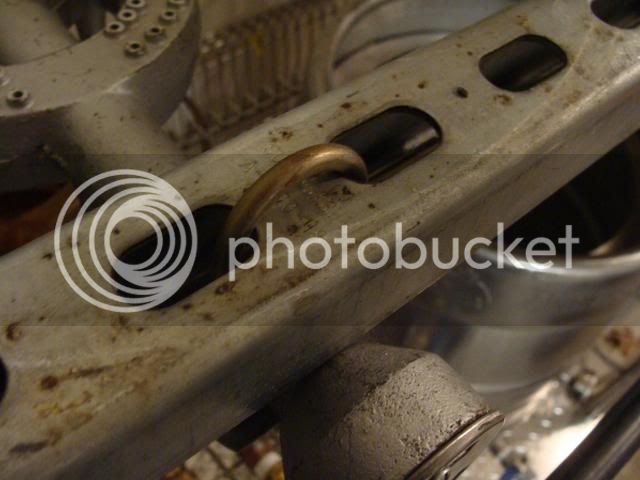
Here's the quick connect I set up for my hose:

DSC02554.jpg


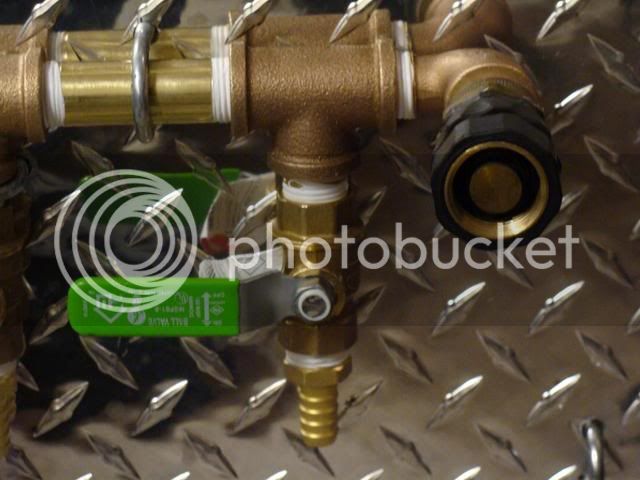
I plan to tweak this idea, because in actual practice the QD leaks like hell. Maybe I just need to buy a different model.

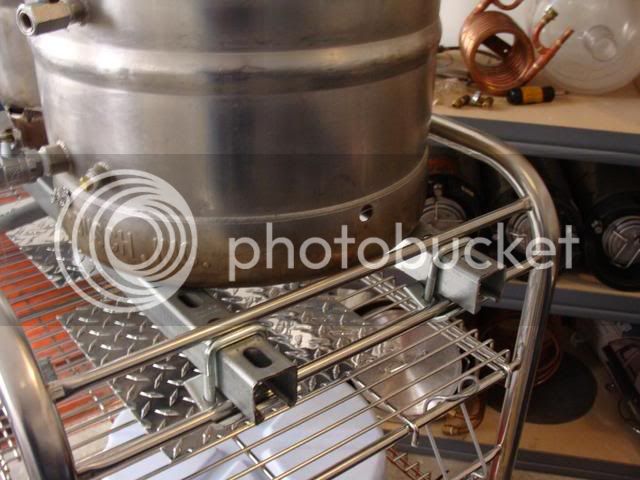
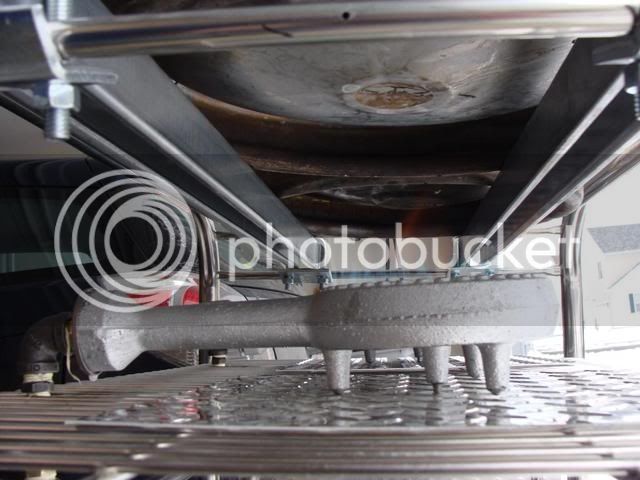
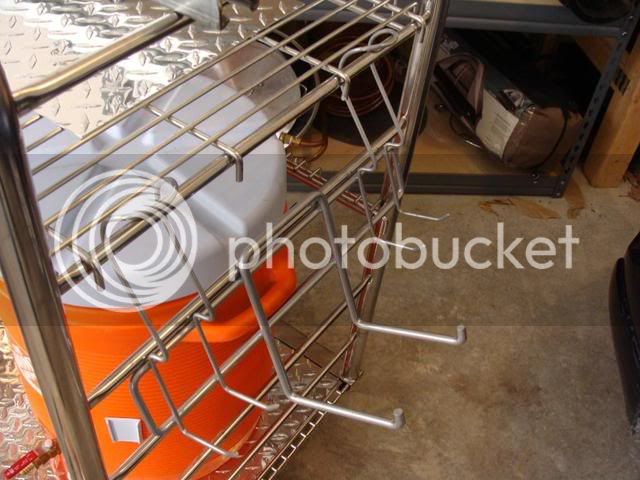
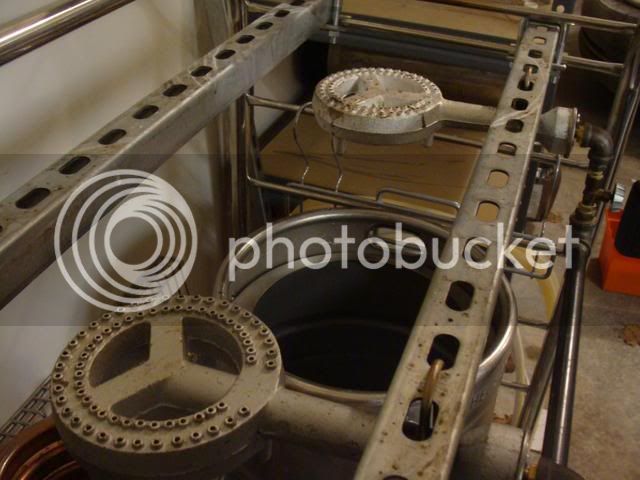
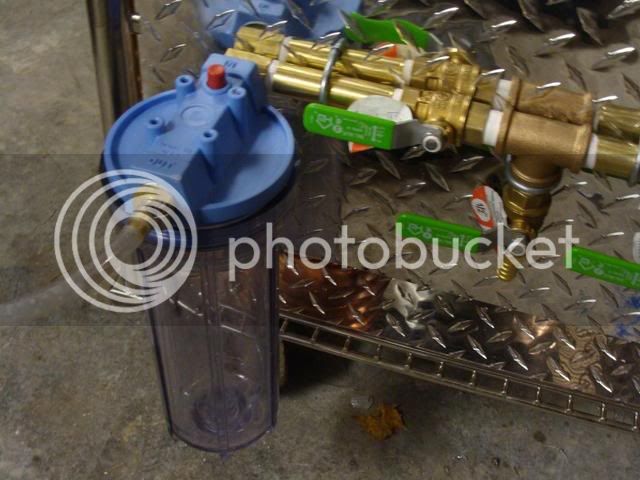
Here's a close up of the filter canister. I filter my water with a coarse filter, and use a shepherds hook to fill the HLT. I might consider hard plumbing this in the future:

DSC02555.jpg
 
I worked out all kinds of configurations for my chiller, pumps, etc....I settled on something like this:

DSC02543.jpg


My MLT is on the right. The HLT will be on the upper tier to the left, and the BK will be on the right. I can use gravity, 1 pump, 2 pumps, or all three in unison if necessary. The profile is quite small compared to the standard 1-tier and 3-tier designs...I think it combines the best of both styles.

I've found gravity to be especially useful in priming the pumps...as well as adding sparge water. I really don't need 2 pumps, but I believe in redundancy and awesomeness equally. :D
 
I think at this point in the build, I need to talk about the SS wire shelving and how it holds up to heat. I fastened my burners, placed the kegs in their normal positions, and fired up the burners just to see what might happen.

I'm SO glad I did.....and I'm SO glad for the constructive criticism of this forum :mug:

About 30 secs into the burn the wire shelving turned cherry red and turned into SPAGHETTI! I'm sorry I don't have pics, but at the time I was more worried about the red hot molten metal falling onto the burner. It really was a sight to behold, and I'm so glad I checked this before game day.

WORD TO THE WISE: CHECK AND RECHECK YOUR HANDIWORK BEFORE YOU USE IT! BREW DAY IS TOO LATE!

:mug:
 
So after the colossal failure of the wire shelving, I had to figure out how to support the full kegs under heat. This is one of the most important things in the build...this could result in disaster if done incorrectly.

I chose some beefy uni-strut....HD was actually helpful for once and actually cut it for me!

DSC02561.jpg


I secured it with the fancy uni-strut hardware...which was eerily perfect for my application:

DSC02562.jpg


Here's how it all fits together:

DSC02563.jpg


And here's the undercarriage:

DSC02570.jpg
 
So, in my best attempt to use the materials at hand, I used the warped and destroyed shelving to my advantage. I made a mid level shelf with a support beam by cutting and bending the original material.

DSC02571.jpg


Whatever metal that stuff was, it was putty compared to the angle grinder :D It's definitely different from the actual support tubing, which required special bits, cutting oil, and elbow grease to drill. The new shelf still allows room for the MLT....I made sure it could fit either the keg or cooler.
 
And here's a closer look at the propane manifold. It's hard to see with all the blinding snow, it's a basic manifold with some needle valves I had in my stock.

DSC02566.jpg


This is KEY. You NEED needle valves....gas rated ball valves are great for emergency shutoff, but they don't provide fine control nor are they designed to be left half open.
 
So then I found this cool-guy rack to hang my hoses from:

DSC02557.jpg


I bent it to hook on nicely:

DSC02558.jpg


And here it is in use:

DSC02559.jpg
 
I never really saw any stamping, etc. on it....I can tell you it's a heavy duty industrial cart.....just not intended to be heated, obviously. I know the tubing is a different metal than the shelving.

I really like the unistrut and would recommend using it on top of a cart like you linked to...it's got great weight bearing properties and doesn't flinch at direct flame. If I could do it over, I'd use it in my wood rig. It was about $20 for 10ft of it. I only needed 6' or so. The hardware is solid, and the thing I really like is that it has holes for mounting things, etc. You'll see soon how I remounted the burners, and I'm really happy with it. U-Bolts are AWESOME!! This install was WAY easier than my last rig. People have mentioned that unitstrut is expensive and it is, but not for a small section for just the top of your rig. I would burn it the first few times in open air though, as it's galvanized and creates fumes. Take care to keep it dry and clean, and rusting won't be a problem.
 
So, after having the burners sit on the platform, I realized they were probably not close enough and I was wasting a lot of heat, so I used U-bolts to mount them to the unistrut:

DSC02970.jpg


The underside:

DSC02972.jpg


And both:

DSC02971.jpg


I really like this design. The SQ14 is just the right weight to make this possible....I imagine I could do the same with banjo burners, but the SQ14 is plenty powerful.
 
Here's a video of the burners going full blast. Note that I have very fine control of the burners with the needle valves (ball valves are trickier). I played a bit with the air intakes so you could see the difference in the flame:

[ame=http://www.youtube.com/watch?v=K-ERx5WZNMM]YouTube - MOV02692 mpeg4[/ame]

:ban::ban::ban:
 
On reply #37 a picture showing the keg on the unistrut I would suggest you add four 3/8"x16 NC bolts 1 1/2" long with washers and nut. Bolt this thru the stut from the bottom with the threads sticking up as studs to center the keg on the strut. Adding more material would be to use 90 degree strut "L" brackets to lock the keg in position. Those are beam clamps you mounted the strut to the wire with, they are intended to secure strut to steel beams for conduit supports for pipe rack runs.
On your first heating thru the stainless mesh you found first hand that stainless has a high expansion rate which you noticed before it began to turn dark red. I was thinking a flame ring around the burners to hold the heat in for more BTU's to the keg bottoms vs heating the area around the burners should help and make the bottles last longer lowering the gas flow. This is where I stop as I switched from burmers years ago to 100% electric heating.
 
Wow! Thanks! I wanted to build mine out of wood by why bother? Very clever and elegant use of found materials. Minimal fabrication. I have to rethink my own approach. Its gotta have wheels...
 
Wood is still a good option....I wouldn't completely rule it out. The thing I like about this rig is that it's half as wide and not so tall I need a ladder. I've basically got it all right where I need it, and can still use gravity for most operations (I hate the march pump).

If you get a cart of some kind, I'd give serious thought to the weight of the full vessels under heat. That will seriously affect the rating of the shelf. I've seen some folks who have taken a large ceramic tile (12x12 or bigger), set the burner on that, and then put the vessel on top. While this adds height, it definitely takes heat out of the equation, and the burners can be easily serviced.
 
That was an interesting question a couple of posts ago, and one I'm concerned about, as I'm about to build a version of this shortly.

Has anyone built one of these with the plastic shelf holders? I am concerned about the heat with them also.

My idea was just to build the shelves you can get at HD, and put Banjo Burners on them. This should correct any problems with the wire shelving. But those plastic shelf holders are a little scary as far as heat goes.
 
I wouldn't even think about trying plastic. You'll be fine if you get a "heavy duty" style shelf with thick gauge metal. It'll be rated for a 1,000 pounds or more, and that's what you'll want to buy. If you place ceramic tile or even durarock on the shelving, you can just place your burners right on the shelf. That'll be enough to protect the shelving, and should hold up to the weight of the vessel. It will raise the height of the vessel, but I guess some things are a compromise.
 
So, in my best attempt to use the materials at hand, I used the warped and destroyed shelving to my advantage. I made a mid level shelf with a support beam by cutting and bending the original material.

DSC02571.jpg


Whatever metal that stuff was, it was putty compared to the angle grinder :D It's definitely different from the actual support tubing, which required special bits, cutting oil, and elbow grease to drill. The new shelf still allows room for the MLT....I made sure it could fit either the keg or cooler.
This is genius... I can picture the MLT lurking beneath the keggle as I type, and things are going through my head. Gravity takes the water from the HLT to the MLT, a pump brings it back up, and gravity can take it back out of the boil kettle.

I'm sure that the cost of fabricating this would be relatively cheap (with access to a welder) to negate my nervousness about doing it on a cart that could erupt at any time! I see guys on Craigslist who will weld for $30 an hour with their own gear.... I figure two hours would be enough time for someone to put the frame of something like this together.... hmmm!
 
Well, this cart is pretty beefy...but you could probably weld something very compact, with some custom stuff that would allow you to better manage space.....I'm a big fan of the HLT/BK on top, with the MLT on bottom. It worked quite well!
 
Stand by to stand by, folks, I've got some HUGE changes I'm making to this rig. I won't spoil it all for you, but it includes 220v elements, a web-enabled controller, sanitary fittings, and a RIMS element for on-demand hot water. Stay tuned!
 
So, I've been doing a lot of planning around upgrading this rig, and I had to get my thoughts down on paper. Google Sketchup has been pissing me off; I'll get the hang of it, but I figured I'd just do it the old fashioned way. So here's a "concept" photo:

P1010312.jpg


I'm still trying to figure out how I'm going to fit the RIMS element in, for now, I have it in an upright position to save space. I'd prefer to have it horizontal with the output going up, but I won't be able to tell until I've got all the parts in front of me. I'm also considering a peristaltic pump to eliminate priming/head pressure issues.

:mug:
 
why the sudden switch to electric? it seems you were about done with all your gas setup. now you've got to re-design the rig?
 
I like the use of the loc-line on the MLT--there are some nice spray type heads for loc-line that would give you a nice spray with out having to make a manifold for sparging.


t
 
why the sudden switch to electric? it seems you were about done with all your gas setup. now you've got to re-design the rig?

There's quite a few things more that I did to the rig......including a 1500w bucket heater on a timer in the HLT.....I have dual pumps on switches, etc. I had been using the propane version for about a year and got sick of being in the merciless Chicago cold...not to mention always worrying about running out of fuel. The propane manifold is bolted on, and I will simply remove it. I may be able to construct something mobile using those parts, if I ever want to go on the road.

Unfortunately I'm not where I can get pics of the "current state" of the rig. When I return from Afghanistan, I will document what has been done, and what I plan to do.
 
Thats the same question I was going to ask...

I know it looks tight, and it is. I'm able to slide a 21" spoon in there and stir things. I can also pull the MLT a bit forward and it's fine. This problem will go away in BrewCart 3.0!
 

Latest posts

Back
Top