• Please visit and share your knowledge at our sister communities:
  • If you have not, please join our official Homebrewing Facebook Group!

    Homebrewing Facebook Group

Rebuilding My Brutus Hybrid Into a Kal Clone

Homebrew Talk

Help Support Homebrew Talk:

This site may earn a commission from merchant affiliate links, including eBay, Amazon, and others.
Did you use a specific technique to clean up the keggles? By hand or with some tools?

I'm looking to do something similar, but unfortunately haven't figured out a decent way to do this? Any suggestions?

Hi vanvlack, I started with new Sabco kegs so they were already in excellent new condition almost five years ago, when I first got them. After awhile they did get a little dinged and scratched and kinda dingy looking. So I used the same technique that I used when I was making my brew stand shine. I actually used sand paper blocks and some sheet sand paper on them. Since they were not very badly scratched or gouged, I used a fine grit on them. I used 320 grit and then went up from there. I ended up using 600 grit on the stand to make the dull stainless steel shine. On the kegs I used 320. The trick is I used a spray bottle of water as I was sanding by hand and wet the area and used the sand paper wet.

You might want to try an area in the back of the keg low on the skirt area first. Just do a small area and sand the heck out of it in the same direction. I went horizontally when I sanded the kegs. Do a small section and see how it cleans it up and you will get a shine. If you keep going to a higher grit you will get the mirror finish eventually, but I only cleaned them up a little and kept it a matte finish. You will see very quickly the results and you can then gauge how much more shine you want and then you can go to a higher grit or leave it the way you like it. Once you decide the level of shine you require on the small area you can then decide if you want to do that to the entire keg. It does take some time though and you will go through a lot of sand paper or sanding sponge blocks. Use gloves on your hands as it will get a black grime all over and its very hard to get off your hands.

After that the Bar Keepers Friend will clean up the black sanding grime and residue and it really made the kegs look fantastic. The other thing that really keeps them clean and fingerprint free is a product called "Weimann" stainless steel cleaner & polish. It comes in a spray bottle and you get it a Home Depot. My wife uses it to clean all of her stainless steel kitchen appliances. The trick with this polish is you have to use a micro fiber cloth (also bought at Home Depot) and this stuff works like a dream. Hope this helps...

John
 
Vanvlack you could also follow Bobby_M and his awesome method here in this video. There is also a thread on here about it as well. Here is the vid.
[ame]https://www.youtube.com/watch?v=9Ln-plGzVc4[/ame]
 
Man your system is awesome! I've already showed the wife. I can't wait until we get our own place, and build something like this.
 
Man your system is awesome! I've already showed the wife. I can't wait until we get our own place, and build something like this.

Thanks, I really love this rig. The brew days are fun, easy, and my beers are fantastic. Good luck when you build yours. It's worth it I promise!

John
 
Awesome thread... tons of hard work and research and it looks like it's really paid off. Nice job!
 
Seriously gorgeous setup. Your hard work and craftsmanship is apparent! Very nice.

Thanks HettyBrooster! My three sons are coming over on Sunday for a brew day! Gonna brew an "American Honey Brown Ale" at around 7%, using several pounds of Florida orange blossom honey, at the end of the boil. Should be a great Memorial Day weekend! :D

John
 
John... Have you kept track of the expenses for this setup? If so, what kind of investment have you made to get where you are?

I get its been 5+ years in the making and like you said a while back, this hobby can get crazy when you think about the money... That's why you shouldn't... But I'm curious!

Ok if your asking them I'm telling.... Keep in mind that even though I didn't finish wiring my original control box, I still had about $1,200.00 into just that box. I even had it powder coated. The Sabco kegs custom made the way I wanted them with the larger tri clover end caps were not cheap either. Nothing in this build was cheap come to think of it. The tri clover stuff really adds up the most though. I have never added it all up (I do have a computer file with all the orders and receipts though), but I would have to say for every single thing start to finish it has to be 8 grand. Probably more like ten though if I sat down and added it all up. That does include my new 2 tap kegerator, new upright freezer, and conical fermentor. It's crazy I know, but it's my hobby right! :tank:

John

I kind of figured it would be up there! My setup is very piece-meal right now... I'm making investments in improving individual parts of it, which is kind of a short-sighted approach. I look at this thread and what you've built and love the vision and forethought put into what you wanted the end result to be.
 
I kind of figured it would be up there! My setup is very piece-meal right now... I'm making investments in improving individual parts of it, which is kind of a short-sighted approach. I look at this thread and what you've built and love the vision and forethought put into what you wanted the end result to be.

Thanks, you will get there. Nothing wrong with a little at a time. Nothing wrong with simple rigs or systems either. Heck I started on the stove with extract and evolved from there. Got pretty darn good at it too, those simpler systems taught me a lot. The cooler mash tun and propane burner for boiling makes great beer also, and I have seen some really skilled people make awesome beer with that type of system.

I had already been brewing since 2002. I knew I really loved the hobby and I had a passion for the whole brewing process. I just didn't brew like this. For me it was totally worth waiting a few years, then going for it and upgrading even though it took a long time. What I have now is an awesome system that is easy to use. I have great control where I need it the most, and it is very fun to use. The brew days are a total blast! To top it off my beers really taste fantastic and my friends, family and neighbors are always either coming over to have some of my home brew, or asking me what I am brewing next. I try to brew once a month and I'm brewing batch number 6 on my new rig tomorrow! Go for it brother, just expand here and there as your budget allows. Like the song goes, "Next thing you know Ole Jed's a millionaire!!" :mug:

John
 
I bet. Like I mentioned in my post in the other thread. I'm on my first electric batch and, wow. I'm impressed with its speed. For sure. It seems I get more steam in the garage but I think that might be because it's not anywhere near as hot. Maybe I should dedicate a spot to the system???
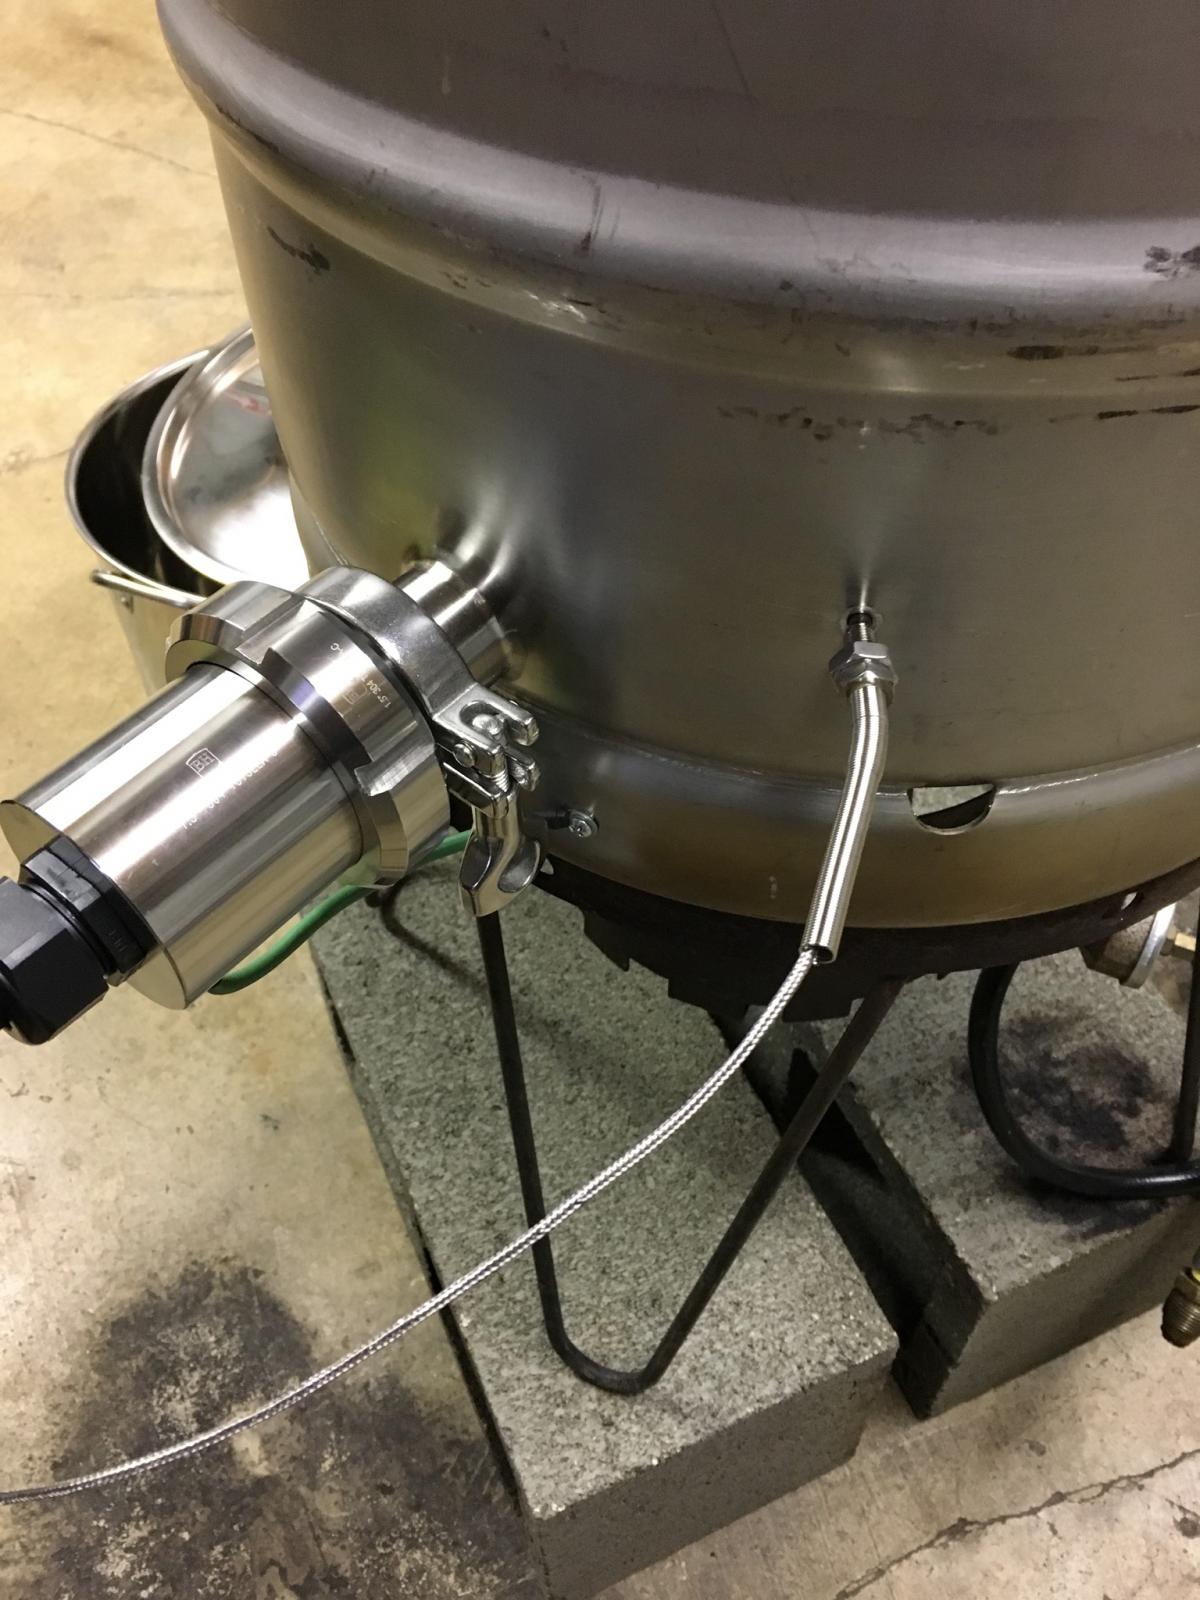
I've gotta get used to the kettle being tethered by the cord. Though the 1 1/2" tri clover fitting makes it easier to clean. I'm thinking about CIP. Maybe....

You should know, I'm gonna rip off your burner move. Being able to still use them for anything (crab boil, power outage, deep frying, etc) is genius.
 
I love the 1 1/2 inch tri clover fittings for the electric element. It's so easy to take out the element in the boil kettle after every brew and clean it, and no cord dragging behind the kettle. Easier to clean the element and kettle separately. With your mad welding skills you could weld a tri clover fitting up in no time! As far as the burner move go for it, I think it's great. Have everyone over for a huge crab boil and use those gas burners! I also thought the same thing about if the power ever went out for a long time like in a hurricane situation here in Florida. If that ever happened at least I could use the stand to cook on it and we could eat!

John
 
IMG_0837.jpg
I went with the housing from brewers hardware.
Yours is the one from still dragon right?
 
Last edited by a moderator:
I've been toying with the idea of a thread. Document my journey into electric brewing and the rebuild process.

I've got a lllllloooonnnnngggg way to go to catch up to you!!!
What's your favorite method of cleaning the elements? I was worried I'd get water where I don't want it. I also had some whiteish stuff on the element when I took it out of the kettle. Proteins maybe??
 
You should definitely make a thread. I use a sponge and you can spread apart the element enough to get the sponge inbetween the top and bottom folded back portion of the element. I also use about an 8 inch piece of weed wacking string and make it into a U. Run the end through the element and grab the other side and hold each end, one end in each hand and move the string back and forth. It will remove the gunk no problem. The white stuff is very common and you will get it on the element every time. Even if you clean it all off a small film of it may come back. It will flake off when it is dry. This is normal.

John
 
Good tip on the weed wacker string. I'll have to give that try. Thank you.
I used a brush and it worked pretty good. I still have some white stuff left on the element but not much.
 
I love the 1 1/2 inch tri clover fittings for the electric element. It's so easy to take out the element in the boil kettle after every brew and clean it, and no cord dragging behind the kettle. Easier to clean the element and kettle separately. With your mad welding skills you could weld a tri clover fitting up in no time! As far as the burner move go for it, I think it's great. Have everyone over for a huge crab boil and use those gas burners! I also thought the same thing about if the power ever went out for a long time like in a hurricane situation here in Florida. If that ever happened at least I could use the stand to cook on it and we could eat!

John

those tri-clover connections are so nice. i went with 2" on mine, even easier to snake the ripple element in/out. on my hlt, i take it out so i can move the kettle and dumpe the last little bit of water. then i set the kettle on the floor to dry with a towel. similar for the boil kettle. i use a plate chiller and clean it out after the brew day with recirculated pbw and actually set the boil element in the pbw to clean that as well (just the element portion, not all the wiring parts).
 
Pm me. It's all about giving back in this hobby and I have met some really good people here over the years. Tell you what, you pay the shipping and I'll send you one!

John
 
Pm me. It's all about giving back in this hobby and I have met some really good people here over the years. Tell you what, you pay the shipping and I'll send you one!

John

Pm sent
Wow!!! That's extremely generous of you.
 
Back
Top