You are using an out of date browser. It may not display this or other websites correctly.
You should upgrade or use an alternative browser.
You should upgrade or use an alternative browser.
Penquin Glycol Chiller vs MoreBeer's Icemaster 100 Glycol Chiller with Stainless Bulkheads
- Thread starter CodeSection
- Start date

Help Support Homebrew Talk:
This site may earn a commission from merchant affiliate
links, including eBay, Amazon, and others.
LuckyBeagleBrewing
Well-Known Member
Distilled water will deteriorate the copper tubing. That is why my R/O-DI piping is all stainless and plastic. DI is close to distilled and it will leech everything it can to replace missing minerals.Why not distilled water?
RO or distilled water will not affect copper tubing. You must be thinking of softened water that still has all the CO2 it had originally dissolved in it and it's the dissolved CO2 that will act as a weak acid and affect certain metals. RO or distilled water has had the CO2 removed as well and is not corrosive. It also has no "memory" and does not need to replace any minerals it previously had.
LuckyBeagleBrewing
Well-Known Member
RO or distilled water will not affect copper tubing. You must be thinking of softened water that still has all the CO2 it had originally dissolved in it and it's the dissolved CO2 that will act as a weak acid and affect certain metals. RO or distilled water has had the CO2 removed as well and is not corrosive. It also has no "memory" and does not need to replace any minerals it previously had.
I was told not to use RO/DI or distilled water with copper tubing and I will leave it at that. All the research I did said the same thing.
Salt softened water is what I am using for the chiller and that is not void of minerals.
Besides that there has to be validity to what I have read because the Icemaster instruction states the following in its instruction sheet.
If you choose to use water only - it is best to use tap water as RO/distilled/deionized water on its own may damage the heat exchanger
LuckyBeagleBrewing
Well-Known Member
One thing I have found that I am not crazy about on the Icemaster is the little hole they put in the glycol chamber cover to run all the tubing and pump wires. I will probably leave the top front cover loose and run it all under that.
Salt softened water is not void of minerals but has had Ca and Mg replaced with sodium or potassium and this causes an imbalance in the water chemistry, making the dissolved CO2 aggressive. Softened water will, for example, dissolve carbonate deposits in old piping and with time make them squeaky clean again. At which point it will start corroding the underlying metal.
I really don't know where Icemaster got the idea from. All the chiller instructions I've read explicitly recommend distilled water as this slows down bacterial proliferation (bacteria just as yeast need minerals as nutrients.)
I really don't know where Icemaster got the idea from. All the chiller instructions I've read explicitly recommend distilled water as this slows down bacterial proliferation (bacteria just as yeast need minerals as nutrients.)

$7.79 ($7.79 / Count)
Craft A Brew - LalBrew Voss™ - Kveik Ale Yeast - For Craft Lagers - Ingredients for Home Brewing - Beer Making Supplies - (1 Pack)
Craft a Brew

$22.00 ($623.23 / Ounce)
AMZLMPKNTW Ball Lock Sample Faucet 30cm Reinforced Silicone Hose Secondary Fermentation Homebrew Kegging joyful
无为中南商贸有限公司

$58.16
HUIZHUGS Brewing Equipment Keg Ball Lock Faucet 30cm Reinforced Silicone Hose Secondary Fermentation Homebrew Kegging Brewing Equipment
xiangshuizhenzhanglingfengshop

$33.99 ($17.00 / Count)
$41.99 ($21.00 / Count)
2 Pack 1 Gallon Large Fermentation Jars with 3 Airlocks and 2 SCREW Lids(100% Airtight Heavy Duty Lid w Silicone) - Wide Mouth Glass Jars w Scale Mark - Pickle Jars for Sauerkraut, Sourdough Starter
Qianfenie Direct
![Craft A Brew - Safale S-04 Dry Yeast - Fermentis - English Ale Dry Yeast - For English and American Ales and Hard Apple Ciders - Ingredients for Home Brewing - Beer Making Supplies - [1 Pack]](https://m.media-amazon.com/images/I/41fVGNh6JfL._SL500_.jpg)
$6.95 ($17.38 / Ounce)
$7.47 ($18.68 / Ounce)
Craft A Brew - Safale S-04 Dry Yeast - Fermentis - English Ale Dry Yeast - For English and American Ales and Hard Apple Ciders - Ingredients for Home Brewing - Beer Making Supplies - [1 Pack]
BellaRae

$82.50
Wilbur Curtis Brew Cone Assembly with Splash Pocket, High Volume - Commercial-Grade Brew Basket - WC-3422 (Each)
Global Commercial Parts

$53.24
1pc Hose Barb/MFL 1.5" Tri Clamp to Ball Lock Post Liquid Gas Homebrew Kegging Fermentation Parts Brewer Hardware SUS304(Gas MFL)
yunchengshiyanhuqucuichendianzishangwuyouxiangongsi

$45.74 ($45.74 / Count)
Brewer's Best Home Brew Beer Ingredient Kit - 5 Gallon (Grapefruit IPA)
Amazon.com

$53.24
1pc Hose Barb/MFL 1.5" Tri Clamp to Ball Lock Post Liquid Gas Homebrew Kegging Fermentation Parts Brewer Hardware SUS304(Gas Hose Barb)
Guangshui Weilu You Trading Co., Ltd

$10.99 ($31.16 / Ounce)
Hornindal Kveik Yeast for Homebrewing - Mead, Cider, Wine, Beer - 10g Packet - Saccharomyces Cerevisiae - Sold by Shadowhive.com
Shadowhive

$176.97
1pc Commercial Keg Manifold 2" Tri Clamp,Ball Lock Tapping Head,Pressure Gauge/Adjustable PRV for Kegging,Fermentation Control
hanhanbaihuoxiaoshoudian
LuckyBeagleBrewing
Well-Known Member
Here is a pic of what I was talking about on the glycol cover for those interested in the IceMaster 100.
For reference, this is one hose through the access hose. Needs a redesign or leave a cover off.
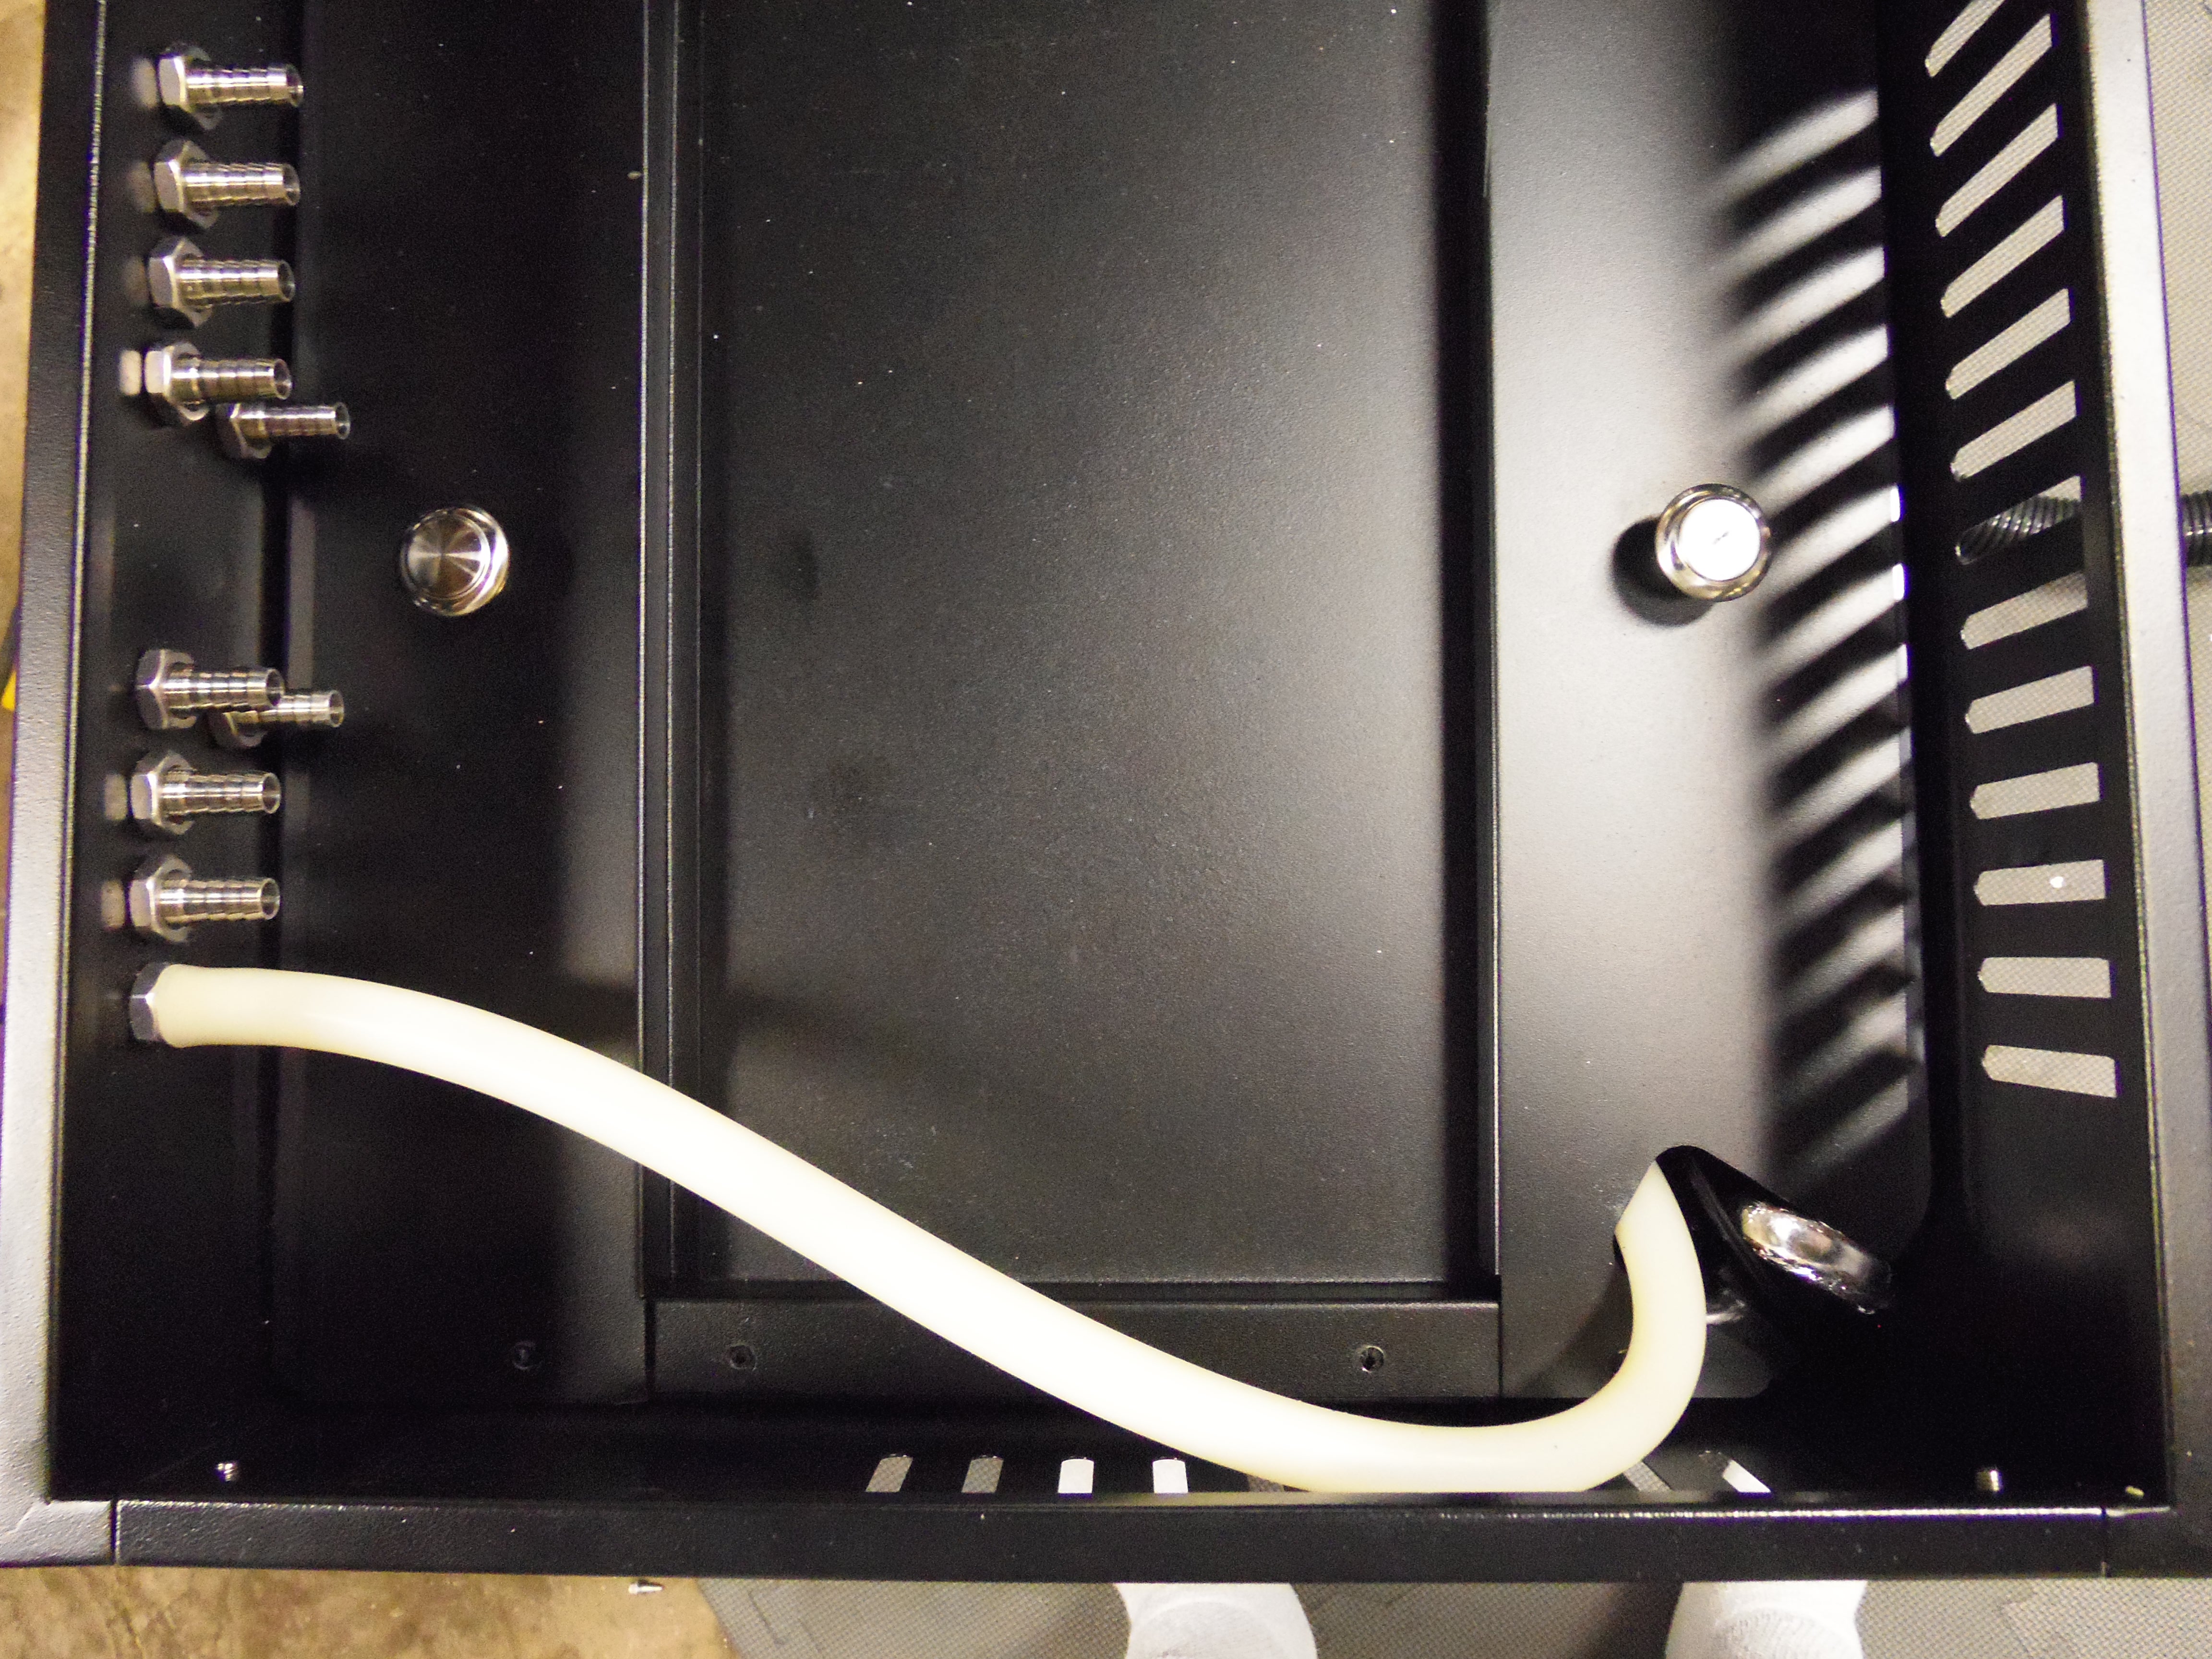
For reference, this is one hose through the access hose. Needs a redesign or leave a cover off.

augiedoggy
Well-Known Member
distilled water is what you are supposed to use with automotive radiators and coolant as well. to slow corrosion down.
I was told not to use RO/DI or distilled water with copper tubing and I will leave it at that. All the research I did said the same thing.
Salt softened water is what I am using for the chiller and that is not void of minerals.
Besides that there has to be validity to what I have read because the Icemaster instruction states the following in its instruction sheet.
If you choose to use water only - it is best to use tap water as RO/distilled/deionized water on its own may damage the heat exchanger
A friend of mine who has a commercial RO business, primarily for non residential customers, puts in all stainless fittings or PEX, for the same reason. Water wants to be at equilibrium with environment around it. This is why you have hard or soft water. Water that is not carrying any dissolved solids, like metals, will strip it to be where it wants to be. This is why water is a solvent and we can use it to extract flavors from food.
Alton Brown's Good Eats episodes on water are really good at explaining the science behind this.
Last edited:
Here is a pic of what I was talking about on the glycol cover for those interested in the IceMaster 100.
For reference, this is one hose through the access hose. Needs a redesign or leave a cover off.
View attachment 632447
That hole does look small but wouldn’t a smaller hole reduce evaporation of your glycol/water mixture? Is it about right size for 1 or 2 hoses but needs to be enlarged for more?
LuckyBeagleBrewing
Well-Known Member
That hole does look small but wouldn’t a smaller hole reduce evaporation of your glycol/water mixture? Is it about right size for 1 or 2 hoses but needs to be enlarged for more?
I am going to take a piece of blue thick foam and leave the cap at the barbs off. 8 to 10 hoses are what I am looking at. When I get the foam in there will be a lot more insulating factor and much greater room.
After I figured out what I wanted to do, I think this will work great.

CodeSection
Well-Known Member
- Joined
- Feb 4, 2018
- Messages
- 1,655
- Reaction score
- 819
I think this is the most important thing. And make sure you use softened and not distilled water.
I seen cfrazier77s setup and it is really nice and compact. Besides that, he has produced some award winning beer.
I just got the icemaster unboxed and so far everything is tight except the drain plug. I will work on that before I fill to ensure no leaks.
It is definitely taller than I thought, but it looks good after I got the coil separator put back together. That and I have to vacuum it out piece if insulation. First run will be with water. Pure water.
I received my box today. I agree, at least the box and inner box are taller than 26". Unfortunately, I will not have time for a couple of weeks to unpack and inspect it. I'm curious if the drain plug has the same issues as previously reported.
LuckyBeagleBrewing
Well-Known Member
I received my box today. I agree, at least the box and inner box are taller than 26". Unfortunately, I will not have time for a couple of weeks to unpack and inspect it. I'm curious if the drain plug has the same issues as previously reported.
Unfortunately mine leaks so I will be fixing that. Like many before me, it is still a problem.
I like the solution posted by a reviewer on MBs website with the hose. I will likely take that route.
CodeSection
Well-Known Member
- Joined
- Feb 4, 2018
- Messages
- 1,655
- Reaction score
- 819
Unfortunately mine leaks so I will be fixing that. Like many before me, it is still a problem.
I like the solution posted by a reviewer on MBs website with the hose. I will likely take that route.
You would think Morebeer would have addressed the leaking drain with the manufacturer. It must be costly to ship with the weight of the unit. Generally, the return shipping cost the retailer must bear regarding defective merchandise is a good incentive for them to address flaws and defects with the manufacturer.
I will look at Morebeer's "solution" once I determine if I have a problem with a leaking drain. Having them take back a defective unit may be easier for me.....
Thanks for the update!
LuckyBeagleBrewing
Well-Known Member
You would think Morebeer would have addressed the leaking drain with the manufacturer. It must be costly to ship with the weight of the unit. Generally, the return shipping cost the retailer must bear regarding defective merchandise is a good incentive for them to address flaws and defects with the manufacturer.
I will look at Morebeer's "solution" once I determine if I have a problem with a leaking drain. Having them take back a defective unit may be easier for me.....
Thanks for the update!
No problem. I took the end piece off and I am just going to hose clamp it. I have one of the sharkbite removal tools but other things work. I will post pics later.
CodeSection
Well-Known Member
- Joined
- Feb 4, 2018
- Messages
- 1,655
- Reaction score
- 819
No problem. I took the end piece off and I am just going to hose clamp it. I have one of the sharkbite removal tools but other things work. I will post pics later.
I just read on MB's website the drain repair process took the person three hours to complete and cost $29! I will be interested in learning how long it takes you to make the same repair. At this point, if I have the same issue, I will have MB pick it up and send me a replacement where they spent their time and three hours making the repair or have MB issue me a refund. I just do not have three hours to waste fixing something that should be in working order when purchased new.
LuckyBeagleBrewing
Well-Known Member
I just read on MB's website the drain repair process took the person three hours to complete and cost $29! I will be interested in learning how long it takes you to make the same repair. At this point, if I have the same issue, I will have MB pick it up and send me a replacement where they spent their time and three hours making the repair or have MB issue me a refund. I just do not have three hours to waste fixing something that should be in working order when purchased new.
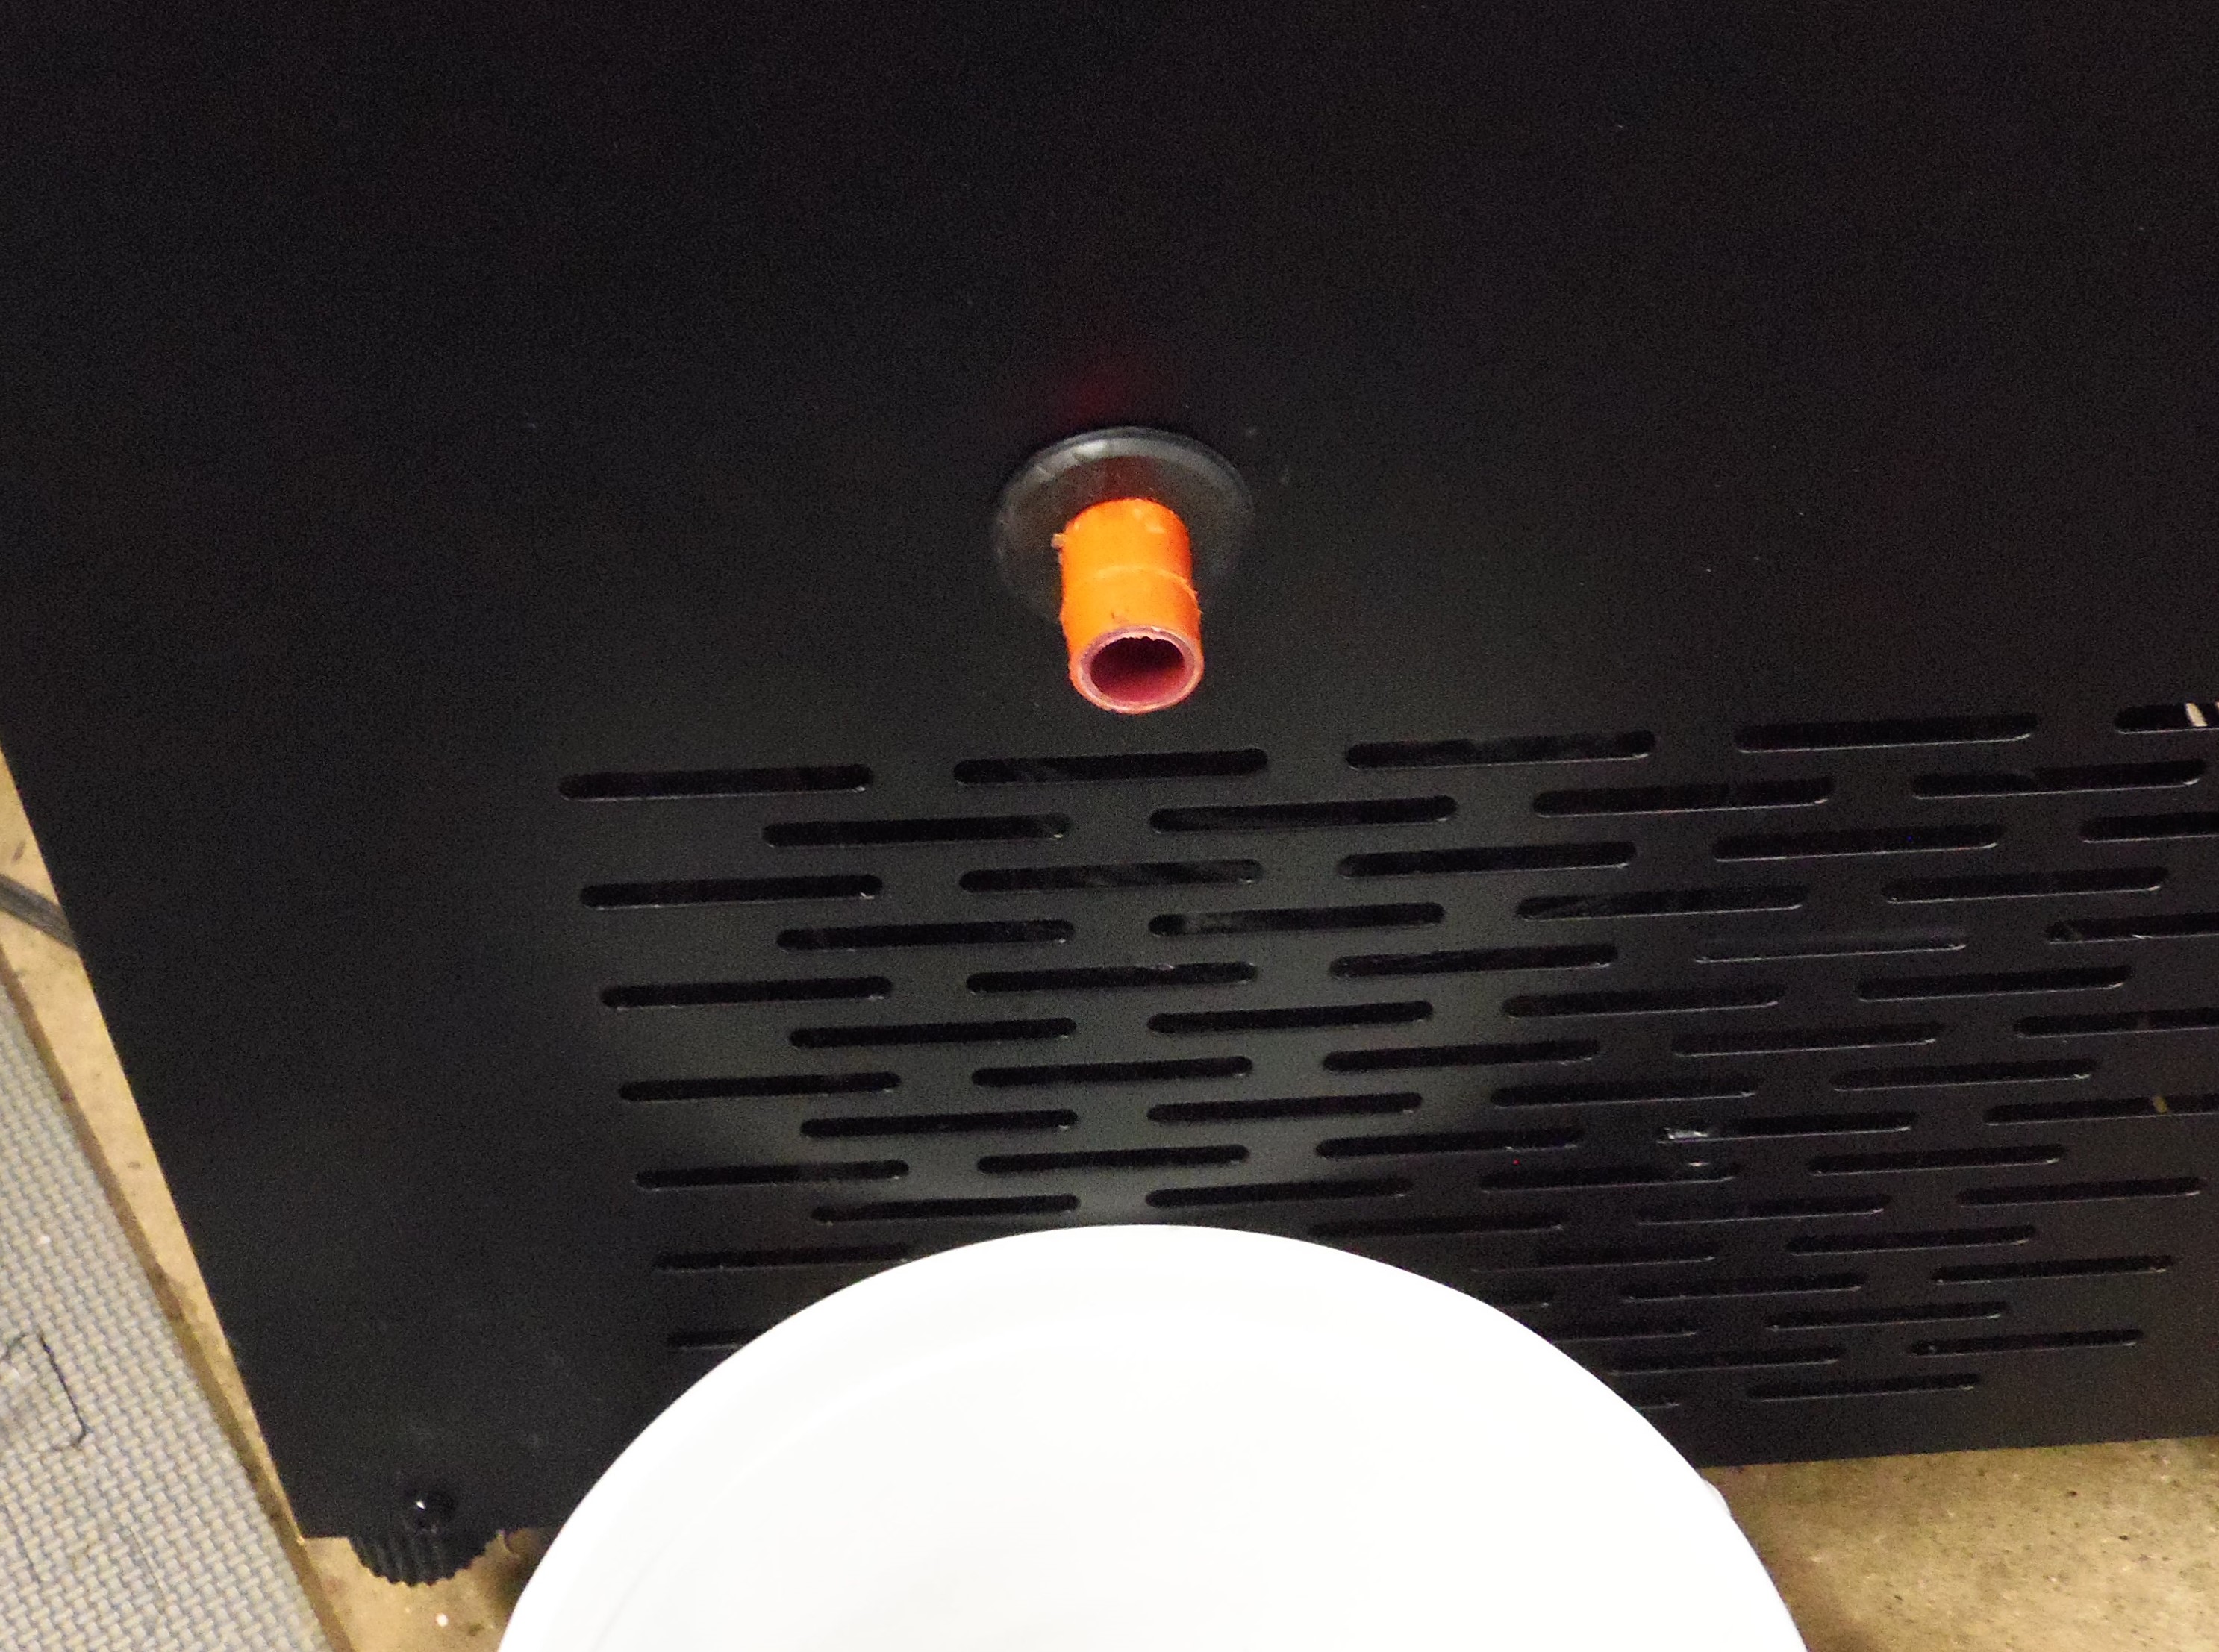
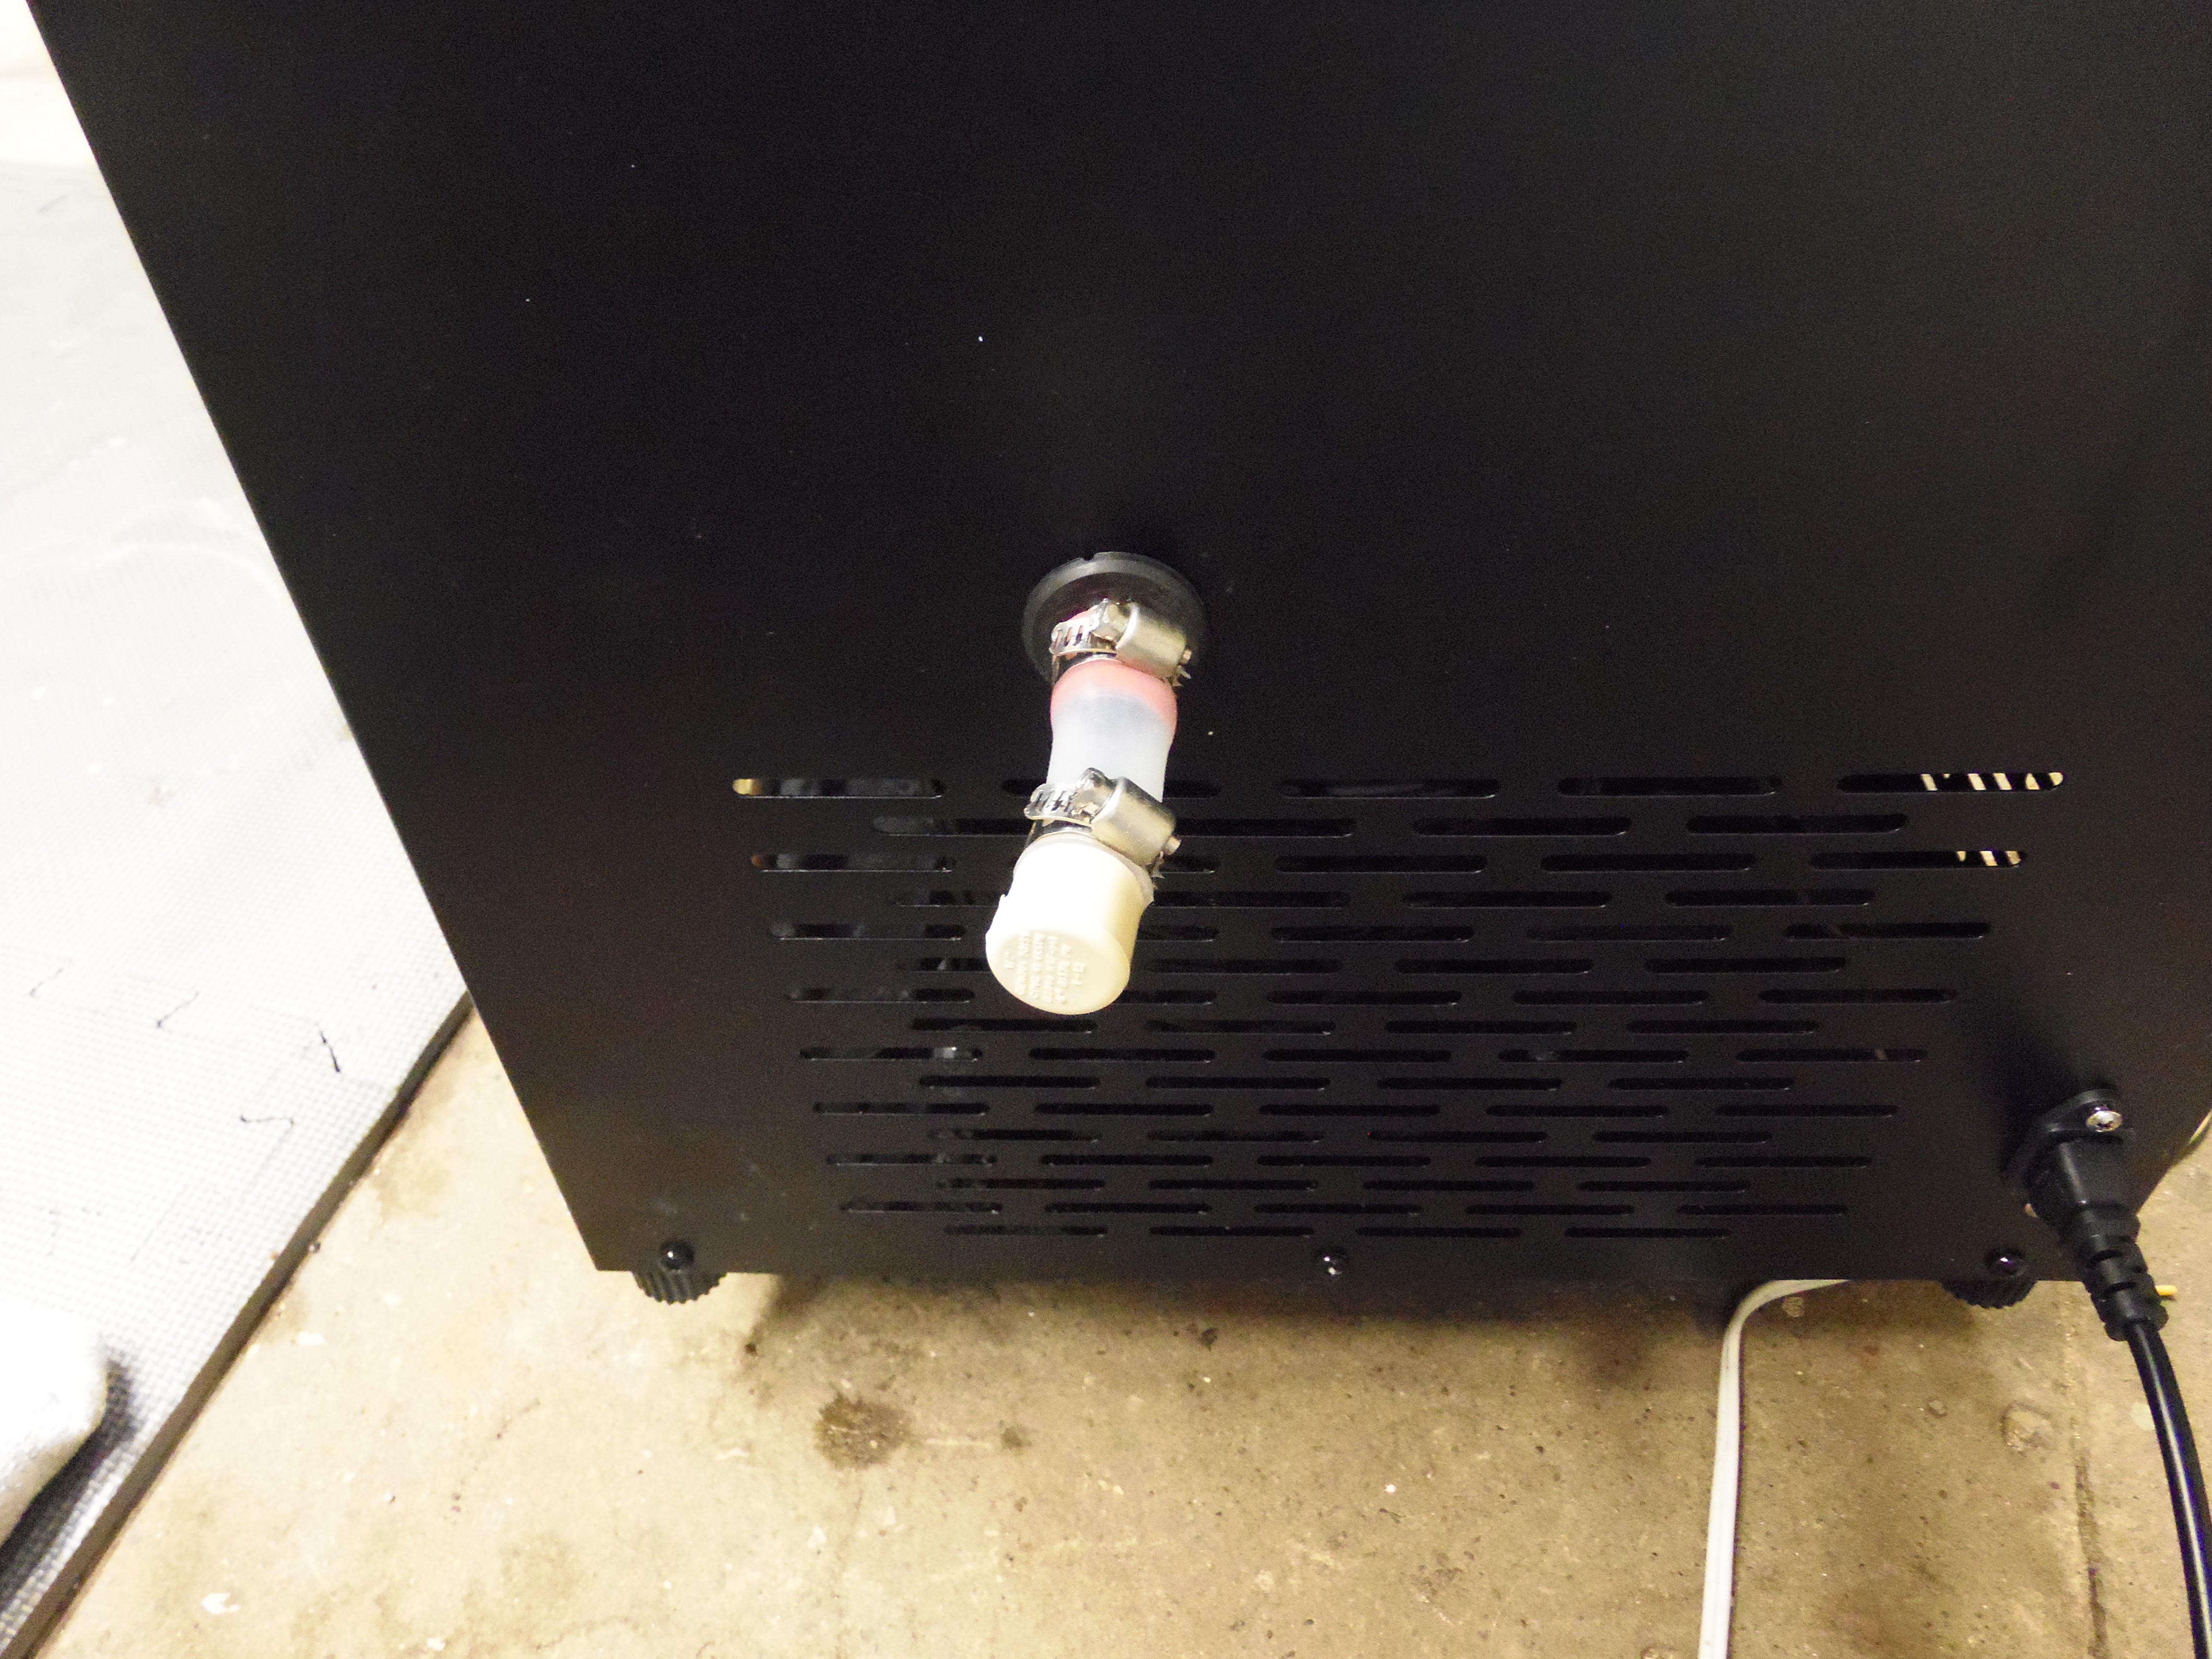
I took off the drain piece which only took a minute. After that I just took a small piece of 1/2 cpvc and cemented a cap to it and connected that with a piece of 1/2 silicone tube (same stuff I use on my RIMS system) and used hose clamps. No leaks now and I am running it to test it. I threw 75 degree water in there and let me tell you that little unit throws out some heat. It seems to be cooling the tank quick though.
I just put a cap on mine for now because I have a pump that will empty it 90% of the way. Sky is the limit on what you want to add.
Bare pipe after removal
Plugged with silicone hose and pvc
LuckyBeagleBrewing
Well-Known Member
I also can't say how much it cost me because these are parts I had laying around.
1 - 1 inch long piece of 1/2 cpvc
1 - 1/2 cpvc end cap
1 - dab of cpvc glue
1 - 2 inch piece of 1/2 silicone tubing
2 - stainless steel hose clamps (1/2 to 29/32 size)
I would guess less than $10 if you had to buy everything. The CPVC glue is probably the most expensive thing.
I really hope this helps. It really does seem to work pretty good once you get the leak solved.
CodeSection
Well-Known Member
- Joined
- Feb 4, 2018
- Messages
- 1,655
- Reaction score
- 819
@LuckyBeagleBrewing, it looks like your fix was pretty simple and only involved the exterior end of the orange tubing. The MB fix appears to involve removing the orange tubing completely. Perhaps that is why it took three hours to disassemble everything. I wonder if the person had a leak and tightening issues where the orange tubing attached to the barb on the inside.
LuckyBeagleBrewing
Well-Known Member
@LuckyBeagleBrewing, it looks like your fix was pretty simple and only involved the exterior end of the orange tubing. The MB fix appears to involve removing the orange tubing completely. Perhaps that is why it took three hours to disassemble everything. I wonder if the person had a leak and tightening issues where the orange tubing attached to the barb on the inside.
Not sure but this was not that involved. It was just the cheap fitting they used on that pipe itself. It had a drip every ten seconds. I have it on a concrete floor anyway. Could also be the fitting was stuck on there for him. I can't imagine he did not know how to remove a sharkbite fitting but you never know. Mine was fairly simple and once I did that it does not leak. Just don't pull the fitting very hard. Work it off from pressing the blue fitting towards yourself. You can look up youtube to see how to remove one of those fittings.
I put down the wrong temp earlier. it was 27 Celsius water in to it and it was at 3 Celsius in no time. Also the default setting for compressor delay is 3 minutes so you have to wait that long for it to startup after you flip the switch to on. After that it works fast. I should be able to hold 4 - 10 gallon batches at lager temps easily.
CodeSection
Well-Known Member
- Joined
- Feb 4, 2018
- Messages
- 1,655
- Reaction score
- 819
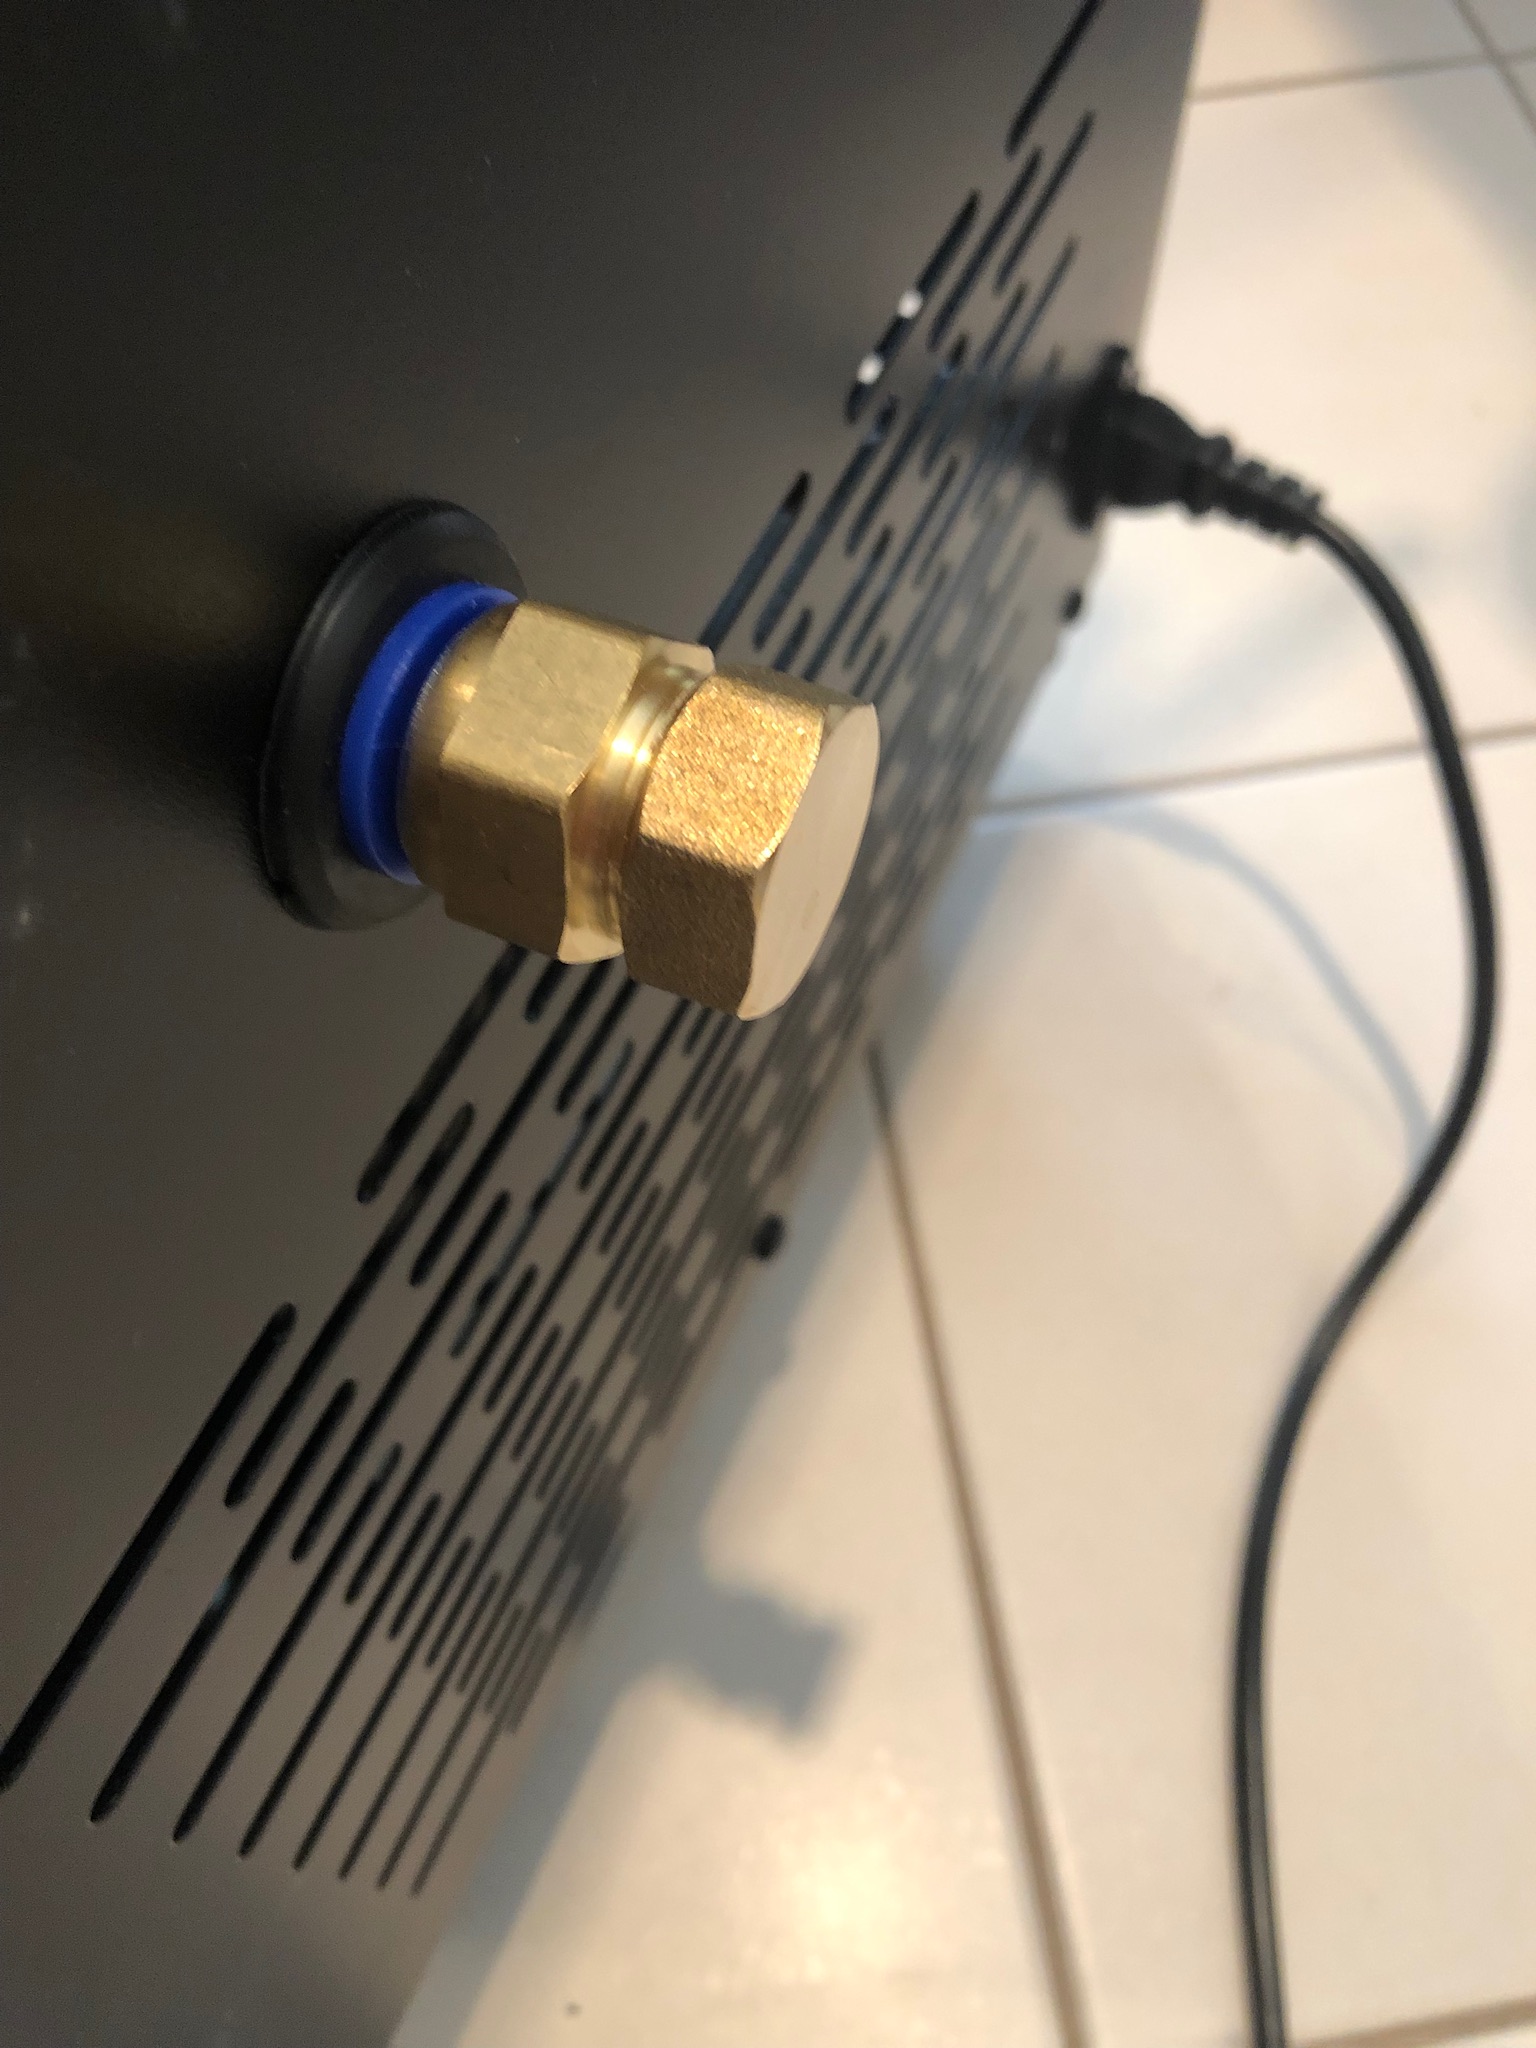
@LuckyBeagleBrewing, I finally got around to unpacking the Icemaster 100. As you are aware, there was little assembly (install wheels and take out lid screws). I had no leaks and it appears the drain valve on my unit is different (at least not the color orange as was shown on yours). Perhaps it is a newer version drain.
My unit's cover by the the freon copper tubing actually was hitting on the the copper tubing and would move the tubing to the side when the cover was installed. I first thought of using a rubber washer between the cover and tubing as I was afraid the metal to metal rubbing would eventually cause the copper to fail in that area. Then later I decided to use a sheet metal scissors and cut off some of the cover and file down the cut. It now fits perfectly.
I agree with you about the space for tubing. There is no way cooling tubing can be forced into such a small hole in the corner. In addition, I would be concerned about the small pressure/freon tubing that is right under the hole breaking off. I decided to have the cooling tubing go through a slit I made by adjusting the covers. Then I bought rubber 1/2" pipe insulation to cover the space between the covers and to put around the exposed tubing.
Last edited:
CodeSection
Well-Known Member
- Joined
- Feb 4, 2018
- Messages
- 1,655
- Reaction score
- 819
I'm not sure why these pictures would not attach to the previous post, but here they are...
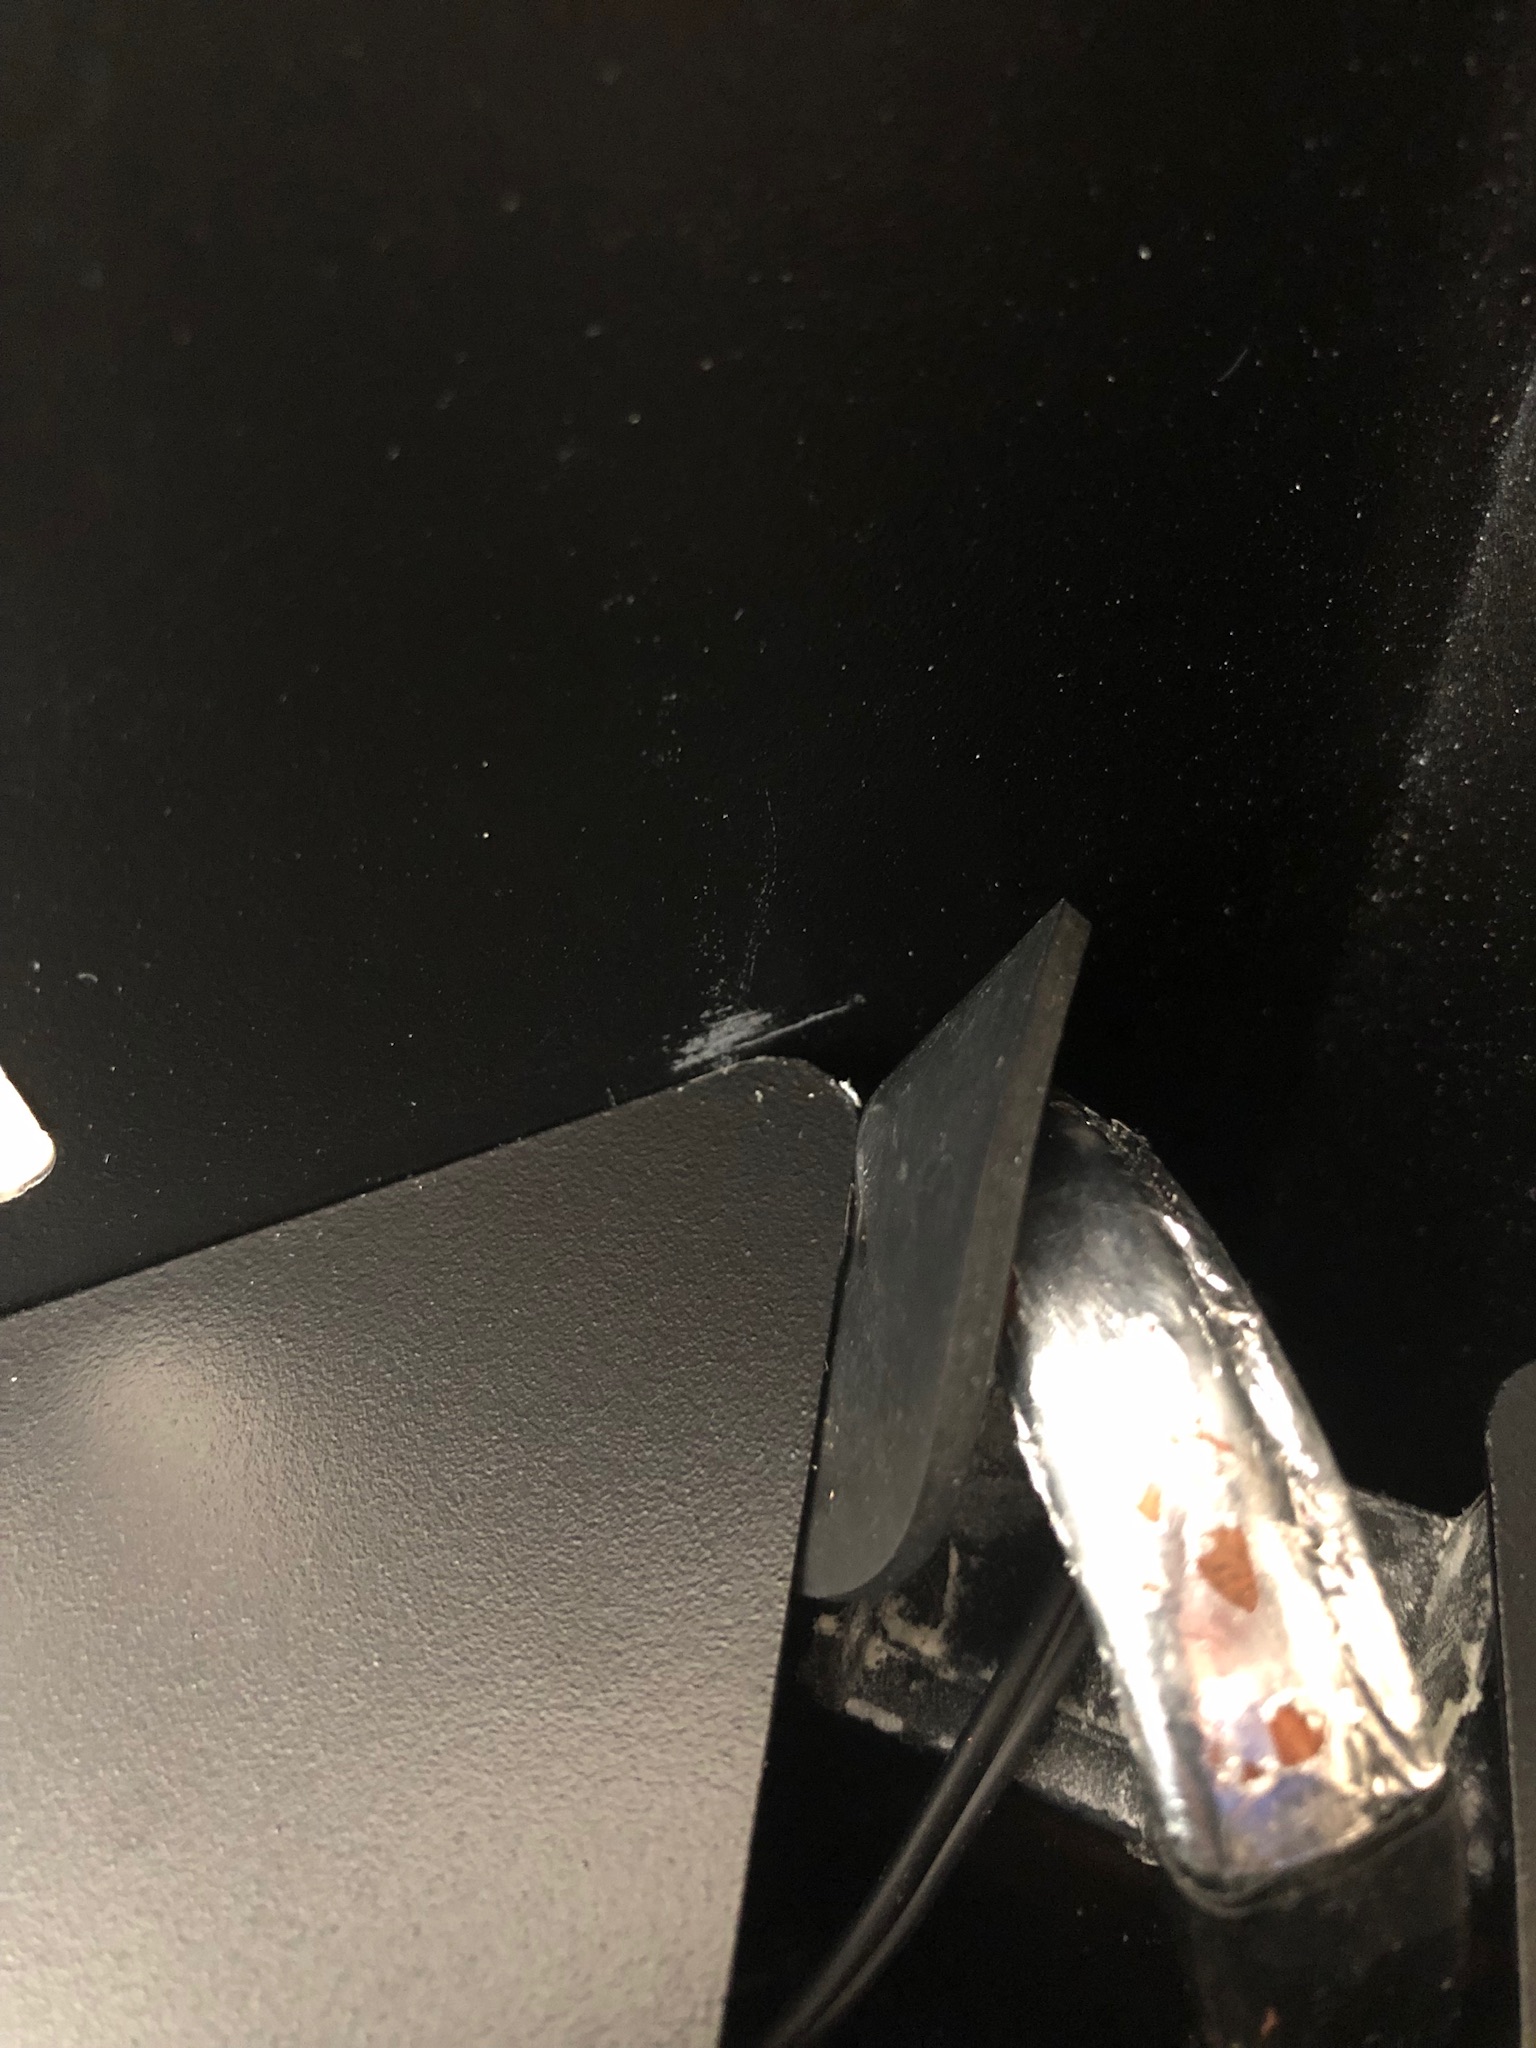

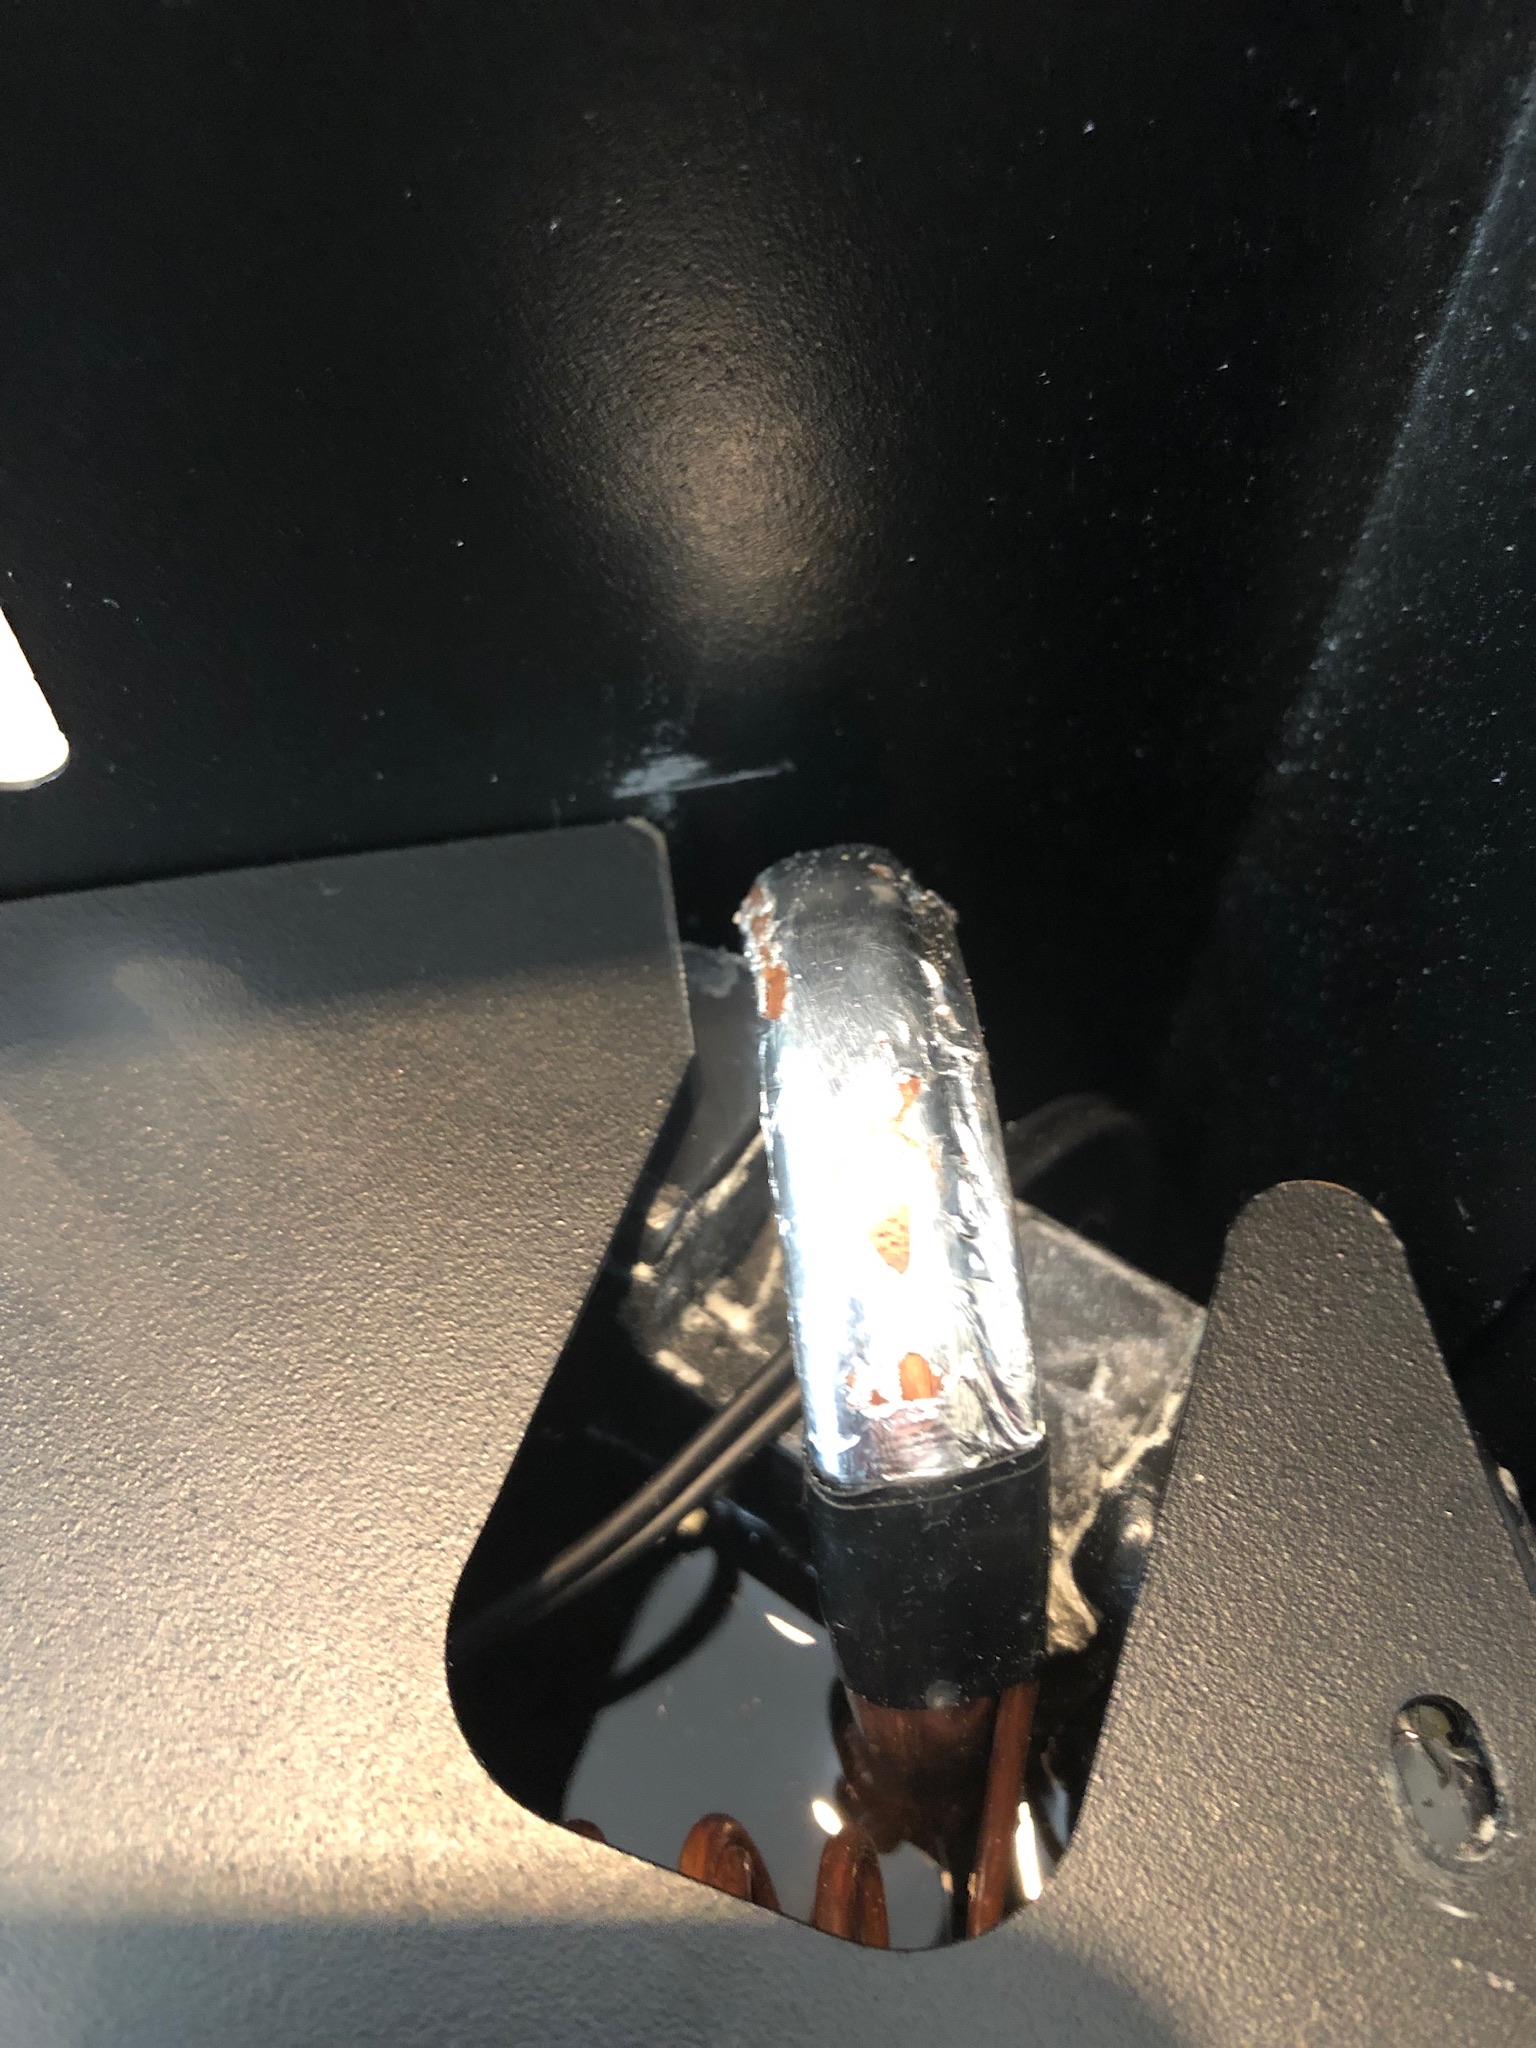

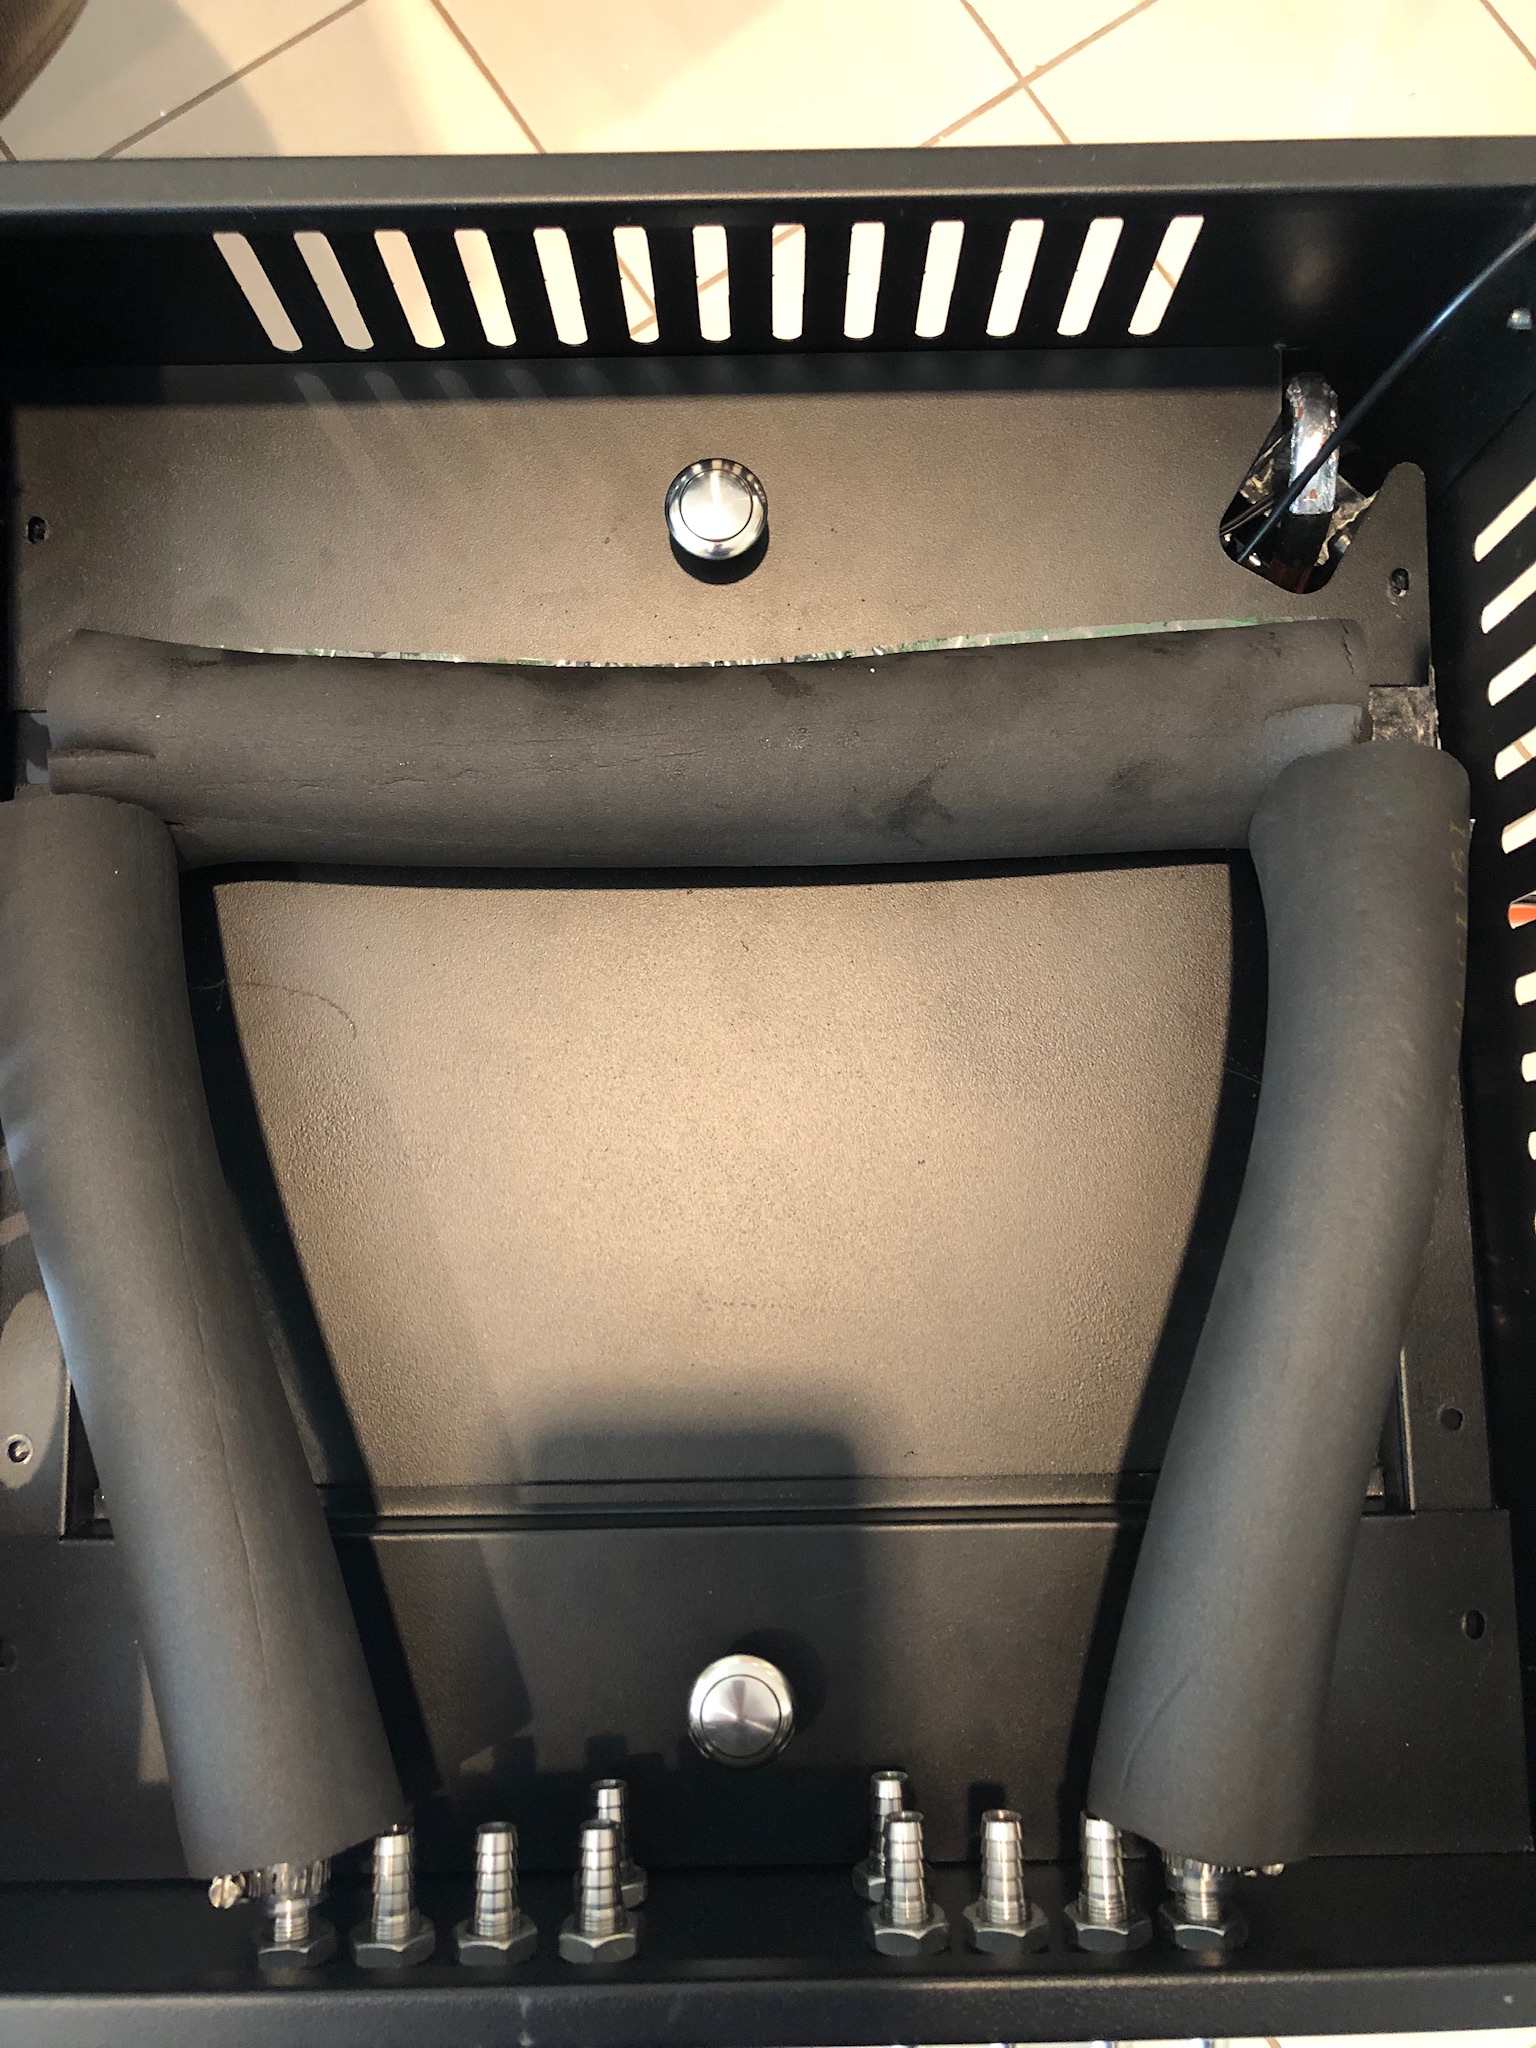


LuckyBeagleBrewing
Well-Known Member
That is nice yours did not leak. Even with the leak it is a good chiller. I did something similar on the hoses only I used Styrofoam and left the cover closest to the barbs off. With the main lid on, I will just have to seal the pump cords and it should be good and sealed all the way around.
Now I just have to finish my chapman fermenter and brew up my Oktoberfest. Got just about everything I need. New York Brew Supply did great and speedy work on the coil fab. They did a nice job with my specs on the stainless coils. I just have to silver solder the coil compression fittings on the lid. My goal is 3 fermenters simultaneously on this chiller.
Now I just have to finish my chapman fermenter and brew up my Oktoberfest. Got just about everything I need. New York Brew Supply did great and speedy work on the coil fab. They did a nice job with my specs on the stainless coils. I just have to silver solder the coil compression fittings on the lid. My goal is 3 fermenters simultaneously on this chiller.
CodeSection
Well-Known Member
- Joined
- Feb 4, 2018
- Messages
- 1,655
- Reaction score
- 819
....Now I just have to finish my chapman fermenter and brew up my Oktoberfest. Got just about everything I need. New York Brew Supply did great and speedy work on the coil fab. They did a nice job with my specs on the stainless coils. I just have to silver solder the coil compression fittings on the lid. My goal is 3 fermenters simultaneously on this chiller.
Very nice. I hope to buy another fermenter in a couple of months. Will your fermenters be seven or 14 gallons? Please share pics once everything is assembled and working.
LuckyBeagleBrewing
Well-Known Member
They are the 14 gallon fermenters. I generally do 10 gallon batches and want to focus on perfecting light lagers. I enjoy a good Helles.Very nice. I hope to buy another fermenter in a couple of months. Will your fermenters be seven or 14 gallons? Please share pics once everything is assembled and working.
Once I get the first one done I will definitely share pics.
My Icemaster 100 just **** the bed after 6 months of use (7 brews) What are your thoughts?:
Process was typicaly the same for every batch:
When in use:
Fermentation: Set glycol to 32 degrees to keep tank at ferm temps (62-72) for 10-15 days
Cold crashing: Set glycol to 25 degrees to keep tank at 36 degrees (3-4 days)
When not in use:
Turn system off completely. Glycol would rise to room temp (60 degrees). When I would turn the system on the day before a brew day it would take about 2 hours to get the glycol from room temp to 32 degrees.
What happened:
Turned the chiller on and after 2 hours the temp dropped maybe 1/2 a degree. I knew something was wrong. I took the lid off and everything looked normal. The lead going into the glycol was cold to the touch but the coil itself was not getting cold (strange). I removed 1/2 the glycol and only about 8 inches of the top part of the coil was frosting and getting cold (20 degrees with my therm pen) The rest of the coil was not (60 degrees with my therm pen).
Thoughts???
LuckyBeagleBrewing
Well-Known Member
My Icemaster 100 just poopy the bed after 6 months of use (7 brews) What are your thoughts?:
Process was typicaly the same for every batch: ...
With those symptoms it sounds like a refrigerant leak but I am just guessing. I would contact Morebeer and tell them it is already broke. I would think the coil would be cold all the way down not just half way. Usually when a compressor goes it will make a lot of noise and pop the breaker or at least that is the way it has been in the last 45 for me.
Check their site because I thought they gave it a one year warranty. I would hope they would honor the warranty respectably.
He beat me to it, that sounds like low Freon.
Is there an update on this?My Icemaster 100 just poopy the bed after 6 months of use (7 brews) What are your thoughts?:
Process was typicaly the same for every batch:
When in use:
Fermentation: Set glycol to 32 degrees to keep tank at ferm temps (62-72) for 10-15 days
Cold crashing: Set glycol to 25 degrees to keep tank at 36 degrees (3-4 days)
When not in use:
Turn system off completely. Glycol would rise to room temp (60 degrees). When I would turn the system on the day before a brew day it would take about 2 hours to get the glycol from room temp to 32 degrees.
What happened:
Turned the chiller on and after 2 hours the temp dropped maybe 1/2 a degree. I knew something was wrong. I took the lid off and everything looked normal. The lead going into the glycol was cold to the touch but the coil itself was not getting cold (strange). I removed 1/2 the glycol and only about 8 inches of the top part of the coil was frosting and getting cold (20 degrees with my therm pen) The rest of the coil was not (60 degrees with my therm pen).
Thoughts???
Is there an update on this?
Yes. Here’s the update:
More beer was awesome with the replacement. Shipped it out fedex very fast. New unit put together and all is good.
BUT....
I got to brew 2 batches on it and the “S” button on the STC-1000 broke. so I couldn’t change the temp of the glycol. I troubleshot it for a couple days with no luck. In the end I bought an ITC-1000F off amazon And wired that in myself (shhhhhh) it works great, nice to have it in Fahrenheit and was fairly easy to gain access to it. So I guess fingers crossed that the compressor/freon level holds up with this one...

Similar threads
- Replies
- 4
- Views
- 1K


