Need help! Control Panel build for one pump and one 5500w element

Homebrew Talk - Beer, Wine, Mead, & Cider Brewing Discussion Forum

Help Support Homebrew Talk - Beer, Wine, Mead, & Cider Brewing Discussion Forum:

This site may earn a commission from merchant affiliate links, including eBay, Amazon, and others.

pbrandt

Warped Barrel Brewing
Joined
Mar 14, 2017
Messages
10
Reaction score
10
Location
Kearney
I will try and make this short and sweet, but it usually doesn't end up that way for me. If I use wrong terminology feel free to correct me as I have little experience around the internal components of electronics, and I want to do it right. The good news is my buddy knows a fair amount about it so he offered to help.

I am building a parts list for a control panel to run a single pump and 5500w element for a HERMS system. The boil kettle is still heated via propane.

I have tried to do my due diligence in reading through multiple posts as well as Kal's control panel build walk through.

So I am considering the following 3 options...

The basics and order the rest
http://www.ebrewsupply.com/1-pid-30a-biab-kit/

Has everything I need except it is not the PID I want
http://www.ebrewsupply.com/complete-30a-biab-kit/

Or Order everything individually
I will post my parts list, but note that I may not purchase everything from Auber. I will look for better prices if I can find them.

I believe this would be the appropriate design for what I want that I found in another thread created by doug293cz.

attachment.php


Parts List (Not going to have an element firing lamp)
Am I missing anything? (Even stuff you may consider minor but I left off!)

1- Enclosure with 40a heatsink
http://www.auberins.com/index.php?main_page=product_info&cPath=34&products_id=340

1 - EZboil
http://www.auberins.com/index.php?main_page=product_info&cPath=53&products_id=560

1- 40a SSR
http://www.auberins.com/index.php?main_page=product_info&cPath=2_30&products_id=30

1 - RTD Sensor with braided cable XLRCON Connector Female Panel Mount
http://www.auberins.com/index.php?main_page=product_info&cPath=20_15&products_id=261

2 - Push button switches (one for element, one for pump) (2NO or 1NO 1NC)
http://www.auberins.com/index.php?main_page=product_info&cPath=32&products_id=223

1 - Locking Inlet for Power Supply
http://www.auberins.com/index.php?main_page=product_info&cPath=7_43&products_id=460

1 - Socket for Element
http://www.auberins.com/index.php?main_page=product_info&cPath=7_43&products_id=410

1 - 120v Panel Mount Socket
http://www.auberins.com/index.php?main_page=product_info&cPath=34&products_id=274

1 - Plug for Element
http://www.auberins.com/index.php?main_page=product_info&cPath=7_43&products_id=411

2 - Contactors
http://www.auberins.com/index.php?main_page=product_info&cPath=2_31&products_id=129

1 - Main Power Switch
http://www.auberins.com/index.php?main_page=product_info&cPath=32&products_id=349

1 - 1amp fuse
http://www.ekmmetering.com/ekm-inline-fuse-holder-w-1-amp-fuse.html?gclid=CMuSgcXIkNMCFQgFaQodh50GAg

1 - 10amp fuse
https://www.amazon.com/dp/B003EEX5PQ/?tag=skimlinks_replacement-20

10ga Wire
16ga wire
20ga wire
Connectors


I am a little unclear on what block options I need for the main power switch.

What are the purple and turquoise wires going from the PID to the SSR?

Is a 50a GFI Spa panel the best way to go to run my 240 into?

Any help would be greatly appreciated!
 
Last edited by a moderator:
Look similar to the diagram from my video series.. biab system build
Link to a parts list in the description.
The main power switch you should not need any blocks it is a 2 NO switch.

The wires from the PID are the signal wires for switching the SSR.
 
I keep seeing contactors in a lot of these builds. The controller that I'm going to build doesn't use any of these...What is the purpose for them?
 
Here's a couple of designs that use the newer EZBoils (DSPR120 and DSPR300.) The first is a very simple design (same as used by @highland_brewer in the video he linked. This one uses the DSPR120 and a heavy duty wall "light" switch to enable power to the element. With this design the EZBoil is powered whenever the control panel is plugged in.

DSPR120 1-Pump Simple.jpg

The second uses a more elegant design, and provides interlocking so that the main power cannot be turned on unless both the pump switch(es) and element switch are off. This one uses the DSPR300, which has a couple of alarm relays that are not in the DSPR120. Other than the alarm wiring both EZBoils are wired the same way.

DSPR300 2-Pump 240V dual contactors safe-start rev-2.jpg

If you have any questions, just ask.

Brew on :mug:
 
Last edited:
I sent a question to auber about the ezboil controller and being able to adjust the power while in mashing mode. I watched the video and didn't see it having that capability wasn't sure if the model the video showed was an older one or what...

Thanks for the diagrams.

So on the first diagram you are taking a leg off and using it for the 110v pump am I seeing this correct?

In mashing mode, the EZBoil adjusts power using "pulse count modulation," same as in boiling mode. The operation is described near the end of the manual (link to the manual on the EZBoil catalog page.) The adjustment is automatic in mashing mode; there is no way for you to control max power used during mashing. It is possible to build your control panel to select between 120V and 240V operation of your element. When running at 120V, the max element power is 1/4 its rated power.

Both designs tap off one hot leg to get 120V for the pumps. That's actually how all the 120V in your house works too.

Brew on :mug:
 
Last edited:
Dumb question, I get how the EZBoil works in mash mode by turning the SSR on and off as required. How does it work in Boil Mode? By it lowering or increasing power to a SSR which is off or on, has no bearing on the high power side?

Thx

In mashing mode, the EZBoil adjusts power using "pulse count modulation," same as in boiling mode. The operation is described near the end of the manual (link to the manual on the EZBoil catalog page.) The adjustment is automatic in mashing mode; there is no way for you to control max power used during mashing. It is possible to build your control panel to select between 120V and 240V operation of your element. When running at 120V, the max element power is 1/4 its rated power.

Both design tap off one hot leg to get 120V for the pumps. That's actually how all the 120V in your house works too.

Brew on :mug:
 
Dumb question, I get how the EZBoil works in mash mode by turning the SSR on and off as required. How does it work in Boil Mode? By it lowering or increasing power to a SSR which is off or on, has no bearing on the high power side?

Thx

RTFM (http://auberins.com/images/Manual/DSPR120_manual.pdf), pages 7 - 9.

It controls power the same way in mash and boil mode. The difference is that in mash mode, an algorithm decides what power level to set based on target temp and actual temp. In boil mode, you set the power level with the knob.

It controls power by turning the SSR on for a fraction of the cycles of the AC voltage. If it wants 60% power, it turns the SSR on for 60% of the time, i.e. 60 power cycles out of every 100 power cycles of the 60Hz (50Hz in some places) voltage waveform. However it doesn't turn it on for 60 consecutive cycles, and off for 40 consecutive cycles. Rather it mixes up the on and off cycles across the 100 cycle period.

Brew on :mug:
 
OK I get it. That's pretty smart. No need for separate switch and POT.

I went to Auberins started to put together my list of parts. A few questions I can use some help with. In the schematic above it shows a Pump Switch as a SW1 or SW16. Looks like a double throw NO. But only one side seems to be used? Is there a reason this switch is not just a single throw?

With respect to the PT100

Looking at the
http://www.auberins.com/index.php?main_page=product_info&cPath=20_15&products_id=189
Its a 2" with a 1/4" NPT. I am assuming I would order it with the 8' braided and mating RTD Connector cable? That will get me the connector on the box housing and the cable to the controller allowing me to disconnect the cable at both the box and thermocouple ends?

PS, I am build a BIAB and would like to place the thermocouple inline with the circulating pump so as the water comes back in through the top of the kettle it reads the temp. Is the 2" OK or should I get something else and do it differently?

Thx

Those switches come standard with two pairs of contacts. You don't have to use the specific switches called out in the design. The pump switches should be rated for at least 5A and 120V (higher rated switches can always be used.)

You might want to look at other sources for the RTD's, as they are available at significantly lower cost elsewhere. You normally want a connector where the RTD cable enters the control panel enclosure, and at the probe itself. The length of the cable between the enclosure and the probe depends how your brewery is laid out.

You want the control temp probe mounted close to the heating element. Otherwise you will have a long delay between the application of heat and the detection of temperature change. This results in the controller calling for too much heat, and overheating (potentially scorching) the wort. Even if you don't scorch the wort, you might get it hot enough to denature the enzymes before your conversion is complete. You may want to add additional temp probes at various locations for monitoring, but the control probe needs to be close to the element.

Brew on :mug:
 
I am looking at this kettle and pump which already has 1/2" NPT fittigs so I assume I would order the RTD with 1/2 NPT as well.

Now question is how long of a probe. I assume I need some kind of TEE fitting so 1.5" probe would do?

Thx
 
Here's a couple of designs that use the newer EXBoils (DSPR120 and DSPR300.) The first is a very simple design (same as used by @highland_brewer in the video he linked. This one uses the DSPR120 and a heavy duty wall "light" switch to enable power to the element. With this design the EZBoil is powered whenever the control panel is plugged in.

View attachment 395665

The second uses a more elegant design, and provides interlocking so that the main power cannot be turned on unless both the pump switch(es) and element switch are off. This one uses the DSPR300, which has a couple of alarm relays that are not in the DSPR120. Other than the alarm wiring both EZBoils are wired the same way.

View attachment 395666

If you have any questions, just ask.

Brew on :mug:

Thanks to everyone for all of your feedback! I like both designs. The first one is very simple (which is good for me). The other part of me knows that down the road I will be all electric.

I think I should go simple to start like the first design. Then once I go all electric I can do a new panel and bring parts from my first panel to my new one.
 
Edit,
After pricing all of the parts out. It comes very close to the 30a BIAB kit from Electric Brewing supply (Especially when you figure in shipping from multiple companies). I am able to order the kit without their PID so I can just put in the EZboil.

http://www.ebrewsupply.com/complete-30a-biab-kit/

Am I totally missing something?
 
While the pricing on those kits isnt really all that bad they really are all still more than you can buy the stuff for elsewhere if you shop around. Honestly if you think otherwise you havent really looked or your just fooling yourself because the process is easier and faster to put all your trust in one supplier and purchase. Plus having a kit with instructions is a benefit but you have to ask yourself is that benefit worth the extra cost for you.
You can easily and safely build a single element ezboil controller with a switch for your pump for under $250 total using ul listed nema connectors
For reference, I built my old panel on my avatar signature for under $300.. That had 3 mypin pids a sestos timer, alarm wired to all 4 and dc power that was pwm speed controlled for 3 DC pumps as well as the volt/amp /watt meter and safety's with flow/float switches it controlled 3 elements. When I priced out the components from Auberins to build my old panel it was over $700 and there was still stuff they didn't carry I would have to source elsewhere.

Also take a good look at the products guys like auberins and ebrew are selling because they really are in most cases, the same generic chinese stuff found on amazon and ebay.. like the $35 rtd probes which can be bought on ebay for $9 shipped or the rebranded mager ssrs for twice as much $.
They are REseller and the key here is they have to buy it and resell it and make a profit...Theres nothing wrong with it, but none of these guys are walmart. They do not buy in large enough quantities to get large enough discounts to pass any savings on to you vs buying yours self from distributors on ebay or amazon... While they may have some exclusive stuff like BCS (which is a repurposed device my employer has been using in our Italian made processors for years BTW) and pids they really arent the best option for everything unless you dont mind spending what could be a lot more..I know it sound like im hating on them but im really just trying to be factual. I know they are probably great companies to work with and if you need someone to hold your hand and show you how to wire and use what your buying instead of researching it yourself then they might be a better choice but someones got to pay for all that support and customer service and that comes in the form of sometimes very large markups that if you buy from them your going to pay for whether you use it or not. Which is why its a better choice for some than others.


case in point?
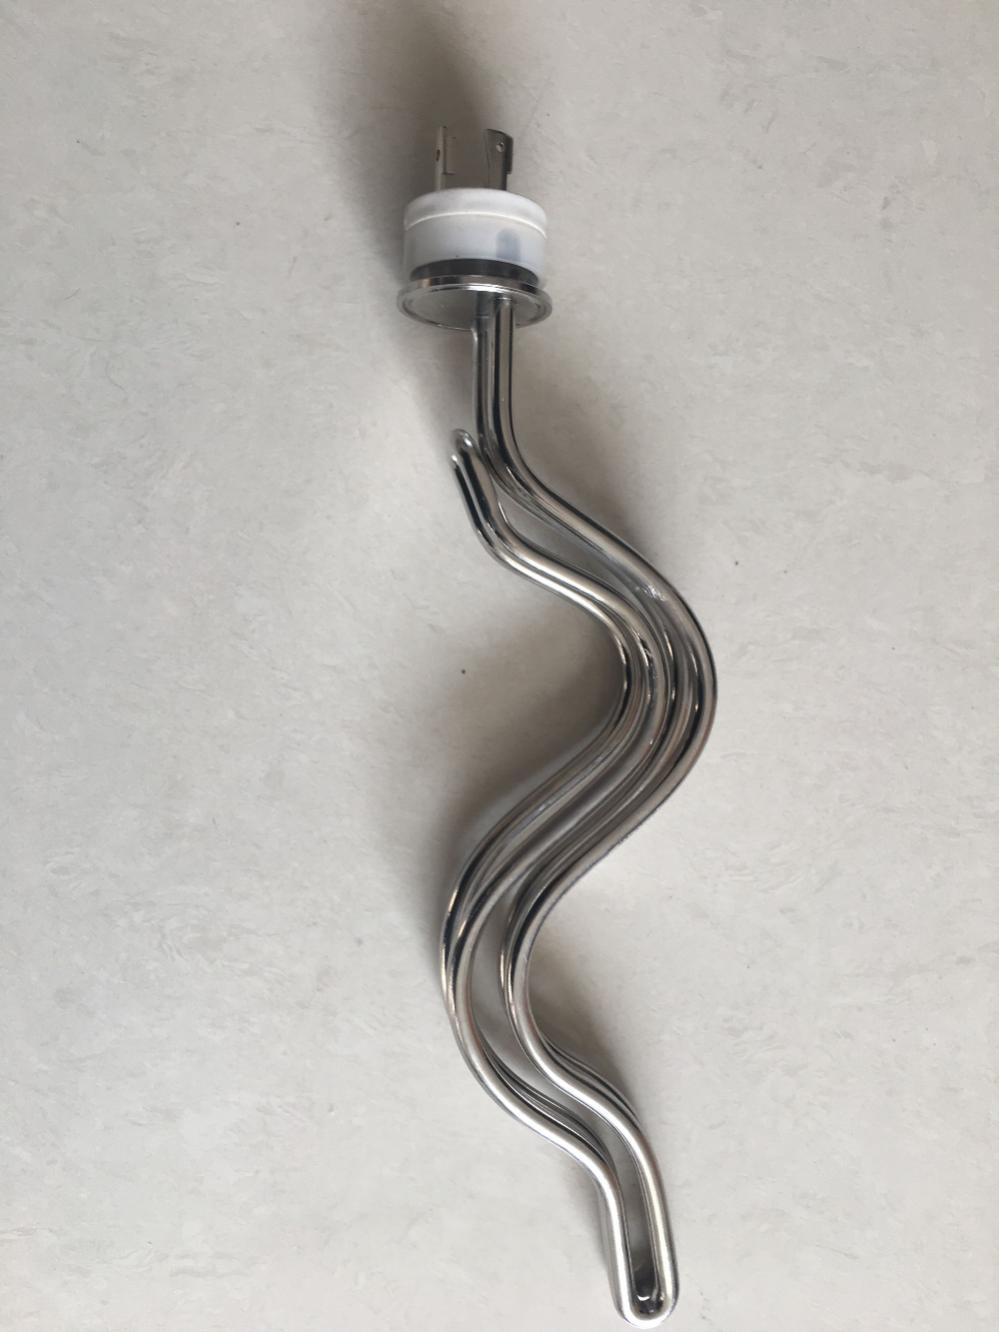
Try buying one of these elements that I paid $16 for from any one of the home brewing supply companies for less than $75...

element1.jpg
 
While the pricing on those kits isnt really all that bad they really are all still more than you can buy the stuff for elsewhere if you shop around. Honestly if you think otherwise you havent really looked or your just fooling yourself because the process is easier and faster to put all your trust in one supplier and purchase. Plus having a kit with instructions is a benefit but you have to ask yourself is that benefit worth the extra cost for you.
You can easily and safely build a single element ezboil controller with a switch for your pump for under $250 total using ul listed nema connectors
For reference, I built my old panel on my avatar signature for under $300.. That had 3 mypin pids a sestos timer, alarm wired to all 4 and dc power that was pwm speed controlled for 3 DC pumps as well as the volt/amp /watt meter and safety's with flow/float switches it controlled 3 elements. When I priced out the components from Auberins to build my old panel it was over $700 and there was still stuff they didn't carry I would have to source elsewhere.

Also take a good look at the products guys like auberins and ebrew are selling because they really are in most cases, the same generic chinese stuff found on amazon and ebay.. like the $35 rtd probes which can be bought on ebay for $9 shipped or the rebranded mager ssrs for twice as much $.
They are REseller and the key here is they have to buy it and resell it and make a profit...Theres nothing wrong with it, but none of these guys are walmart. They do not buy in large enough quantities to get large enough discounts to pass any savings on to you vs buying yours self from distributors on ebay or amazon... While they may have some exclusive stuff like BCS (which is a repurposed device my employer has been using in our Italian made processors for years BTW) and pids they really arent the best option for everything unless you dont mind spending what could be a lot more..I know it sound like im hating on them but im really just trying to be factual. I know they are probably great companies to work with and if you need someone to hold your hand and show you how to wire and use what your buying instead of researching it yourself then they might be a better choice but someones got to pay for all that support and customer service and that comes in the form of sometimes very large markups that if you buy from them your going to pay for whether you use it or not. Which is why its a better choice for some than others.


case in point?
Try buying one of these elements that I paid $16 for from any one of the home brewing supply companies for less than $75...


I really appreciate your feedback!

I did look around to the best of my ability to try and find better prices on items. I did find RTD probes on ebay for much less money, but was confused that they were all 4 pin connections vs 3 pin.

I guess here is the comparison.
BIAB kit is $335, subtract $89 (remove their PID from the package) which puts me at $246 and add back in another $46.95 for the EZboil gives me $292.95 plus some shipping.


Here is my updated parts list using the first design in post number #4 given by doug293cz. My list includes two temp probe options, but not sure the less expensive one will work or additional parts needed for the panel mount.

Maybe I can find a less expensive enclosure to help with the cost?

Just a side note that I have welded fittings, and plan to have the temp probe placed in a T where the wort returns to the mash (1.5" probe).

This totals to $273.51 which is less, but part of me thinks that an extra $20 is worth it with my little experience and knowledge. Although thanks to a lot of people here and youtube videos I know way more than I did in the beginning!

So if you see something that I can save a lot more money on let me know. If not for $20 I think I will order the kit.

Thanks again for everyone's help!

Element switch $11.50
https://www.amazon.com/dp/B002MPPTB...0c-20&linkId=6910e4af63523c994272f3fbb6d3699d
Temp Probe $12.98
http://www.ebay.com/itm/RTD-Pt100-T...878196?hash=item1eb2a071b4:g:lL0AAOSwqBJXXWGy
Temp Probe Option 2 $46.35
http://www.auberins.com/index.php?main_page=product_info&cPath=20_15&products_id=249
Enclosure $62.65
http://www.auberins.com/index.php?main_page=product_info&cPath=34&products_id=340
PID $46.95
http://www.auberins.com/index.php?main_page=product_info&cPath=53&products_id=560
Element Indicator Light $3.45
http://www.auberins.com/index.php?main_page=product_info&cPath=7_33&products_id=248
40a SSR $15.50
http://www.auberins.com/index.php?main_page=product_info&cPath=2_30&products_id=30
Wire Pack $8.99
https://www.brewhardware.com/product_p/wirepack50.htm&Click=17367
Connector Pack $10.98
https://www.amazon.com/SOLOOP-Termi...=Insulated+Electrical+Terminal+Connectors+Set
Buss fuse holder (2) $4.98
https://www.amazon.com/Bussmann-BP-...0c-20&linkId=4ef1170cd5e0bbb327c0223023ed63e3
10 amp fuses $3.71
https://www.amazon.com/BUSSMANN-BPA...0c-20&linkId=f3e13d75a7730bd013d045e9a88c01ca

1 amp fuses $2.99
https://www.amazon.com/Qty-Fast-Blo...id=1491842345&sr=8-2&keywords=1+amp+buss+fuse

Pump switch $11.98
http://www.auberins.com/index.php?main_page=product_info&cPath=32&products_id=303
Pump Outlet $4.77
https://www.amazon.com/Eaton-TR1877...0c-20&linkId=66d03d86a40337097eff4a3146e99ac1
Element Socket $14.70
http://www.auberins.com/index.php?main_page=product_info&cPath=7_43&products_id=410
Inlet for Power Supply $32.90
http://www.auberins.com/index.php?main_page=product_info&cPath=7_43&products_id=460
From Spa Panel to Control Panel $19.50
http://www.auberins.com/index.php?main_page=product_info&cPath=7_43&products_id=470
 
Hope this helps... comes out to $121 including shipping but I didnt include wire (honestly I found the home depot and radioshack were cheap sources for this but the kit at brew hardware looks good too but you still need the heavier wire.
Also you very well might want a fancier looking control panel but many have used the plastic electrical enclosures that lowes and home depot sells including myself and its actually the same enclosure High gravity brewing uses here for reference. (they use a vinyl decal to dress up the front)
http://www.highgravitybrew.com/store/pc/Electric-Brewery-Controllers-c272.htm
They are a lot easier to cut and drill holes into.

30a switch- $10
http://www.ebay.com/itm/Leviton-Whi...366818?hash=item5b353f54a2:g:m1kAAOSwknJXxMGQ

temp probe. $9 (whether a 3 or 4 pin jack was used at the probe end makes no difference)
http://www.ebay.com/itm/RTD-PT100-T...c14123b484ac54a591bdb6&pid=100506&rk=1&rkt=1&

3 pin aviation connector for panel $1.03
http://www.ebay.com/itm/M12-12mm-3-...072416?hash=item3aa65acfa0:g:TdUAAOSwpDdVLc9k

As far as the enclosure this is an easier and cost effective optional 12x12x6" electrical enclosure (the picture is not correct)$36
http://www.homedepot.com/p/12-in-x-12-in-x-6-in-Junction-Box-R5133713/202043349

22mm indicator lights $1
http://www.ebay.com/itm/G-CAO-Sale-...hash=item210e6729d1:m:mX-5E9OsSywoqQGuFcMobkg

40a ssr,grease and heat sink (same manufacturer as the ones auberins sells) $12
http://www.ebay.com/itm/SSR-40A-DC-...767797?hash=item5421d39735:g:1NMAAOSwKtlWpk~8

bussman 3 fuse holder rated at up to 30a (to protect the element, pump and pid on separate lines) $8
http://www.ebay.com/itm/Buss-30-Amp...096213?hash=item3f638c9115:g:fSwAAOSwDNdV1fNQ
fuses (home depot for like $2-3)

Pump switch $2.69
http://www.ebay.com/itm/NEW-TWO-2-P...216727?hash=item540c378017:g:YeQAAOSwwNVTukEu

pump outlet (15a which is safer to use with a 10a switch anyway) $4
http://www.ebay.com/itm/Leviton-Alm...786682?hash=item3614e5027a:g:AZUAAOSw4YdY0X6u

element socket $8
http://www.ebay.com/itm/New-P-S-Loc...183194?hash=item3614eb0f5a:g:gcsAAOSwOgdY0e8d

inlet for power supply (not sure why you want this, its easier to just attach a cord to the control panel that unplugs at the other end.) $18
http://www.ebay.com/itm/NEMA-L14-30...133412?hash=item54374e5564:g:YSIAAOSwdzVXv~S-

from spa panel to control panel $8.26
http://www.ebay.com/itm/NEMA-L1430P...811427?hash=item36050a8ca3:g:B-gAAOSw-7RVFd1X

It helps a lot!

I am a little confused on your last 2 items listed.

You said "(not sure why you want this, its easier to just attach a cord to the control panel that unplugs at the other end.)"
Can you explain this a little further?

I guess here is how I envisioned the wiring diagram in my head. This is going to be very elementary.

240v wire from my breaker panel into my spa panel (hard wired) > from spa panel (which has the spa panel to control panel plug you listed last) to my control panel (Control panel has inlet for power supply). Bottom of my control panel will have 4 receptacles (one for the main power coming in from the spa panel, another going to the element, another for the pump, and one for the temp probe.)

Or are you saying I can run the wire straight into the box and I should add a receptacle for the spa panel to plug into.

I will also need a plug for the element which I failed to list on my parts list prior.

Everything else makes sense!
I hope you're just being loose with terminology, but power input must always be a plug (exposed blades), and power output must always be a receptacle. This guarantees you that you never have voltage on exposed plug blades. Voltage on exposed plug blades is an obvious hazard. A recessed plug is most often used when the input plug is mounted in the panel.

If you want to hardwire the spa panel to the main service panel (i.e. no connectors in between) then the installation would probably be required to meet code, and depending on jurisdiction may require a permit and/or inspection. A receptacle and plug break between the two means your spa panel doesn't have to meet code, since it's not part of the structure wiring.

Brew on :mug:
 
What I was saying was many people permanently wire the cord to the control panel and just have a plug on the end that plugs into an outlet on the wall thats wired to the spa panel... Theres no need to have a cord that detaches at both ends... You just need a gland like these http://www.ebay.com/itm/5-Pcs-PG19-...862040?hash=item33be3ae1d8:g:o6gAAOSwaB5XjrVD to wire a cord to the panel just like 99% of most other appliances.

I bought a dryer outlet from the home depot for my panel along with a 4 prong dryer plug because they were cheap.
 
Augiedoggy. The heatsink that comes with that SSR is pretty small compared to the ones you can get from Auber.. Will a larger heat sink help with the lifespan of the SSR or do you think its completely pointless???
 
Augiedoggy. The heatsink that comes with that SSR is pretty small compared to the ones you can get from Auber.. Will a larger heat sink help with the lifespan of the SSR or do you think its completely pointless???

It's actually the same size as the smaller one Auberins sells for like $10... I use them in my builds but I always use a 12v fan blowing through then as well.
 
how did you get down to 12v? Do you think these heat sinks would work fine without a fan? also auber does sell what looks like a larger rectangle sink
 
I hope you're just being loose with terminology, but power input must always be a plug (exposed blades), and power output must always be a receptacle. This guarantees you that you never have voltage on exposed plug blades. Voltage on exposed plug blades is an obvious hazard. A recessed plug is most often used when the input plug is mounted in the panel.

If you want to hardwire the spa panel to the main service panel (i.e. no connectors in between) then the installation would probably be required to meet code, and depending on jurisdiction may require a permit and/or inspection. A receptacle and plug break between the two means your spa panel doesn't have to meet code, since it's not part of the structure wiring.

Brew on :mug:

Yes I was just being loose with my terminology, but I appreciate the correction and feedback.

What I was saying was many people permanently wire the cord to the control panel and just have a plug on the end that plugs into an outlet on the wall thats wired to the spa panel... Theres no need to have a cord that detaches at both ends... You just need a gland like these http://www.ebay.com/itm/5-Pcs-PG19-...862040?hash=item33be3ae1d8:g:o6gAAOSwaB5XjrVD to wire a cord to the panel just like 99% of most other appliances.

I bought a dryer outlet from the home depot for my panel along with a 4 prong dryer plug because they were cheap.


Yep, I plan to have an outlet on the wall for the spa panel. That's what I thought you were getting at.

Thanks again
 
how did you get down to 12v? Do you think these heat sinks would work fine without a fan? also auber does sell what looks like a larger rectangle sink

Auberins and Amazon's or eBay also sells the larger heatsinks. The main difference being is that are about twice the markup from auberins vs the latter.. I installed a DC power supply which outputs 12 and 24v to power my 24v coil relays, pumps and the 12v for the fan. On my new brucontrol based panel the 12v also powers my Arduino mega and the 24v powers my relay board.
 
Auberins and Amazon's or eBay also sells the larger heatsinks. The main difference being is that are about twice the markup from auberins vs the latter.. I installed a DC power supply which outputs 12 and 24v to power my 24v coil relays, pumps and the 12v for the fan. On my new brucontrol based panel the 12v also powers my Arduino mega and the 24v powers my relay board.

Augiediggy - Do you have a link or part number for the DC power supply you are referencing? I am looking for similar, and also looking into the brucontrol setup. Thanks again for the help, as you have been providing links to items from my requests, and I have used links you provided to others as well!
 
Auberins and Amazon's or eBay also sells the larger heatsinks. The main difference being is that are about twice the markup from auberins vs the latter.. I installed a DC power supply which outputs 12 and 24v to power my 24v coil relays, pumps and the 12v for the fan. On my new brucontrol based panel the 12v also powers my Arduino mega and the 24v powers my relay board.

I will have to look for them....Do you feel a fan is really necessary though? I'm not really wanting to get super complex with this build...I'm trying to keep it as cheap as I can and still have good functionality.
 
I will have to look for them....Do you feel a fan is really necessary though? I'm not really wanting to get super complex with this build...I'm trying to keep it as cheap as I can and still have good functionality.

It appears that many brewers run control panels without fans. To be able to do this, the heatsink needs to be mounted on the outside of the enclosure, so that ambient air can circulate around it. The SSR(s) should be mounted directly to the heatsink, so a hole in the enclosure large enough for the SSR(s) is necessary. Also, use a thin layer of thermal compound between the SSR(s) and heatsink. You can improve the thermal dissipation from the heatsink by mounting it on the side of the enclosure, with the fins in a vertical orientation. This will enhance convection across the heatsink. I have no idea why most brewers seem to put their heatsinks on the top of the enclosure (other than having seen others to that.)

Brew on :mug:
 
You can improve the thermal dissipation from the heatsink by mounting it on the side of the enclosure, with the fins in a vertical orientation. This will enhance convection across the heatsink. I have no idea why most brewers seem to put their heatsinks on the top of the enclosure (other than having seen others to that.)

Amen to that!

I would also add that the heatsink can be inside an enclosure so long as it is maybe only one being powered at a time and the enclosure is metal. If it is large enough, it will transfer heat to the ambient environment.
 
I'm just trying to figure out what kind of box I'm going to use now...plastic or metal...cant make up my mind. Do you think having the heatsink on the outside of a plastic box would work or would it get too hot and potentially melt the plastic??? I have no clue how hot these SSRs get. Ive only dealt with CPU coolers.
 
Just make sure to cut a hole for the SSR in the enclosure so that the metal plate on the SSR is in direct contact with the heat sink (with a little thermal compound in the interface.) You want the heat to be directly conducted from the SSR to the heatsink without any intervening layers of material (except for the thermal compound.)

Brew on :mug:
 
I cant seem to find any of the mount outside the box heat sinks on ebay or amazon. I did find larger ones that you can mount inside the box though.. I might just have to buy one from auber or find a fan I guess? Seems like buying the mount outside one from auber would be cheaper than going the fan route.
 
Im just trying to figure out how I would actually make the inside mount work externally and I cant think of any way... Im really curious though... I found a good deal on a in box large heat sink and a ssr for less than 20 bucks...Do you absolutely need a fan with these internal mounted Sinks? I can't imagine these things getting so hot they fry especially if you reach your desired temperature fast so you aren't running them wide open... Anyone using these in box without a fan and having issues?
 

Latest posts

Back
Top