• Please visit and share your knowledge at our sister communities:
  • If you have not, please join our official Homebrewing Facebook Group!

    Homebrewing Facebook Group

Native ESP8266 BrewPi Firmware - WiFi BrewPi, no Arduino needed!

Homebrew Talk

Help Support Homebrew Talk:

This site may earn a commission from merchant affiliate links, including eBay, Amazon, and others.
Four years in the making, it's time to finally release the (beta version of the) latest BrewPi-ESP8266 firmware. This release contains a number of enhancements vs the previous "v11" firmware, including:
  • File system initialization enhancements
  • Substantial refactoring and upgrades (e.g. JSON handling)
  • Unified handling of Serial and WiFi output
  • Add ability to add human-readable names to probes (Thanks @speshak)
  • Add support for logging to Prometheus (Thanks @speshak)
  • Added new “low delay” mode (preliminary glycol support)
  • Swap SPIFFS for LittleFS for ESP8266 Builds
  • Fix message displayed with temperature control is set to “OFF” (rather than IDLE)
  • Added WiFi information command to get signal strength
  • Add mandatory confirmation to firmware to prevent accidental EEPROM resets (“network scanner” bug)
...most excitingly, however, this firmware adds support for ESP32 modules. In comparison to the ESP8266, the ESP32 brings additional pins and other new hardware which enables a number of features beyond the capabilities of the ESP8266 including:
  • Adds support for TFT LCD Displays
  • Adds support for "extended settings" not previously supported in BrewPi
  • Adds Bluetooth scanning support
  • Adds support for using Tilt Hydrometers as a temperature sensor
  • Adds support for using @inkbird wireless temperature sensors (TH2 and TH2-Plus)
  • Adds support for using TPLink Kasa WiFi switches
The above enhancements mean that - for those who are willing to accept the risk of bluetooth/network failures - a fully solder-free BrewPi can be built using TPLink Kasa WiFi switches to control temperature alongside a Tilt or Inkbird bluetooth sensor for beer/fridge temperature monitoring.

As with all of my firmware, The v14 beta firmware is available via BrewFlasher and BrewFlasher Web Edition. This version of the firmware can be directly accessed through the links below:

One word of caution -- Although I've done my best to test this firmware (including fermenting/cold crashing a beer using a Tilt and Kasa Switch) there may be bugs -- potentially severe ones. Use caution when testing, and let me know if you encounter any issues or anything that otherwise seems off.

Good luck, and happy brewing!
 
HI - Soldered as best I could - ESP is flashed and even connected to the Wifi. Have connected it to fermentrack using wifi.

once connected to the board I power the screen on but do not see any image. Am I meant to see the Fridge on screen or do i need to do something else to see this?
There a couple of solder bridges that you'd need to sort out, as @Thorrak said on the RJ45 and there's one on the D1Mini, between 3V3 and D8, you might also have a dry joint on the GND. There could be another couple of dry joints on the surface mount components?

For testing I can recommend @LBussy 's firmware available in BrewFlasher, it's under other, WiFi reset & Sensor/Wiring Test. It's VERY useful when putting your system together and debugging your cabling!
 
Glad to see the "Low Delay" version for glycol being added. I've been using V.0.11 with glycol in Fridge Const. mode for several years now. what are the specifics of this new "Low Delay" version. Do I still need to use just the frig sensor and set PID values to {0,0,0}, etc.?
 
I currently have a working Fermentrack setup using the Arduino controller. I am building a ESP8266 controller for the wifi. Can I flash the ESP and test the new controller build with my current fermentrack Pi configuration or would I need a new fermentrack install on the Pi? Im afraid of messing up my current well functioning controller. Can multiple different controllers be used if I wanted the arduino for one fermenter and the ESP for another?
 
Glad to see the "Low Delay" version for glycol being added. I've been using V.0.11 with glycol in Fridge Const. mode for several years now. what are the specifics of this new "Low Delay" version. Do I still need to use just the frig sensor and set PID values to {0,0,0}, etc.?

All that Low Delay does is change the timings for cooling:

LowDelayNormal
MIN_COOL_OFF_TIME
60​
300​
MIN_HEAT_OFF_TIME
300​
300​
MIN_COOL_ON_TIME
20​
180​
MIN_HEAT_ON_TIME
180​
180​
MIN_COOL_OFF_TIME_FRIDGE_CONSTANT
60​
600​
MIN_SWITCH_TIME
600​
600​
COOL_PEAK_DETECT_TIME
1800​
1800​
HEAT_PEAK_DETECT_TIME
900​
900​

It doesn't change any of the other tuning settings. Eventually I'd like to get glycol mode built, but - as I've mentioned in the past - I don't have a glycol chiller. I did add a "glycol mode" extended setting with these changes as a placeholder for when it eventually gets built, but that setting does nothing at the moment.


I currently have a working Fermentrack setup using the Arduino controller. I am building a ESP8266 controller for the wifi. Can I flash the ESP and test the new controller build with my current fermentrack Pi configuration or would I need a new fermentrack install on the Pi? Im afraid of messing up my current well functioning controller. Can multiple different controllers be used if I wanted the arduino for one fermenter and the ESP for another?

Your existing installation of Fermentrack will work with both an Arduino controller and an ESP8266 controller running the older firmware. The only function of the newer firmware that will not work with your existing installation of Fermentrack is the "eeprom reset" function -- everything else will work perfectly.

I'd start by using your existing installation of Fermentrack -- you can always migrate later.
 
There a couple of solder bridges that you'd need to sort out, as @Thorrak said on the RJ45 and there's one on the D1Mini, between 3V3 and D8, you might also have a dry joint on the GND. There could be another couple of dry joints on the surface mount components?

For testing I can recommend @LBussy 's firmware available in BrewFlasher, it's under other, WiFi reset & Sensor/Wiring Test. It's VERY useful when putting your system together and debugging your cabling!


Thanks Chris. Sorry for not responding earlier. I accepted in the end the SMD style was above my competency with a soldering Iron and ordered some more boards that had less soldering points and holes instead of surface mountings but i will take heed and try to be as clean as possible.
 
I have 3 of the surface mounted boards that I do not have the appropriate skills to complete. Anybody want them ? No money needed. I can even send the SMD's I have with them. PM if any help.

I'd prefer to send all 3 to one person if possible.

Update - I have a home for these boards.
 
Last edited:
I updated my Fermentrack software last night. I now get a "504 Gateway Time-out" I cannot access it on my Pi or remotely. Can someone tell me how to erase the original on my Pi and load the Newest version. Thank you.
 
I do not know what a docker is, so I guess I have the non docker version? I did not install docker on my Pi.
 
Last edited:
how would one migrate from the non-docker to the docker version? will the new auto script move all my settings/etc to the new format?

also for the webflasher, i assume i cant flash them over wifi/need to connect via usb yet?
 
Does anyone happen to have 3 (or any really) of the Through Hole w/LCD and Dupont - No RJ45 Thorrak PCBs? These guys: thorrak_hardware/D1 - LCD TH Dupont NoRJ.md at master · thorrak/thorrak_hardware

If so, can I buy them from you? Happy to order from OshPark, but figured I'd check to see if anyone had extras from an uncompleted project first.

Second, has anyone mocked up a 3D printed case based around that PCB? I have a big ol' junction box I was going to try and build the setup in, but if there was an existing purpose-built case, that would be lovely. No one wants to see what happens when I get the rotary tool out to try and cut nice squares for the power sockets.

Thanks!
 
I really need to know how to make this work again. My fermantrack is down and It is locked at 64 degrees, I need to ferment another batch and I need to know how to unistall what is and start fresh or fix what I have.
 
I really need to know how to make this work again. My fermantrack is down and It is locked at 64 degrees, I need to ferment another batch and I need to know how to unistall what is and start fresh or fix what I have.
have you tried just unplugging and replugging in the pi? id say if nothing else, you could delete all the indices for fermentrack and run the setup all over again. all you should need to do then is add the brewpi device back, which should already be on your network. lose profiles and names, but it would get you unstuck. If you had a spare SD, could just install everything from scratch to the pi and such and hang onto the existing SD for a 'fix' later?
 
Same thing happened to me when I tried the update. It ended up being quicker to just started over with a fresh install of Pi using the newest installer. It lets you configure the wifi up front so it was easy. Then I installed the latest fermentrack.
 
I do not know what a docker is, so I guess I have the non docker version? I did not install docker on my Pi.

Yeah - you almost certainly have the non-docker version then. As @chucknorris101 suggested, the first recommendation is to restart your Pi. Following that - depending on how old the installation is - you might want to try running the Django 3.0 upgrade steps listed here.

Issues like this are, unfortunately, why I decided to switch to Docker-only support. :( My recommendation is - either once you recover your installation, or if you decide to install anew instead - to switch to a Docker-based install once feasible.

how would one migrate from the non-docker to the docker version? will the new auto script move all my settings/etc to the new format?

also for the webflasher, i assume i cant flash them over wifi/need to connect via usb yet?

It's pretty easy! As SD cards are cheap, my recommendation is to do a fresh Raspberry Pi OS install to a new SD card, preserving your old setup until you are 100% migrated. Aside from that, all you have to do is backup the old installation and restore to the new one.

If you prefer a video of the process, you can see one here:


Settings for things like gravity sensors, BrewPi controllers, etc. will all transfer automatically. Certain site-wide settings maintained via the Django admin and Constance (such as the brewery name and graph line colors) will not transfer and will have to be re-set manually.

Second, has anyone mocked up a 3D printed case based around that PCB? I have a big ol' junction box I was going to try and build the setup in, but if there was an existing purpose-built case, that would be lovely. No one wants to see what happens when I get the rotary tool out to try and cut nice squares for the power sockets.

I might be mistaken, but I'm pretty sure all of my PCB designs fit in the same 3D printable case. That PCB design doesn't require/allow the use of a "sensor" breakout board, but the hole for the RJ-45 jack is more than large enough to support routing the cables for your sensors through directly instead.
 
Thanks - if i wanna be lazy and just delete it from my existing pi and reinstall - is all i need to do delete the folder? i dont see it in my list of installed pkg but may have used the wrong command

edit: it installed after killing off redis server, but now it wont load the gui well and gives a 413 error when trying to load either backup i made. im going to putz with it a bit more before calling it and starting fresh

edit edit: wiped it clean and backup went perfectly
 
Last edited:
Thanks - if i wanna be lazy and just delete it from my existing pi and reinstall - is all i need to do delete the folder? i dont see it in my list of installed pkg but may have used the wrong command

edit: it installed after killing off redis server, but now it wont load the gui well and gives a 413 error when trying to load either backup i made. im going to putz with it a bit more before calling it and starting fresh

Which error is 413? "Entity too large"?
 
Four years in the making, it's time to finally release the (beta version of the) latest BrewPi-ESP8266 firmware. This release contains a number of enhancements vs the previous "v11" firmware, including:
  • File system initialization enhancements
  • Substantial refactoring and upgrades (e.g. JSON handling)
  • Unified handling of Serial and WiFi output
  • Add ability to add human-readable names to probes (Thanks @speshak)
  • Add support for logging to Prometheus (Thanks @speshak)
  • Added new “low delay” mode (preliminary glycol support)
  • Swap SPIFFS for LittleFS for ESP8266 Builds
  • Fix message displayed with temperature control is set to “OFF” (rather than IDLE)
  • Added WiFi information command to get signal strength
  • Add mandatory confirmation to firmware to prevent accidental EEPROM resets (“network scanner” bug)
...most excitingly, however, this firmware adds support for ESP32 modules. In comparison to the ESP8266, the ESP32 brings additional pins and other new hardware which enables a number of features beyond the capabilities of the ESP8266 including:
  • Adds support for TFT LCD Displays
  • Adds support for "extended settings" not previously supported in BrewPi
  • Adds Bluetooth scanning support
  • Adds support for using Tilt Hydrometers as a temperature sensor
  • Adds support for using @inkbird wireless temperature sensors (TH2 and TH2-Plus)
  • Adds support for using TPLink Kasa WiFi switches
The above enhancements mean that - for those who are willing to accept the risk of bluetooth/network failures - a fully solder-free BrewPi can be built using TPLink Kasa WiFi switches to control temperature alongside a Tilt or Inkbird bluetooth sensor for beer/fridge temperature monitoring.

As with all of my firmware, The v14 beta firmware is available via BrewFlasher and BrewFlasher Web Edition. This version of the firmware can be directly accessed through the links below:

One word of caution -- Although I've done my best to test this firmware (including fermenting/cold crashing a beer using a Tilt and Kasa Switch) there may be bugs -- potentially severe ones. Use caution when testing, and let me know if you encounter any issues or anything that otherwise seems off.

Good luck, and happy brewing!
@Thorrak

Does the ESP8266 have the ability to use the Kasa wifi switches?

Does the ESP32 have the ability to use a wired temperature sensor?
Concerns for me with using Tilt as the primary temperature sensor is having the battery go out, resolution of temperature to 1F instead of 0.1F (not sure if this is accurate or not but my one-wire probes read out to 0.1), and of course connectivity problems.
 
@Thorrak

Does the ESP8266 have the ability to use the Kasa wifi switches?

Currently, no. It's a possibility, but not something I have tested.

Does the ESP32 have the ability to use a wired temperature sensor?
Concerns for me with using Tilt as the primary temperature sensor is having the battery go out, resolution of temperature to 1F instead of 0.1F (not sure if this is accurate or not but my one-wire probes read out to 0.1), and of course connectivity problems.

Yes - the ESP32 supports all of the same hardware as the ESP8266 (though I haven't compiled a version that uses the LCD2004 screens). I'm actually working on a new PCB for the ESP32 right now (literally - I have Eagle open on my other monitor!), but if you're looking for a board to play with sooner that supports wired sensors, shoot me a PM and I might be able to hook you up.
 
One thing I will mention about using the Tilt -- my strong recommendation for anyone thinking of using it as a temperature sensor is to get a Tilt Pro. Those things are amazing, provide temperature readings in 0.1deg increments, and also have stronger signal strength.
 
th1.jpg
th2.jpg
th3.jpg
th4.jpg
th5.jpg


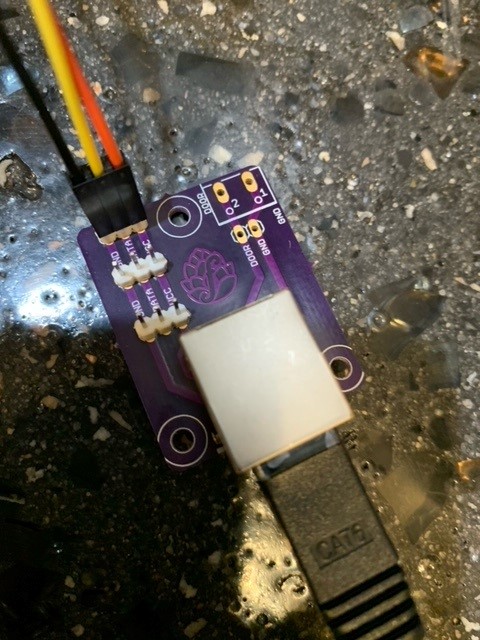
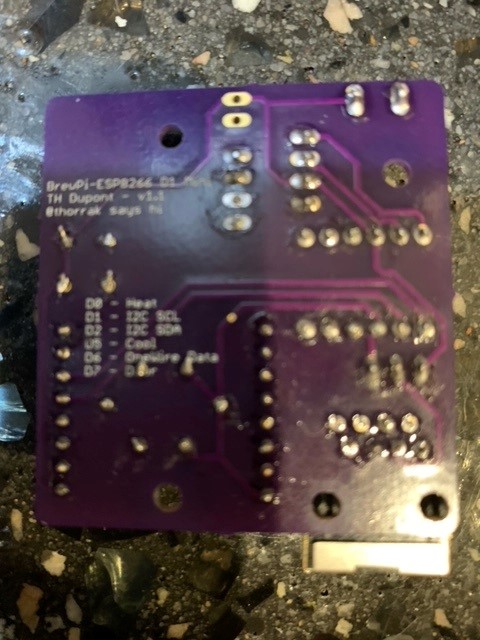
Hi - Anybody any idea why I can't see the one wire sensors in fermentrack. I ended making 5 boards and have them all connecting to the wifi and displaying the readings on a display. In fermentrack I can connect to the controller but only see pin setting and no one wire settings. I just bought a pack of small cat6 cables on amazon for the connections and did not do anything special with the pins. Any ideas. I've tried a few main boards and sensor boards and have seen any one wire sensors coming up yet ?

Thanks in advance

Neal
 

Latest posts

Back
Top