• Please visit and share your knowledge at our sister communities:
  • If you have not, please join our official Homebrewing Facebook Group!

    Homebrewing Facebook Group

Nate's motorized grain mill

Homebrew Talk

Help Support Homebrew Talk:

This site may earn a commission from merchant affiliate links, including eBay, Amazon, and others.
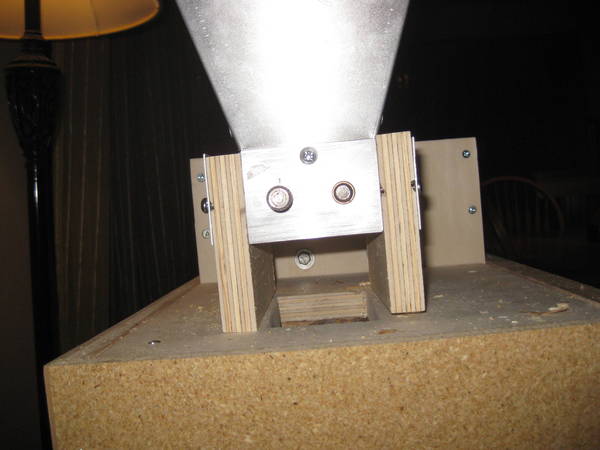
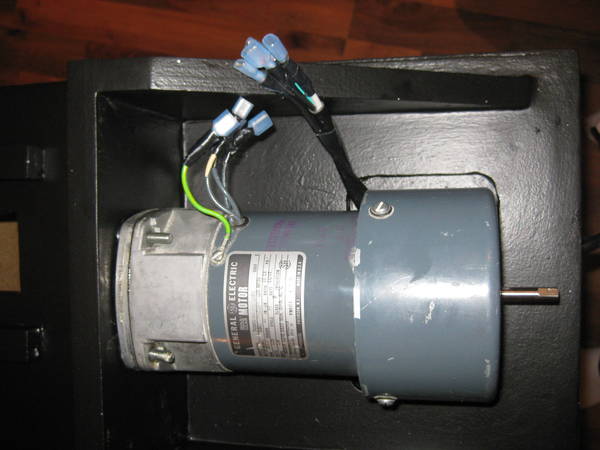
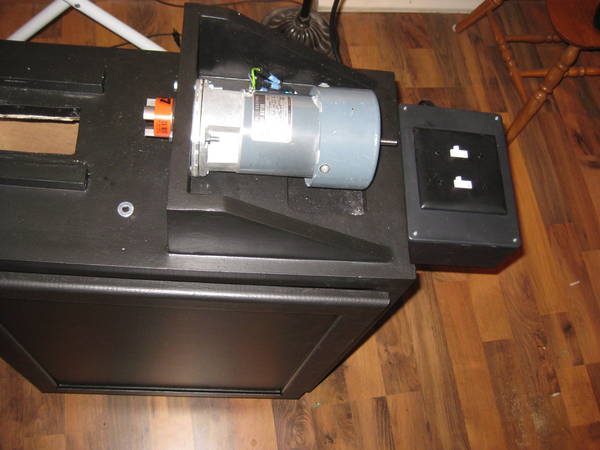
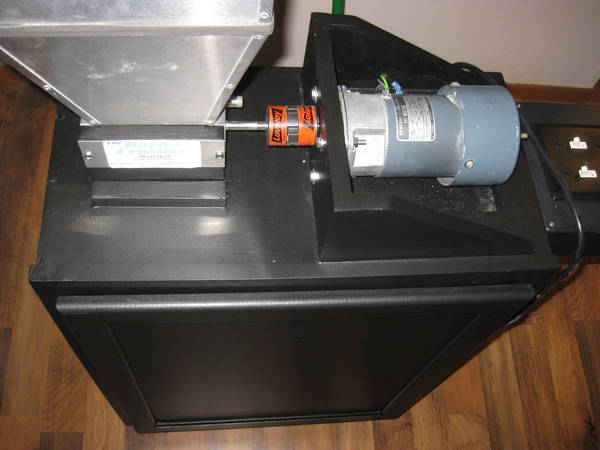
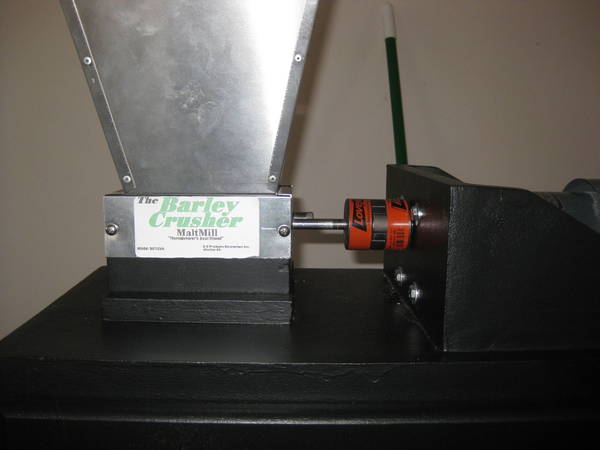
fitting the crusher base

IMG_08853.JPG


IMG_08864.JPG


IMG_08872.JPG
 
i re-drilled the holes from 5/16 to 3/8. that allowed a little more "play" when i put the bolts through and helped the base to sit more even. if you look close in the pics it seems a little "wobbly."
 
Looking good! what are you going to "catch" grain in that fits in the cabinet?

And do you have a layout of that motor bracket? Just ordered all the stuff since my drill died today....want to get a head start like you did.
 
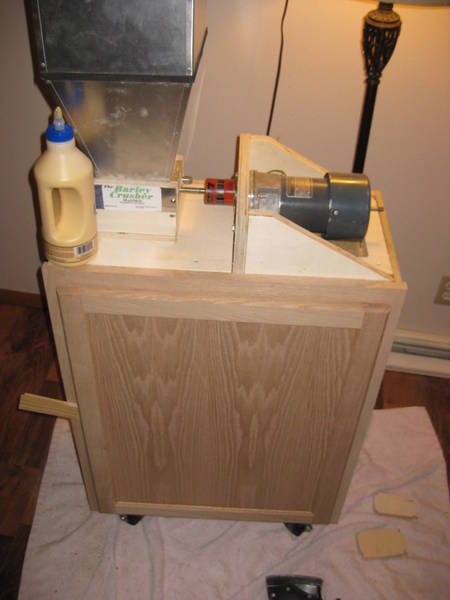
kegtoe nice woodwork.

With some leftover wood make safety guard to cover the drive shaft and protect your friends;)


Cheers,
ClaudiusB
 
alright, I'm looking for some help from the HBT community.

1) I'm looking for some ideas on how to mount my control box. I have a project box from Radio Shack where i am going to mount the capacitor inside and 2 switches on the outside. I am thinking that i would make a psuedo table top to the right level with the rest of the top. I'd then likely make on on the left to put a scale on for weighing grains.

2) What's your opinions on color for the cabinet. I was originally going to stain the whole thing. But with the ply wood being a different species. AND the top not being perfectly square, it shows a few gaps and some end grain with the plies. I think now i'd like to sand it, use a bit of putty, prime it, and paint it black. That way i can add my HBT sticker to the front too.

What do you all think?

IMG_08912.JPG
 
On the first question, i would go with just one switch, there is no reason for two, mine is up for fwd and down for reverse. (IMO)

You do nice work so it might look better if you make a wood box that matches your masterpiece for the switch and CAP.

Why don't you cover the motor and the shaft and make a small "table" above those items to set you scale?

Good luck
 
bought a project box from radio shack for 6 bucks. holds the capacitor and two switches with faceplate.

From the front
IMG_08921.JPG


From the back of the box plate
IMG_0893.JPG
 
motor and wiring

I wanted to use the mated spade connectors in case i ever wanted to change the motor - wouldn't have to rewire the whole thing
IMG_09011.JPG


IMG_09031.JPG


IMG_09043.JPG
 
Does anyone know the dimension of the capacitor. Trying to get ahead start on the project box. Want to make sure I leave space for it. I bought a 8x6x3 project enclosure. But I want to put a extra outlet and switch for it. Lights for the power on the extra outlet,forward,reverse and power to the motor. Then I decided I liked the idea of a light switch and a 3 way light switch for the controls. Here's a pic of the supplies. Just wana make sure it all fits. The dimensions would help alot. Thanks for everyones help

image-3936860196.jpg
 
I only used one switch...it is all you need. SPDT switch...ON-OFF-ON...gives you forward and reverse with OFF in the middle position.
 
jakecpunut said:
@agezzi1 5 1/2" long (counting tabs that you hook your wires too) 2 7/8" wide 1 1/2" deep

hope that helps!

Thanks that helps alot. My motor should b here tomorrow. I just finished the project box when I got your response. Here's a pic of the finished product( plenty of room for the cap). Just got to wire the motor. As well keep up the videos on the tube. I'm a fan, thanks again

image-4246353901.jpg


image-684303852.jpg


image-2075223767.jpg
 

Latest posts

Back
Top