
Jonnio
Well-Known Member
- Joined
- Dec 30, 2007
- Messages
- 1,489
- Reaction score
- 10
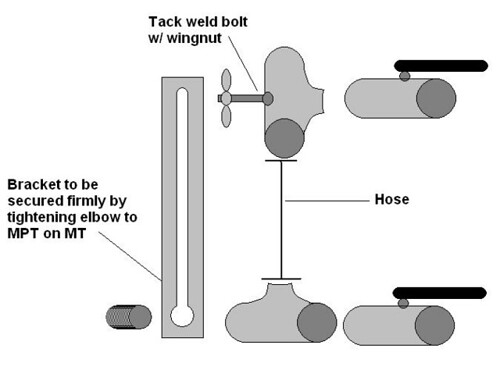
Once the height of the tee is set, that's it. There is no possibility of the fluid level changing.
That's a good idea, but wouldn't you want/need to have the height of the outlet of the loop be adjustable depending on the size of your grain bill? I can't see an English Bitter and a big Barleywine having the same setting.


![Craft A Brew - Safale BE-256 Yeast - Fermentis - Belgian Ale Dry Yeast - For Belgian & Strong Ales - Ingredients for Home Brewing - Beer Making Supplies - [3 Pack]](https://m.media-amazon.com/images/I/51bcKEwQmWL._SL500_.jpg)


")
