My (somewhat delayed) Brew Room Build

Homebrew Talk - Beer, Wine, Mead, & Cider Brewing Discussion Forum

Help Support Homebrew Talk - Beer, Wine, Mead, & Cider Brewing Discussion Forum:

This site may earn a commission from merchant affiliate links, including eBay, Amazon, and others.

Exception13

Supporting Member
HBT Supporter
Joined
Oct 9, 2012
Messages
240
Reaction score
186
Location
Westport, Ontario
In 2013, we started the build of our forever home. We moved in during the summer of 2014 and I was itching to get to work on my own permanent brew space. Imagine my surprise when I discovered that there were a tonne of other 'more important' jobs to be done first..... :(

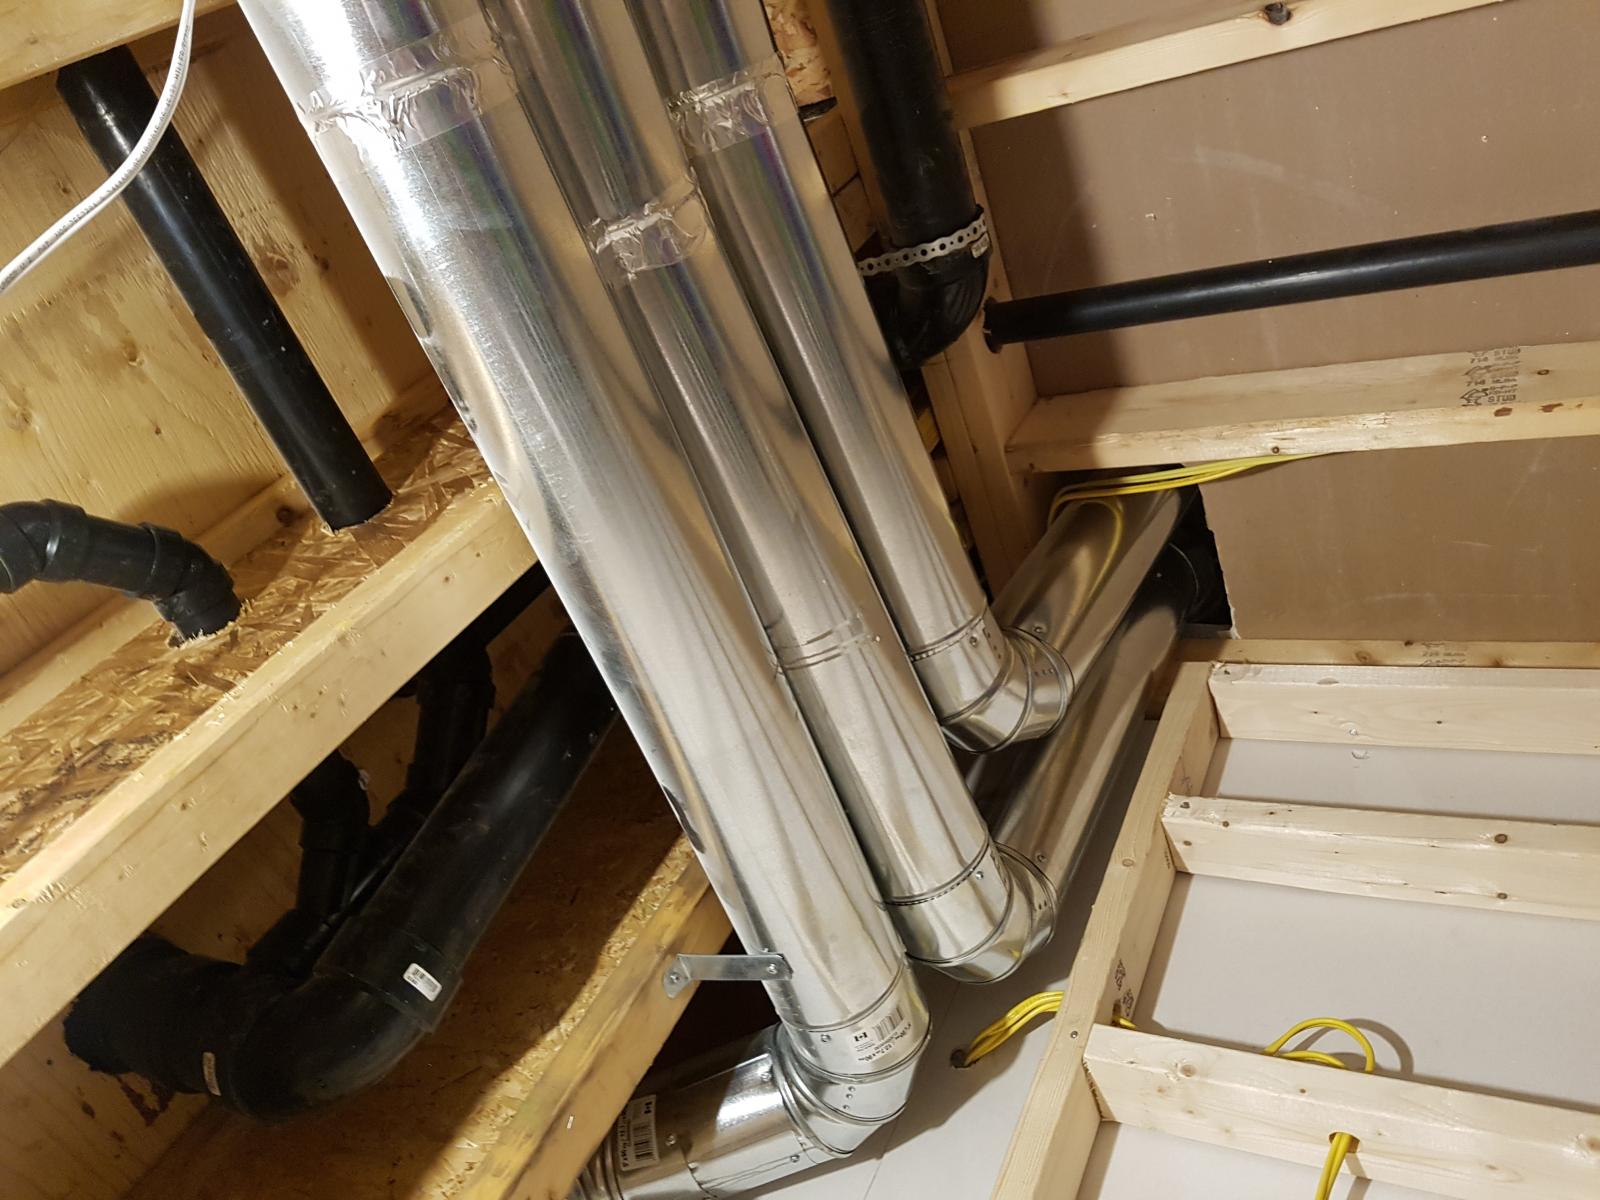
Fast forward to the spring of 2017 and I have finally started on my brew room. The space is unfinished 6'10" x 8'7" stud to stud and the ceiling is 9'6" to the bottom of the main floor joists. Sooo, lots of room I think. There is a straight run between the joists to an exterior wall for ventilation. Hot and cold water lines are also present and easy to access.

attachment.php


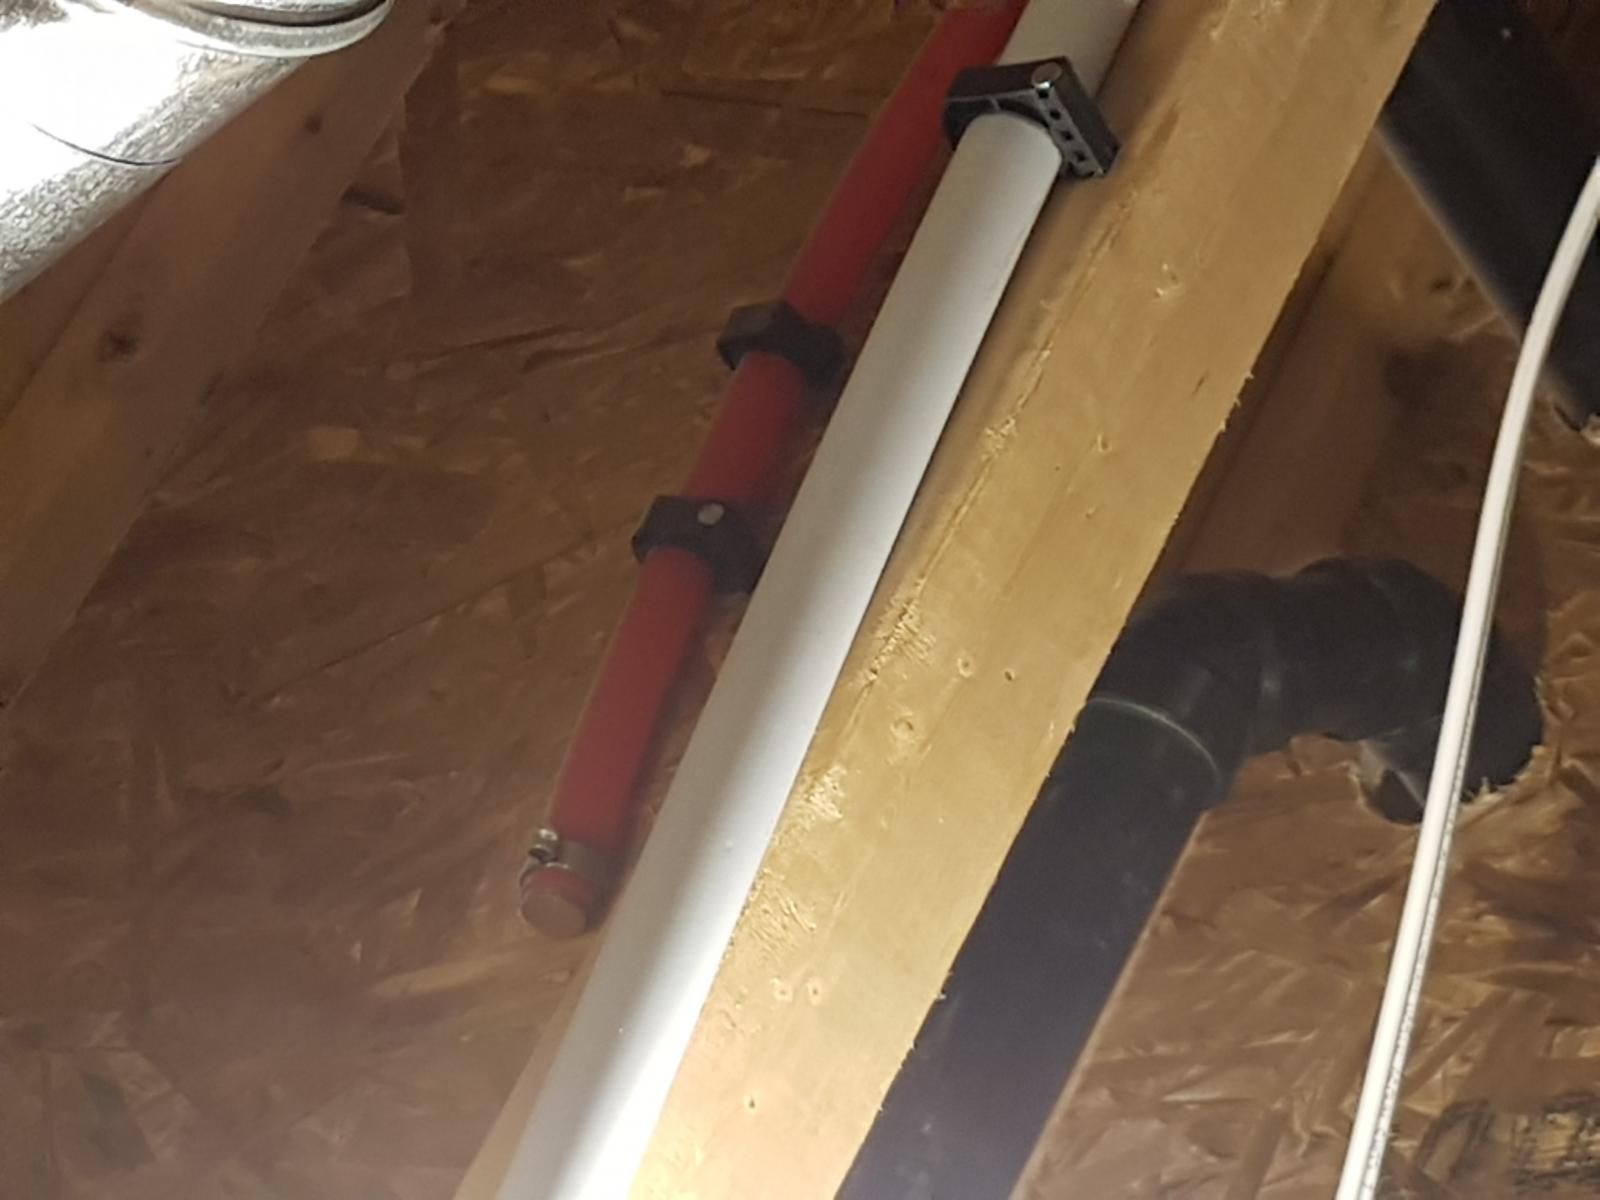
Drain for the sink is a minor issue as it is in the ceiling.... but there are pumps for that.

attachment.php


This will be an electric brewery using 2 of the Avantco 3500 Induction plates. I do 5 gallon batches and in my testing of these plates, I can get the required water to boil fairly easily. I have the two 240v 20a circuits in the room now.

attachment.php


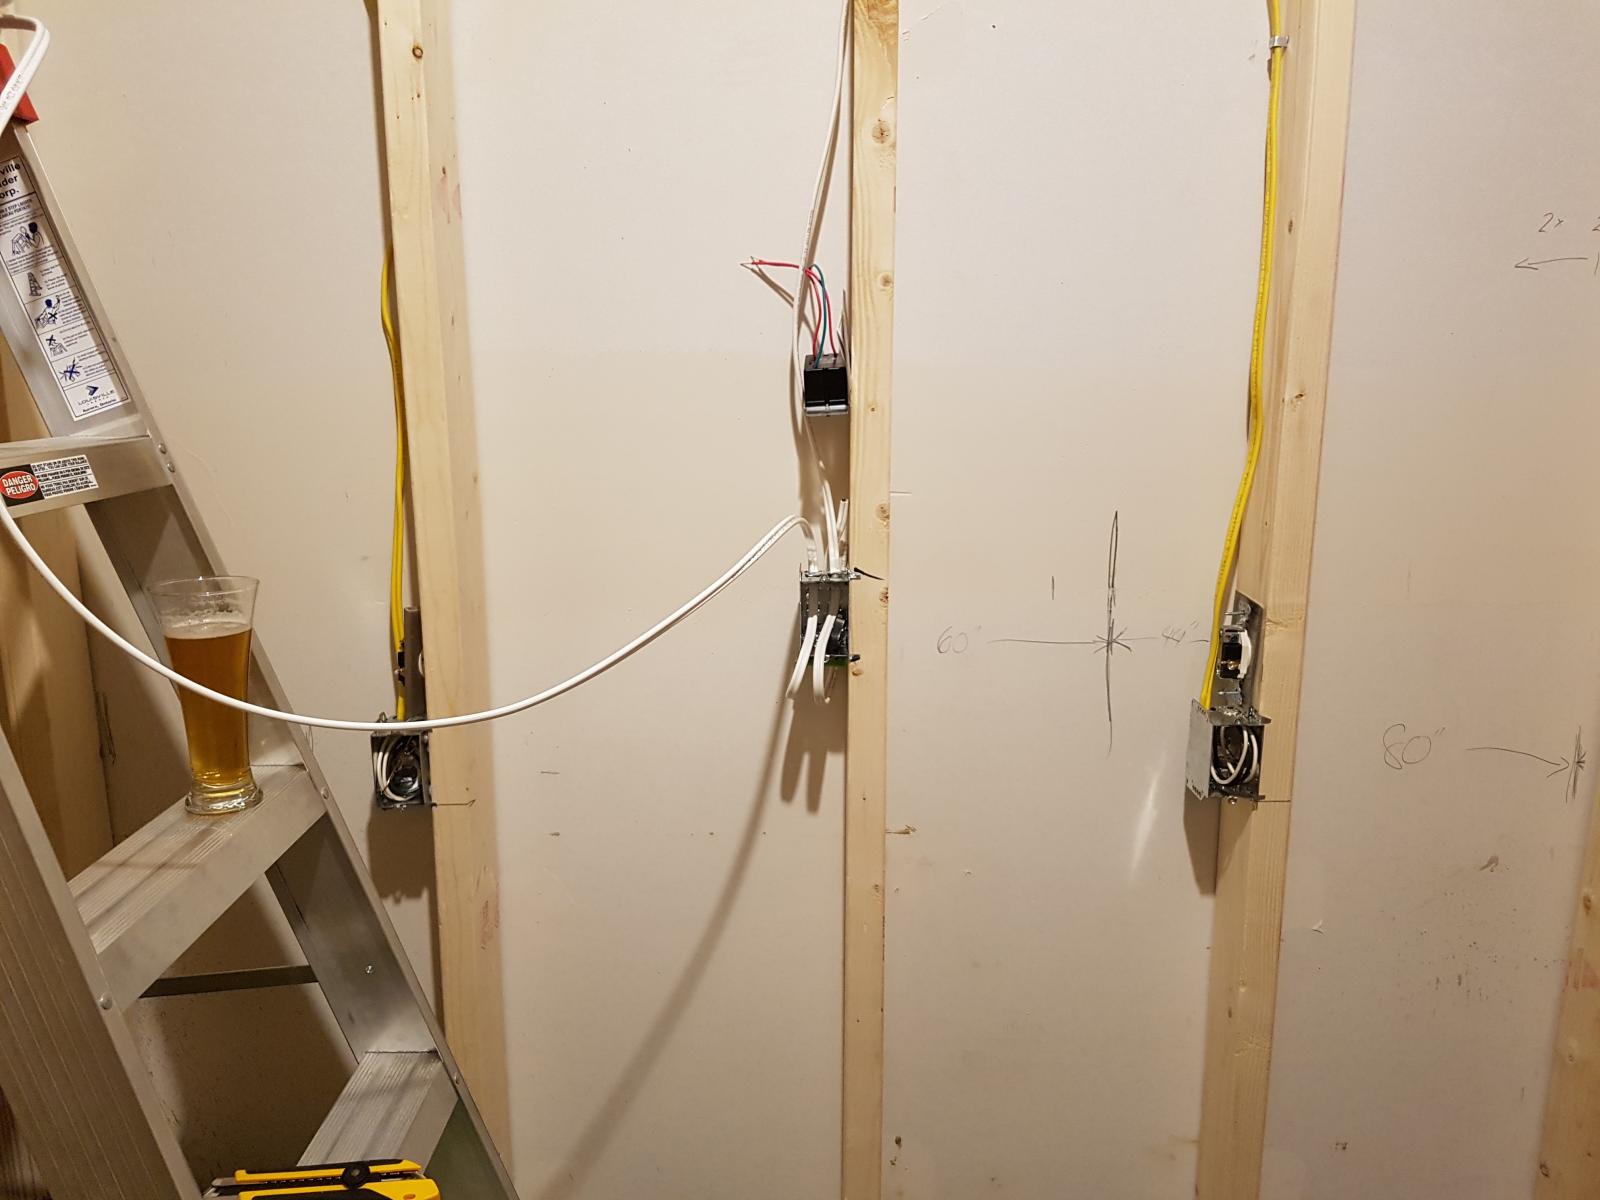
I believe that you can see the RDWAHAHB on the ladder. Also have the wire for the speed control switch for the Vortex in and am starting to run back to the panel….. Speaking of which...

I have a sub-panel with 50a available for 120v circuits. So, I think I'm ok for electricity.

attachment.php


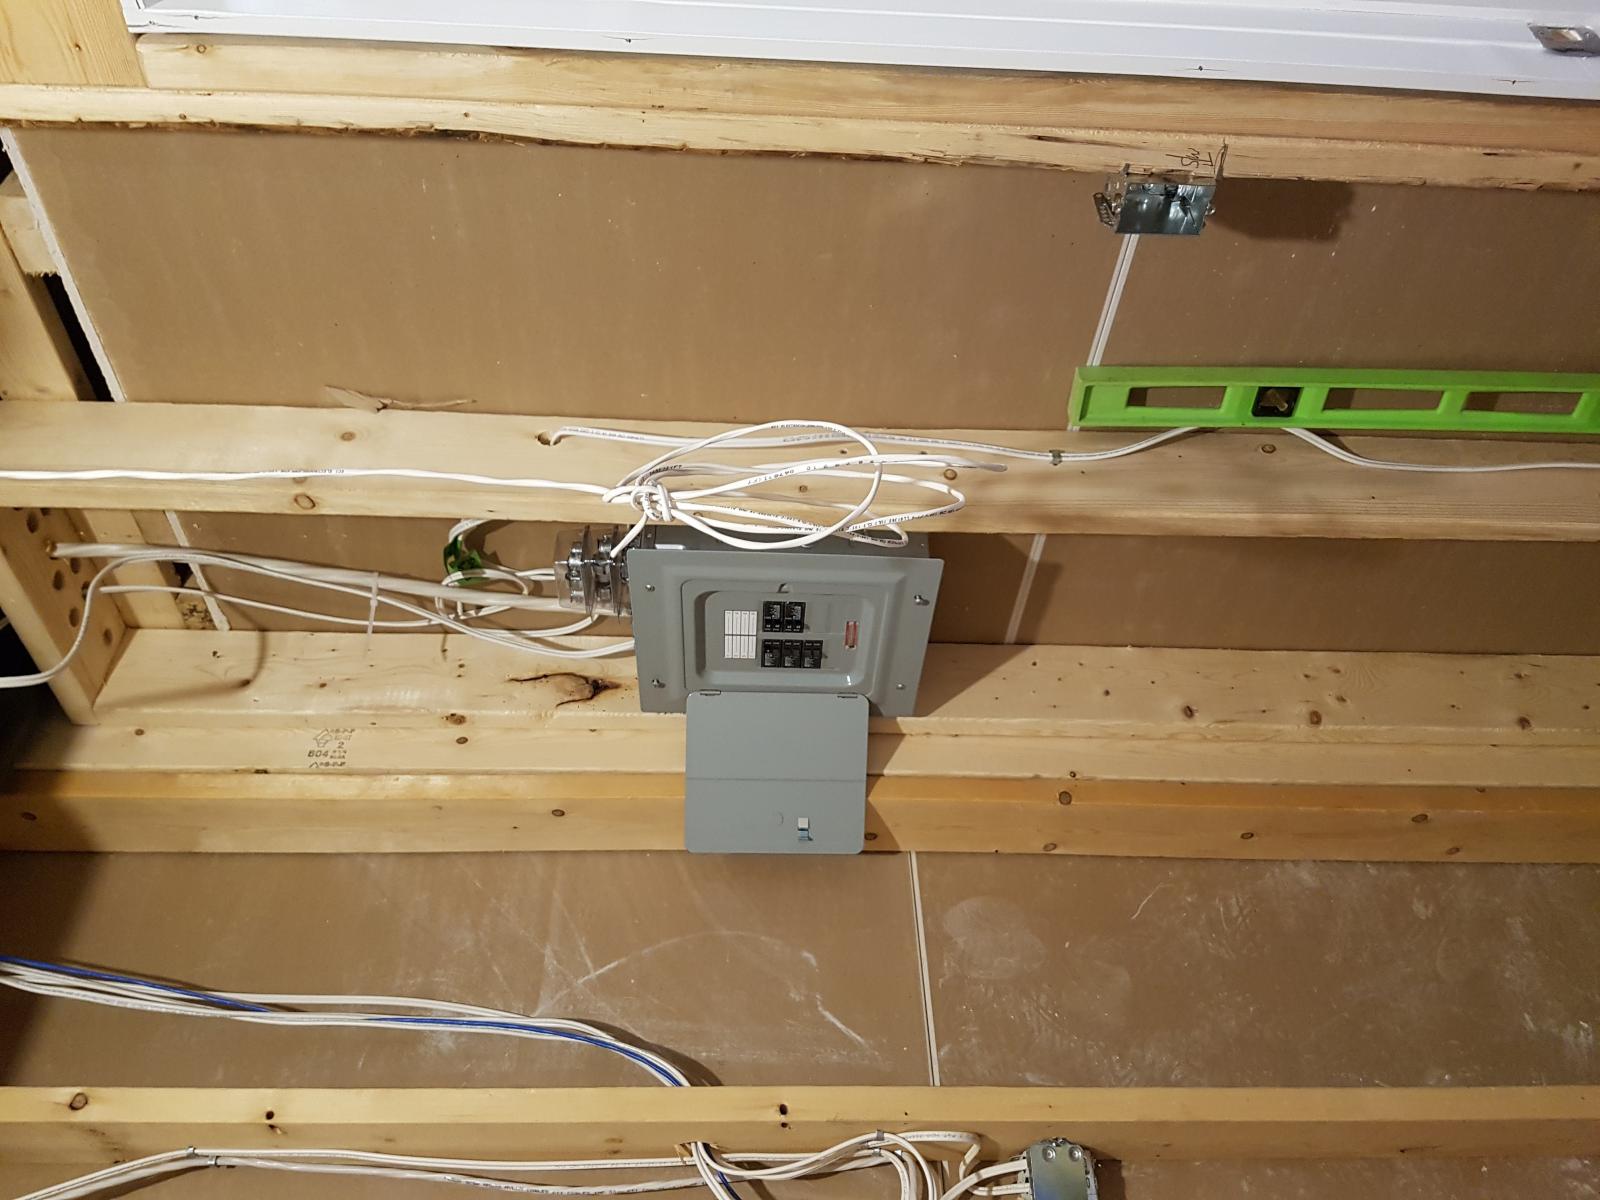
As can be seen, I have started pulling wire. The sub is live but just for the temporary circuit with a light on it. I have an electrician friend who will be connecting these circuits up to the panel when I’m done. The wall you can see to the left of the panel happens to be where my bar is so that’s where the kegerator (for now… keezer eventually) will sit with taps going through the wall to the bar.

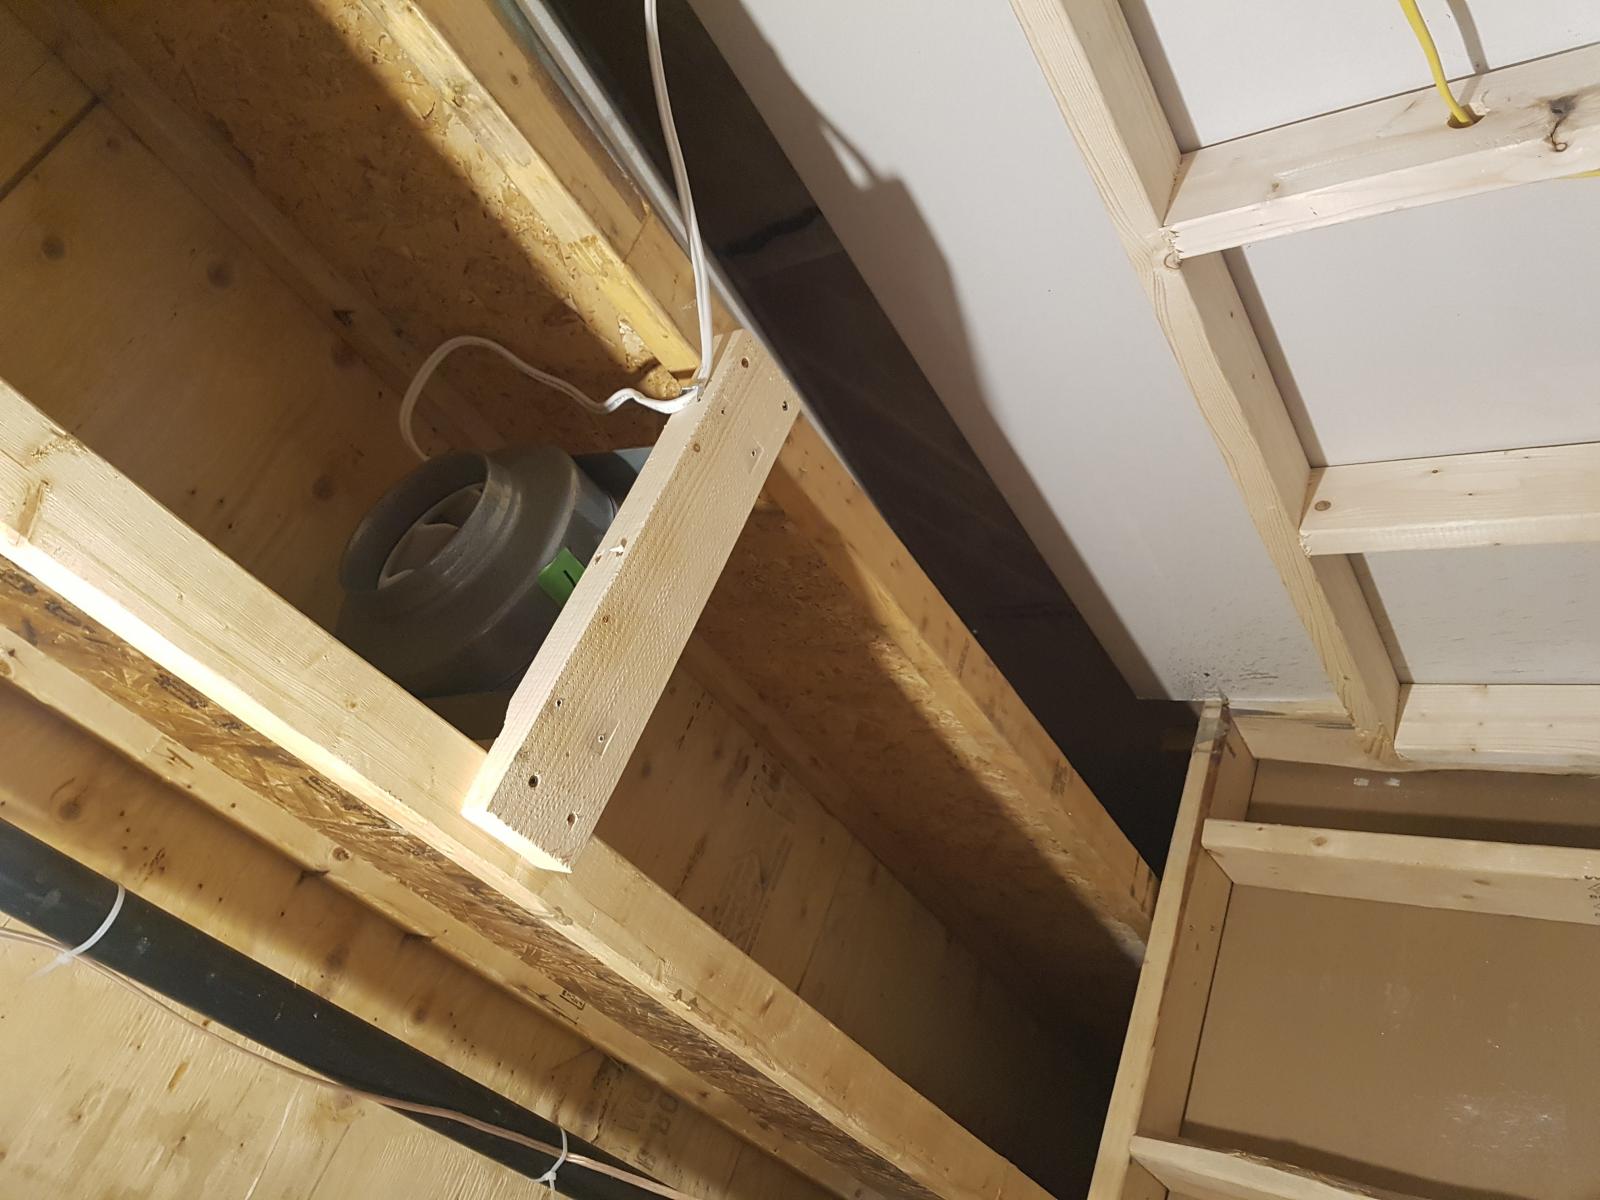
I have the exhaust fan mounted and ready for ducting. Not sure what I’m gonna do for a vent hood yet. Depends on funds, I guess. I have a friend who bangs tin so may get her to fab me a hood out of galvanized.

attachment.php


I know that the keen-sighted are asking, why did he stud over the drywall there? And why is the framing for that wall a foot shorter than the adjoining walls? The house has ICF foundation and that drywall is covering the ICF. Rather than cut the drywall and ICF to run wiring and plumbing (cause the sink is going to be on that wall), I decided that this was easier. It’s a foot shorter cause my plan is to suspend a ceiling and it’ll be below that low top plate.

I will plan to keep this updated as the build progresses. Still a bunch of work to do but… it’s started… :mug:

Cheers!

Chris

20170326_135458.jpg


20170326_135511.jpg


20170326_135924.jpg


20170326_135411.jpg


20170326_135354.jpg
 
Last edited:
Looks like I need a lesson on getting pics to orient themselves correctly, be inline with the text and not be duplicated at the bottom of the message.....

Anyone?...

Cheers!

Chris
 
Looking good! I'm finishing up a 5 mo. long similar build myself. It's very rewarding - especially when you know you're staying in the house forever! Looking forward to following your progress.
 
Pics are showing up fine for me..Looks like alot of work ahead but rewarding work nonetheless. I remember my brewshed build out..Felt like I was NEVER going to get it done but 2 years later, I have brewed well over 400 gallons in it and I love it as much today as I did when it was being built.
Wifey loves it too as she is not a fan of messes/brewday/beer equipment all over the house so six degrees of separation with this hobby has done our marriage wonders.

I just refreshed my memory with your brewshed thread. My wife doesn't like the smell of boiling wort, nor the constant parade of brew gear through the kitchen to the garage and then back through the kitchen to be cleaned and then ... well, you get the picture.

Gonna take my time with this and try to get everything right. Already I see I may be moving a couple of the circuits to accommodate a brewstand idea... we'll see.

Cheers!

Chris
 
Looking good! I'm finishing up a 5 mo. long similar build myself. It's very rewarding - especially when you know you're staying in the house forever! Looking forward to following your progress.

I figure it's a journey that I should savour, cause it will take a while. Thankfully, the warmer weather is nigh so I don't have to freeze my @$$ off in the garage. Gotta keep the pipeline full while I'm building, after all. :mug:

Cheers!

Chris
 
I did not get much done this weekend as we had company. I did manage to pull more wire for lighting and plugs. Also confirmed that my exhaust fan works as does the speed control. Soon as I get it vented to outside and some sort of hood up, I'll test with boiling water before I box it in completely.

I am contemplating just how I want my brew station to work. I like the idea of a single tier with pumps, but I'm not crazy with the added cost. Currently using a rubbermaid cooler for an MT with a couple of stainless pots for HLT and BK. I am browsing through the brew sculpture threads to see if anything that will work for me. Not thrilled with a tall 3-tier due for obvious reasons. More research is required. :)

Chris
 
Chuckle. Nice to know that somebody read this. Summer happened. The brew room is on hold while we enjoy what little sun and warmth we can in this so-called Summer 2017. It has been wet here in the Rideau Lakes. I have a shed project I am just finishing up. I need to spend some more time in my Siren before it gets too cold for me to sail. Once all that is complete... and the boats are out of the water, and the dock and lift are as well, it'll be time to get back to the brewery.

Cheers!
 
^^^ what he said. I was just bored and looking throught the forums. Good luck on the summer projects and enjoy what sun ya got left. Here in alaska I understand.

Love to see the updates and progress.

Cheers
 
Thanks very much to you both for the kind comments. Never been to Alaska, Thedude907, but I did spend 8 years in Labrador in my younger years. Much colder there than here, but probably less chilly than some stuff you get to deal with.

I figure it'll be next month before I get back at it. Brewing up a Black IPA this weekend and it still sucks to be doing that in the garage. :D Hauling the gear up from the basement and then tearing it down and hauling it back. Soon... soon.... (that's what I keep telling myself)

Cheers!

Chris
 
Just a short update. Here in the Rideau Lakes, summer is drawing to a close. We have had glorious weather for September and October.... not so much for July and August, sadly. At any rate, the boats are out of the water, the dock is on shore and evenings are being spent at the firepit. Fall is here.

I had a chance to brew (in the garage) 3 times this summer. Did a clone of Bell's Two Hearted, a black IPA and a Blonde Ale. They turned out well. I am looking forward to the time when I don't have to haul the equipment up from the basement. So, back to the brewery build.

I've ordered drywall and will start hanging that next weekend (visiting family this weekend). I still have to run the duct for the exhaust fan and install the outside louvre. I also have to figure out a hood. Think I'll build one for now. The electrical is just about done in terms of pulling wire. I had a thought that I'd like to have the option to run a control panel a'la Kal's. So I am adjusting the circuitry on the subpanel to allow for a 30-amp GFCI circuit. I'll pull the wire for that and leave it in the wall, not connected for now. The rational here is that I already have 2 20-amp 220V circuits run for my 3500w induction plates and I can brew using them. Long term, I want to have the PID control that a Kal panel will give me. But, that means saving up some dollars.

More pictures coming as I progress along.

Cheers!

Chris
 
I managed to get a couple of hours work in over the weekend. I've finished wiring and have installed the supply PEX lines from where they will connect to the existing piping to where the sink is going to go. As I mentioned above, I already had 2 existing 240V 20amp circuits to run the Avantco plates. I am wiring lighting and 15 amp circuits for "stuff" from a 50amp panel.


20171126_153151.jpg
20171208_105934.jpg


When we built the house, I had the electricians install a couple of 120V 20amp circuits for a Keezer and a fermentation fridge. I had originally planned on having these behind the bar. Because we've repurposed this room from a sauna to a brewery, I wanted to move those two circuits from the bar to the brewery.

20171126_153308.jpg


20171203_095053.jpg


I am hesitant to show my poor finishing skills, but...

20171208_113417.jpg


20171211_072822.jpg


The picture makes it look a lot better than it really is.

You probably noted in the picture of the panel, I already have the 30amp line run for an eventual Kal style panel. Just need to buy the GFCI breaker (shudder) and build the panel (puts on his procrastination suit), but the capability is there without having to open walls in the future.

20171203_095038.jpg


I ran PEX to the sink location. Next job will be running the drain and vent. This is a basement room with a bathroom directly above. Plumbing is easily accessable, but the drain lines are in the ceiling. So, I'll be using a pump

20171130_104115.jpg


More to come as I get to it.

20171210_155520.jpg


Cheers!

Chris
 
Christmas was kind, the weather was just a tad cold for the most part. Lots of family at the house and no brewing time for Chris, sadly.

I didn't take any pictures this weekend but I did manage to run some solid vent pipe from the exhaust fan out across the bathroom (room next door) ceiling to the outside wall. Next weekend will be installation of the outside vent cover after I've cut the hole and re-insulated around where the pipe exits the house. My plan is to have this pipe run down from the outside wall to my brewery. I will fashion a P-trap with a 1/2 inch tube running from it to the sink. That should take care of any condensation in the line.... I hope. I'll post some pictures of this when I'm done.

Cheers!
 
More work on the ventilation. I got a roll of insulation sock to cover the vent pipe.


20180113_162727.jpg


I also connected the pipe to the fan and did a test run with no hood or steam. The fan pushes lots of air. I'll be opening a window downstairs to to allow for make-up air. The speaker wire you can see was run when the house was built (and the room was gonna be a sauna). I'll have music in the brewery from the zoned whole-house audio..

20180113_162618.jpg


I plan on making my hood using the ideas from This Thread. This coming weekend we have house guests so I'm not sure when I'll get that built. Soon, I hope. I want to run a test with two pots boiling.

I also ran pex to the wall where the taps will be. eventually, I'll have a wall-mount drip tray with glass rinser on the bar side.

20180113_162814.jpg


This is what I had a taste of this weekend. Doubly Worthy!

Cheers!

Chris

20180112_164921.jpg
 
A bit more work done this weekend. As mentioned above, I'm using this thread to build my exhaust hood. I started off with the end caps. Went to the Home Depot near my work and searched around for a half-sheet. No joy. Then, in a fit of stupidity, I thought the really cool looking 24x24 1/2 inch G1S pieces would fill the bill, so I bought those. Chris obviously missed the 15 and 1/4 inch radius for the endcap. Didn't discover this idiotic mistake til I was laying out the half-circles and ... they wouldn't fit. Duuuhhhh.

Again, during the trip to the Home Depot, I found the FRP sheets. Took one over to the cut station and waited. Then went searching for an orange aproned person. Found one... only to be told that they only cut wood... nothing else. After much raising of eyebrows and, "You're kidding....", I managed to get them to agree to cut the 30 and 1/2 strip off at the drywall station... with a utility knife and T-square.

After I got home and realized my mistake with the plywood, I went to my local Home Hardware Building Centre. I live in a small town, so I wasn't too optimistic that they would sell me a half-sheet. I chuckled with the employee after he told me he would sell me a half-sheet, but I'd have to buy the other half as well. They did have a cut station though, so problem solved, cause my Venza won't hold a full sheet.

I used contact cement to glue the FRP to the plywood and then cut the endcaps out.
IMG_20180128_134540_288.jpg
IMG_20180128_134540_298.jpg

Once that was done, I started screwing the remainder of the sheet of FRP to the endcaps to form the hood. One-armed paper-hanger is the best way to describe this task. It was chilly in the garage and I was afraid that I would snap the FRP. Didn't happen, but the contortions I had to endure were pretty funny. I finally got a couple of bungie cords to hold the FRP in a semblance of a curve and got the endcaps screwed on.

IMG_20180128_134540_306.jpg

The OP of the build thread used 2-by lumber for the bottom of the hood. I had some 1-by lying around and used that instead. The OP also used a J-trim on the bottom... not sure I'll need it. I'll do a test boil before I decide.

I added the flange for connection to my 6-inch Vortex fan.....

IMG_20180128_134540_310.jpg

... and she is ready to hang. Hopefully, I'll get to that this week.

IMG_20180128_134540_319.jpg

Cheers!

Chris
 
I managed to fit in some time today to do some work. Very busy sports weekend with hockey, football and curling vying for my attention.

I had two systems I wanted to get finished up - plumbing and exhaust. I got them both started, but not finished... Either of them (Sigh)

The hood I built last weekend is now hanging.
20180204_104902.jpg
. But.... I don't have the hard pipe and elbows to connect it to the Vortex. So... on to plumbing.

20180202_135537.jpg

I have the sink, taps and pump. Also have the drain and fittings to connect it all up. But, I glued the 1 1/4 to 1 1/2 transition to the wrong side of the check valve. During the winter months, the hardware store in my community isn't open on Sundays, so that will be next weekend's job. I'll also connect the supply lines.

I've decided to do a drop ceiling with pot lights. When the hood went up, that led fixture I put up a while ago won't give enough light. So, pots in the drop ceiling and waterproof pots in the exhaust hood is the way I will go.

Soon as the plumbing is done, drywall. [emoji4]

Cheers!

Chris
 
I did some lighting and plumbing work on the weekend before our Dominican Republic vacation (which was very, very good, btw). I was chicken to do the supply lines, being as we were gonna be away for a week, but I did run the drain. After measuring multiple times, saying a prayer, and various other things, I cut the drain line running from the master bath shower (which conveniently runs across the ceiling of the brewery) and installed a flex Y-connector.
20180217_121641.jpg


I had dry fit a vertical line to a 90 and 45 elbow and some straight pipe. This runs down to the check valve and ball valve and 90 to connect up to the pump which will be installed under the sink.
20180217_121753.jpg


I ran the shower for half an hour and voila! No leaks!. I glued everything up and turned my attention to the exhaust hood lighting. I had these 4 shower ready LED pots left over from the house build. They work perfectly in the hood.

20180216_132125.jpg

20180216_132136.jpg


Here it is all lit up....

20180216_141755.jpg


20180216_141806.jpg


More to come.

Cheers!

Chris
 
Last edited:
Looking good Chris. Can't wait to see and "sample" when its all done.

Chris
"Thing 2"
Hey Thing Two!

Glad to see you found your way back to the forums. Plumbing supply and drywall happened this past weekend. Inching ever closer to completion. Will let you know when you can come over and help brew.

Cheers!

Chris
Thing One
 
Last edited:
It's getting to the point that I can see light at the end of the tunnel. Hooked up supply lines for the sink. It sure is a lot easier working with Pex than it is sweating copper. Maybe it's just because I suck at sweating pipe... yeah, that's probably it. At any rate, the supply lines are ready to rumble... and they don't leak.

20180303_121603.jpg


20180303_121609.jpg


20180303_121621.jpg


I also started drywall. Have I mentioned in this thread about how I tend to overestimate the amount of material needed for a particular project? With me, that is usually the case. Many a home building centre employee shakes his or her head when I roll in with extra stuff to return - usually by the shopping cart or flatbed load. Not so much in this case. Underestimated the drywall required by two full sheets. Actually... screwed up on measurements is more like it. No Chris, two pieces 35 inches wide will not come out of one sheet of 4x8 drywall. Then there's that thing about the building centre in my town not being open Sundays in the winter. Doh!

20180304_130521.jpg


Suspended ceiling is going in, hanging just below the tops of the drywall.

20180304_135118.jpg


The supply line seen below will be for the glass rinse on the drip tray at the bar on the other side of that wall.

20180304_151553.jpg


20180304_151559.jpg


More as I get to it.

Cheers!

Chris
 
More stuff done. Drywall is up, taped & mudded, and painted.

When I started this project, I knew I was not very good at the taping and mudding part. Oh, I had tried it before with mostly hilarious results. I had contemplated plying a friend with beer and getting him to help (well... do). But, timing didn't work so I was stuck with me.

So.... it didn't turn out that bad. I know it isn't perfect but, it looks pretty damned good.

20180310_100557.jpg


20180310_152823.jpg


20180311_135123.jpg


20180312_062251.jpg


20180312_062355.jpg


Suspended ceiling and flooring is next on the agenda.

Cheers!

Chris
 
Got quite a bit done this weekend. Suspended ceiling - check

20180316_084807.jpg

20180316_114140.jpg

20180316_145047.jpg


Flooring - check

20180318_115740.jpg

20180318_115748.jpg


Sink - check

20180318_200559.jpg


Exhaust hood - check

Didn't get a shot of that rehung.... Just go back a few posts and imagine the finished wall behind it. [emoji6]

Will be building the bench next weekend, finishing up with mouldings and paint touchups.

Then, I think, I will brew a beer. [emoji4]

Cheers!

Chris
 
Brewstand was on the agenda for this weekend. Also, baseboard, door casing and paint.

I used Kal's brewstand design. It went together very well. I got it, the vent hood endcaps and trim, and the sink spacer stained with a MinWax Walnut. SWMBO helped out with the colour choice and also did the paint on the baseboard and door casing.

I'll hit this stand with a couple of coats of Varathane and we will be good to go for an inaugural brew this weekend. I have a Bell's Two-Hearted Clone recipe that I like and it'll be the first brew.

Cheers!

Chris
20180324_144010.jpg
20180324_152156.jpg
20180325_094458.jpg
20180326_073649.jpg
20180326_073625.jpg
20180326_073603.jpg
 
Brewing has happened. Real, honest to goodness brewing. [emoji4]

20180406_095038.jpg


The room isn't set up quite yet. I have to add shelving and get the fermentation fridge set up. Serving keeper is on the horizon as well. But there is enough done to allow for a brew day.

Definitely wasn't without issues. First time I've used a pump and it was hilarious to have that leak a bit and then spray 170 degree strike water all over my shirt, pants, wall and floor.

Got that under control and proceeded onward. End result was a really nice Two-Hearted clone in the fermenter. Hit numbers fairly well. We shall see what the end result is in a month or so.

After cleaning up.... [emoji28]

I decided to try my new sous vide stick and do a one gallon BIAB Cali Common.

I was impressed at its ability to keep temperature constant in an open pot. Ramping up to mash out took minutes. Wish I'd taken pictures. Videos are up on my Instagram @chrisrideau if anyone wants a peek, but here's the fermenter in the fridge.

20180409_062609.jpg


Cheers!

Chris
 
Back
Top