taintedplay
Well-Known Member
looks great so far!

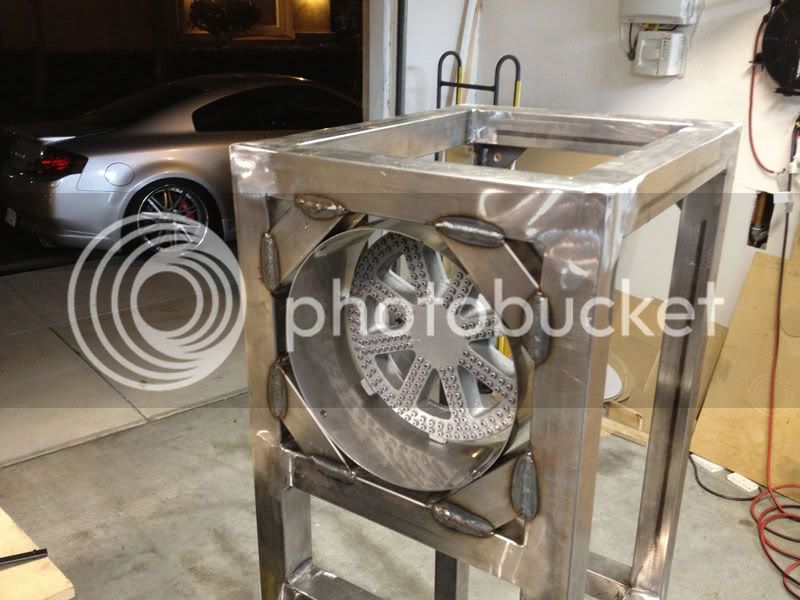
If I may... Noticing your beads on the corner brace I was wondering if that was stainless or mild? (both the frame and the brace) are your running .035? I am guessing your running those bottles as well but I have not upgraded mine yet, if that is stainless have you ever tried the flux core ss wire?


")

Sweet!
Question:
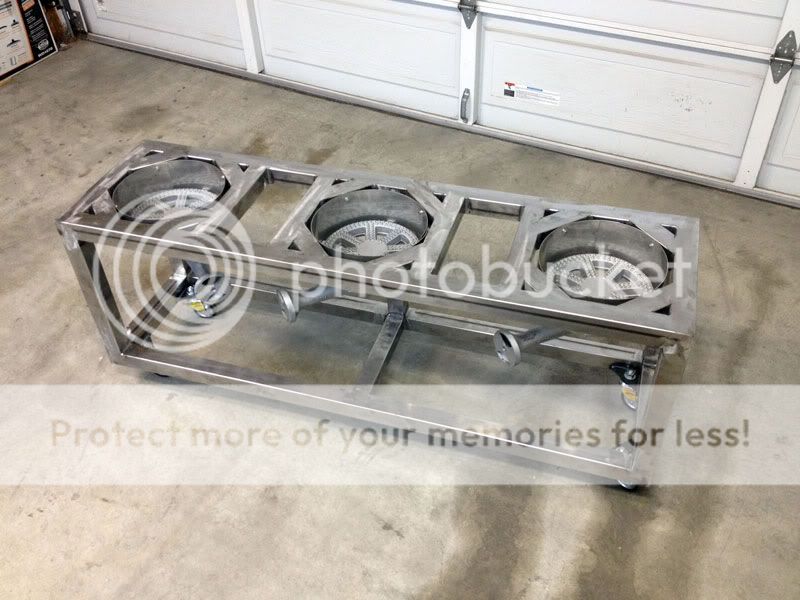
Are you planing to put an air gap between the frame and your Pots, Kettles or Kegs?
Sorry the photo is sideways....
n2fooz: How about a some more pics of that Infinity? Is that a G37? Wheels/brakes/suspension look aftermarket. Does it have a lot of work into it?


nice stand you got yourself there...envy is not a great look on my but damnit i want it. mine is sort of the same only 1x1x1/8 steel. the burners are the regular bayou classics and i couldnt drive a tank over it.
just out of curiousity...i dont know if it was covered, but i used a mig style welder...actually it was flux core wire instead of using the gas...that looks an awful lot like tig welding...either that or i really do suck at welding.
on a final note, im not sure about wearing out the saw...i havent heard anything like that but since im not a professional i suppose i cannot exactly say one way or the other...what i do know is that i have a craftsman 9'' compound sliding miter saw that is about 20yrs old and has cut all kinds of metal, including all the cutting for my stand...with the help of a 10.00 harbour freight metal blade...and it still works like a champ.
Subscribed...great looking build so far.
I have been looking at builds for several months now, planning my own and taking ideas from a ton of people.
May I request that when it comes time to mount your burners that you include some up close shots. That is one thing that I haven't figured out yet in my own plans. Cheers...wnc
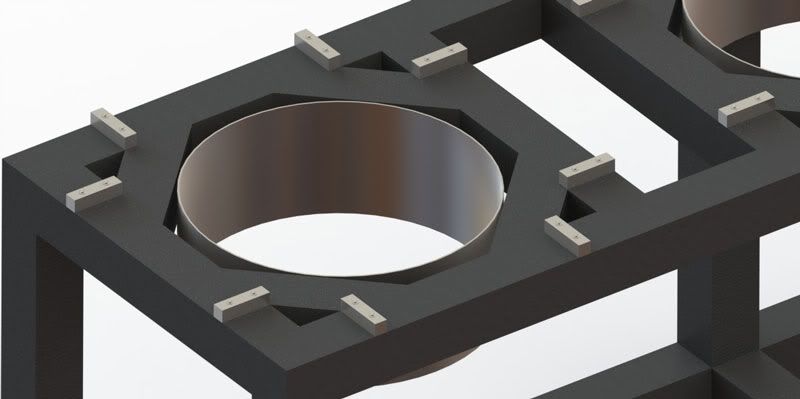
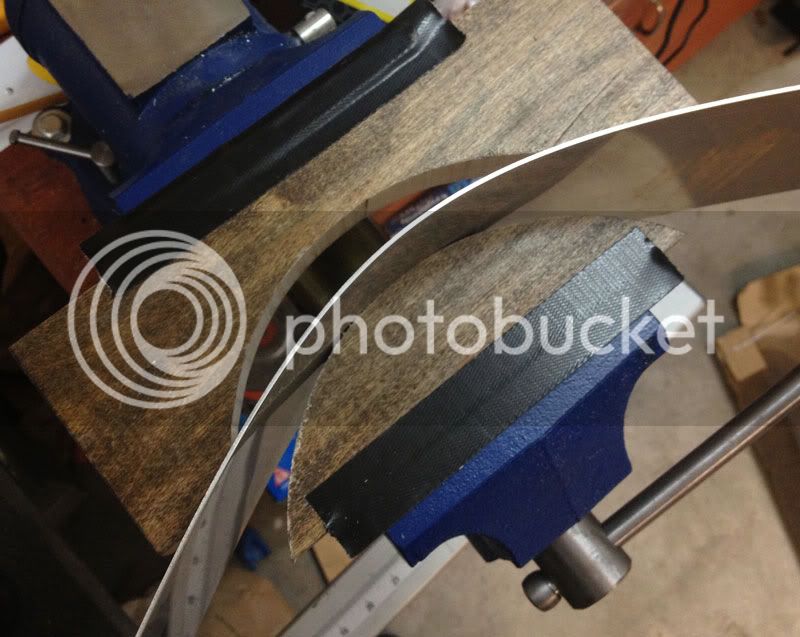
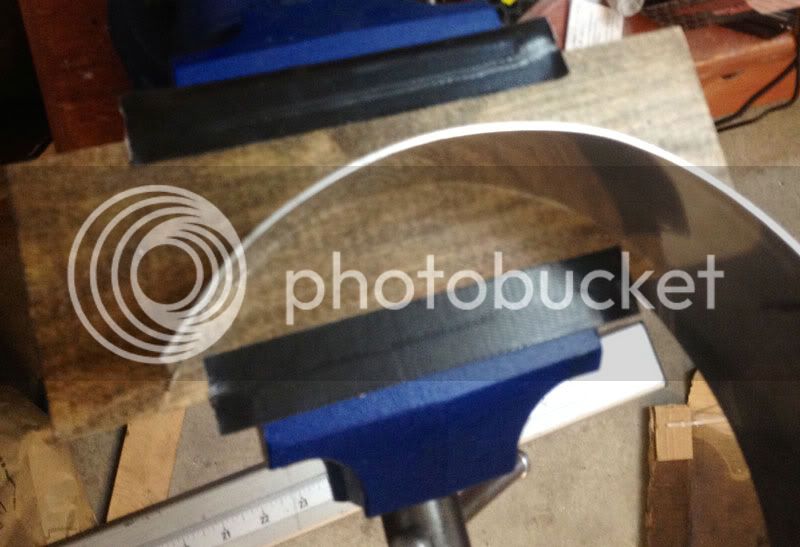
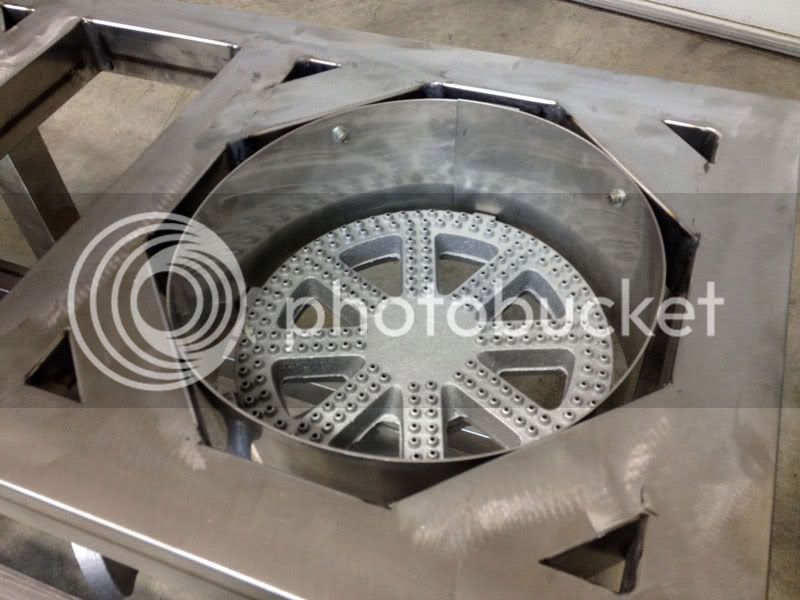
That's a super clean looking mount. I like the jig you made for bending the SS.
Only concern I have is where is the burner exhaust going?
Thanks to Sea1961, I'm going to add Stainless spacers at the top to help exhaust and protect the paint.
n2fooz said:Thanks.
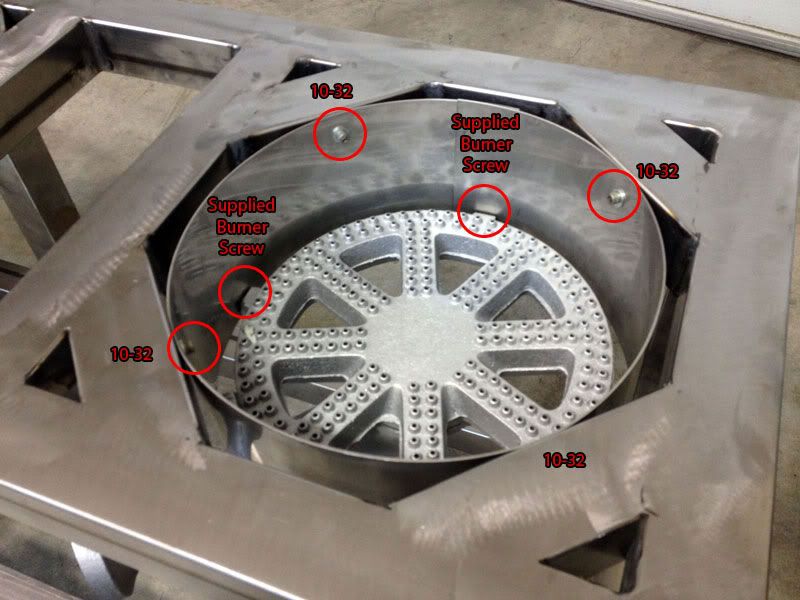
For mounting the burners, I used the heat shields. I drilled holes for the supplied burner screws at the bottom of the shield and mounted the burner to the shield. I then drilled and tapped (4) 10-32 holes on the 45º gussets. The burner/heat shield assembly is then mounted to the stand with (4) 10-32 stainless steel cap screws and washers.
Hope this helped.
Can you show/explain this in more detail?
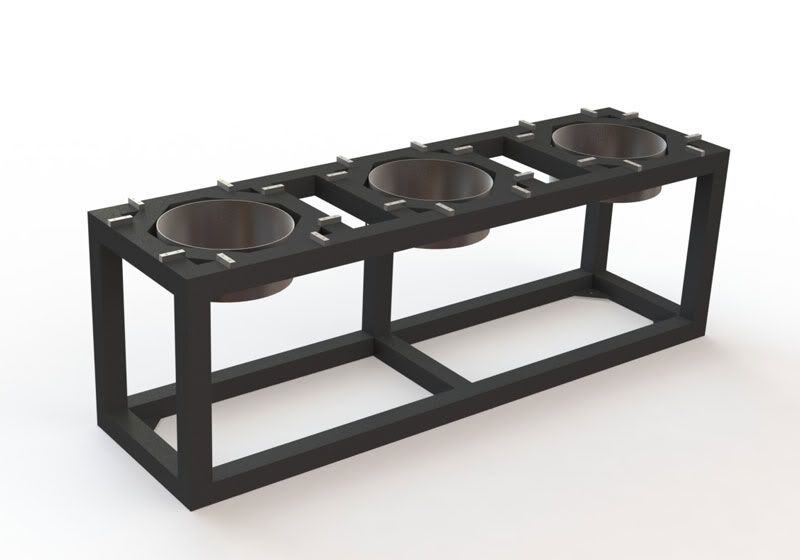
The stand-offs can be cantilevered further in and thus eliminating the large diagonal pieces.
The stand-offs can be cantilevered further in and thus eliminating the large diagonal pieces.
Do you have a sketch up of the whole thing? That is sexy.


![Craft A Brew - Safale BE-256 Yeast - Fermentis - Belgian Ale Dry Yeast - For Belgian & Strong Ales - Ingredients for Home Brewing - Beer Making Supplies - [3 Pack]](https://m.media-amazon.com/images/I/51bcKEwQmWL._SL500_.jpg)


