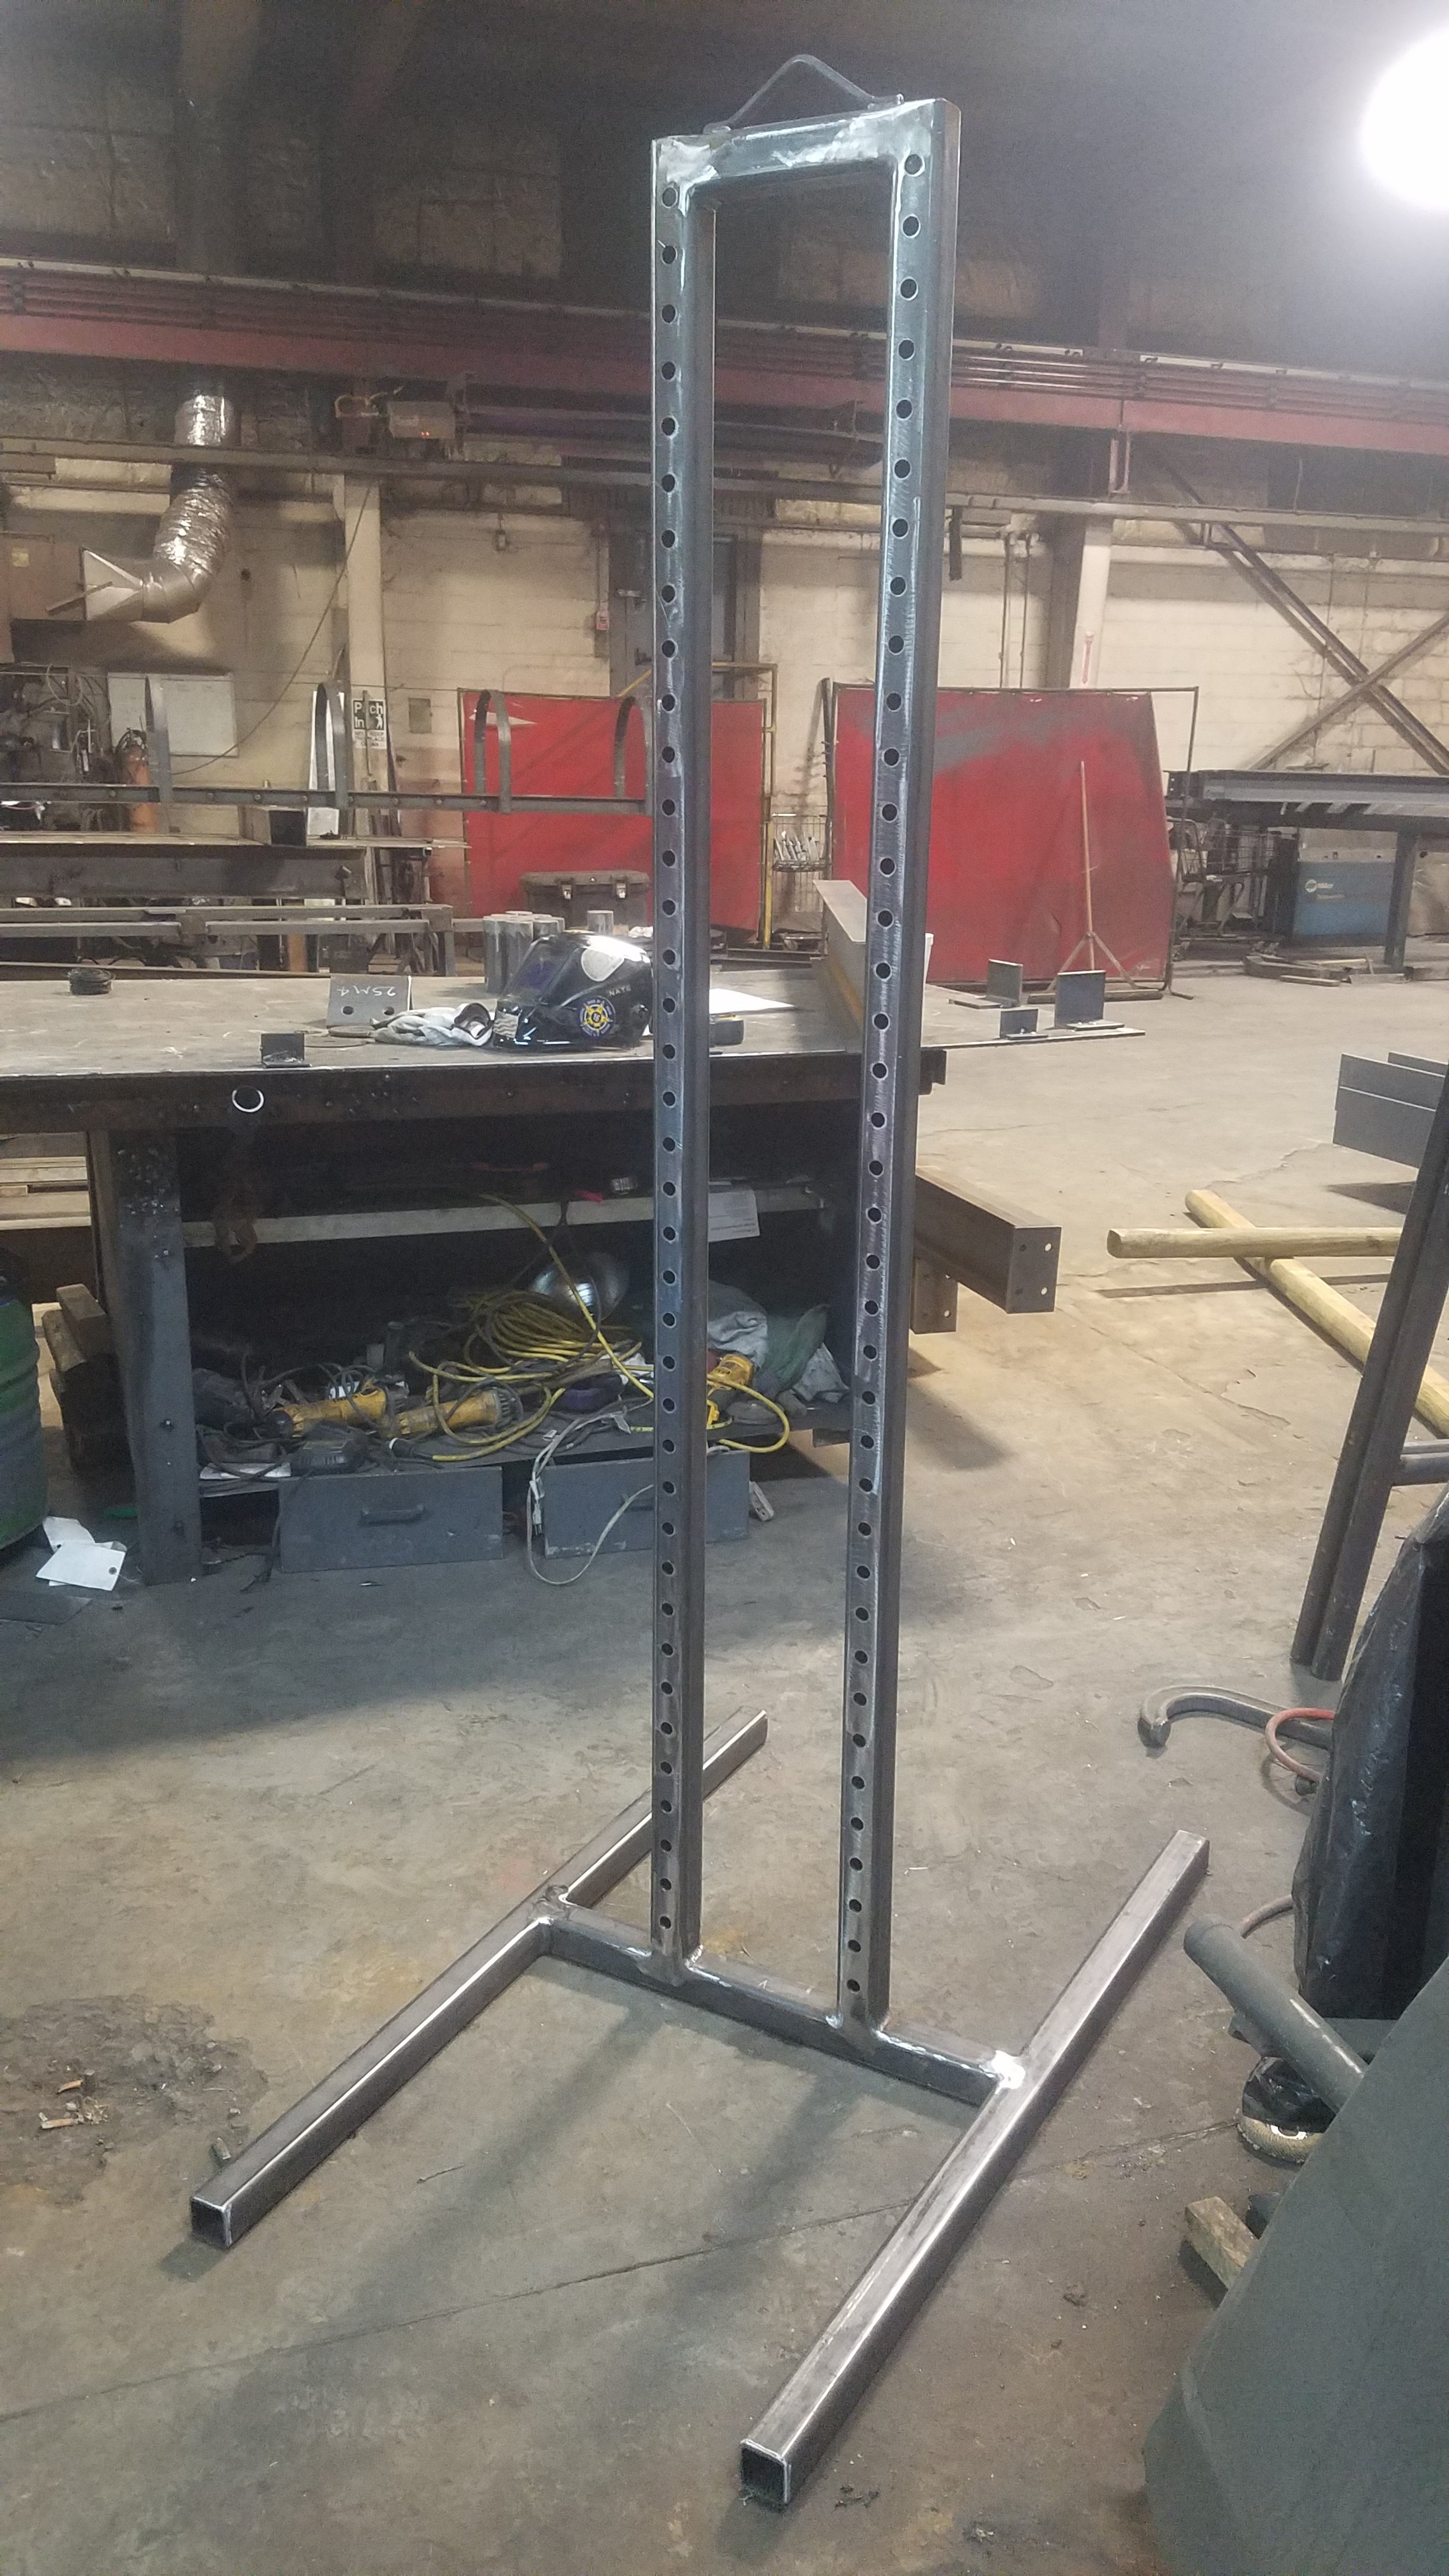
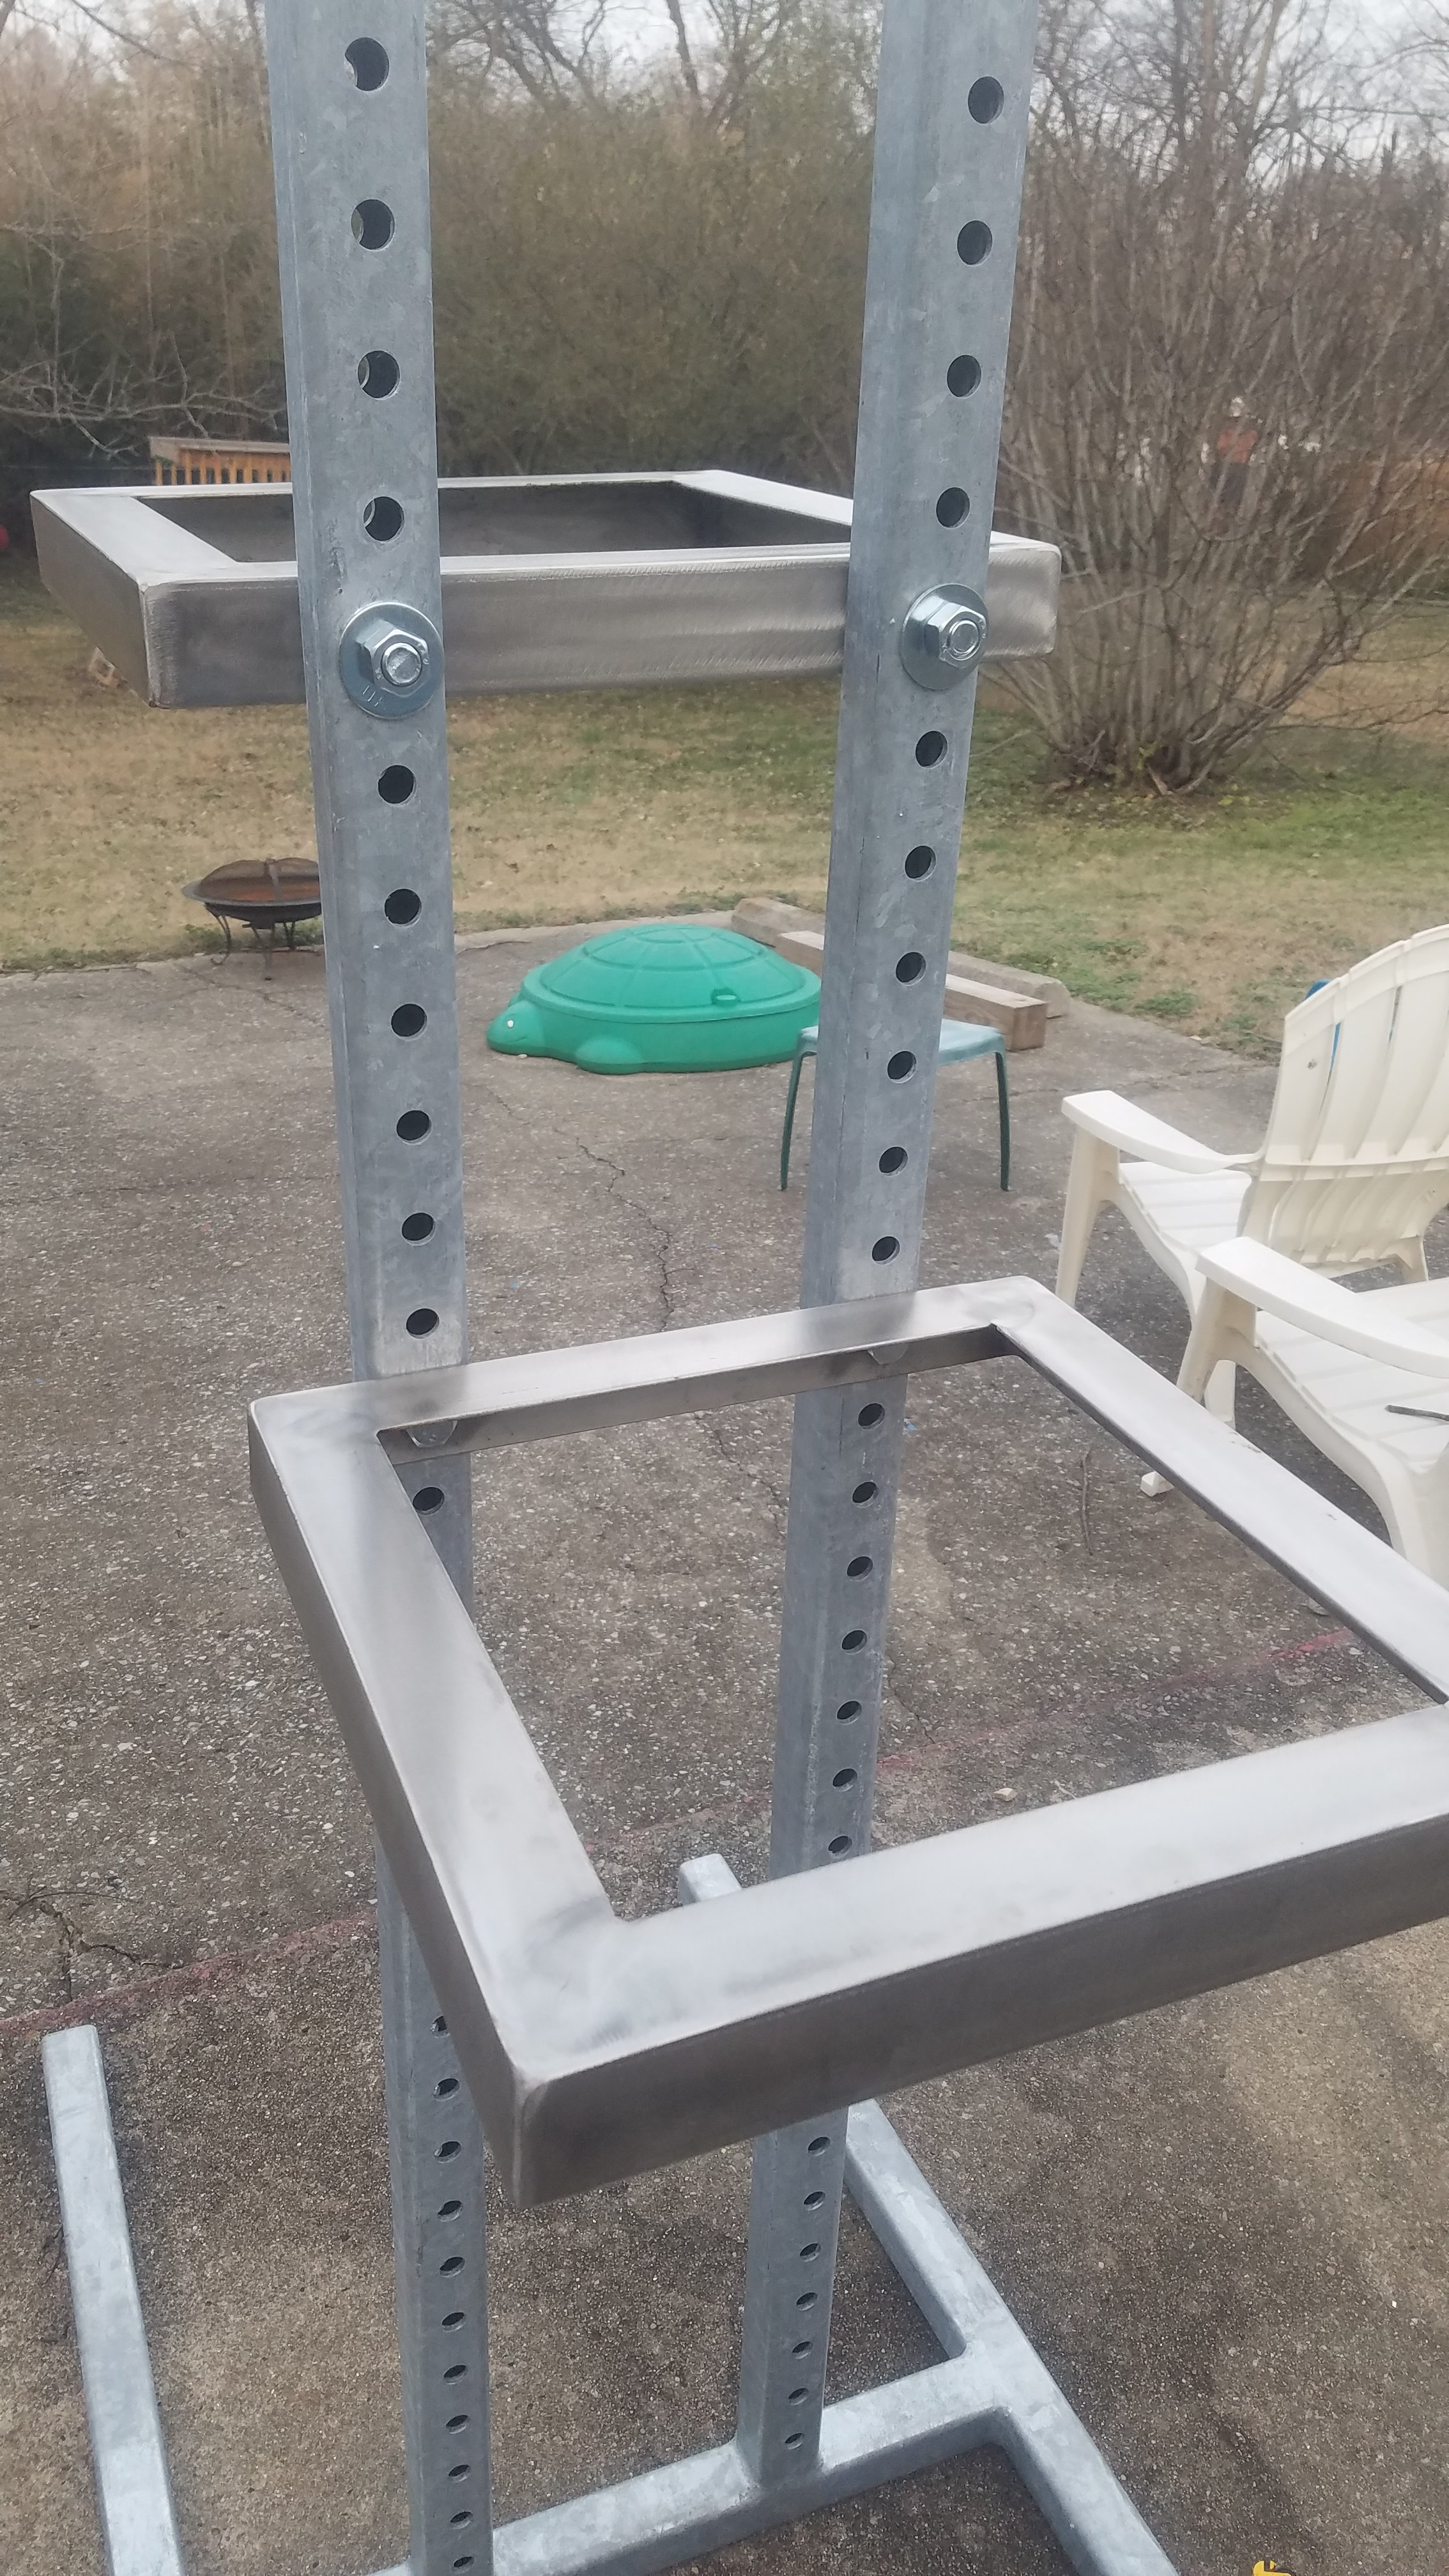
My idea for an adjustable 3 tier stand, thoughts?

Homebrew Talk - Beer, Wine, Mead, & Cider Brewing Discussion Forum

Help Support Homebrew Talk - Beer, Wine, Mead, & Cider Brewing Discussion Forum:

This site may earn a commission from merchant affiliate links, including eBay, Amazon, and others.

Croesius

Active Member
Joined
Nov 12, 2017
Messages
25
Reaction score
8
Hey folks! I'm just getting back into the brewing scene after a 4 year hiatus, kids and all. However, during that hiatus I began working at a fabrication shop, so I naturally must use this access to steel and machinery for my own benefit.

I'd like to make a gravity fed, three tier tower, but I also want adaptability. I'd hate to weld everything up and then find a great deal on a piece of kit that didn't fit right on the stand. I'm thinking a frame, with through holes drilled 1-2 inches all the way up. Then, I can make some tiers that can bolt into a variety of positions.

BrQFchK.jpg


I've been scanning the boards and Pinterest and whatnot, but haven't seen anything quite like this. Anyone seen/made one similar? It's my first proper stand build, and I know I'm probably overlooking things. It will naturally have burners and accessories in the final product, but just for theory, any advice?
 
Good concept. Similar to a hydraulic shop press frame. I may steal the idea. Thanks.

Concerns, well, tipping vs tripping. The feet have to be long enough for stability, but short enough to be out of the way.

I can't tell from your sketch exactly how the shelf pins work. If you use at least grade 8 through bolts you'll be golden. I wouldn't depend on butt welds for that application.

Yeah, I like it. Keep us posted how this develops.

Another thought. Consider using H column stock for the uprights. Drill your holes through the web, half as many holes, no alignment worries.
 
Last edited:
The through holes aren't really an issue, we have a large CNC drill machine at work, I was able to set precise spacing for the holes, so they are all dead-nuts accurate center-to-center and gauged off the edge. Did that aspect of it today in fact!

7SGSpdj.jpg


I plan on making the tiers out of a thinner wall square tubing, with through holes on it to align with the tower. We have plenty of structural hardware at the shop, and I'll be going with 1/2" bolts. I used a 9/16 hole to accommodate the added thickness of hotdip galvanizing, so it should be a snug fit. The struts on the tiers I think I will use a static 1/2" round bar, rather than another bolt, as the weight from above will hold it in place with tension.

However...y'all have seen my blueprint... plans are thoroughly subject to change!
 
I should have figured you have cnc equipment. Hard to compete without these days.

I'd have used 3/4" bolts, but that's because I'm about half crazy anyway. I like the pin idea for the shelf brackets. I just figured the 3/4 - 10 nuts would be easier to start with one hand while you hold up a great heavy iron shelf with the other.

I think it's gonna be great.
 
I just figured the 3/4 - 10 nuts would be easier to start with one hand while you hold up a great heavy iron shelf with the other.

True, true...Might have to weld some wings onto the nut if it proves to be a burden.

Also weighing my options on material for the tiers. Mild steel would be easy and readily available, but stainless might be a bit nicer, even if it'll take a bit longer to fab.
 
Stainless is very pretty, but so is a nice tight coat of iron oxide. But then I'm the guy who will hike 5 miles up a creek bed to look at an old railroad bridge. Did I mention crazy? Yeah, thought I did.
 
So...uh...you got any pictures of that bridge? :D

I'm a sucker for aged metal as well!
 
Well, yeah. Go to bridgehunter.com, go to Crawford County, Arkansas. It's the 1898 through truss bridge on the A&M railroad.
Not my pictures. Better than.

I'd be happy to show you my pics, but I'm still trying to figure it out. Every thing I copy from my computer looks like the bottom of a dried up stock pond, and this phone is my only internet connection.
 
Slightly, it's a "skip lunch and work off the clock 45 min at a time" deal, so I'm about 2 hours in at this point
 
I made something similar but without it being adjustable. I like how you made the bottom wider.

Interested to see how it being adjustable works out, what kind of kettles are you using?
 
I made something similar but without it being adjustable. I like how you made the bottom wider.

Interested to see how it being adjustable works out, what kind of kettles are you using?

I have a 15 gallon keggle that I just picked up from a friend that I will be using as an HLT, an Igloo cylinder cooler for the mash tun, and just a basic 10 gallon no-name boil kettle. The frame is a bit overkill for my current setup, but I know I will be expanding in the future, and I wanted something that I could grown into. Plus, the holes mean I can add pretty much anything to it, like a pulley for BIAB or whatnot.
 
Nice!
I know the wall thickness is pretty stout, and you got it galvanized and all, but I was wondering.........Gonna' sleeve those mount holes?


Edit: That's my thoughts.....:D
 
Why did you get it galvanized as opposed to hitting it with some clear coat? You are limiting yourself with the ability to safely chop and weld your stand. I sure wouldn't galvanize your platform(s) with a burner.
 
Why did you get it galvanized as opposed to hitting it with some clear coat? You are limiting yourself with the ability to safely chop and weld your stand. I sure wouldn't galvanize your platform(s) with a burner.

I designed it with the express purpose of never chopping or welding the stand. I have seen plenty of stands made by brewers that had to be cut up and remade once they got a larger mash tun, or a taller kettle. The holes in the frame allow me to put on whatever tier I choose, in whatever height or configuration I desire.

The individual tiers which bolt on will be made of 1"x1"x3/16" stainless angle, so there will be no worry for burning off the zinc and getting galvsick.
 
The individual tiers which bolt on will be made of 1"x1"x3/16" stainless angle, so there will be no worry for burning off the zinc and getting galvsick.

You're not planning on bolting it on with a 3/4 grade 8 bolt are you? The proportions would be a bit off!
 
You're not planning on bolting it on with a 3/4 grade 8 bolt are you? The proportions would be a bit off!

No, the majority of work we put out of my shop uses 3/4" A325N or F1852N hardware, so it would be tempting to just grab whatever we had available, but 1/2" will assuredly hold far and beyond the weight I'm putting on it.
 
Rather than bolt together, you could have pins with cotter pin holes welded to each tier, then you push the pins through the holes, slide the cotters on, and boom. The weight of each shelf would keep it from falling out, and you can quickly and easily remove pieces for storage. A triangulated support under each shelf would keep the flex down to basically nothing.

You are inspiring me to take pictures of the stand I just built and get it posted.

Post away! I think everyone here loves the DIY nature of what brewers get up to.

Cotter pins would definitely work, but I've always preferred nuts and bolts, suppose it's what I grew up with. Plus, bolts are easier to loosen/tighten if I need to "custom fit" some mismeasurements :D
 
I will admit i didnt read the entire thread with all the posts, just skimmed thru it, so my opinion may not have much merit, take it with a grain of salt if necessary.

So anyways, i was just looking at the photos that you posted and a few of the comments. I totally love this idea you have drawn up and are making a reality. great work so far. my question is, why didnt you make the tiers so that they can hang on the upright center section WITHOUT bolts? my initial thought about this last photo (directly above this post) was that it would have been awesome if the CNC drill machine could have made keyhole holes and you could weld the heads of the bolts on the tiers to fit in the holes and lock into place under weight.

I am new to home brew and have been using single a single keggle to make a few 5 gallon batches but i am wanting to build a 'brutus' style setup, I was considering how to build it so it would take up the least amount of floor space when not in use, but i am thinking something like what you have built here might be more in order for me.

keep it up, i cant wait to see more.
 
my question is, why didnt you make the tiers so that they can hang on the upright center section WITHOUT bolts? my initial thought about this last photo (directly above this post) was that it would have been awesome if the CNC drill machine could have made keyhole holes and you could weld the heads of the bolts on the tiers to fit in the holes and lock into place under weight.

That's a damn good idea, and one I did field along the way. If I were to be making these for sale, I'd definitely do a keyhole, probably some lighter weight material too! However, this was an under-the-radar project, so I didn't want my CNC operator spending too much non-billable time on it. It's mostly just a proof-of-concept personal prototype.
 
Looks similar to the concept I've been rolling around in my head for a build. But instead of the holes through the frame, I was thinking about pegs out one or both sides of the upright, with a slotted C collar on each tier that would just slip over the peg. No positive lock - would always come apart under an upwards load, but with 5-10 gallons of water on board, it wouldn't go anywhere. Quickly breaks down for storage, etc.
 
Back
Top