My Hopstopper V2 - On Gas - Implementation

Homebrew Talk - Beer, Wine, Mead, & Cider Brewing Discussion Forum

Help Support Homebrew Talk - Beer, Wine, Mead, & Cider Brewing Discussion Forum:

This site may earn a commission from merchant affiliate links, including eBay, Amazon, and others.

day_trippr

The Central Scruuuutinizer
HBT Supporter
Joined
May 31, 2011
Messages
44,221
Reaction score
31,854
Location
Stow, MA
First, some context.

I've always brewed using gas rigs, and have used various methods of managing hops in the boil kettle.
When whole cones were still dominant I used muslin bags, then when the transition to pellets occurred I switched to nylon bags, and then switched to a 6"d x 20"h 400 micron stainless steel spider.

None of these "solutions" really work all that well. Both nylon bags and hop spider load up with grain gunk and break material way too early in the boil and have to be attended to frequently. There's no doubt the efficiency is significantly affected.

Years ago I tried the first version Hop Stopper. Once. It really failed miserably due to design issues and limitations and I had no desire to go through that horror show again. Now The Electric Brewery has come out with their V2 model, and has been selling it at a discount WITH a 100% no BS guarantee. Love it or return it for a full refund. Cool! I'm in!

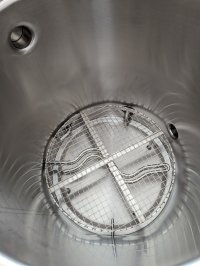
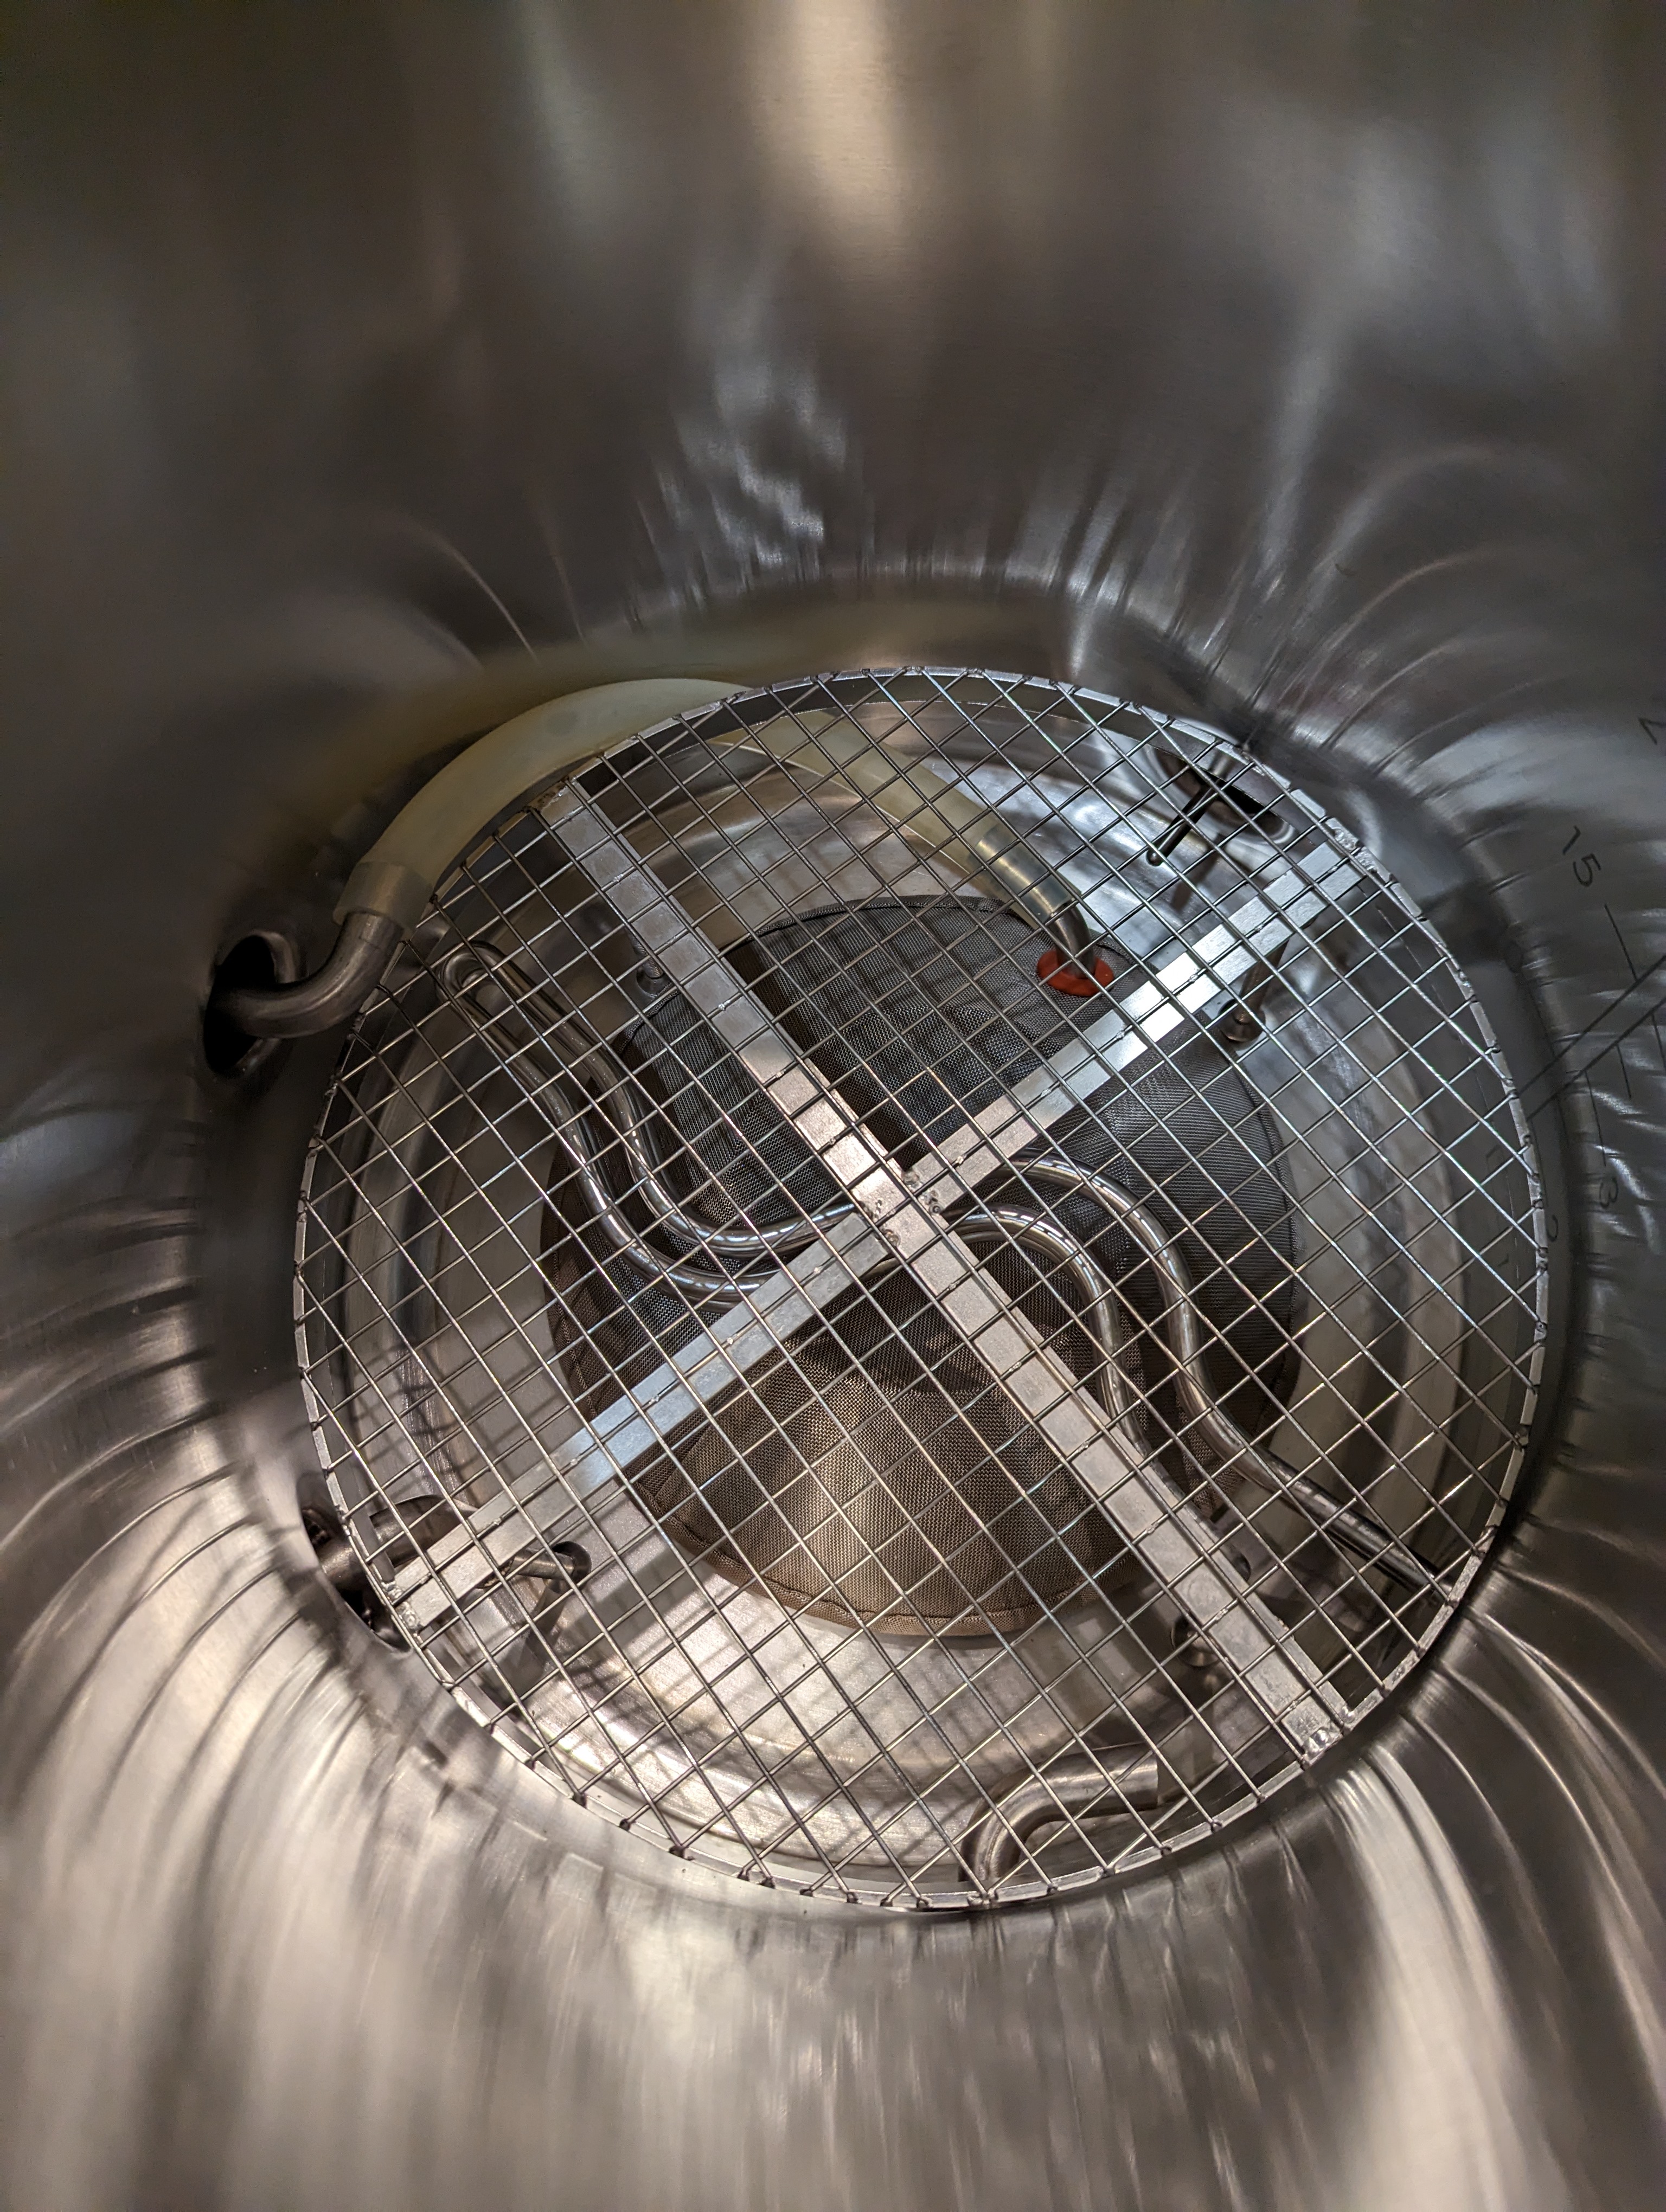
hopstopper_v2_00.jpg


But...I believe there's a potential issue with this version for gassers: it lies totally flat on the kettle bottom. The one time I tried resting my spider on the kettle bottom it left a deep, matching scorch mark - literally the only time I've ever scorched my BK - and that was a major pita to remove.

Now, I will say I have not seen any reports of the V2 causing kettle scorching, but one must keep in mind The Electric Brewery is primarily for electric brewing, so one would expect most of their products go into E-brewing use. E-kettles don't have "hot bottoms", the elements are at least an inch or two above the kettle bottom and heat the wort, not the kettle. So having a Hop Stopper resting on an E-kettle bottom is a non-issue wrt scorching.

Preferring not to be the one that discovers this is a real issue for gassers, I'm opting for avoidance.

A second issue plainly stated by the company is recirculation should be kept below 1 gpm to avoid loading up and potentially collapsing the mesh. They advise if one still wants to recirculate at a higher rate to add and use a parallel drain port and reserve the Hop Stopper port for end-of-brew kettle draining.

I love my well for its 50-something°F water year 'round, and experience shows the faster I can spin wort through my IC the faster it's chilled to pitching, and that means up in the 5-6 gpm range for my March 815pl.

And, finally, my hefty 50 foot 1/2" SS IC would totally pancake that poor Hop Stopper. It really needs to be out of the way until it's time to drain the kettle to the fermentors.

So, based on all that, I decided to add a second drain port to my boil kettle, and put the Hop Stopper V2 on a flexible connection to the primary drain port, with the ability to hold it well off the kettle bottom and out of the way until desired.

Right then. Here's what I've done.

First, I ordered some 1/2" SS tubing bits from @Bobby_M brewhardware.com, one 12" section with a 45° bend at the 8"/4" point. After playing around with the fit in the kettle I cut the long leg of the bent section to get the Hop Stopper in a good position on the kettle bottom, used the cut-off piece at the valve end with the Blichmann collar, then shaped the end that sits inside the Hop Stopper per specification.

hopstopper_v2_02.jpg


hopstopper_v2_01.jpg


I then used a Dremel ceramic wheel to make a length wise cut about 1/4" long on the end of the other piece of SS tubing, then used a fiber cut off wheel to lop off that 1/4" long piece of tubing. I spread out the slit then crimped the ring around the mesh at the end of the Hop Stopper. This will be used to hang the works up when not being actively used.

hopstopper_v2_04.jpg


Connected the bits with silicone tubing. Later on I added a pair of worm clamps.

hopstopper_v2_03.jpg


Test fit in the kettle.

hopstopper_v2_05.jpg


Ok. Next was adding another drain port. I still had one of brewhardware.com's wonderful weldless 1/2" bulkhead fittings left over from my original build, so I had them send me a ball valve and a cool 5/8" screw-on dip tube. I put the Hop Stopper, the ss tubing bits, and the ball valve through a hot PBW soak (lots of oil came off, fwiw) followed by an overnight citric acid bath (5% by weight) for passivation of all the machined bits. Next morning I rinsed all the bits with RO water and blew them dry with my compressor.

So, hole marked, tools ready to go.

hopstopper_v2_06.jpg


This is how I've always holed my kettles. Towels keep things fairly stable without scratching them up.

hopstopper_v2_07.jpg


Tip: don't be shy about using the center punch. Put a decent dent in the metal to hold a puddle of oil. The dent will be removed given the finished hole size, and your drill bit will appreciate the oil.

hopstopper_v2_08.jpg


3/16" hole went through like buttah :)

hopstopper_v2_09.jpg


[TO BE CONTINUED]

Cheers!
 
Last edited:
Moving on.

Slopped the hole with oil then used a step bit to bring the hole to 5/16", the diameter of my punch's screw.

hopstopper_v2_10.jpg


Next I fit my well-oiled 13/16" diameter Greenlee punch...

hopstopper_v2_11.jpg


...and used my impact driver to spin the punch home in seconds.

hopstopper_v2_12.jpg


That's a clean hole right there :)

Assembled the new valve with a male camlock and installed it on the kettle.

hopstopper_v2_13.jpg


Next, I drilled a hole near the top of the kettle for a 10-32 socket head screw to be used to hook the Hop Stopper and hold it well out of the way. I formed a piece of SS wire into a hook and loop so it will stay attached to the Hop Stopper.

hopstopper_v2_15.jpg


hopstopper_v2_14.jpg


A truly "Dry Run", I simply unhooked the Hop Stopper and let it slam down. The dip tube was perfectly positioned. This might actually work! :)

hopstopper_v2_16.jpg


So...after washing the kettle inside and out to remove all the oil I put it in its place on the brew rig.

hopstopper_v2_17.jpg


There won't be any issue with hooking up hoses - I already use a heat shield for that area of concern, and my female camlock hose connectors have plenty of reach to clear the frame.

hopstopper_v2_18.jpg


Filled the kettle nearly to the top for an overnight "pressure test" of the new bulkhead and valve...

hopstopper_v2_19.jpg


Planning on a WCIPA on Saturday. Won't be NEIPA-scale wrt kettle hop usage, but it'll still be a decent test :)

Cheers!
 
Last edited:
Just checked the kettle and no leaks. Gotta love @Bobby_M's bulkheads! :D

[edit] Checked this morning and still tight. Pumped out the kettle through the Hopstopper and in the end left pretty much the same 1-1/2 cups of liquid behind as when using the stock, square-cut Blichmann dip tube. This thing is ready to go!

Cheers!
 
Last edited:
I'm intrigued and am interested in seeing how this works. I'm using the same kettles and used the Hopstopper original once or twice and it was terrible. I've tried a few other solutions but non of them worked well either. I've been using no filtering out of the BK, other than whirlpooling. I also do not want to loose the ability to whirlpool as fast as I can for cooling.

If this works out for you I'm definitely copying.
 
I'll be adhering to the maker's recommended usage wrt flow rate, etc, so I'm not going to be limit-testing. You can trust that I'll be frank about how this all works. If it craters I'm out the cost of the added drain port, NBD, so I'm hopeful, but definitely not invested.

And should the outcome be clearly positive compared to using spiders etc I would hope there would be some followers. Jeeze ;)

Cheers!
 
pretty darn cool creativity! I imagine that with a bunch of hops and trub in there after cooling, the hop stopper may not sit exactly flat as it will rest on top of some of the trub/hops. If anything, it may simply not drain as well as with the water test if it remains a little elevated due to sitting on trub/hops. Interested to see how your ingenuity plays out with the first brew with this. Again, very cool solution!
 
I've actually given some thought to that. Historically, I have had gawdawful success at forming anything that resembles a functional "cone" of debris in the middle of my BK during a post-chill whirlpool. Whatever "Mount Trub" is formed inevitably slumps outwards and at least the margins get slurped up when racking to my carboys, even with a side pickup drain.

I don't think there's enough structural adhesion in the pellet-mush rich pile to avoid the inevitable. The option would be to shut down earlier, and add the yield hit to my Beersmith equipment profile. But I confess I don't get worked up about it - if I get a ton of hop sludge in the fermentors it doesn't seem to matter as to the beer quality. It's mostly about getting my yield-to-the-tap optimized - I really like to put a full five gallons in both kegs at the end of the day - so various losses need to be accounted for with reasonable fidelity.

In the same vein I'm not worried about the Hopstopper laying flat. If it doesn't flatten whatever was piled up when the kettle has drained down to the last few gallons I can always prod it with my SS spoon :)

Still, the proof shall be in the brewing. I was hoping to knock out a batch tomorrow (Saturday) but dispensation had to be made to The Spousal Unit's desires for the day. Looking at Sunday now...

Cheers!
 
A minor enhancement, I wasn't confident my wire loop would not slip off the screw inadvertently, so I changed to a 1/4" longer screw (now a 10-32x3/4"), added an acorn nut on the end, then re-formed the wire with a wider loop.

hopstopper_v2_20.jpg


hopstopper_v2_21.jpg


I don't think it's going to fall off now :)

Chomping at the bit to give this a try, but now one of my boys is coming over with wife and grandson for a visit tomorrow, so now I'm looking at Monday...

Cheers!
 
Everything is so much easier without a 6" spider in the kettle! Just started FO hops with chiller in place...

20201214_145942.jpg


Moment of truth isn't far now :)

Cheers!
 
Running out - close to 1 gpm (a little under)...

hopstopper_v2_24.jpg


Exceptionally clear wort!

hopstopper_v2_25.jpg


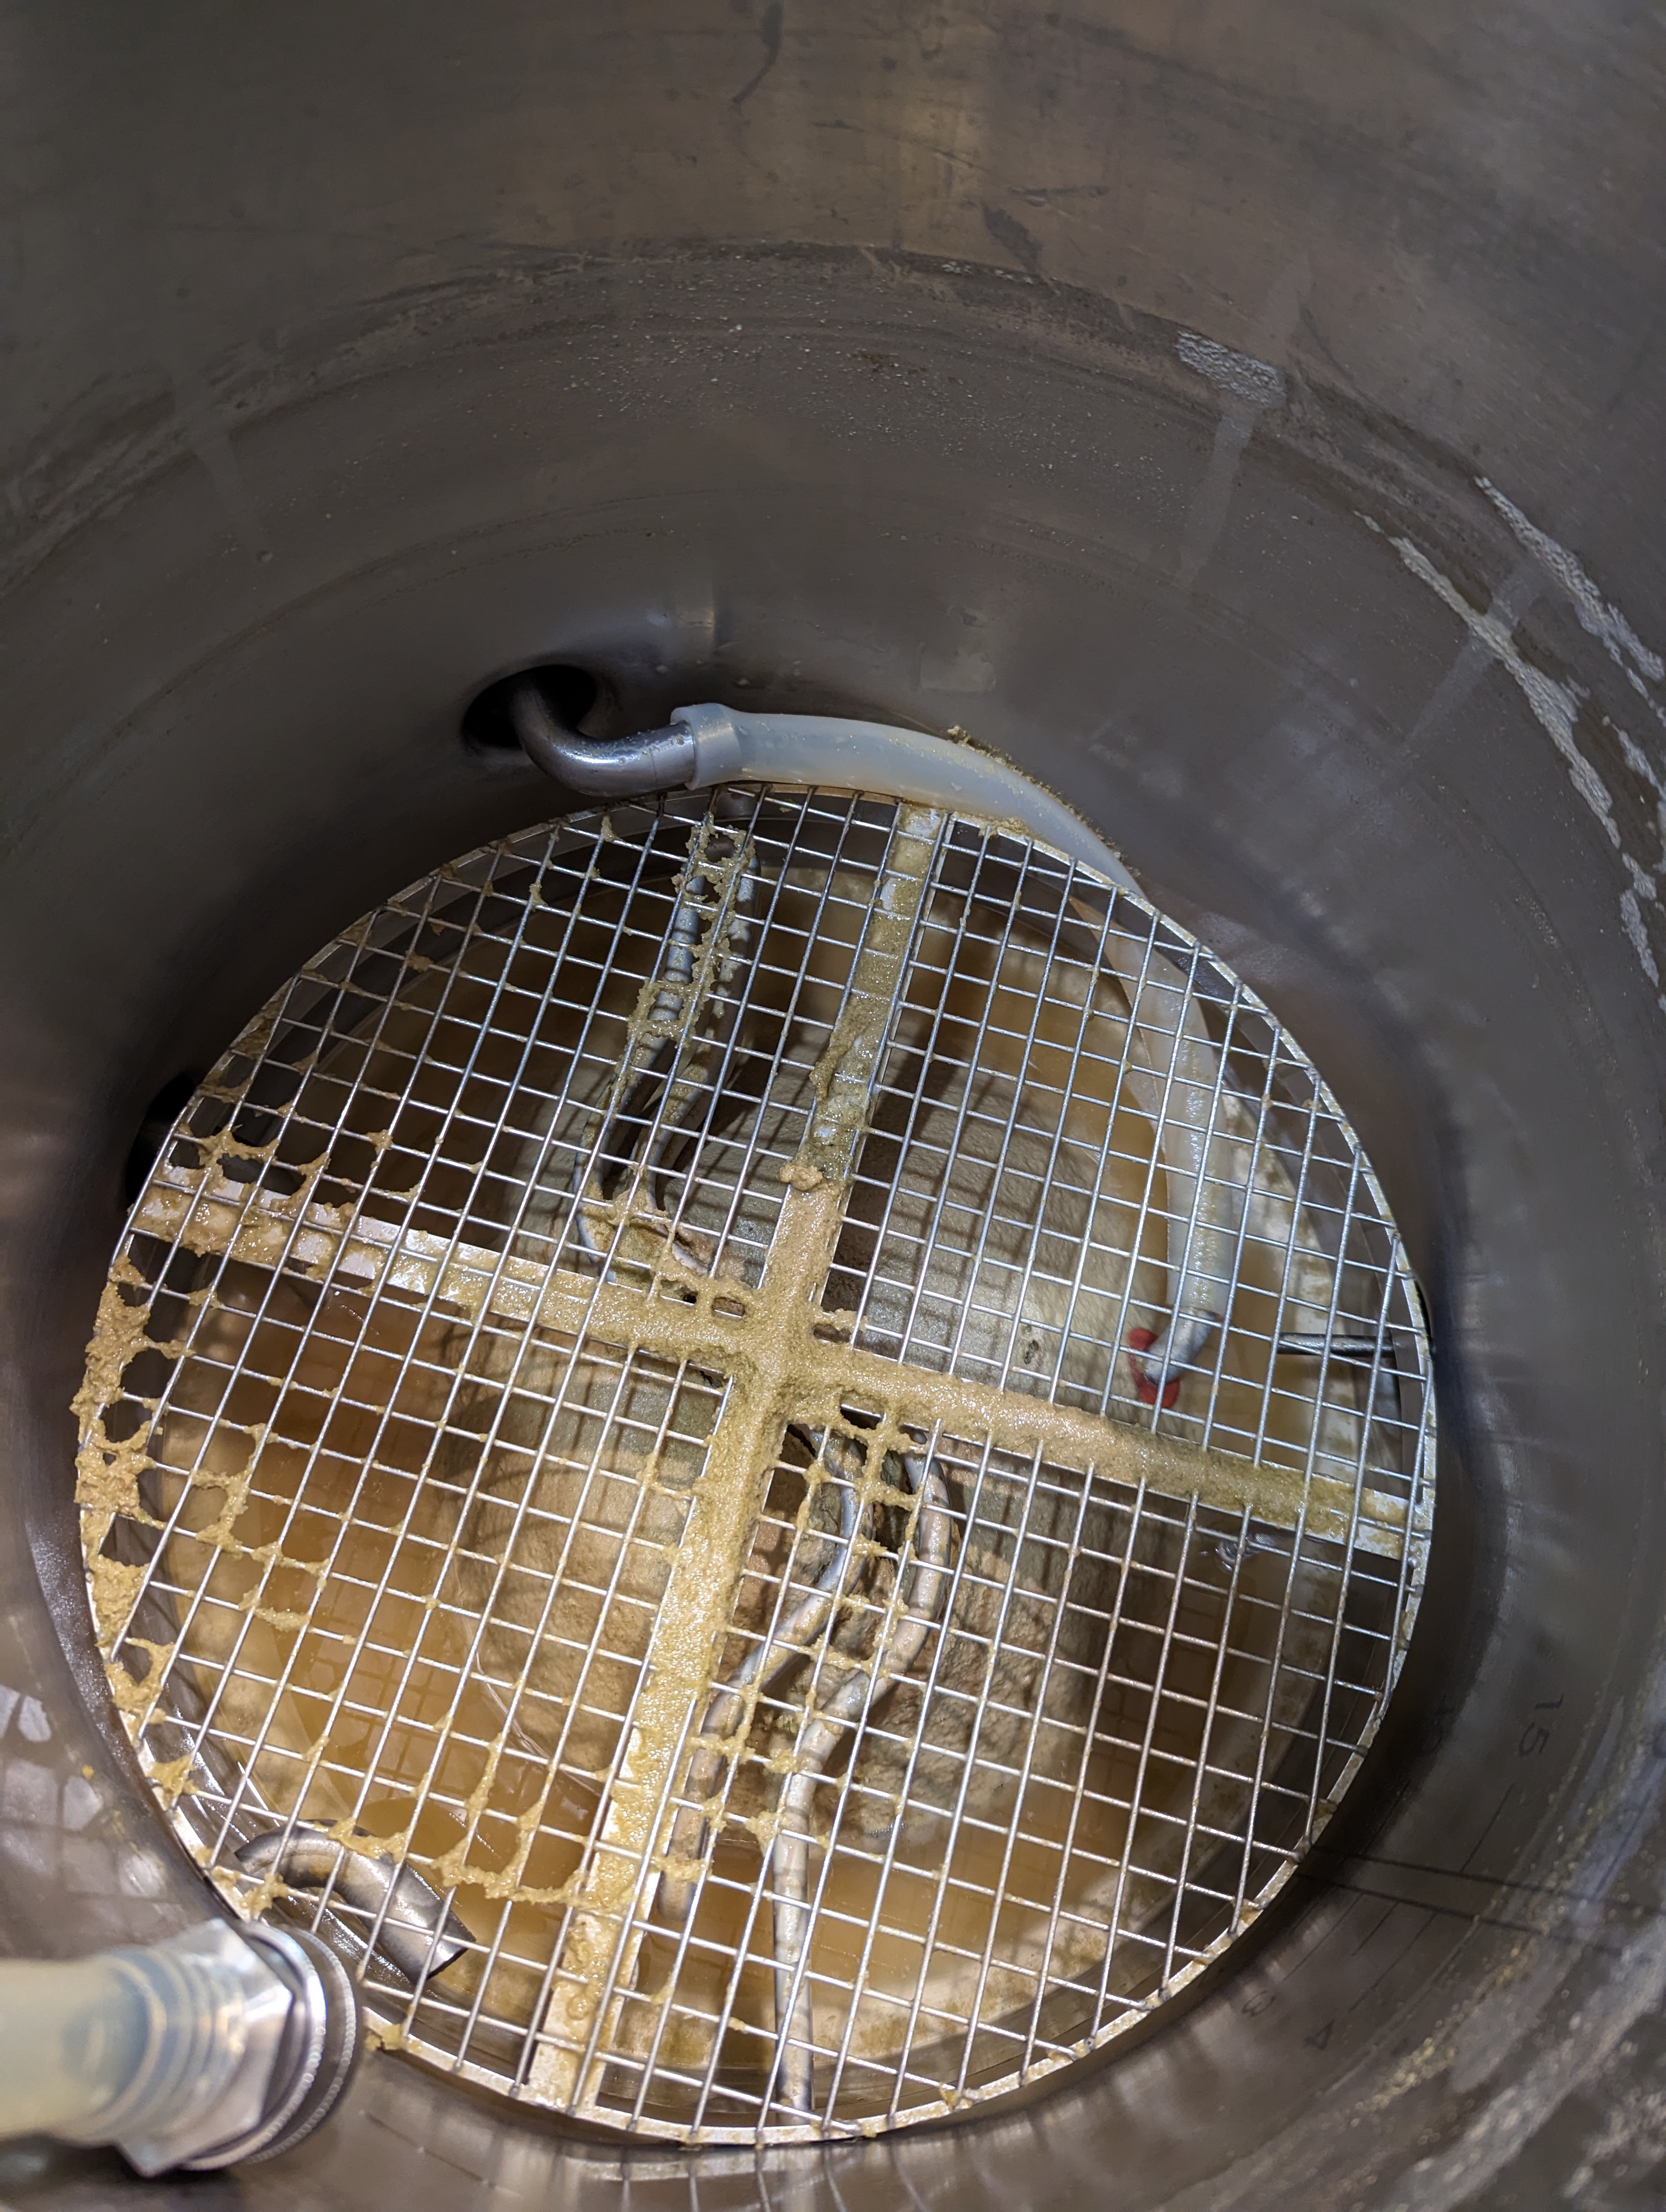
I almost forgot to shoot a pic before pulling the 'Stopper out. That's a total of 8 ounces of hops left behind in ~one quart thick hop soup.

hopstopper_v2_26.jpg


That little dude was seriously heavy with hoppage!

hopstopper_v2_28.jpg


Doesn't look any worse for wear - maybe a bit sucked in but not much.

hopstopper_v2_29.jpg


There shall be beer! All gassed up and ready for the chamber.
Normally there'd be a solid inch of hop debris on the bottom of the carboys for this recipe...

hopstopper_v2_27.jpg


First impression was a positive experience and I will be using this rig again. The tougher test will be against one of my NEIPA recipes with close to double the kettle hops. That's not scheduled for awhile as I'm now sitting on ~25 gallons of three NEIPAs brewed in the last month :)

I will have further comments later this evening, but right now I'm hungry! Gots to get some snacks in me, stat! :D

Cheers!
 
Ok, so, after one moderate use, here's my take on the HopStopper V2 and my implementation:

Ups:
- It is a joy to just dump pellets right in the kettle and not worry about it. No lifting and draining and shaking and stirring a spider every five minutes.
- I have no doubt the hop utilization was therefore greatly improved. Can't beat free swimming pellets!
- Not having a spider fighting for space in the kettle with my IC! A 6"d spider and an 11"d IC inside a 17.65" ID kettle was pretty much an interference fit and a bit of a pita at times.
- Not having a spider meant the lid could fit tight on the kettle - and I could better tune the gap when boiling allowing a lower boil-off rate.
- Chilling went faster without the spider jamming up the whirlpool.
- Amazingly bright wort! Way clearer than without the 'Stopper.
- Obviously, there was no scorching.

Downs:
- draining at < 1 gpm adds time vs the usual full-bore 5~6 gpm that I usually fill my carboys. I was being extra cautious so this probably added ~15 minutes.
- cleaning the HopStopper is challenging to get the last bits of hop debris out, vs the spider. If it won't go through the mesh you have to coax it through the dip tube port. Probably added 10 minutes because I'm a bit obsessive about cleanliness :)

Interestings:
- I expected the kettle losses to be higher than using the stock kettle dip tube and a spider because there would be a pile of wet spent hops left in the kettle vs the latter. On the other hand, I usually include some wort loss to hops that leave with the spider at the end of chilling - and there's no other place in BeerSmith to account for that aside from kettle losses, so that's where I've always put it. But, I let the spider drain to where the spent hops are almost crumbly - damp but not "wet".

So I went with a quart all up, and that was pretty much on the nose: I still ended up with 11 gallons split between two 6.5g carboys as is my usual practice.

Bottom line:
I really liked using this thing vs not. If it can handle any of my NEIPA recipes that use almost twice as much kettle hops, I'll be totally sold and would recommend it. If it can't handle that though, it's going to be a shame. Fingers crossed in the meantime.

The extra ("bypass") port to allow full-speed recirculation was totally worth the addition - the wort was spinning at a really good clip without the spider in the way and cut my cooling time down by maybe a third - say 6-7 minutes. So some of the extra time for running out and cleaning, etc, was countered by the quicker chilling.

hth!

Cheers!
 
Last edited:
Looks like really clean wort going into the fermenter! So seems obvious that the hop stopper helps with the hot/cold break as well as the hops. Great job. Cheers!
 
You're right - and the folks at The Electric Brewery make mention of it holding back break material.
I had my doubts but - and I wish that pic was focused better - the wort ran almost stunningly bright, way clearer than anything I've pulled without the HopStopper, that's for sure.

I'm adding that to my Ups list - even though most folks don't care (and frankly, I didn't either - before :))

Cheers!
 
Looks great! I was contemplating that for my system but I reciruclate during the mash in my 2 vessel system so I just opted for a giant 6"x 14" 400 Micron Hop spider that I threw 9oz of hotside hops into for a NEIPA. It was the easiest batch to cool using my CFC ever, as I'm used to it getting clogged up on NEIPA brew days. Glad you could make it work for you!
 
Update

I've done a few heavily kettle-hopped neipas now - 10 ounces of pellets each - using the Hopstopper V2, and I'm appreciating it more and more. Verging on loving it :)

One thing I had to do was increase the pre-boil volume to account for higher kettle losses. All of my recipes were predicated on using a spider and fully draining the hops to the point they were crumbly, and the oem Blichmann dip tube would leave around a cup of wort behind. With the Hopstopper V2 I have to account for those same hops being left behind saturated with wort. For 10 ounces of pellets that has amounted to a solid quart of wort lost, so I've been tweaking my Beersmith equipment profile to account for it, and this latest batch everything clicked with the prescribed volume to the carboys hit right on the nose.


julius_11_23jan2021_07.jpg


It does take a bit more time to get the wort in the carboys - you have to respect the 1 gpm specified by the seller otherwise the mesh will plug hard - and the whole thing can be pancaked from the pump vacuum (and they will not replace a pancake ;)) I'd love it if I could run it as fast as I used to go without it - basically 5-6 gpm lickity split. But looking at the settled carboys with a third as much hop debris and break material makes it worth the wait...

Cheers!
 
Update

I've done a few heavily kettle-hopped neipas now - 10 ounces of pellets each - using the Hopstopper V2, and I'm appreciating it more and more. Verging on loving it :)

One thing I had to do was increase the pre-boil volume to account for higher kettle losses. All of my recipes were predicated on using a spider and fully draining the hops to the point they were crumbly, and the oem Blichmann dip tube would leave around a cup of wort behind. With the Hopstopper V2 I have to account for those same hops being left behind saturated with wort. For 10 ounces of pellets that has amounted to a solid quart of wort lost, so I've been tweaking my Beersmith equipment profile to account for it, and this latest batch everything clicked with the prescribed volume to the carboys hit right on the nose.


View attachment 716144

It does take a bit more time to get the wort in the carboys - you have to respect the 1 gpm specified by the seller otherwise the mesh will plug hard - and the whole thing can be pancaked from the pump vacuum (and they will not replace a pancake ;)) I'd love it if I could run it as fast as I used to go without it - basically 5-6 gpm lickity split. But looking at the settled carboys with a third as much hop debris and break material makes it worth the wait...

Cheers!
Looks great! Time! How precious it is! In the grand scheme of things, we are patient with mashing, sparging, boiling, etc. So even though putting into the fermenter costs you double the time, its still 12 minutes total at 1gpm? So it actually added 5-8minutes on top of the old method? Seems worth the trade off to me. Heck in those 5-8, or even 10 extra minutes, you could go to the bathroom, check your mail, and crack open a beer! Time well spent lol.
 
lol! I would not advocate bathroom breaks in the middle of filling carboys, but your point is well taken, and I agree. Not having all that fermentor space taken up by debris is helpful in its own right - provides a bit more guardband against blowing foam :) A bit more time is worth the payback here.


Looks great! I was contemplating that for my system but I reciruclate during the mash in my 2 vessel system so I just opted for a giant 6"x 14" 400 Micron Hop spider that I threw 9oz of hotside hops into for a NEIPA. It was the easiest batch to cool using my CFC ever, as I'm used to it getting clogged up on NEIPA brew days. Glad you could make it work for you!

As I noted I switched from a very good SSB 400 micron 6"x20" spider. With 10 ounces of hops the submerged volume was not large enough to keep the hop pellets loose, so I needed to stir and drain it frequently lest the efficiency plummet.

Free swimming was always my goal, I just needed the right solution. I think this could be it :)

Cheers!
 
For the 1/2” SS tubing with the 45 bend at the 4”/8” point, did you have Bobby custom that? I can’t find that part in regular stock. (Maybe too much beer last night, and not enough coffee this morning Is why I can’t find it)

EDIT: If you’re using a 15gal Keggle (like I am) they have a different Hopstopper with the dip tube hole more near the center of the cone so a 1/2” SS tube with a 90deg bend is required/recommended.

I’m going to give it a go in my Keggle. See how it plays out.
 
Last edited:
The Hopstopper version I purchased was specific to Blichmann 20 gallon kettles with the dip tube bent and cut to fit. And it did fit perfectly for the oem orientation.

After playing with the geometry and drawing up what I thought would allow the flexible arrangement to work I replaced the original dip tube with one I spec'd for @Bobby_M to fabricate. I made the lengths on either side of the bend oversize so when that arrived I trimmed the lengths to fit and then put the required cuts on the tip...

Cheers!
 
Do you get less fermenter loss resulting in a larger batch size out of the fermenters assuming you fill to the same level?

I certainly expect to - the difference between the old and new processes certainly has resulted in a dramatically smaller trub layer. But until I got my equipment profile tuned to account for the kettle loss I was coming up short in the fermentors so the net was less than desired (ie: I was putting only ~4.75 gallons in my 5 gallon kegs).

This is made more evident as kettle hop amounts increase. It's too bad Beersmith doesn't have a recipe entry one could use for wort lost to hops. Lacking that one has to put the losses in the equipment profile, which is a bit of a pita as the profile gets used for both low and high hopped brews.

Cheers!
 
The Hopstopper version I purchased was specific to Blichmann 20 gallon kettles with the dip tube bent and cut to fit. And it did fit perfectly for the oem orientation.

After playing with the geometry and drawing up what I thought would allow the flexible arrangement to work I replaced the original dip tube with one I spec'd for @Bobby_M to fabricate. I made the lengths on either side of the bend oversize so when that arrived I trimmed the lengths to fit and then put the required cuts on the tip...

Cheers!

Thanks @day_trippr! I ordered my hopstopper with the dip tube, and then my valve, bulkhead, hose, and clamps from @Bobby_M. Just got back from the hardware store and got my stainless doo-dads to attach everything. For now, I’ll see if the 90deg dip tube plays out. Because I’m in a keggle, I won’t have as easy as a time unhooking the stainless wire, so I’m trying to work through that engineering feature.
 
I use one in my keggle. I got the SS tube when I got the hop stopper. It's @ 90° and the grommet is off "center". I haven't tried it yet with pellet hops as I'm trying to go through a bunch of whole leaf I have.
 
I strongly agree - hop loss is my largest source of variability in finished batch size.

I decided to spawn my (well tuned) equipment profile into derivatives based on kettle hop mass.
My original works well with modestly hopped brews (eg: kolsch) so now I have a separate one for my neipas.

But I am surprised after all these years Brad hasn't provided a user-adjustable "loss per ounce" for hops at all stages of brewing, including losses in the fermentor from dry hopping. He doesn't have to go out on a limb - leave it to the user to set the multiplier(s), pump the recipe numbers into it, do the math, and adjust both the initial fermentor volume and final package volume accordingly. We can handle it :)

Cheers!
 
Got everything installed and works like a dream. The darn hardware store didn’t have any acorn nuts, so I went with a wing nut/lock nut combo to keep the SS wire in place.
3C8BC88B-0226-4DB5-B8FA-6F8674DBF46E.jpeg

6CBA8777-A4BF-4C8C-AD94-4273494404EC.jpeg

A06F74C0-10D5-465A-9394-818BA177DDC8.jpeg

DA2FA81D-FBE4-4D2B-BABB-666A44FC5478.jpeg

0CD782C0-670C-46B6-86A6-EBB9A05E102A.jpeg

F74735CB-FF9C-4D10-AB78-EB959FCD70E7.jpeg


Thanks for sharing the build.
 
You've inspired me to buy a Hopstopper 2.0. I electric brew with induction, so I just need the Hopstopper with no additions. I normally let my wort settle for 20-30 minutes after whirlpool before transferring to minimize the transfer of trub. I assume this is no longer necessary , or at least can be minimized with the filter. If so, that would more than make up for the increased transfer time with the lower flow rate. Now I just need to add the additional high flow port.
 
If you visit The Electric Brewery's Hopstopper V2 page they actually kind of feature "you don't have to let the wort settle anymore".

fwiw, what I've been doing: chill via IC with recirculation pump running, when the wort hits pitching temperature pull the IC, and leave the pump running for a minute. Then I shut the pump off, switch the pump input from the high flow port to the Hopstopper port, drop the Hopstopper (you don't need that step obviously :)), then start the 1 gpm runoff to the carboys. So, not setting any real time aside for settling...

Cheers!
 
Another successful outing for the Hopstopper! It's a keeper for sure :)

juicy_bits_7_13feb2021_03.jpg


This recipe uses the same amount of kettle hop pellets as the Julius batch prior - 10 ounces - and using the same "high hop" equipment profile that nailed the fermentor volume worked for this brew as well, so I'm feeling confident about my workaround for BS3's lack of hop loss accounting...

Cheers!
 
That's impressive. Can't wait to receve and use mine. I probably typically leave 3-4 quarts of wort/trub in the kettle after transferring 9 gal to the fermenter. Looking forward to a considerable yield improvement,
 
Thanks for sharing this! I recently upgraded my kettle and it came with two bazooka screens , one short and one long. I didn't see you mention them on this particular forum, so I thought I would ask about them.

I don't like using my hop spider or a hop sock for the same reasons you already pointed out, but since I used a fine-mesh stainless chinois from my cheffing days to filter cooled wort from kettle to fermentor it didn't matter that I had a ton of gunk. However, I just swapped out my IC for a really good plate chiller and pump assembly. It changes my brewing process a lot; I can whirlpool among other things. But now I have to be more in control of what leaves the kettle, as I can't plug up the plate chiller.

If you have used bazooka screens, did they work at all or is the hop blocker v2 just so much better?
 
If you have used bazooka screens, did they work at all or is the hop blocker v2 just so much better?
So...I used a bazooka screen for some 70+ batches in my 8-gal BK and it did a nice job (for the most part).

This year, I was finally able to graduate to my Keggle as a BK. It just so happened that @day_trippr started this thread as I was investigating how I wanted to hold back the trub.

Well, I saw the results and decided to swan dive into the pool. I’m only 2 batches in, but yes, it’s a noticeable difference in holding back the particulates....but as with all things Homebrew DIY, it’s nothing that 2 Franklins can’t solve.

Now...is it worth it? That’s your decision. In the end, what Charlie says, still holds true. RDWHAHB.
 
fwiw, I have zero experience with bazooka or similar tubular lautering screens. Just spiders, and the two versions of Hopstoppers, with V1 being a tragic purchasing mistake ;) but V2 being as close to lautering nirvana as I have gotten :D

Cheers!
 
Well, I finally brewed for the 1st time since I bought the Hopstopper ~2 months ago. Unfortunately, I had 2 significant failures. I stated earlier that I electric brew with induction, but didn't mention that it is BIAB also. I should have been clued in when I heard boiling action when beginning to heat the wort after mashing when the mash temp was barely elevated. I figured there was some localize heating, but didn't think about scorching, having never experienced it. Needless to say, the Hopstopper on the bottom of the kettle results in significant scorching with induction, which is pretty obvious in retrospect. Therefore, it looks like I'll have to be installing the modifications you guys have made for gas brewing. The space on the sidewall of the kettle during mash will restrict the area for the bag, but probably no more than the "false bottom" needed to keep the mash weight in the bag from crushing the Hopstopper.

The beer was a WC IPA with 12oz of late addition loose hops for the HS to filter. I've decided to go forward with the beer in spite of the scorching. I couldn't detect anything in tasting the wort, but I'll taste again before dry hopping. So, the large amount of hops led to the 2nd failure. I had "calibrated" and marked the position of the ball valve for 1 GPM flow ~6 weeks ago, but was slightly confused about how to interpret my mark since it had been awhile. When I started the pump, the flow definitely seemed too high. Instead of just shutting the pump off and readjusting the valve, I adjusted it on the fly and very briefly increased instead of decreasing flow. I quickly adjusted, but the damage was done. It was pretty evident that I had pancaked the HS2. The flow eventually dropped to a trickle, at which time I decide to stop draining, insert a sanitized gloved hand into the wort and remove the HS2 and dip tube. I cleaned the HS2 and attempted to restore its shape before soaking the assembly in Starsan and reconnecting and resuming draining. 20 minutes later and the flow basically stopped again, with 5 of 10 gallons in the fermenter. I finally decide to bypass the HS2 for the remaining wort. Even with this, the amount of trub into the fermenter was maybe 1/2 or 1/3 what I previously have gotten. I'm looking forward to using it correctly in the future.

So this beer has scorching and a risk of infection. I hope that sharing my boneheaded brew day will help the rest of you avoid my mistakes. I will look into trying to add some short pieces of stainless tubing to act as "tent poles" inside the Hopstopper to prevent pancaking. This seems like something that could be added pretty easily to the design initially.
 
Woof. Man, that had to be a tough day. Hopefully your beer survived - I will say the one time I rested my 6"d hop spider on my BK bottom during the boil and caused a deep matching scorch, nobody ever noticed a burnt note in the beer - including me (which, to be honest, surprised the heck out of me). So there's some hope this won't be a harsh experience.

I have zero experience with induction cooking, but it makes sense that the same localized over-heating could occur under the HS2 as I expected with gas. Hopefully you can come up with a similar method as I did that won't get hung up in your mesh bag. That's an aspect I had never considered...

I'll take this opportunity to add to my own story to date: I did two 10 gallon neipas this week and the HS2 worked admirably, and now that I have tweaked my BS3 equipment profile I've been consistently hitting the desired volumes and ending up with 10 gallons +/- a few ounces in the kegs every batch. I will say the lautering through the HS2 is a bit tedious - taking a little over 11 minutes to fill my carboys - but I learned patience is truly a virtue in such things long ago :D

Cheers!
 
Back
Top