My First Fermentation Chamber (Almost Done...)

Homebrew Talk - Beer, Wine, Mead, & Cider Brewing Discussion Forum

Help Support Homebrew Talk - Beer, Wine, Mead, & Cider Brewing Discussion Forum:

This site may earn a commission from merchant affiliate links, including eBay, Amazon, and others.

vettehead99

Member
Joined
May 20, 2016
Messages
15
Reaction score
5
Location
Detroit
I figured I would put up yet another quick fermentation chamber DIY I did over the past couple of weeks. It's a few quick photos and I'm bypassing a lot of the nitty gritty details, but if you want to see a lot more writing, check out the link on my sig.

I basically followed the same style of design as found in the following blogs:

https://www.brewpi.com/fridge-hacking-guide/

https://dotps1.github.io/homebrewing/2018/01/22/brewing-your-own-brewpi.html

http://diybrewpi.wikia.com/wiki/DIYBrewPi_Wikia

I'm sure these links are familiar to many who've done this build.

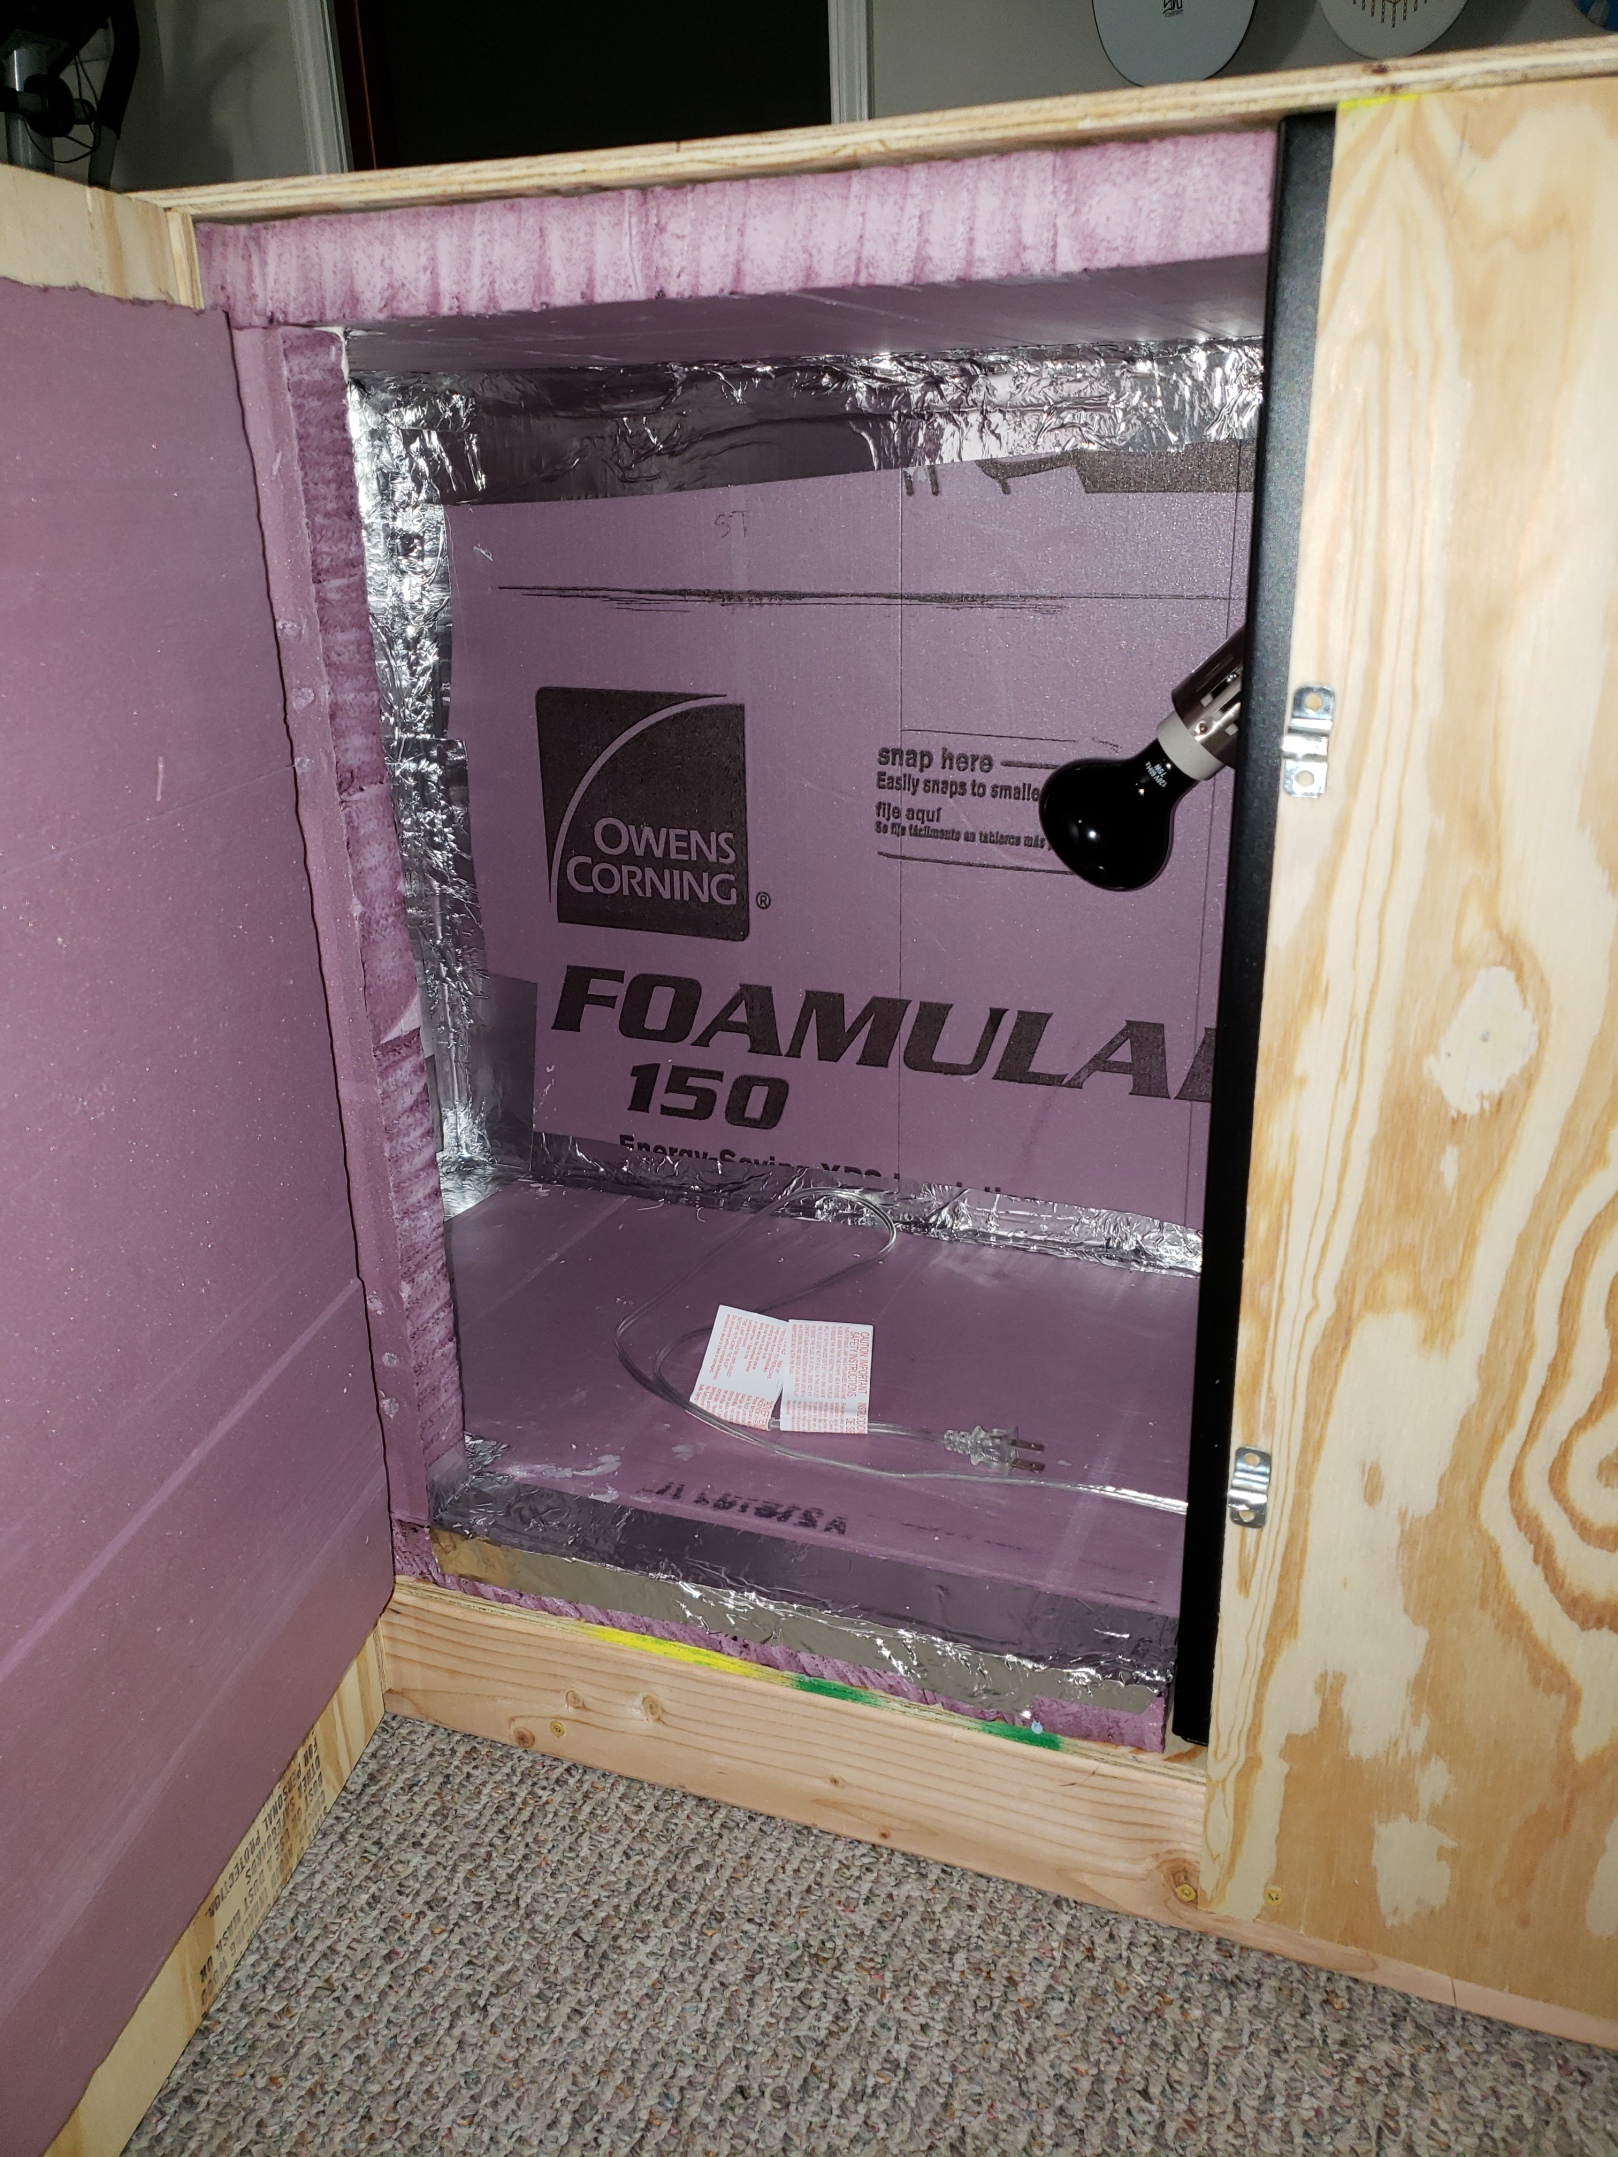
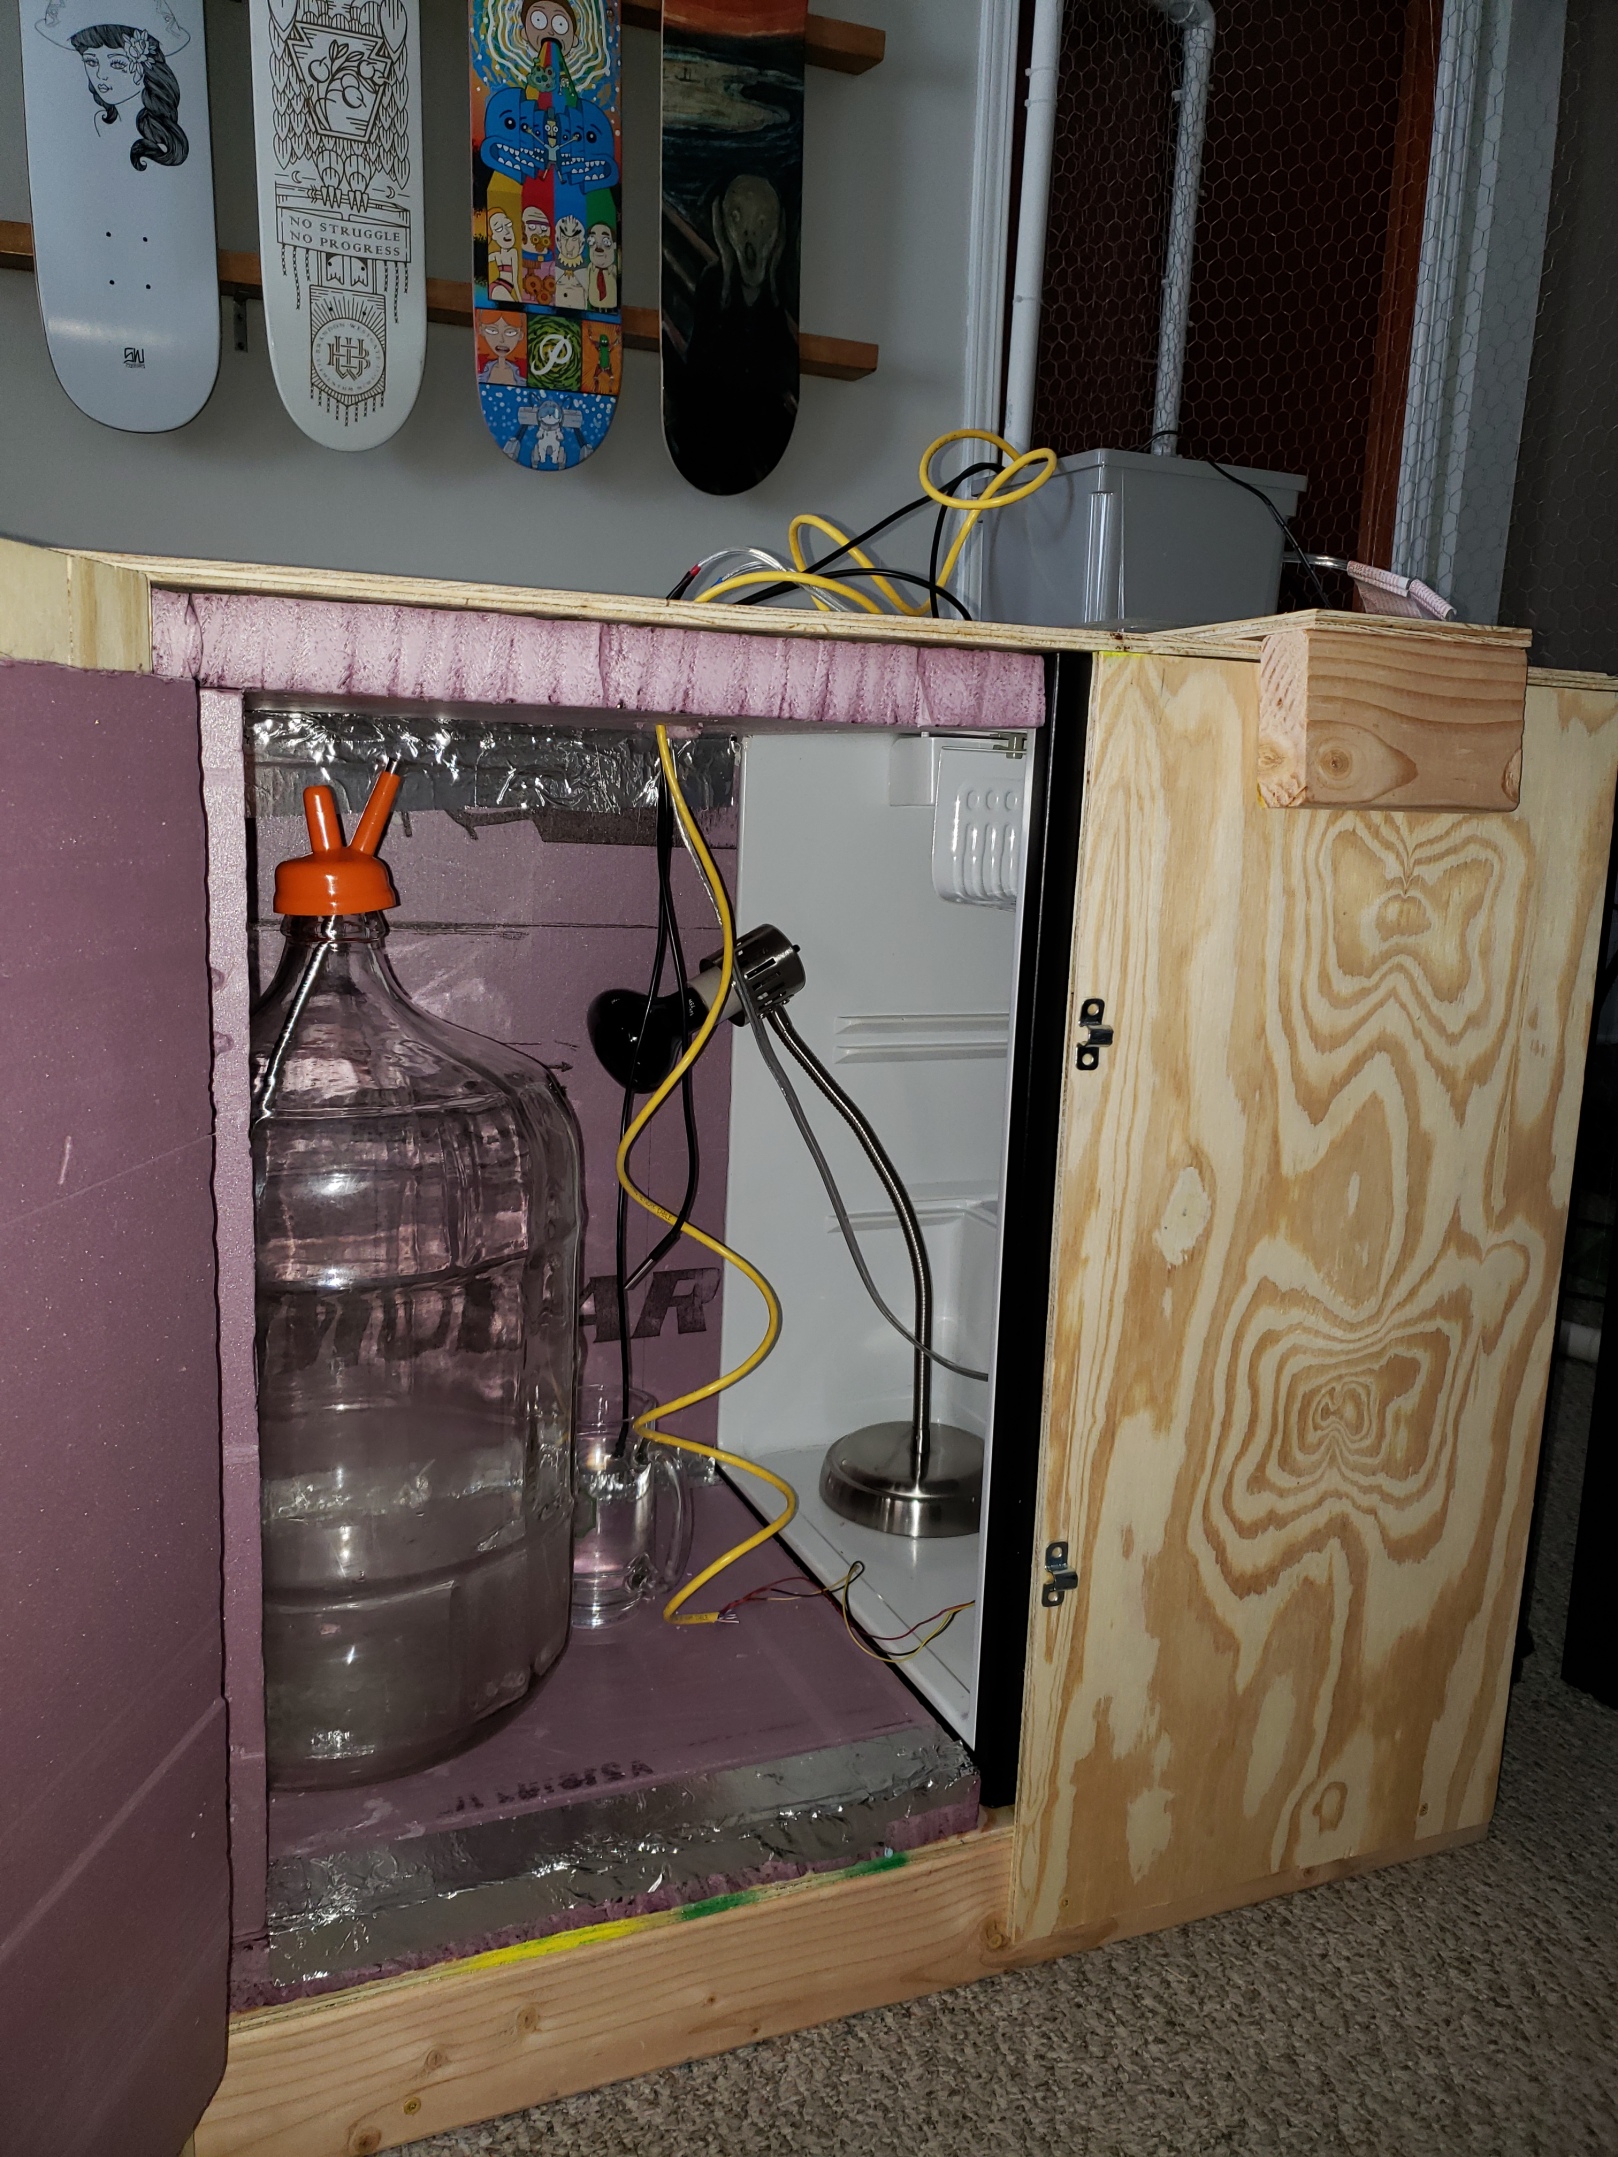
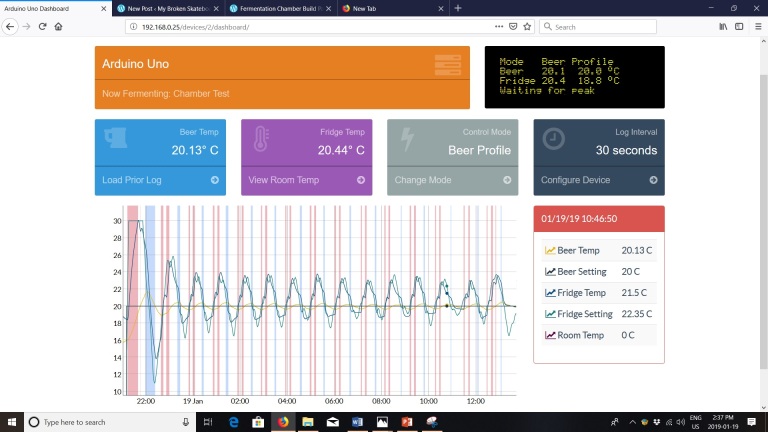
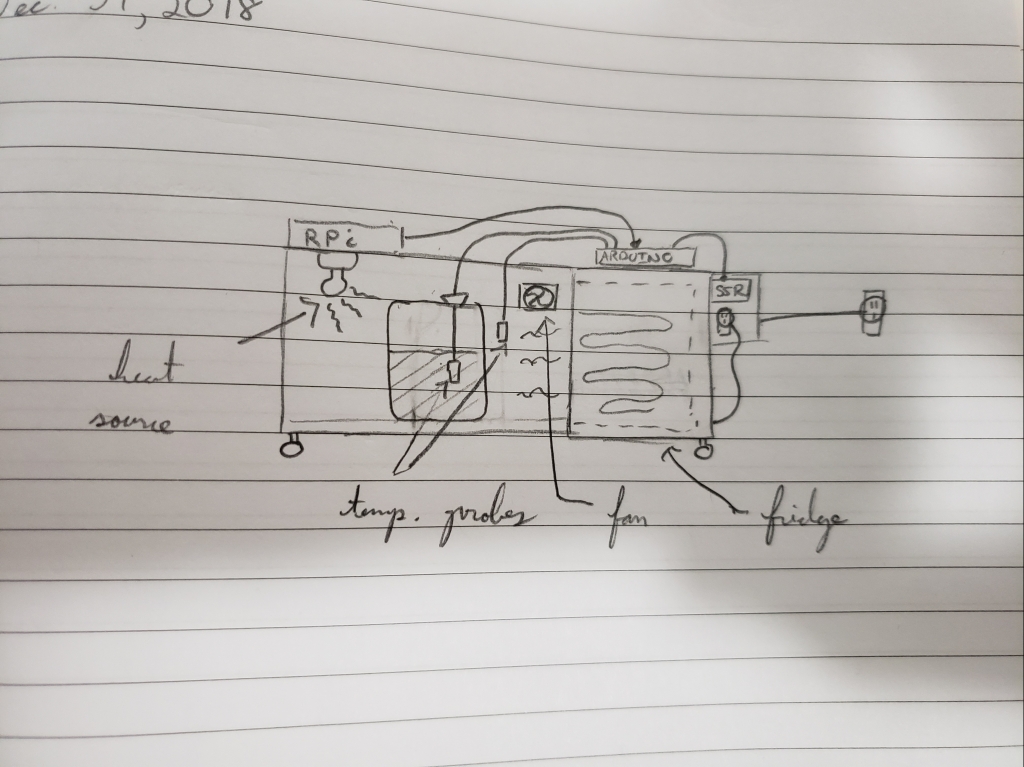
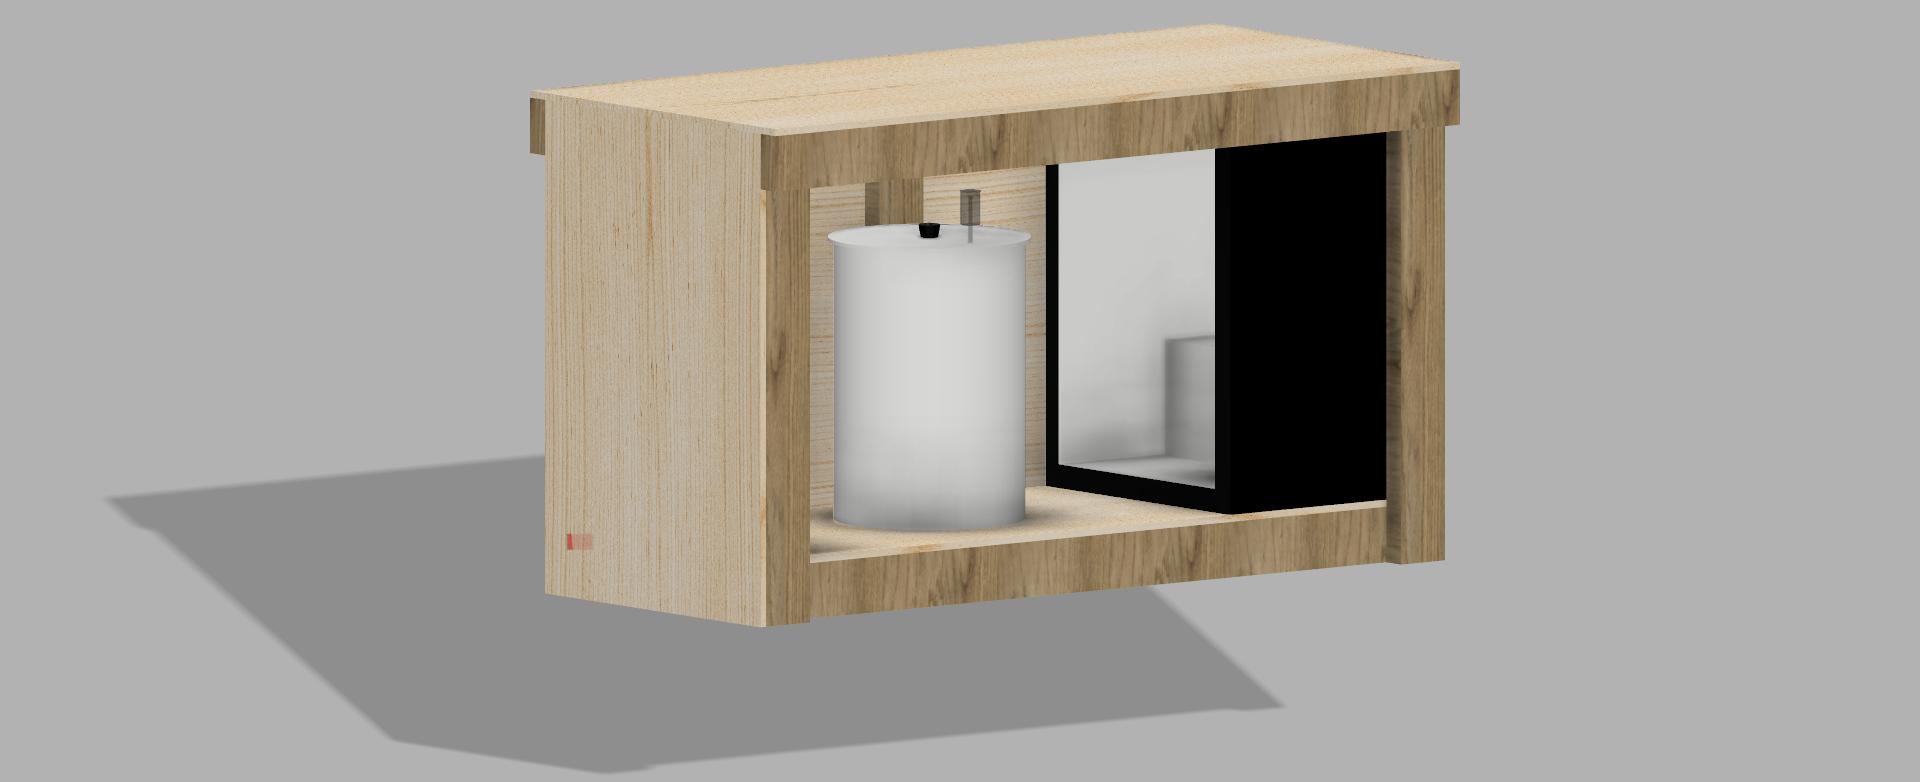
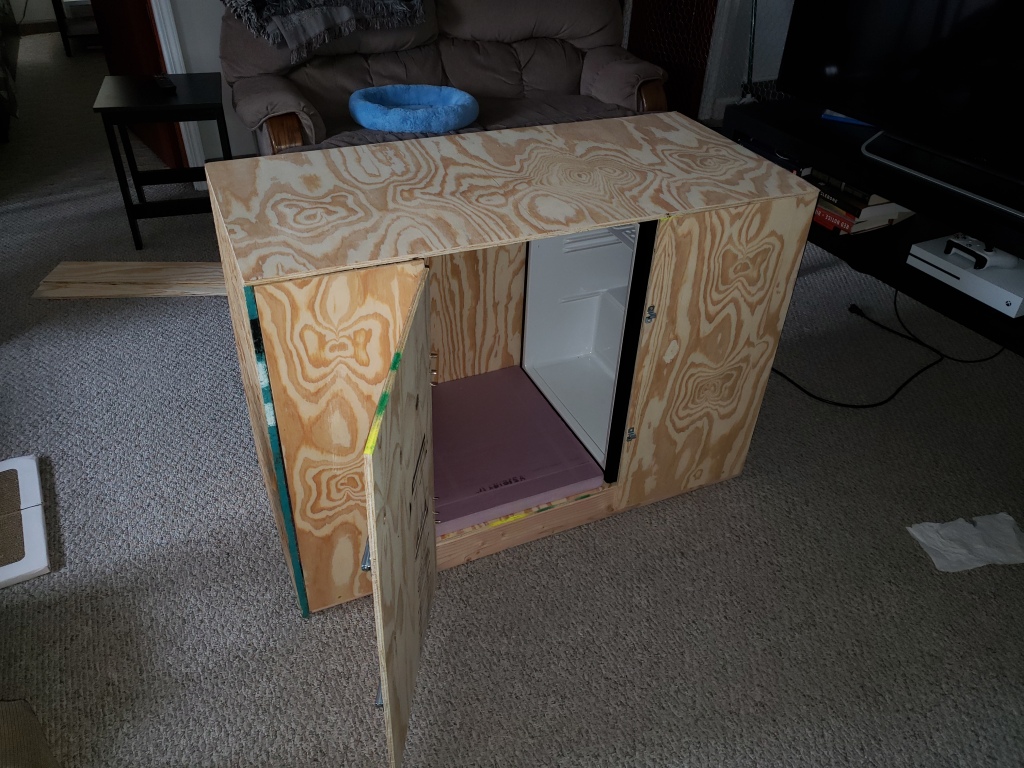
It's far from the prettiest fermenter out there, but so far it does the trick. I did a quick test on a cup of water to see how well the environment works, below is the Fermentrack output. I'm testing it right now on 5 gallons of water to see how well it holds a 20C temperature over 5 days, followed by a cold crash. It didn't come out looking quite like the conceptual idea I had going, but that's because I made a lot of little woodworking mistakes along the way.

A couple other details for those interested:

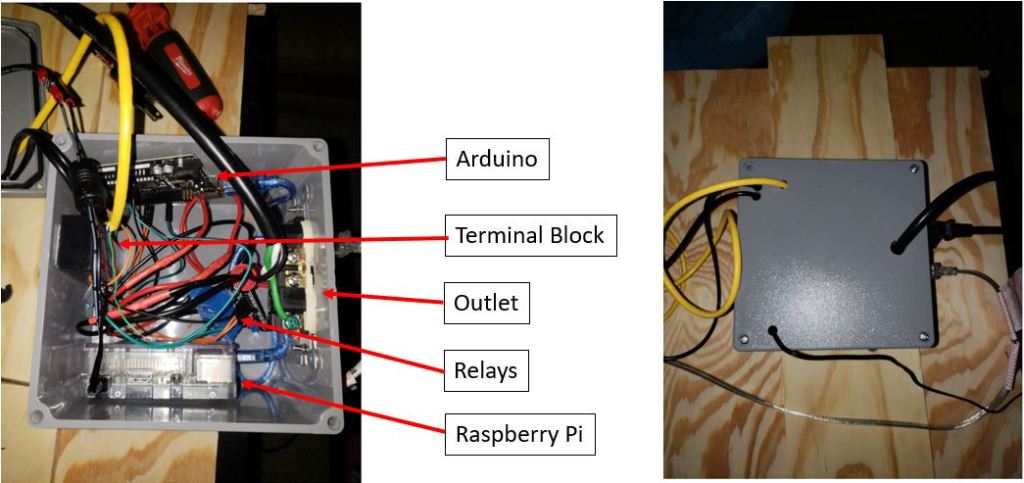
I used an arduino and raspberry pi as I'd planned on doing a brewpi setup. I quickly discovered this was going to be a nuisance as it required going to legacy versions of Raspian Jessie and configuring different hex files for the arduino. I went the Fermentrack route, and I was amazed at how easy it was to initially set up. I've had a few intermittent issues with the controller needing a reflash between logging sessions, but so far it's working. Hats off to both @FuzzeWuzze and @Thorrak for contributions to brewpi and Fermentrack. If I ever meet you in person, I definitely owe you beers (or maybe 6 :mug:)

Also, the yellow cable is a hacked up ethernet cable for the fan. Ethernet cable is a surprisingly useful cable for hobby wiring. Only downside is the small 22 gauge wiring is so damn prone to being cut when stripping. Maybe I need some better strippers.

There's still some testing and tuning to do before it's ready for the next brew. I'll have some better pictures once I finish the final touches.
20181231_182909-e1546299087880.jpg


ferm-chamber-render.jpg


20190112_120113.jpg


20190117_223249.jpg


project-box.jpg


20190119_143232.jpg


fermentrack-dashboard.jpg
 
I figured I would put up yet another quick fermentation chamber DIY I did over the past couple of weeks. It's a few quick photos and I'm bypassing a lot of the nitty gritty details, but if you want to see a lot more writing, check out the link on my sig.

I basically followed the same style of design as found in the following blogs:

https://www.brewpi.com/fridge-hacking-guide/

https://dotps1.github.io/homebrewing/2018/01/22/brewing-your-own-brewpi.html

http://diybrewpi.wikia.com/wiki/DIYBrewPi_Wikia

I'm sure these links are familiar to many who've done this build.

It's far from the prettiest fermenter out there, but so far it does the trick. I did a quick test on a cup of water to see how well the environment works, below is the Fermentrack output. I'm testing it right now on 5 gallons of water to see how well it holds a 20C temperature over 5 days, followed by a cold crash. It didn't come out looking quite like the conceptual idea I had going, but that's because I made a lot of little woodworking mistakes along the way.

A couple other details for those interested:

I used an arduino and raspberry pi as I'd planned on doing a brewpi setup. I quickly discovered this was going to be a nuisance as it required going to legacy versions of Raspian Jessie and configuring different hex files for the arduino. I went the Fermentrack route, and I was amazed at how easy it was to initially set up. I've had a few intermittent issues with the controller needing a reflash between logging sessions, but so far it's working. Hats off to both @FuzzeWuzze and @Thorrak for contributions to brewpi and Fermentrack. If I ever meet you in person, I definitely owe you beers (or maybe 6 :mug:)

Also, the yellow cable is a hacked up ethernet cable for the fan. Ethernet cable is a surprisingly useful cable for hobby wiring. Only downside is the small 22 gauge wiring is so damn prone to being cut when stripping. Maybe I need some better strippers.

There's still some testing and tuning to do before it's ready for the next brew. I'll have some better pictures once I finish the final touches.
20181231_182909-e1546299087880.jpg


ferm-chamber-render.jpg


20190112_120113.jpg


20190117_223249.jpg


project-box.jpg


20190119_143232.jpg


fermentrack-dashboard.jpg

That's an awesome looking fermentation chamber! I hadn't thought about going the "fridge with no door" route to be able to convert that style of mini-fridge to be compatible with 5 gallon carboys. Smart move!

Out of curiosity, what are you using as a heat source? Is that a 75W ceramic heater, or a 7.5W one?

If you have any issues with Fermentrack requiring a reflash (or anything similar!) let me know and I'll see if I can help. Glad to hear your chamber is working as expected - go make some beer!!

I got the fridge for free, so I figured I would try it. A chest freezer may seal better, but for now this seems to be working. I'm testing at 20C, which is a good ale temp, I don't know how well it will hold lager temps. That's another test.

I lost connection to the controller a few times when I was playing around with Fermentrack in the beginning. Basically I would see my temperatures in the browser, then I would get a "can't receive LCD text from controller/script" error when I tried to add a new profile. I checked the wiring to make sure it was all connected. After a reflash it restarted and seemed to work. I'll keep track and let you know if it happens again!

It's a 75W heater. I know from some of the forums this might be too high, so I might swap it for something smaller after some testing. It's smaller than the mini heater I had planned in the beginning!

I'm curious, is there a plan or an option to export the graphical data to a .csv or excel file? I'm a nerd at heart and it's a treasure trove of data.

The data is already a CSV behind the scenes - I’m not near a build to find the link, but there should be one already to download it.

75W is too big unfortunately. Think 10W. :)

Let me know if anything else breaks!!
 
I'm running my first brew and so far as noted above I do get some ping ponging with the heat lamp. My insulation job isn't the best, it's evident that after I hit the fridge set point, the temperature drops somewhat quickly (it's cold in michigan!)

That being said, I'm quite impressed with the temperature control so far, it maintains a pretty good control of the beer temp, I can hold ~ +/- 0.1C worst case.

Before the next batch I have a few things to improve, probably take out the heat lamp and put a normal incandescent bulb. If I build another one of these, I'll probably up the insulation thickness on the chamber walls.
Any update on your project?
 
Any update on your project?

Yes! Been a while, but I've had a chance to work with it.

My second batch I did a lager, I picked a 3 stage lagering profile. It holds 54F for 14 days, bumps to 62 for 3 days, then ramps down to 35F over 30 days.

The chamber did fine for the majority of the profile, however once it got down to about 42F the fridge was starting to cycle on and off quite a bit, hence I decided to halt the drop.

It ping pongs quite a bit, likely a testament to the fact that my insulation isn't a high enough R value, but in the grand scheme of things, it serves it's purpose. If anything, it works great for ale profiles and ok for lager profiles to a degree. If I really want to get into lagering, I may wait until there's a sale at Lowes or Home Depot and just do a freezer conversion.
 
however once it got down to about 42F the fridge was starting to cycle on and off quite a bit, hence I decided to halt the drop.

It ping pongs quite a bit, likely a testament to the fact that my insulation isn't a high enough R value, but in the grand scheme of things, it serves it's purpose. If anything, it works great for ale profiles and ok for lager profiles to a degree. If I really want to get into lagering, I may wait until there's a sale at Lowes or Home Depot and just do a freezer conversion.

I did almost exactly the same thing but with one of those small cube dorm fridges, just building 2" thick foamboard box around the doorless unit. It could not get below about 54°F without constantly running.

The ping ponging is due less to heat loss than heat/cool source imbalance.

During active ferm, yeast provides the heat, only cooling should come on and the PID should adjust to keep from overshoot.
 
Back
Top