• Please visit and share your knowledge at our sister communities:
  • If you have not, please join our official Homebrewing Facebook Group!

    Homebrewing Facebook Group

My Fermentation Chamber Build

Homebrew Talk

Help Support Homebrew Talk:

This site may earn a commission from merchant affiliate links, including eBay, Amazon, and others.

Ace_Club

Well-Known Member
Joined
Sep 21, 2008
Messages
43,816
Reaction score
2,373
Location
Chicago, IL
I'm in the process of switching from extract, basement-ambient-temp brewing to all-grain, controlled-temp brewing. I'm currently working on constructing the fermentation chamber.

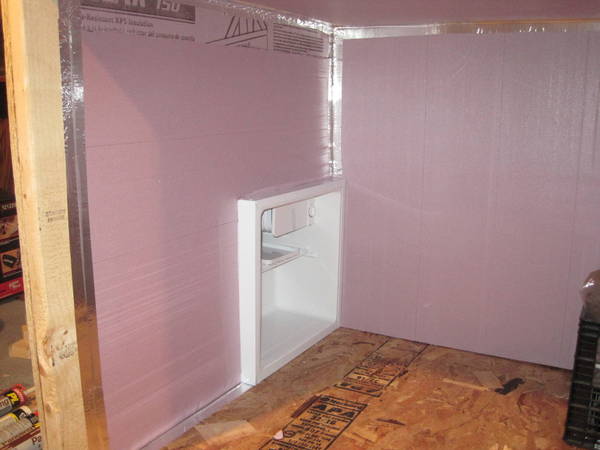
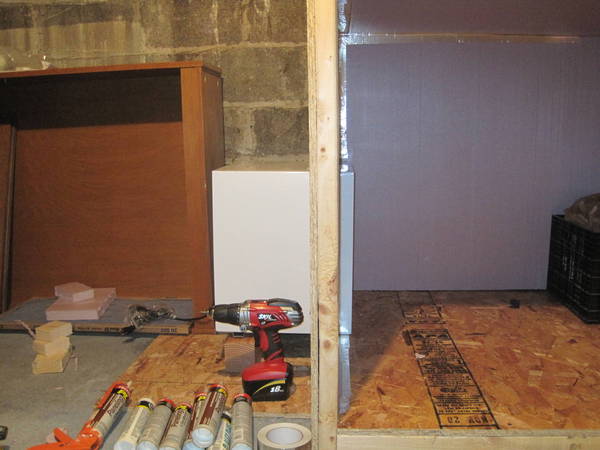
The outside dimensions of the chamber are 48" x 48" x 43". I plan to add approximately 3.5" of rigid foam board insulation, which will then be covered with FRP.

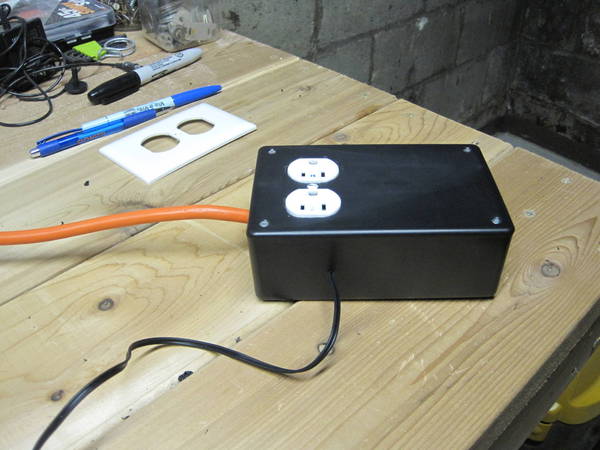
The chamber will be kept at 60F and cooled utilizing a standard mini fridge. Here are some pics of the current progress. Next step is adding the insulation.

IMG_1986.jpg


IMG_1987.jpg
 
cant wait to see this. place holders kind of take the fun out of tracking a project and getting all peoples comments in line - just a suggestion.
 
FRP? Chicago? You wouldn't happen to be a sailor would ya? I would sure love to do a Chi-Mac one day.
 
cant wait to see this. place holders kind of take the fun out of tracking a project and getting all peoples comments in line - just a suggestion.

Your wish has been granted. Place holders deleted. :D

FRP? Chicago? You wouldn't happen to be a sailor would ya? I would sure love to do a Chi-Mac one day.

Used to be in the Navy, but had a desk job. That was good though, as I get horribly sea sick.
 
cant wait to see this. place holders kind of take the fun out of tracking a project and getting all peoples comments in line - just a suggestion.

It's nice to see everything at the front of the thread. Some of the epic build threads on here get upwards of 50 pages and the BS comments make it a pain to read through, like this one.

Just a suggestion.
 
He'll likely do what several people around here do and butt the opening of the fridge (door removed) up to an opening of the chamber and seal the edges. Essentially expanding the interior of the mini fridge.
 
He'll likely do what several people around here do and butt the opening of the fridge (door removed) up to an opening of the chamber and seal the edges. Essentially expanding the interior of the mini fridge.

Yeah, I of course just read about those. And, what a neat idea! Hmmm :tank:
 
Progress on this has been very slow. Nothing has been done on the physical construction of the box. However, I was able to get my temperature control box completed. It's an aquarium dual-temperature controller from ebay.

Side view. Orange is the power cord. The small black wire from the side is the temperature probe. The outlet on the top is for the heater and cooler (one outlet per device).

IMG_20622.JPG


Front view.

IMG_20631.JPG


Front view with power. (Controller only displays in C, but that's what you get for a whole temperature control box under $30)

IMG_2064.JPG
 
glad to see your making progress on yours, mine has had no progress since fall. Twins on the way, getting a nursery together, motorizing my grain mill, assembling cribs, installing carpet.

I snuck something in there for myselff :)
 
Picked up the insulation yesterday and was able to get it installed in the floor. More to do tonight. Will post pictures of the progress later tonight.
 
Subscribed.

I was just up at MDHB yesterday, good to know there's locals on here.

I've been thinking of something like this myself, although I was maybe going to use a window A/C instead of a minifridge.
 
Assuming you are gonna have a fan sitting in the mini fridge? Thats what I do with mine. Plugged a power strip into the "cool" oultet on the temperature control and plugged the fridge and fan into the strip. So the fan only runs when the fridge does.
 
Assuming you are gonna have a fan sitting in the mini fridge? Thats what I do with mine. Plugged a power strip into the "cool" oultet on the temperature control and plugged the fridge and fan into the strip. So the fan only runs when the fridge does.

That is correct. I also plan to use the reptile heat rope for the heating capability.
 
Made some good progress on the fermentation chamber build. I installed the 3.5" of rigid foam insulation in the floor cavity. I then installed a sheet of 1/2" plywood over that to provide added support for the fermenters.

I also installed the 3.5" of rigid foam insulation in the ceiling cavity. These two sheets (2" and 1.5") were installed using a paneling adhesive. They are currently clamped/supported and will be allowed to dry overnight. A pic of the current state below:

IMG_21213.JPG
 
These two sheets (2" and 1.5") were installed using a paneling adhesive. They are currently clamped/supported and will be allowed to dry overnight.
IMG_21213.JPG

3M spray adhesive works great tacky in a minute and permanent enough in case you need to make changes. No need for clamps.
 
How is this build going Ace Club? I just started my chamber with similar dimensions and a CL mini-fridge today. Hope it's going well.
 
Subscribed!! WOOT WOOOOOOOT! Just got rid of my aquarium fermentation chamber. Plan on rigging one of these up soon.
 
did you special order the insulation? I seem to have a hard time finding thicker than 1" here in TX
 
did you special order the insulation? I seem to have a hard time finding thicker than 1" here in TX

Nope, just picked it up from Menards and strapped it to the roof of my Corolla. :D

They carried thicknesses up to 2" in the store.
 
Celsius is way better anyways. :) Makes life much easier to figure out when water boils at 100 and freezes at 0. Go Metric!! Woot!
And that about sums up mine and everyone else's Celsius knowledge. I'm not sure the title celsius 233 would have been such a great seller.

Looking good. Keep the build going.

-cheers
 
I'm going to be scouting out a reclaimed building materials place for a cabinet that will fit a few carboys. If I come up short, I'm curious what does all the wood cost at a big box store for a basic build like this?
 
Crap, you guys digging up this thread are making me think about actually finishing this project. It has sat, languishing, for months now.

As for the cost of the wood, I think the base lumber was around $40 to $50. Could probably get that number down lower if you use thinner plywood.
 
Progress has been made!! :ban:

Today I was at Target and saw that their mini fridges were on sale, so I picked one up and continued my build.

From this image, you can see that I've finished insulating the back wall and have started taping some of the seams with Aluminum Foil tape.

IMG_2773.JPG


This shot shows the side wall with the mini fridge installed. This wall still requires the addition of a 2" thick piece of insulation.

IMG_2774.JPG


A side shot showing the mini fridge through the wall.

IMG_27752.JPG


All that's left is the 2" side wall insulation, the fourth wall/door and its insulation and installation of the FRP flooring. Then the seams will be caulked and the chamber will be turned on.
 
looking good. im just about done with mine, but i just used 2" of insulation and was thinking that would be enough to hold lagering temps. should i add more insulation?
 
Back
Top