• Please visit and share your knowledge at our sister communities:
  • If you have not, please join our official Homebrewing Facebook Group!

    Homebrewing Facebook Group

My attempt at a 20 gallon, future-prrof system with stout tanks

Homebrew Talk

Help Support Homebrew Talk:

This site may earn a commission from merchant affiliate links, including eBay, Amazon, and others.
So last night I poured myself one of my double IPAs and sat down to watch my beloved kings dominate the sharks. There was a random brewers hardware package that came addressed to me so I decided to open it, thinking it was just another box in the constant stream. Nope! it ended up being a present from one of the SWMBO's aunt/uncle. I guess answering, "what would you like for Christmas" with a link of whatever I was currently looking at finally paid off!

teub.jpg


Anyways, I have eliminated stout from the conical race and am 99% sure I'll be going with Brewhemoth. Thanks for the input.

although, ther brewer's hardware 15/20 gallon one is mioghty tempting

CONICAL15G.jpg


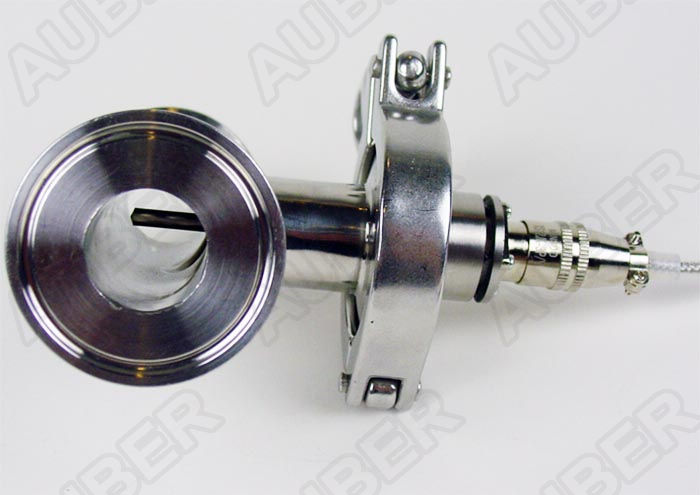
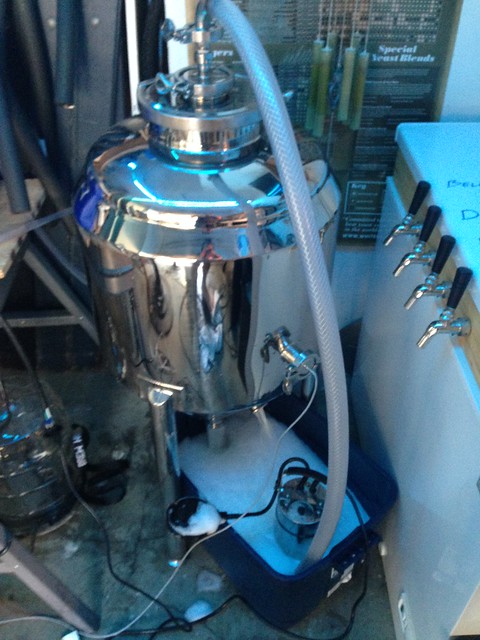
I really like the larger opening on theirs. 8" tri clamp on the 20 gallon! But unfortunately there isn't an easy way to cool it like the off the shelf cooling option from brewhemoth. I am all for diy, and can't wait to do one for the glycol chiller, but keeping something rated for high pressure should be left to the pros.

So I'm still going over the financials of brewhemoth once I add in everything, but hopefully I'll order it soon.

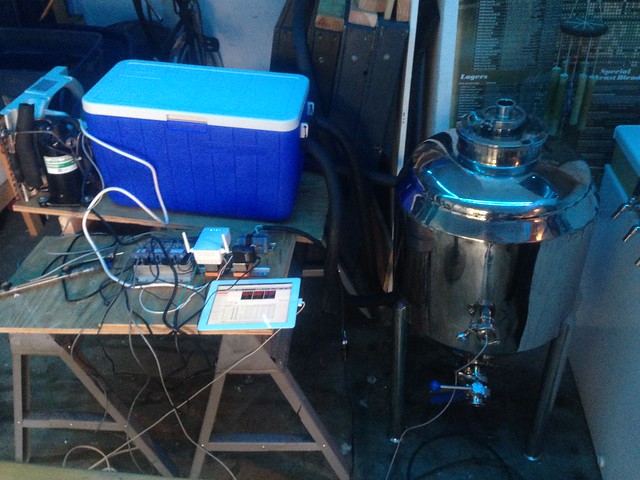
I went with 4 legs, stainless, and 1 foot longer. I polished them myself. One day I would like to get a second brewhemoth but I will probably only get 3 legs instead of the 4.

Any chance for a picture or a cost breakdown of adding the stainless legs?
 
The Brewers Hardware ones are pretty sexy. I am thinking of getting their 30 gallon boil kettle in the near future and switching over to all tri clover for kettle, pump and chiller. Haven't ruled out Stout for the boil kettle yet. Just have to recoup some funds first before I can look seriously.
 
Christmas treated me well!

dadz.jpg


-Motor for the mill
-Plate chiller
-5000 mL flask
-Oxygen tank regulator

I now have too much to do. Good thing the pots are still a ways away.
 
Last edited by a moderator:
Finally started working on the milling station
Parts List:
-Monster Mill
-1 hp Grizzly motor 1725 rpm
-12” pulley (1/2” Bore)
-1.75” Pulley (5/8” Bore)
-70” v belt
-two pieces of 80/20 to mount the motor
And the coolest part, the old workbench. I have begged my dad for over a year to give it to me since he wasn’t using it. We had pulled it out of an old office building and he finally gave it to me for Christmas!

Here are all the parts laid out.
o5wg.jpg


A good shot of the bench
6a6f.jpg


I will mount the motor to two pieces of 80/20
jgxt.jpg


And then mount those two pieces to the frame as such (just mocked up for now)
olkf.jpg


I really like this way of mounting the motor because it will be very easy to adjust the tension in the belt. Hopefully I’ll have it done to brew with by the weekend. At first it will just be powered by plugging it in, but eventually I’ll hard wire in a 3 way switch for reverse/off/forward control.
 
Finished the milling station last weekend. Its a dark photo, but you get the idea. Excited to use it on brew day this weekend. I don't have it wired up to a switch yet, so i'll just be plugging it in to turn it on.

0xjo.jpg


I got my tri clover temp sensors from auber. I went with the instrument tee variety.

8adi.jpg


1f9h.jpg


I like the quality of them, however I am not sure I like the length of them.

l4v6.jpg


As you can see, they barely extend into the path of the liquid. And this is without a gasket, so it is actually worse. They do not have a picture for the instrument version on their website, however, they have this picture for the standard one.

PT100-Clamp_installed.jpg


So here are my questions and thoughts:

-will i still get a reliable reading?
-should i request a return and get the standard ones and get standard tees?
-if i choose to use the instrument ones I have, could i just do a test to see the temperature differential that I experience and adjust my temperatures accordingly?

Thanks for the input!
 
I like your mill station!
Find yourself an old electric desk fan, and rob the guard off of it for that big ol' pulley that's waiting to grab something!........:D
 
The idea is to use an instrument tee with an instrument length RTD, or a standard tee with a standard length RTD. I went with instrument for both, because the normal tees are freaking huge and I wanted things to be a little more compact.
 
You should have ordered the longer RTD for the tee you have. I used the short RTD and Instrument Tee on the output of my MT. I used the longer RTD on my HLT.
 
Ok, i guess i need to be clearer. I have instrument tees and instrument probes. That is what the picture is of.
 
What did Auber and Brewer's Hardware say? I have that setup and the probe tip is in the center of the fluid path.

I can only speculate, but it looks like your tees are out of spec, although they don't provide any measurements of what they should be on the website. Before I ordered mine I had them measure the fittings for me.

It could be your probe is too short just as well. It is supposed to be 35 mm from the face of the ferrule.
 
Yikes. I have the same setup, and the probe tip is right in the path.

I'd guess it is the probe, not the tee that is out of spec. My probes aren't even soldered on straight to the TC, so I can't imagine it is a high tolerance process to make them.
 
Yikes. I have the same setup, and the probe tip is right in the path.

I'd guess it is the probe, not the tee that is out of spec. My probes aren't even soldered on straight to the TC, so I can't imagine it is a high tolerance process to make them.

I'm not close to this these parts right now otherwise i would measure them, but if you could measure your tee from the center the long section to the flange that the probe goes in, that would be great. Did you get them from brewers hardware?
 
I'm not close to this these parts right now otherwise i would measure them, but if you could measure your tee from the center the long section to the flange that the probe goes in, that would be great. Did you get them from brewers hardware?

Yes, I got from brewers hardware. I'm out of town, and like an idiot I didn't bring my brewery with me, so I can't measure. Also, I'm a little drunksies and not sure if I can work a tape measure right now without losing an eye or getting arrested. :drunk: I really think these tees are produced within a REALLY tight tolerance. My probe, as i mentioned, does not seem to be manufactured particularly carefully.

I'll try to remember and measure in a couple days when I get home.

Considering utilizing my lack of judgement to order an autosparge... The balancing of flow rates is a giant PITA. That isn't a stout-tanks specific complaint, more of a fly-sparge complaint. Have you considered adding something like that? I think I could DIY a little cheaper than 50 smackers, but not by much.

So i measured the probes and they are 1.3", just as they are listed on the auber page. So i guess I will have to deal with it.

Also, i ended up ordering the sparge arm from Stout, so I'll let you know how it works.
 
Well well well, the conical drama is over. Last Thursday night I took swmbo out to a nice dinner and convinced her that the brewers hardware 20 gallon jacketed conical was a future proof option that will let me do it how the big boys do. So later that night I ordered it. Just after I ordered it I realized i worked within 20 minutes of the brewers hardware warehouse . Low and behold, I called them up and picked it up on Friday.

Words cannot describe how excited I am.

c8pn.jpg


y52e.jpg


kg9n.jpg


2ifo.jpg


I just love it. I love the steepness of the cone, the massive 8 inch tri clover on top, and of course the jacket. I tossed in a BCS tri clover temp senso, a sample valve and a spray ball for a cip. I can't wait to fill her up this weekend using back to back BIAB's.

But, before that happens, I need to get temp control for it. I will be using a BCS462 to control a watter/glycol bath. It will be cooled using a 5000 btu window ac and heated using a 300 watt aquarium heater.

I am still debating how to do this. I might just dial in the desired temp of fermentation for the water bath and constantly recirulate it through the jacket with a pond pump. Reason being, the temperature in Southern California is swinging between 50 and 75 so i need heating and cooling.

Otherwise, when it is hot I will keep the bath around 45 degrees and only pump when needed. Does this sound like a good plan of attack?

All of the glycol system parts arrive this week, so expect some progress in the upcoming days!
 
Funny- I just saw this thread today and got my 20 gl Stout Tanks in over the weekend. I'm following this thread. My system is going to be pretty similar to this one. Congrats on the conical! . I wish I could offer advice but I'll be watching what you do on this one because I had everything else planned. Cheers
 
That is sure nice looking. I need to wait a year or so before I'll risk buying more big-ticket brewery items... or wait until SWMBO is out of town. Maybe she just won't notice the giant shiny addition.

I've been drooling over conicals for a while now. While I'm a little stuck between stainless vs DIY plastic, I think brewers hardware has the best off-the-shelf option, regardless of cost.
 
Started the Glycol chiller last night. The main components are a 48 quart cooler and frigidaire window ac unit, both from Amazon. I Bought the ac unit used, but it came packaged and appeared to be brand new.

http://www.amazon.com/gp/product/B00363RSUS/?tag=skimlinks_replacement-20

http://www.amazon.com/gp/product/B003F4TH6G/?tag=skimlinks_replacement-20

Also, this was not my original idea. Much reading of all of the posts here, especially the diy plastic conical thread. Anyways, here we go:

The poor cooler

51b1.jpg


Starting to tear the ac apart. There is a moment when you realize that there is no way that you could return it if you break it. That moment happened about right here.

5ldw.jpg


Here it is fully stripped of the base and everything else. Also, wired the to pinkish wires together that went into the thermostat. This bypassed it and will have the compressor run anytime it has power.

op6i.jpg


Here I am mocking it up on the new base made of plywood. Measures 36" x 16"

pyp9.jpg


Use the base to drill holes to mount the compressor and the fan unit

ct73.jpg


Cut a slit in the cooler for the chiller. This was much easier done with a sharp serrated knife rather than the jigsaw.

zn6z.jpg


Put everything in place

nhfk.jpg


1jrg.jpg


f3f2.jpg


That's as far as I got last night. My plan is to have it done this weekend, so that I can test it during the week and then use it for real next weekend.

My one question is how to deal with this:

9i6g.jpg


My three options are as follows:
1. Leave it as is and fill the water line below it
2. Fill the gap with something like silicone and then try and use some kind of waterproof painting solution. Maybe something that boats use for repair. Would love some input on this.
3. Combine both of the above two options.
 
Last edited by a moderator:
how about fiberglass? you buy the fabric sheets and impregnate them with an epoxy resin.

That's an awesome idea. I'll have to look into, as i have zero experience in that field. Well, other than fixing a couple surfboard dings.
 
Might have trouble getting the polyester resin,( used normally with fiberglass kits), to stick to the cooler material.

Try it out on your test piece that you cut out.

Probably your best bet will be something you can "pour in place", around your evaporator core lines.You can use modeling clay to build a "dam" around them, so your filler will not flow out.
Also on MOST plastics, to get something to bond to them well, you have to remove the "skin" or "shine " that you see on the surface.

That's normally done with a LIGHT flame.........Yes, it can get tricky!

You could probably do it with a "pourable" silicone or RTV.........We use some here at work, but it's not handy right now or I would get the number for you.
It's made by Dow -Corning.........I'll scope it out and get back to ya'.

I would think you would get maximum benefit if the evaporator core were totally submerged.


Edit:.......This stuff: https://www.xiameter.com/en/Products/Pages/ProductDetail.aspx?pid=01907506&R=X407EN&C=US

I have used some of it before, and it worked well to make a "pour in place" gasket for a fermenter lid.

The stuff I acquired was from here at work, as when the chemicals we use reach their "shelf life", they pay to dispose of them.

I just saved them a few bucks........
 
What AC unit model did you buy? Did you have any problems bending the lines to put into the cooler?

Thanks
Pat
 
FWIW, I emailed brewershardware.com about the size of the instruments tees, since I will be using them as well. The 1.5" tri clamp instrument tees are 1.6" from the ferrule to the centerline. Just a heads up for anyone who might be using them in future builds, they may not work well with the 35mm probes.
 
Interesting to see that you are going with a bottom outlet on the mash tun. I was thinking of doing the same. Where is it going to sit such that you can use a bottom outlet ?
 
It sits like any other pot. The bottom outlet is covered by an SS skirt so the it sits flat. I thought the same thing at first but Stout cleared that up for me. Mine work great
 
Wow, it's been a while. After several weekend trips, including one up to RR for the Pliny release (yes it lived up to the hype) I got back at it this weekend. I wired up my new panel enough to use it. 2 x 2000w elements. Did 2 7.5 gallon batches of my house IPA and filled up the conical for the first time. All i have to say is that i hope I never use a carboy ever again.

Cleaning with the cip was a breeze. I have the window ac cooling the glycol-less glycol bath and a pump keeping the conical at 67-69 *F. Love monitoring the temps on the ipad while away from the setup. Although the first day at work i was a little nervous to leave it alone. I still need to figure out this port forwarding so that i can monitor it while away. Ambient temps in my garage have been at 60 so the window ac has cycled on about twice a day for very short periods of time. I will be adding a small pump inside the bath to keep the water recirculating to get better cooling when the conical pump is off.

Another exciting point is that I am currently in escrow for a house that has a nice 2 car garage waiting for the brew set up. Even has a instant hot water heater that i plan on using to my advantage. Now to get 240 wired in there...

Anyways, here are some pics:

CIP - any thoughts on why i get so much foaming with saniclean? i was told it should foam less than starsan. Water temp was around 60 *F.

12781021774_cf7a409c9c_z.jpg


new panel, not quite done, but done enough for biab!

12781026794_9292909abc_z.jpg


conical cooling setup

12780556395_c47bea2620_z.jpg


12780552095_1a8cba4187_z.jpg
 
Back
Top