More Home Malting

Homebrew Talk - Beer, Wine, Mead, & Cider Brewing Discussion Forum

Help Support Homebrew Talk - Beer, Wine, Mead, & Cider Brewing Discussion Forum:

This site may earn a commission from merchant affiliate links, including eBay, Amazon, and others.

ClarnoBrewer

Well-Known Member
Joined
Oct 15, 2009
Messages
340
Reaction score
7
Location
Independence
I wasn't sure where to put this, but it doesn't get more DIY than maltng your own barley!
First off, let me say that I'm lucky that over the winter I have plenty of free time. I work from February to November, so I'm currently spending my time tinkering and convincing SWMBO that I'm desperately looking for a winter job...

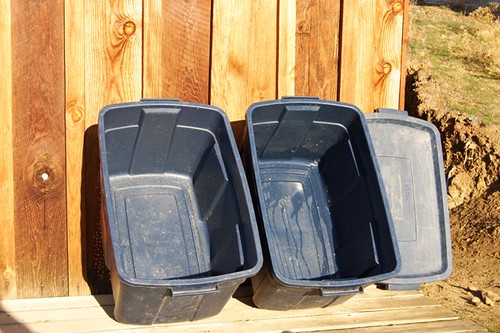
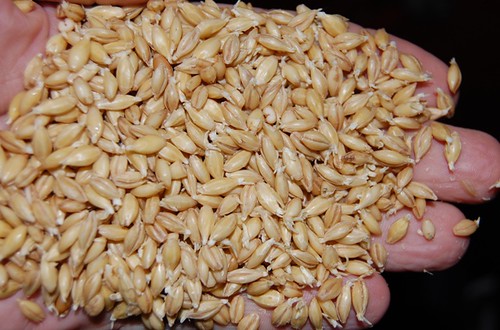
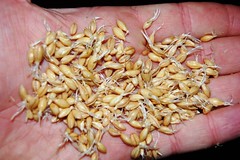
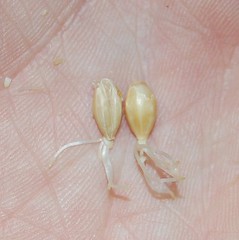
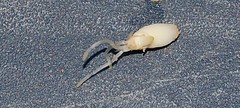
Having sad that, I embarked on an attempt at malting my own barley. There's a guy not far from me that grows 2-row specifically for beer. He grows feed barley and wheat on most of his ranch, but since he brews, he's started putting out a fair bit of the good stuff. I bought a 50lb bag from him for about $18 and it was already cleaned and dried.

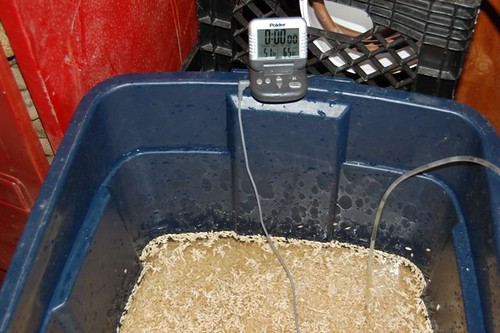
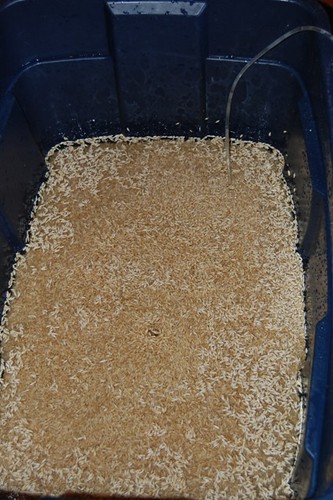
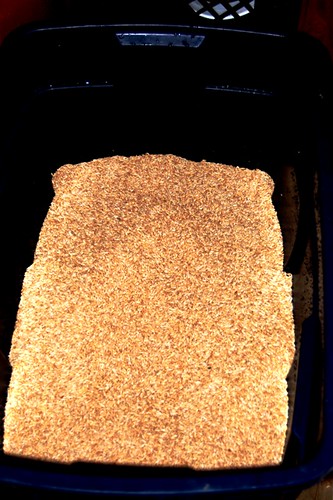
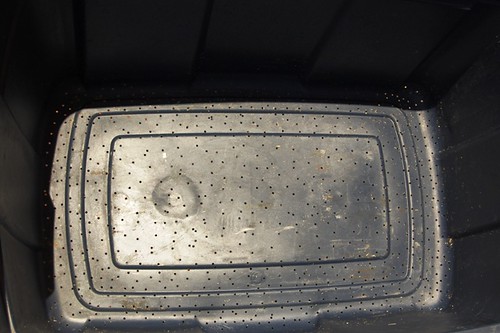
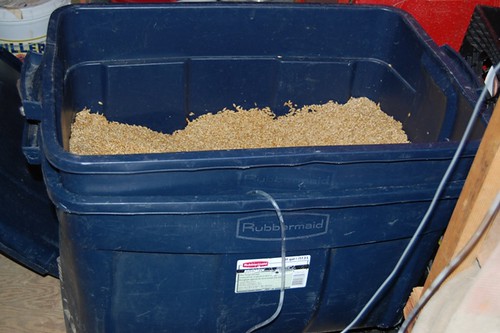
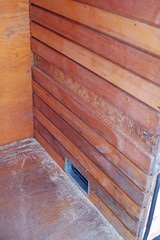
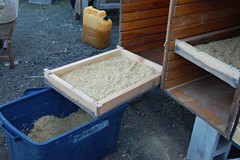
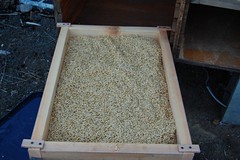
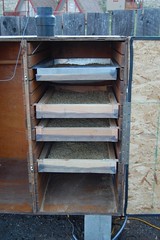
The process was pretty simple. Soaking, sprouting, couching, kilning and roasting. Unfortunately I didn't take pics. I'm going to start another batch after Thanksgiving and I'll document and share if people are interested.

I guess the important thing is that if you have a bit of time, home malting is pretty easy. Next week I'm going to brew with the barley I just malted, so the proof will be in the pudding.

Is anyone interested in a walk-through? If so, I'll take pics as I go.
 
Is anyone interested in a walk-through? If so, I'll take pics as I go.

You must be kidding. Bring it on. And you are right, it doesn't get more DIY than malting your own barley. As far as I am concerned, it is at least half of the process of making beer. I don't kid myself: the malster is my brew partner in every beer I make.
 
I also read the Happiness is Home Malting thread and thought it was great. My method is a little different, so I figure I'll share it. I'd like to see more people interested in at least trying such things themselves. But I also understand that not everyone is as nutso as I am about trying absolutely everything. Well, almost everything...

Seeing as our house is about to be over-run by in-laws and Germans, it'll have to wait until after Turkey-week. But I'll get on it as soon as I can. Thanks for the encouragement!
 
I brewed a batch on Thanksgiving, using only the grains I'd malted with my first try. My efficiency was about 60%, which doesn't surprise me much. My grains had probably sprouted too much the first time, and we had a hard time getting the mash temp up enough (long story).

That batch should be ready in a few weeks, so I'm going to start malting another batch of grain today. The first time I malted I did 15lbs. This time I'm going to try 20 or 30lbs. I'll take lots of pictures and try to explain what I'm doing.

Having said that, I want to reiterate that COLObrewer has already posted a really nice step-by-step of his malting, and I don't mean to take away from that. I'm just offering another perspective on the process. I should have some pics up this evening. Enjoy!
 
I brewed a batch on Thanksgiving, using only the grains I'd malted with my first try. My efficiency was about 60%, which doesn't surprise me much. My grains had probably sprouted too much the first time, and we had a hard time getting the mash temp up enough (long story).

...

Having said that, I want to reiterate that COLObrewer has already posted a really nice step-by-step of his malting, and I don't mean to take away from that. I'm just offering another perspective on the process. I should have some pics up this evening. Enjoy!

It's hard to get consistent modification in home malting unless you have really dialed in your process. I only did about 2 lbs and I still haven't used them...maybe you ought to try a single decoction with your home malted grains to get more out of them.
 
It's hard to get consistent modification in home malting unless you have really dialed in your process. I only did about 2 lbs and I still haven't used them...maybe you ought to try a single decoction with your home malted grains to get more out of them.

I agree. Luckily, at the price I'm paying for barley, I can afford to just add 25% to my grain bill. But a single decoction would be worth a try. I'm also hoping to hit my conversion better with this batch of grain. I also don't expect very consistent beer this way. I expect good beer, just not something that's the same every time or particularly predictable on the lightness/darkness scale.
 
Batch #2 is under way! I decided to do 40 pounds this time, to get me just a bit ahead. First off, here's a basic equipment list:

2 Rubbermaid bins, one of which has many 1/8" holes drilled in the bottom.
1 lid for the bins.
1 aquarium airpump and long airstone.
Thermometer
Scale
Kiln (I'll explain more on this later)
Oven

That's pretty much it for equipment. Here are the bins I used:

a>


a>


a>
 
Okay, inserting images using Flickr isn't working (or I don't know what I'm doing), so here is a link to the set so far: Malting

You'll see the equipment as well as the grain covered with water.

The Steep:
I cover the grain and keep it at around 50* for about 3 days. I change the water first after 2 hours, then every 12 hours. Whenever I think about it I give the grain a stir and pick out any floating debris. When I change the water I just dump all of the grain in the rubbermaid with the holes, give it a stir around, then dump it back in the first one and add clean water. The steep is pretty hard to screw up unless you completely forget about it.
 
Wow, fescue? That sounds really interesting. Is it an additive to a barley based beer, or is it a primary ingredient? I see you're in Lexington. You should put some bluegrass in there...

On another note, it's day 2 and I've changed the water in the barley twice now, and continue to pick little bits of weeds and other stuff out of it. I actually got 2 half grasshoppers. There may be a name for my next beer in there... The temperature is pretty constant at 50-55*. I'll give it 2 more days of soaking and then it's on to sprouting!

I also just checked up on my first home malted beer. It has one more day in the primary, but it's nearly at it's F.G. of 1.010. It tastes good. It's definitely darker than I'd expected, due to my homemade Crystal being more of a 90 than a 20, but I don't mind that. It's going to get dry-hopped with some Cascade and it should be a nice IPA or IBA.
 
So the grain has been soaking for about 2 days and I'm going to go ahead and sprout it. I'll post some pics later, but the basic operation is this:

1. Drain the barley in the sieve bin and leave it there.
2. Put a few inches of water in the other bin and put the aerator stone in that.
3. Fit the sieve bin into the other bin so that the bottom of the sieve is above the water level. I have to use some spacers to make this happen.
4. Turn the barley regularly. I do it whenever I think about it, but at least every 6 hours. I let it sit overnight unless it's getting close to being fully modified.

Now it's a matter of watching for the rootlet (chit) to form and then the acrospire to begin growing inside the husk. I'll post some pics of this as it happens. Basically you want the acrospire to grow the entire length of the kernel, but no farther.
 
The barley has started sprouting! At the base of each grain you can see small white rootlets (chits) beginning to sprout. The acrospire is starting to grow under the husk, opposite the 'split' side of the seed. When the acrospire is the full length of the seed, it's time to kiln.

Here's a link to the pic of the tubs nested together: tubs

Here's a close-up of the grains, showing the chits: grain
 
So, the airstone spatters oxygenated water droplets all over the bottom of the tub containing the malt after it's been soaked?
 
So, the airstone spatters oxygenated water droplets all over the bottom of the tub containing the malt after it's been soaked?

Sort of. It's basically moving moist air up through the grain. This helps keep the grain from drying out and also helps with transfer of gases. It also helps to keep the temperature of the mass down.
 
Here are your pics. You can copy the address of the image itself (rht click copy image address on my browser) and then use the mountain icon thing to paste the link into or use bracket IMG bracket before and bracket /IMG bracket after the link
Sieve tub nested in the other tub. Bottom tub has a few inches of water and the aquarium air stone in it.
4156213085_6344ba48f5.jpg

Barley has started sprouting. The small white rootlets (chits) can be seen. The acrospire is starting to cause the side opposite the split to bulge near the chit.
4156212945_79a7184b25.jpg
 
Make sure you gently stir the grains somehow at this point!!!!!!!!!! You want to be gentle enough to not break the rootlets, but enough to keep the rootlets from growing into a tangled mass.

While in grad school we used to teach a lab that was basically making a crude amylase extract from germinating barely and then comparing the activity of 2 vs 4 vs 6 day old sprouts. We germinated the barley in roughly 18"X12"X4" trays, and for both the 4 and 6 day old seedlings, we bascially ended up with a floor mat. You could grab one corner, and lift the whole thing out in one giant piece the rootlets were tangled so much. It didn't matter so much for us as we just tore off a chunk and threw it into the blender with buffer
 
Here are your pics. You can copy the address of the image itself (rht click copy image address on my browser) and then use the mountain icon thing to paste the link into or use bracket IMG bracket before and bracket /IMG bracket after the link
Sieve tub nested in the other tub. Bottom tub has a few inches of water and the aquarium air stone in it.

Thanks again! I'd tried that, but apparently did something wrong. I'll try again. Thanks again for reposting them!
 
Make sure you gently stir the grains somehow at this point!!!!!!!!!! You want to be gentle enough to not break the rootlets, but enough to keep the rootlets from growing into a tangled mass.

While in grad school we used to teach a lab that was basically making a crude amylase extract from germinating barely and then comparing the activity of 2 vs 4 vs 6 day old sprouts. We germinated the barley in roughly 18"X12"X4" trays, and for both the 4 and 6 day old seedlings, we bascially ended up with a floor mat. You could grab one corner, and lift the whole thing out in one giant piece the rootlets were tangled so much. It didn't matter so much for us as we just tore off a chunk and threw it into the blender with buffer

Very true! I just give it a gentle turning with my hands. I find that if I do this every few hours, the rootlets never have a good chance to interweave. I'll have the next step, hopefully with pictures, posted in a few minutes.
 
Alright, the next step, and maybe I can post my own pics this time!
The rootlets are growing pretty quickly by this point, and as pjj2ba said, keep them moving or they'll tangle into a nasty clump. The movement also prevents them getting too hot in the middle, which they're really prone to doing at this point. Keep the temperature at the center of the mass below 75*. Here's a pic of a handful of the grains at this point:
4157548143_06faae06cc_m.jpg


Here's a close up of two grains, front and back. Notice the rootlets and how the grain is beginning to bulge where the acrospire is growing under the husk in the RH one.
4158310782_2ca36ef058_m.jpg


And now the most important part- the acrospire. I've removed the husk from this grain so you can see the acrospire growing up the kernel. It's about 1/3 of the way along. As soon as that acrospire reaches the full length of the kernel, we should be at 100% modification.
4158311018_fd4e3d6503_m.jpg


At this point, things tend to start to happen pretty fast. I'll probably end up kilning this afternoon or this evening. My last batch was over-modified because I under-estimated how quickly these little guys grow.
 
Alright, it's kilning time! The malt is fully modified, so into the kiln it goes. The kiln is actually a box I found, with the slats already in it. I'm not sure what it was, but it's perfect for trays of grain. I installed a small space heater in the bottom and a vent in the top. It worked great for my first 15lb batch. We'll see how it does with 40lbs. It gets abut 110-120 in there. I'll stir the grain and rotate the trays from time to time. Here are some pics:
The heater:
4159171238_dc4a9158c7_m.jpg


The inside:
4158409017_94bd16f707_m.jpg


Filling the trays:
4159171558_73cb43b5c4_m.jpg


Full Tray:
4159171752_c457e74415_m.jpg


Full Kiln:
4158409523_4c571a7a09_m.jpg
 
awesome... how much weight do you lose with drying?

I should end up at approximately the same weight I started with. So I started with 40lbs of barley, soaked it, which probably doubled it's weight, sprouted it, then in the drying process, I should get back down to around 40lbs. The easiest way to tell is by feeling it and biting it. It should have a nice crunch to it when it's done. I'm probably going to take about 5lbs and roast it as a Crystal of some sort. That means I need to pull it out of the kiln before it's completely dry and start upping the temps in an oven.
 
Update: The barley has been in the kiln since about 5:00 p.m. yesterday. It turns out that kilning outside in 25* temperature is different than kilning when it's 50*. I shouldn't be surprised. So I had to add another heater to get the temp up to where I'd like it. The barley is drying, and slow isn't a bad thing at this stage. My only concern is that the lower temps allowed the barley to continue sprouting, so I may have some over-modified grain. Luckily it was a bit under-modified when I put it in the kiln.
It should be dry by tonight or tomorrow morning.
 
Wow. This is pretty cool. Now just grow your own barley to malt, then grow your own hops, and culture your own yeast strain. You could have a truly 'house' beer.

Malting is something that intimidates me, so as of now, I'll leave it to the professionals. I like the write up though!
 
Wow. This is pretty cool. Now just grow your own barley to malt, then grow your own hops, and culture your own yeast strain. You could have a truly 'house' beer.

Malting is something that intimidates me, so as of now, I'll leave it to the professionals. I like the write up though!

I'm glad you like the write up. I'm not good at slowing down enough to record what I'm doing, so it's been a bit of a challenge.

We do already have hops growing that I've used a couple of times. I'm not sure what they are though. I intend to plant some known varieties this spring.

I was hoping that my approach would make it a bit less intimidating, but it does take some time and space. And you're never exact on your roasting, but I don't mind that. It's fun to do, and if I want a very specific beer, I'll buy the grain.
 
The malt spent the last 2 days in the kiln, and now I have 35lbs of pale malt, and 5lbs that I roasted to a darkish crystal. I'll probably do a few small batches of biscuit or munich type malts as well. I'm picking up another 50lbs of raw barley tomorrow. I hope to get about 100-150lbs of grain malted over the next month or so. That should keep me in grain for the next 6 months, and would put my grain costs at less than $5 a batch.
 
Sorry, long day of Christmas crap yesterday. I'll take some pics of the malt today. As for making different types, it's just a matter of how long and at what temps to roast it. The oddballs being your crystals. They are roasted when they're still a little wet, which is why I already roasted those. Apparently the higher temps on the wet grain cause some of the sugars to crystalize. Pics coming soon!
 
A pretty important update for anyone considering this. I malted 3 batches over the winter. The first two were great. A little lower on efficiency, but that was expected. The third batch, I believe, is the culprit in ruining 20 gallons of beer.

When I was kilning the last batch, we had a nasty cold snap. Instead of getting the grain in the 100-115 range, it sat at about 80 degrees for some time. I think this cause some sort of rot or mold or something nasty. I brewed pretty regularly for a few weeks, stockpiling, as it were. The bad flavor wasn't obvious in the wort, or even in the transfer tastings. But every one of those beers has a nasty, almost band-aid taste now.

I'm pretty sure it's due to the kilning. I'd like to malt some more now that it's warmer and see what happens, but I won't be brewing four batches without a thorough tasting.
 

Latest posts

Back
Top