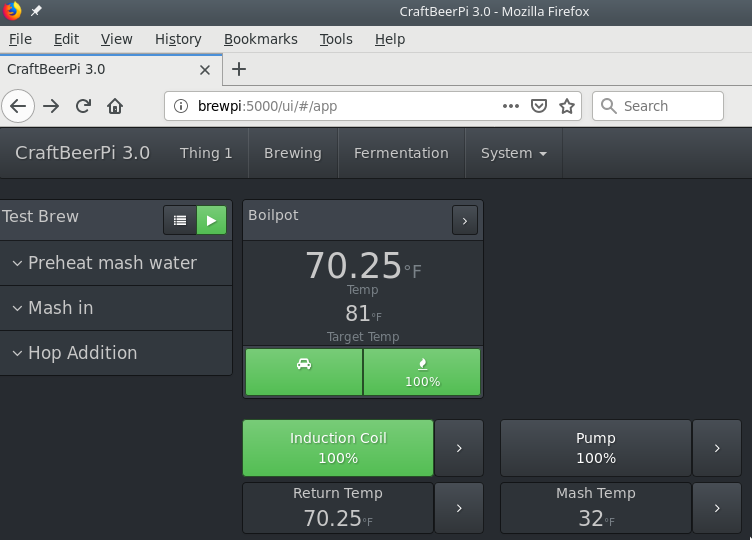
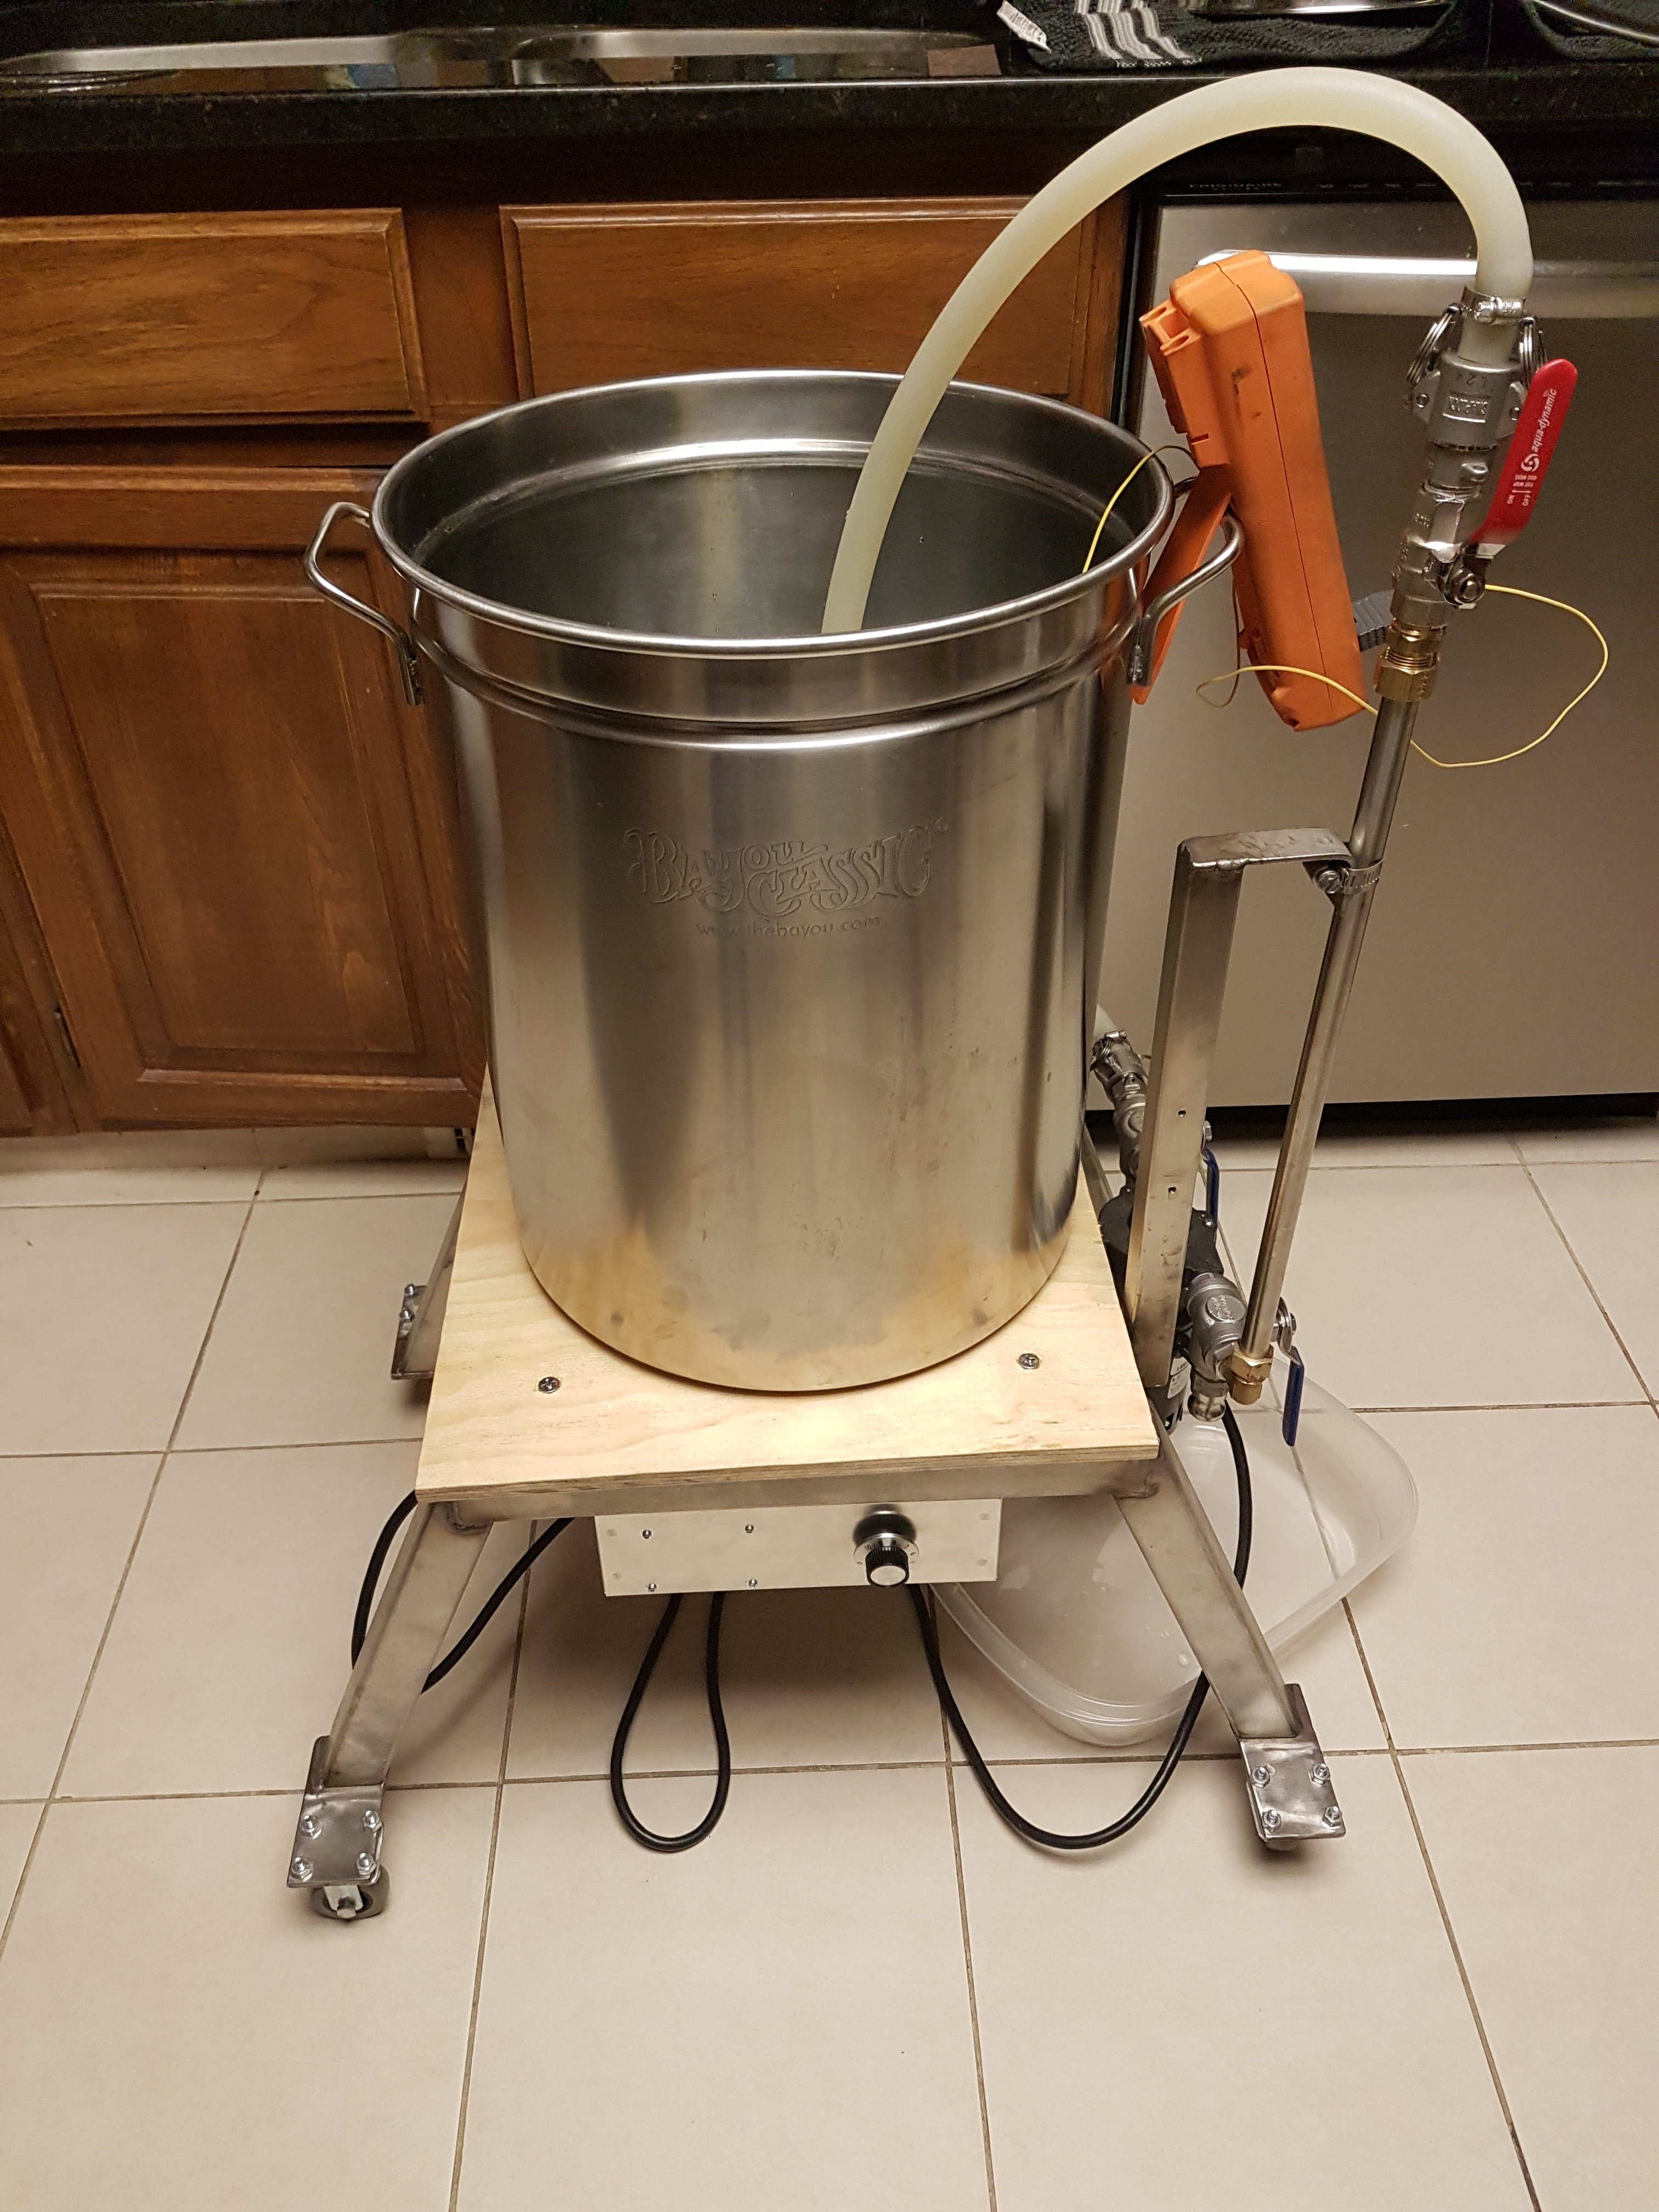
Meet Thing1.
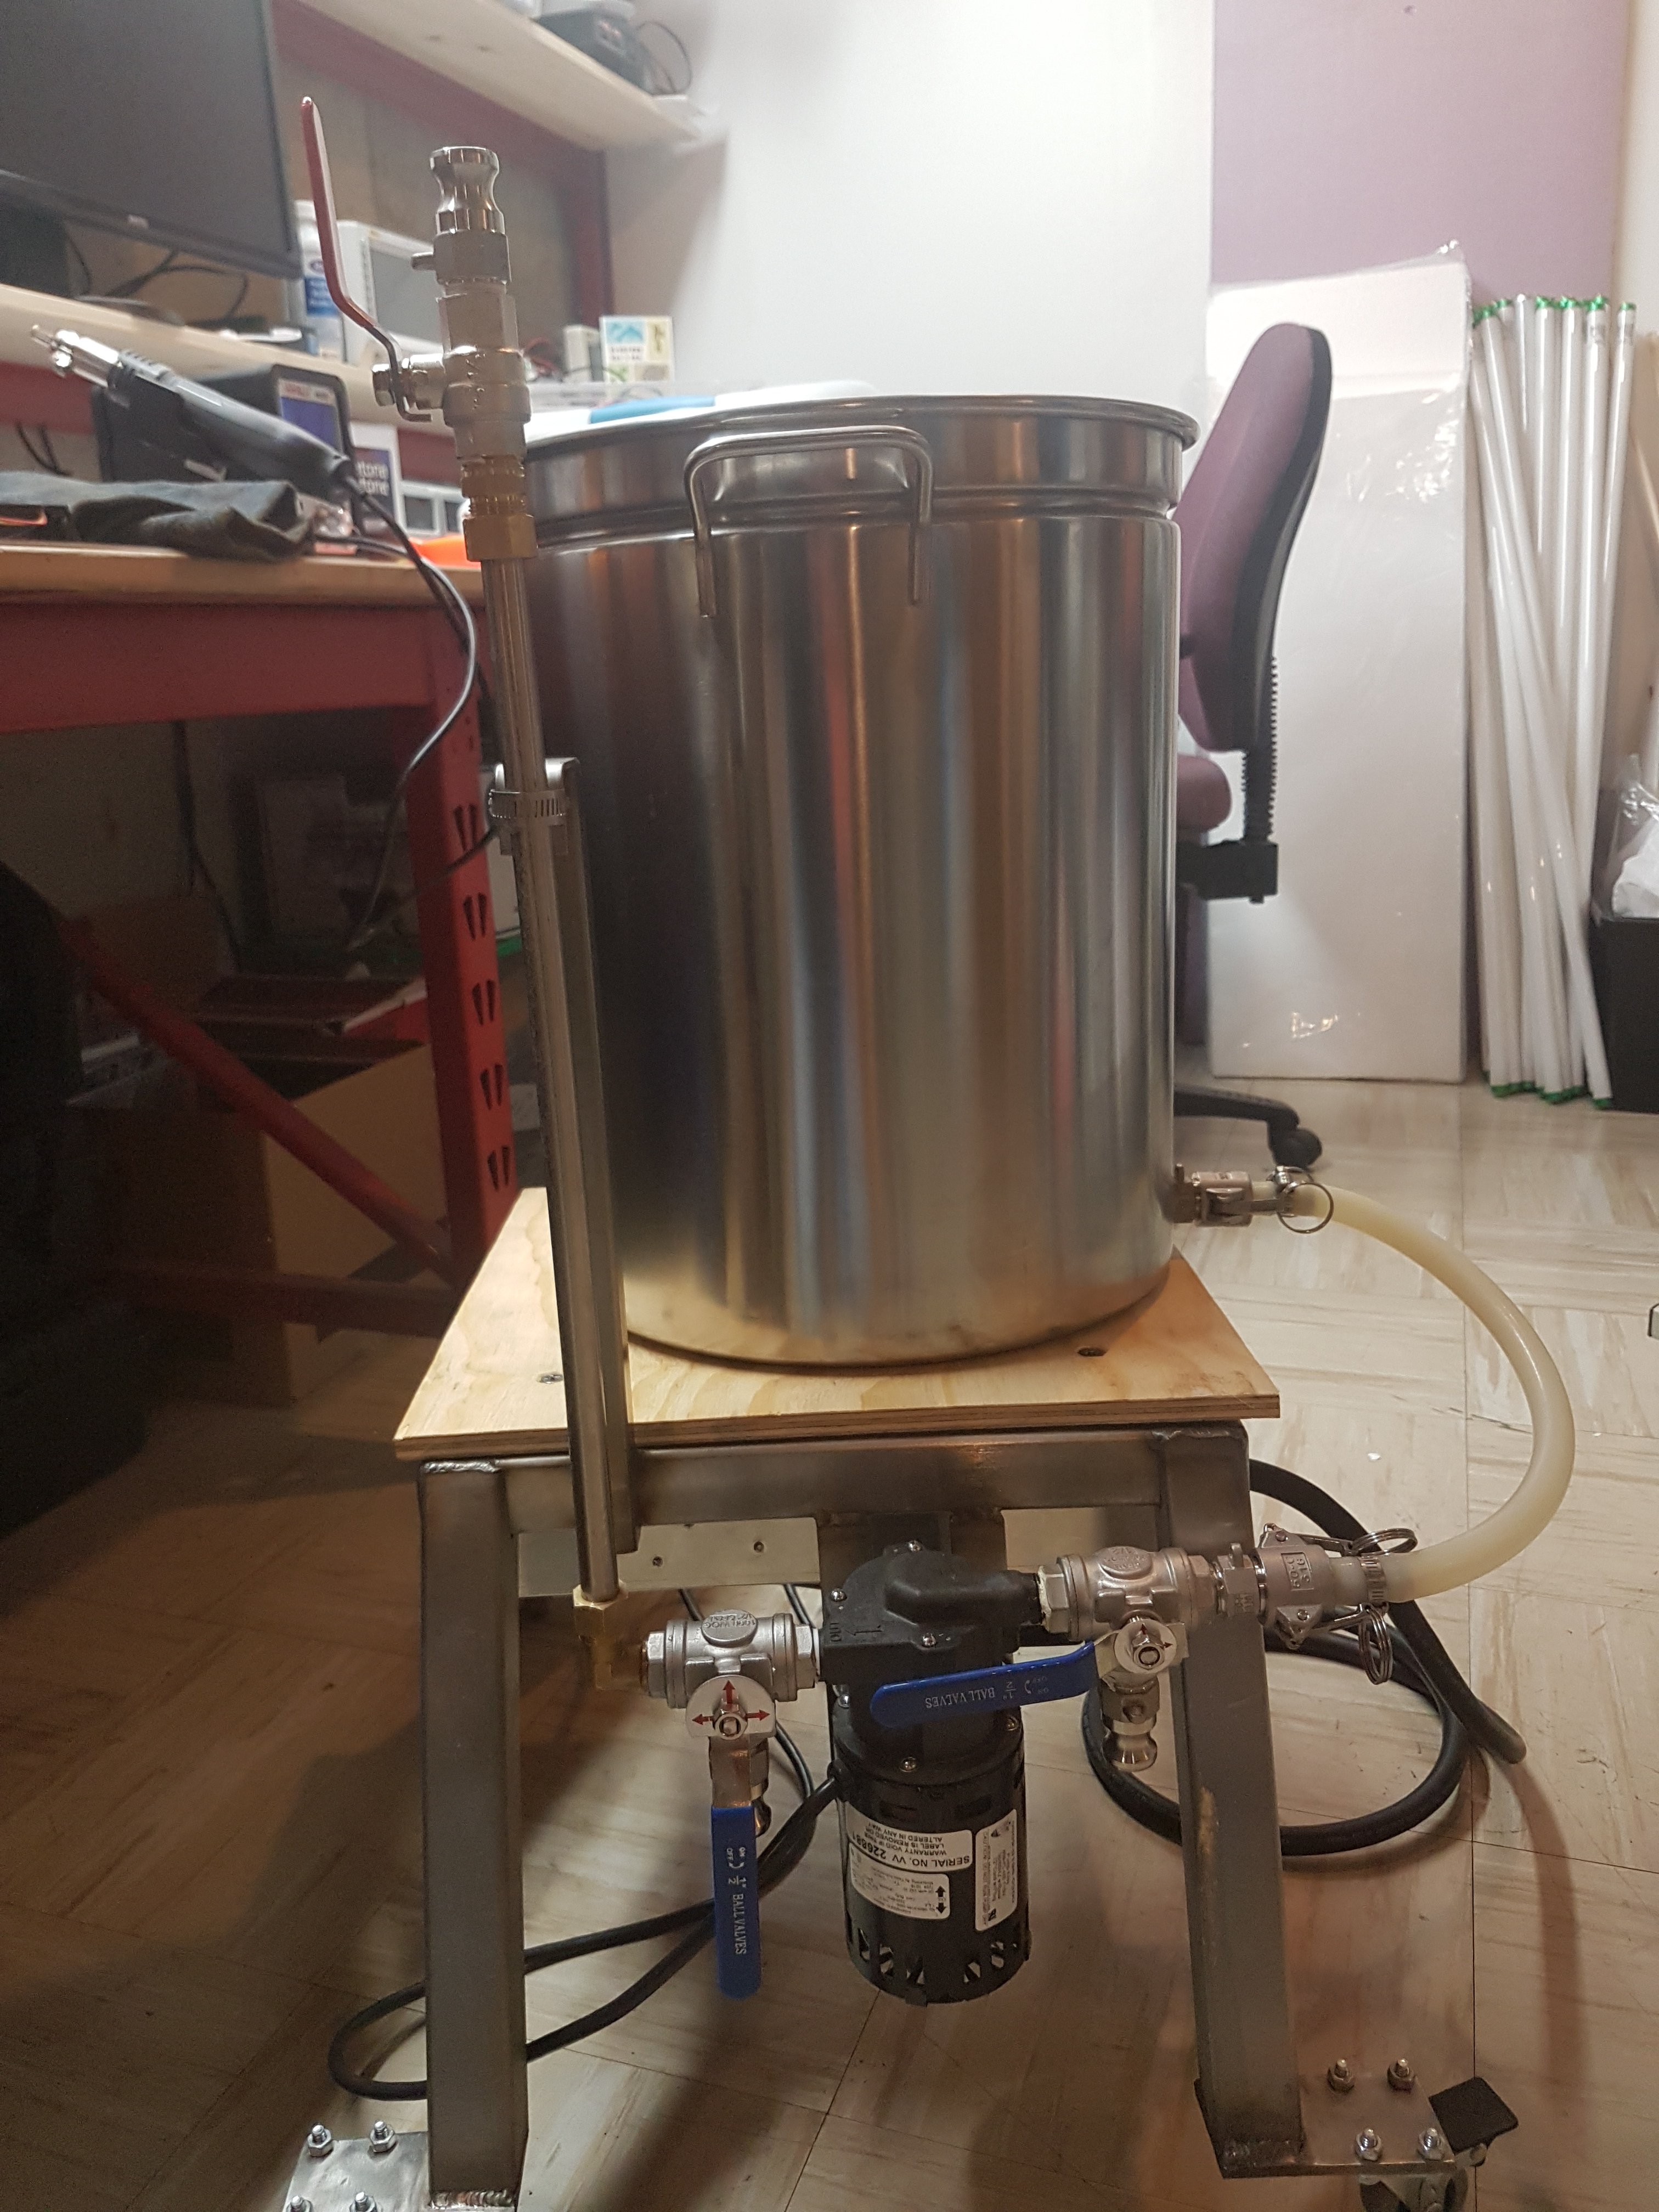
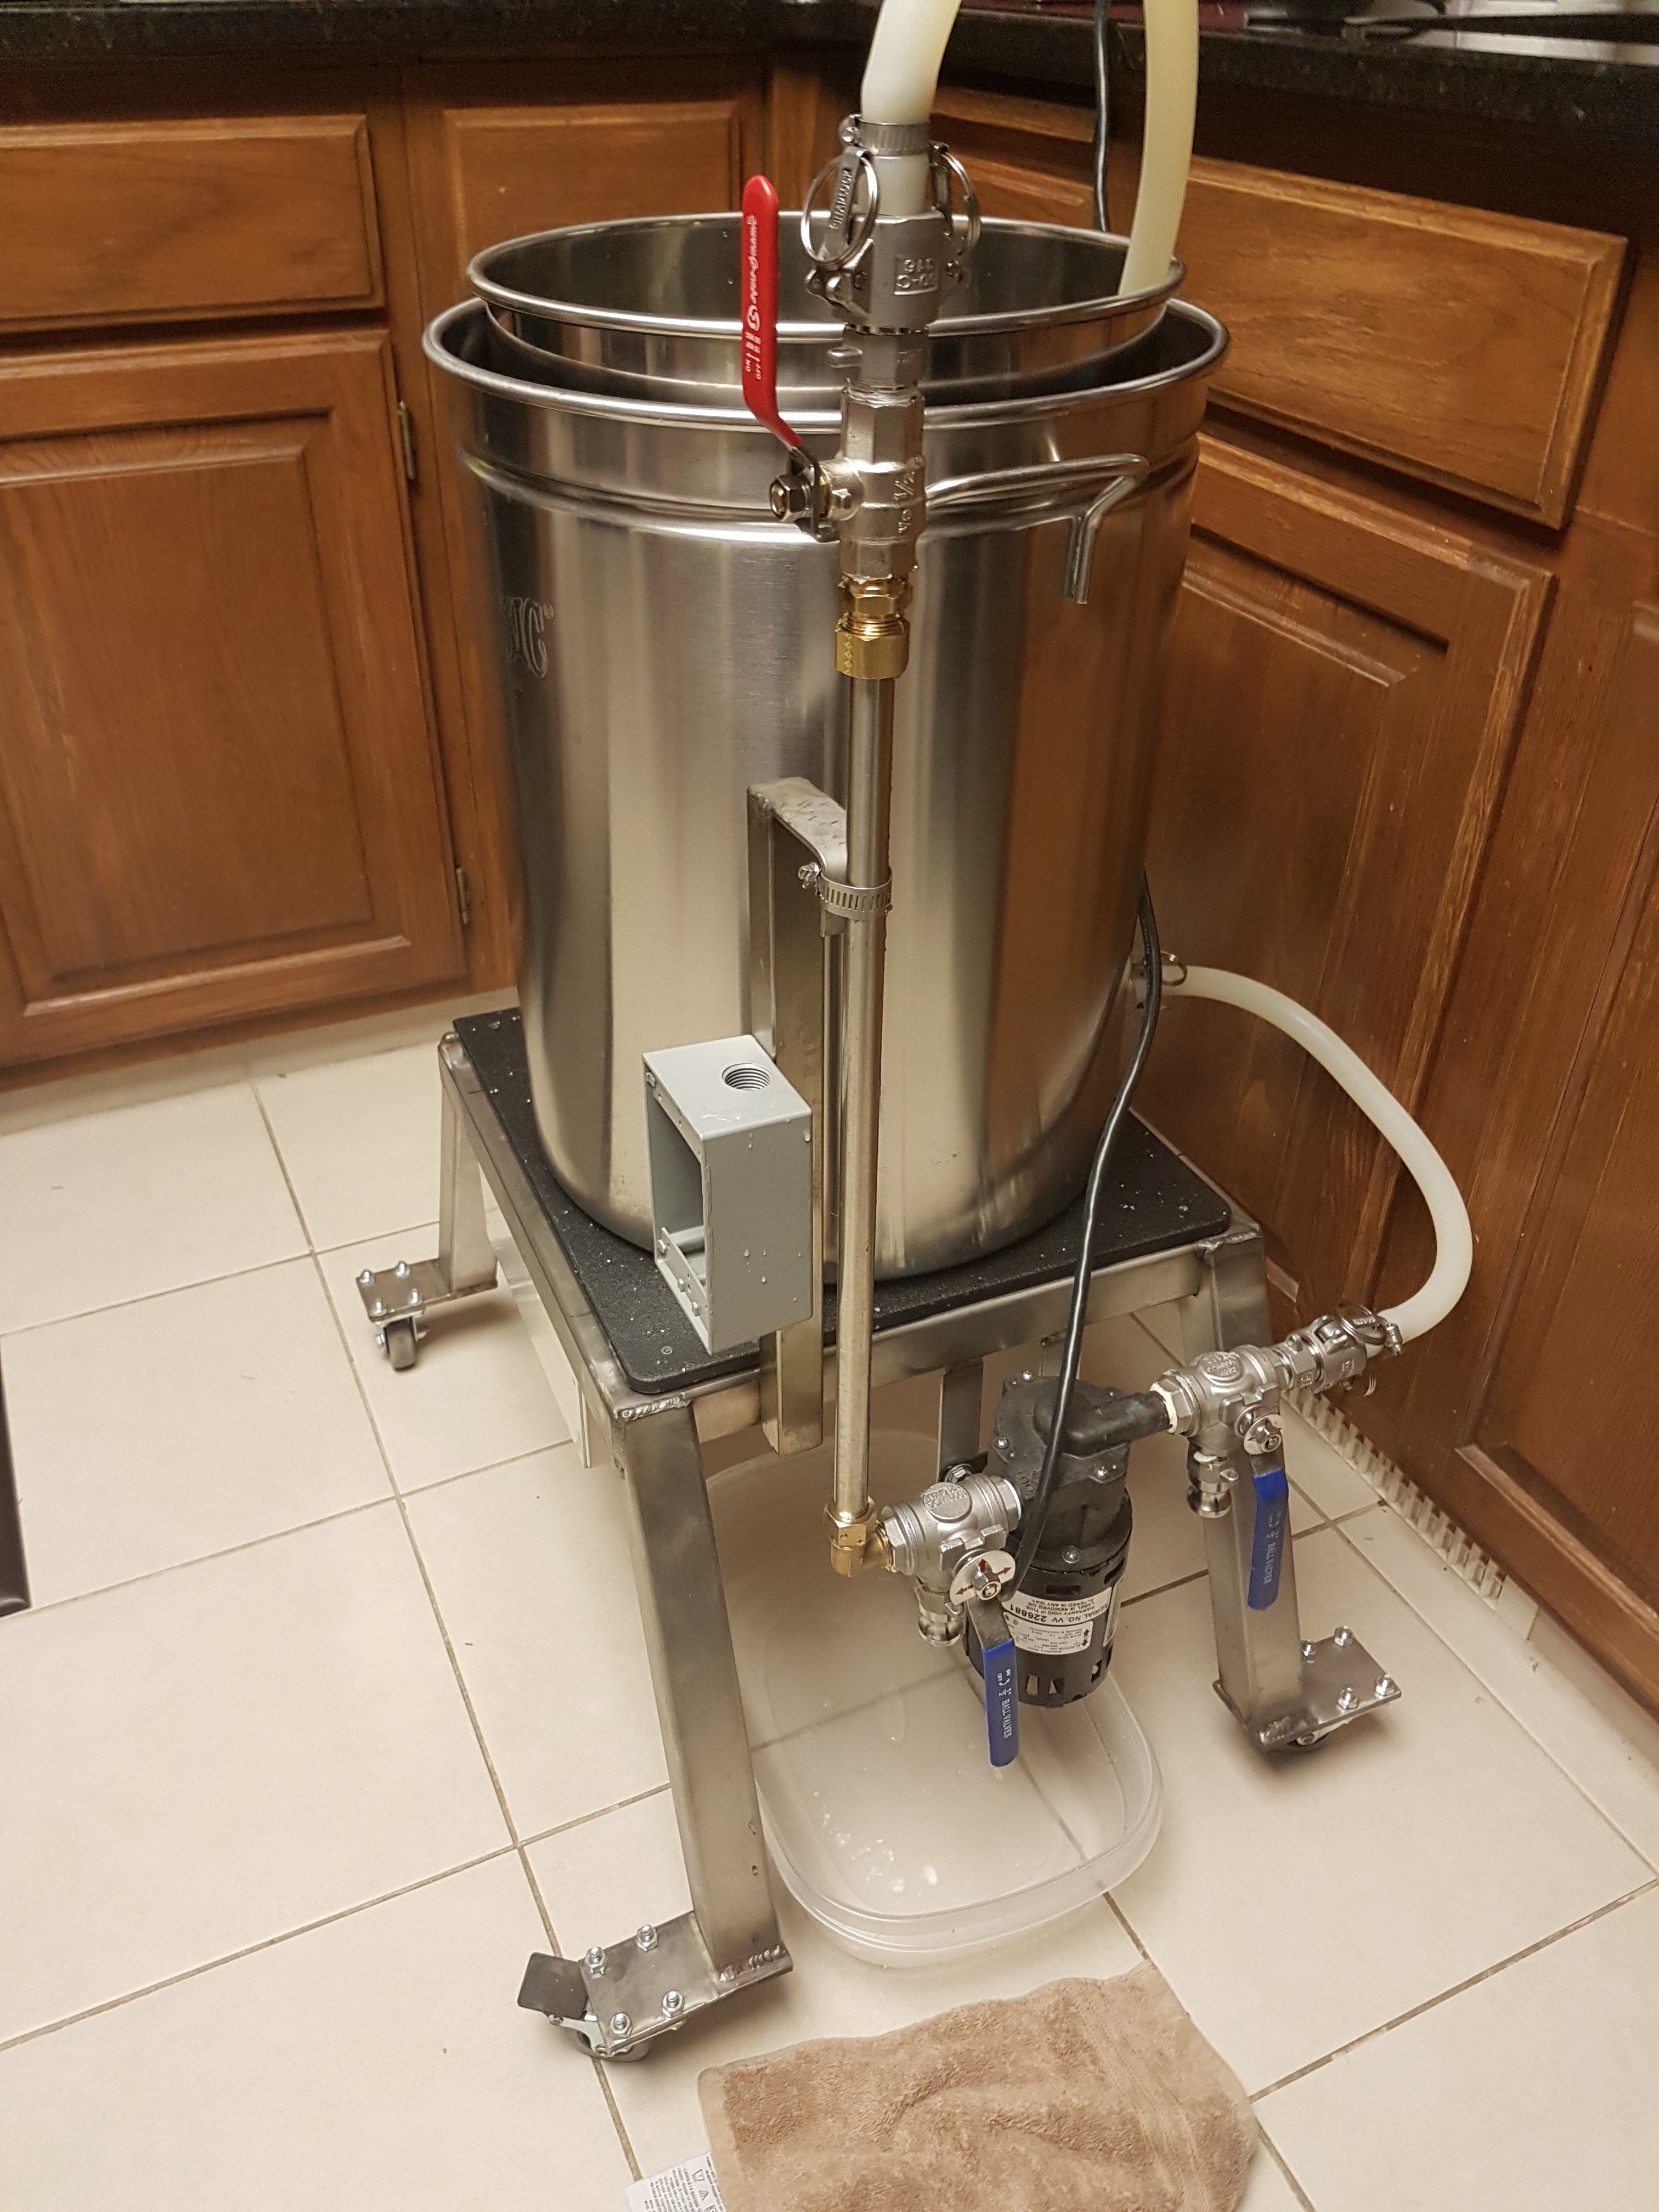
Thing1 has:
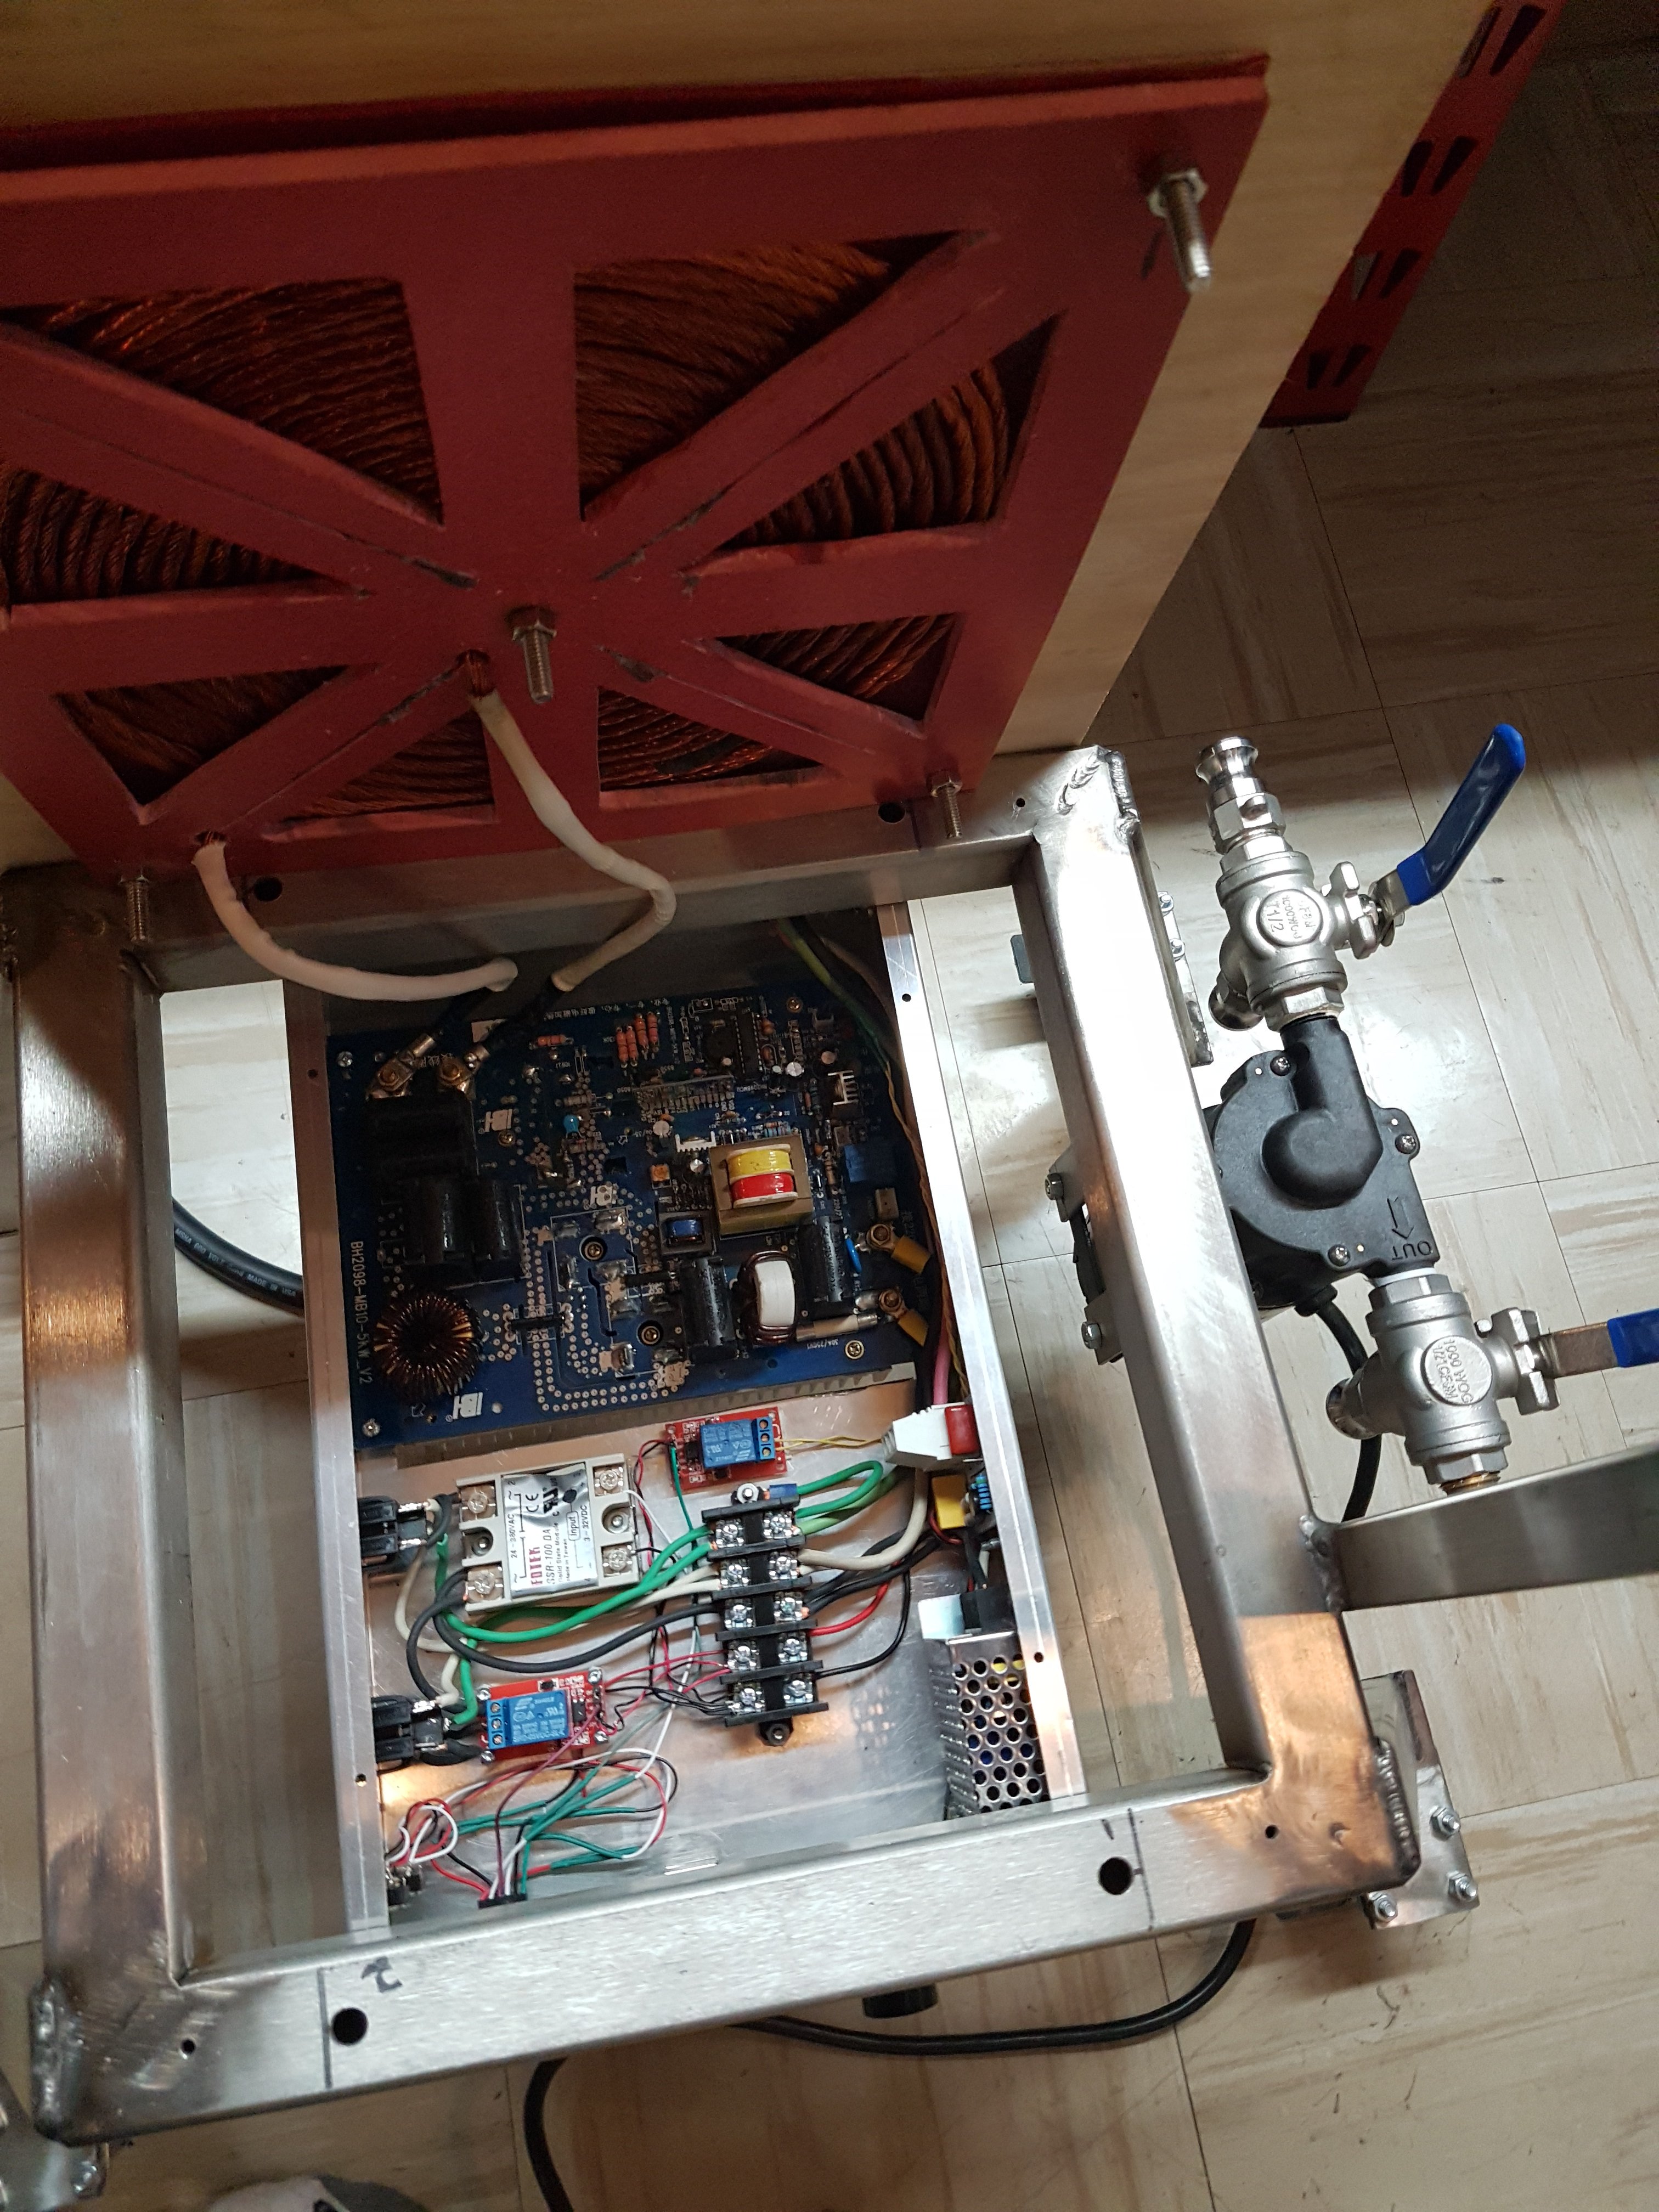
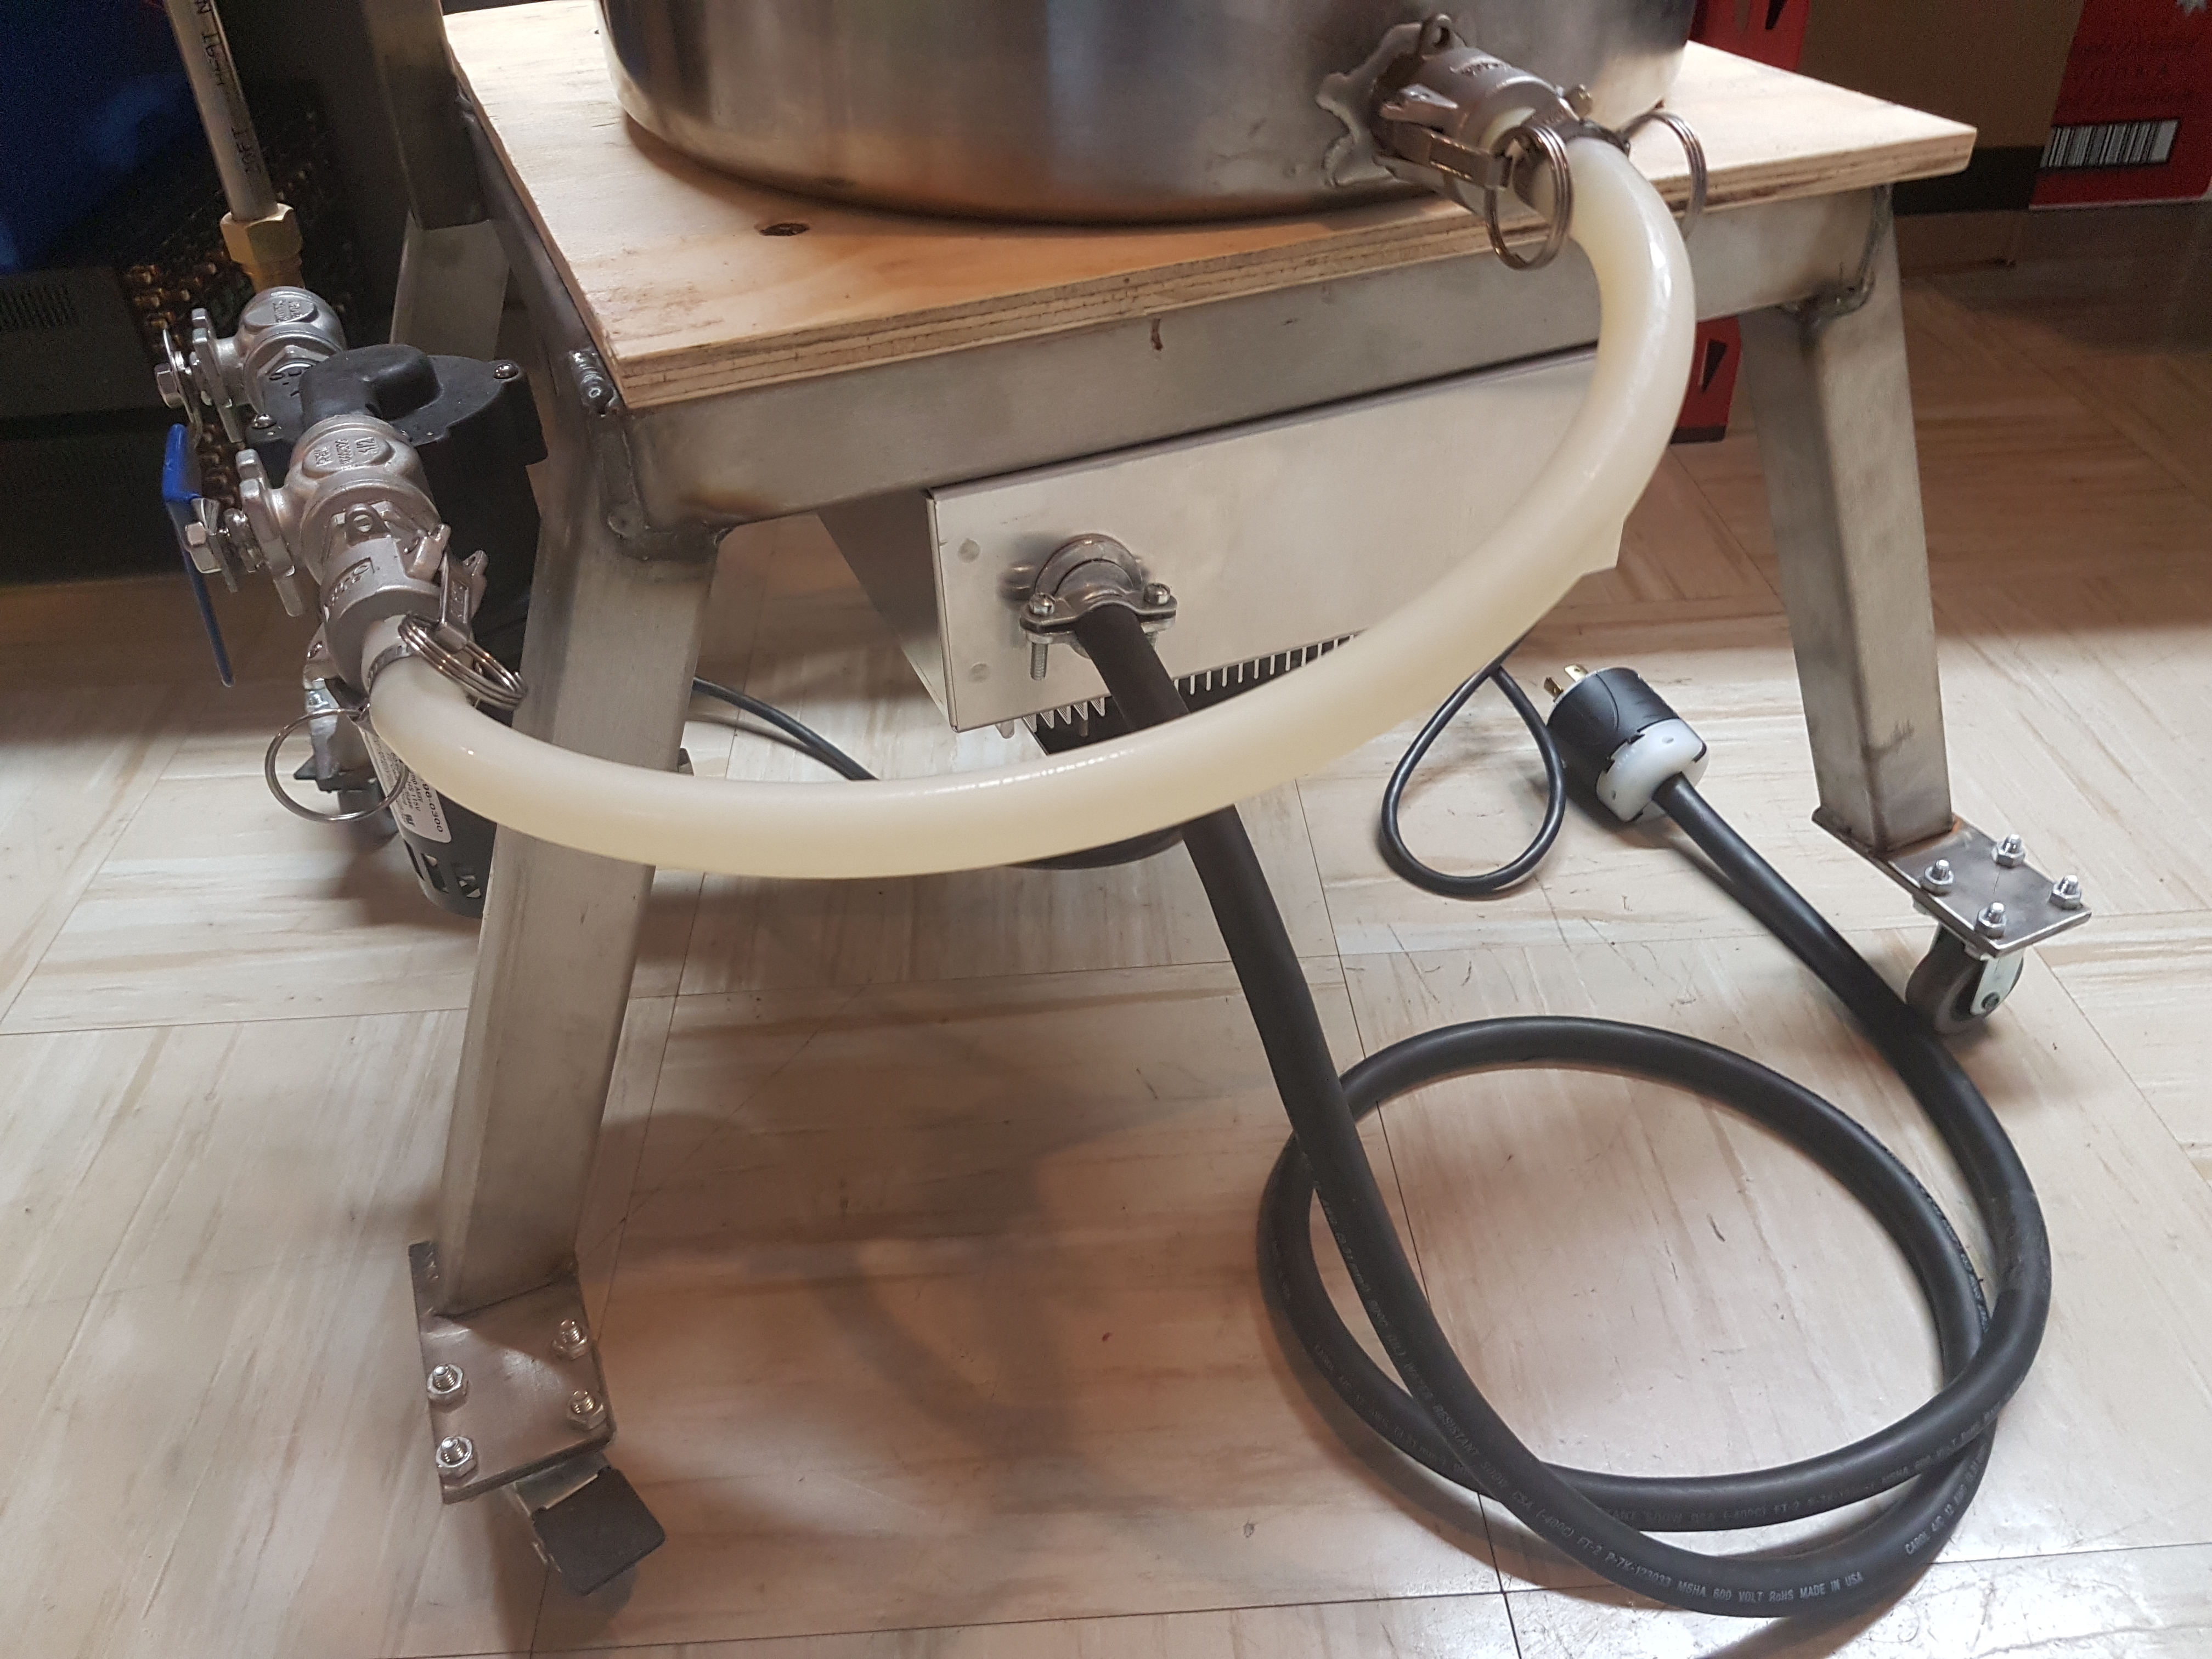
- 5 Kw Induction heating
- an 11 gallon boil kettle
- a 8 gallon grain "basket"
- a CraftBrewPi controller
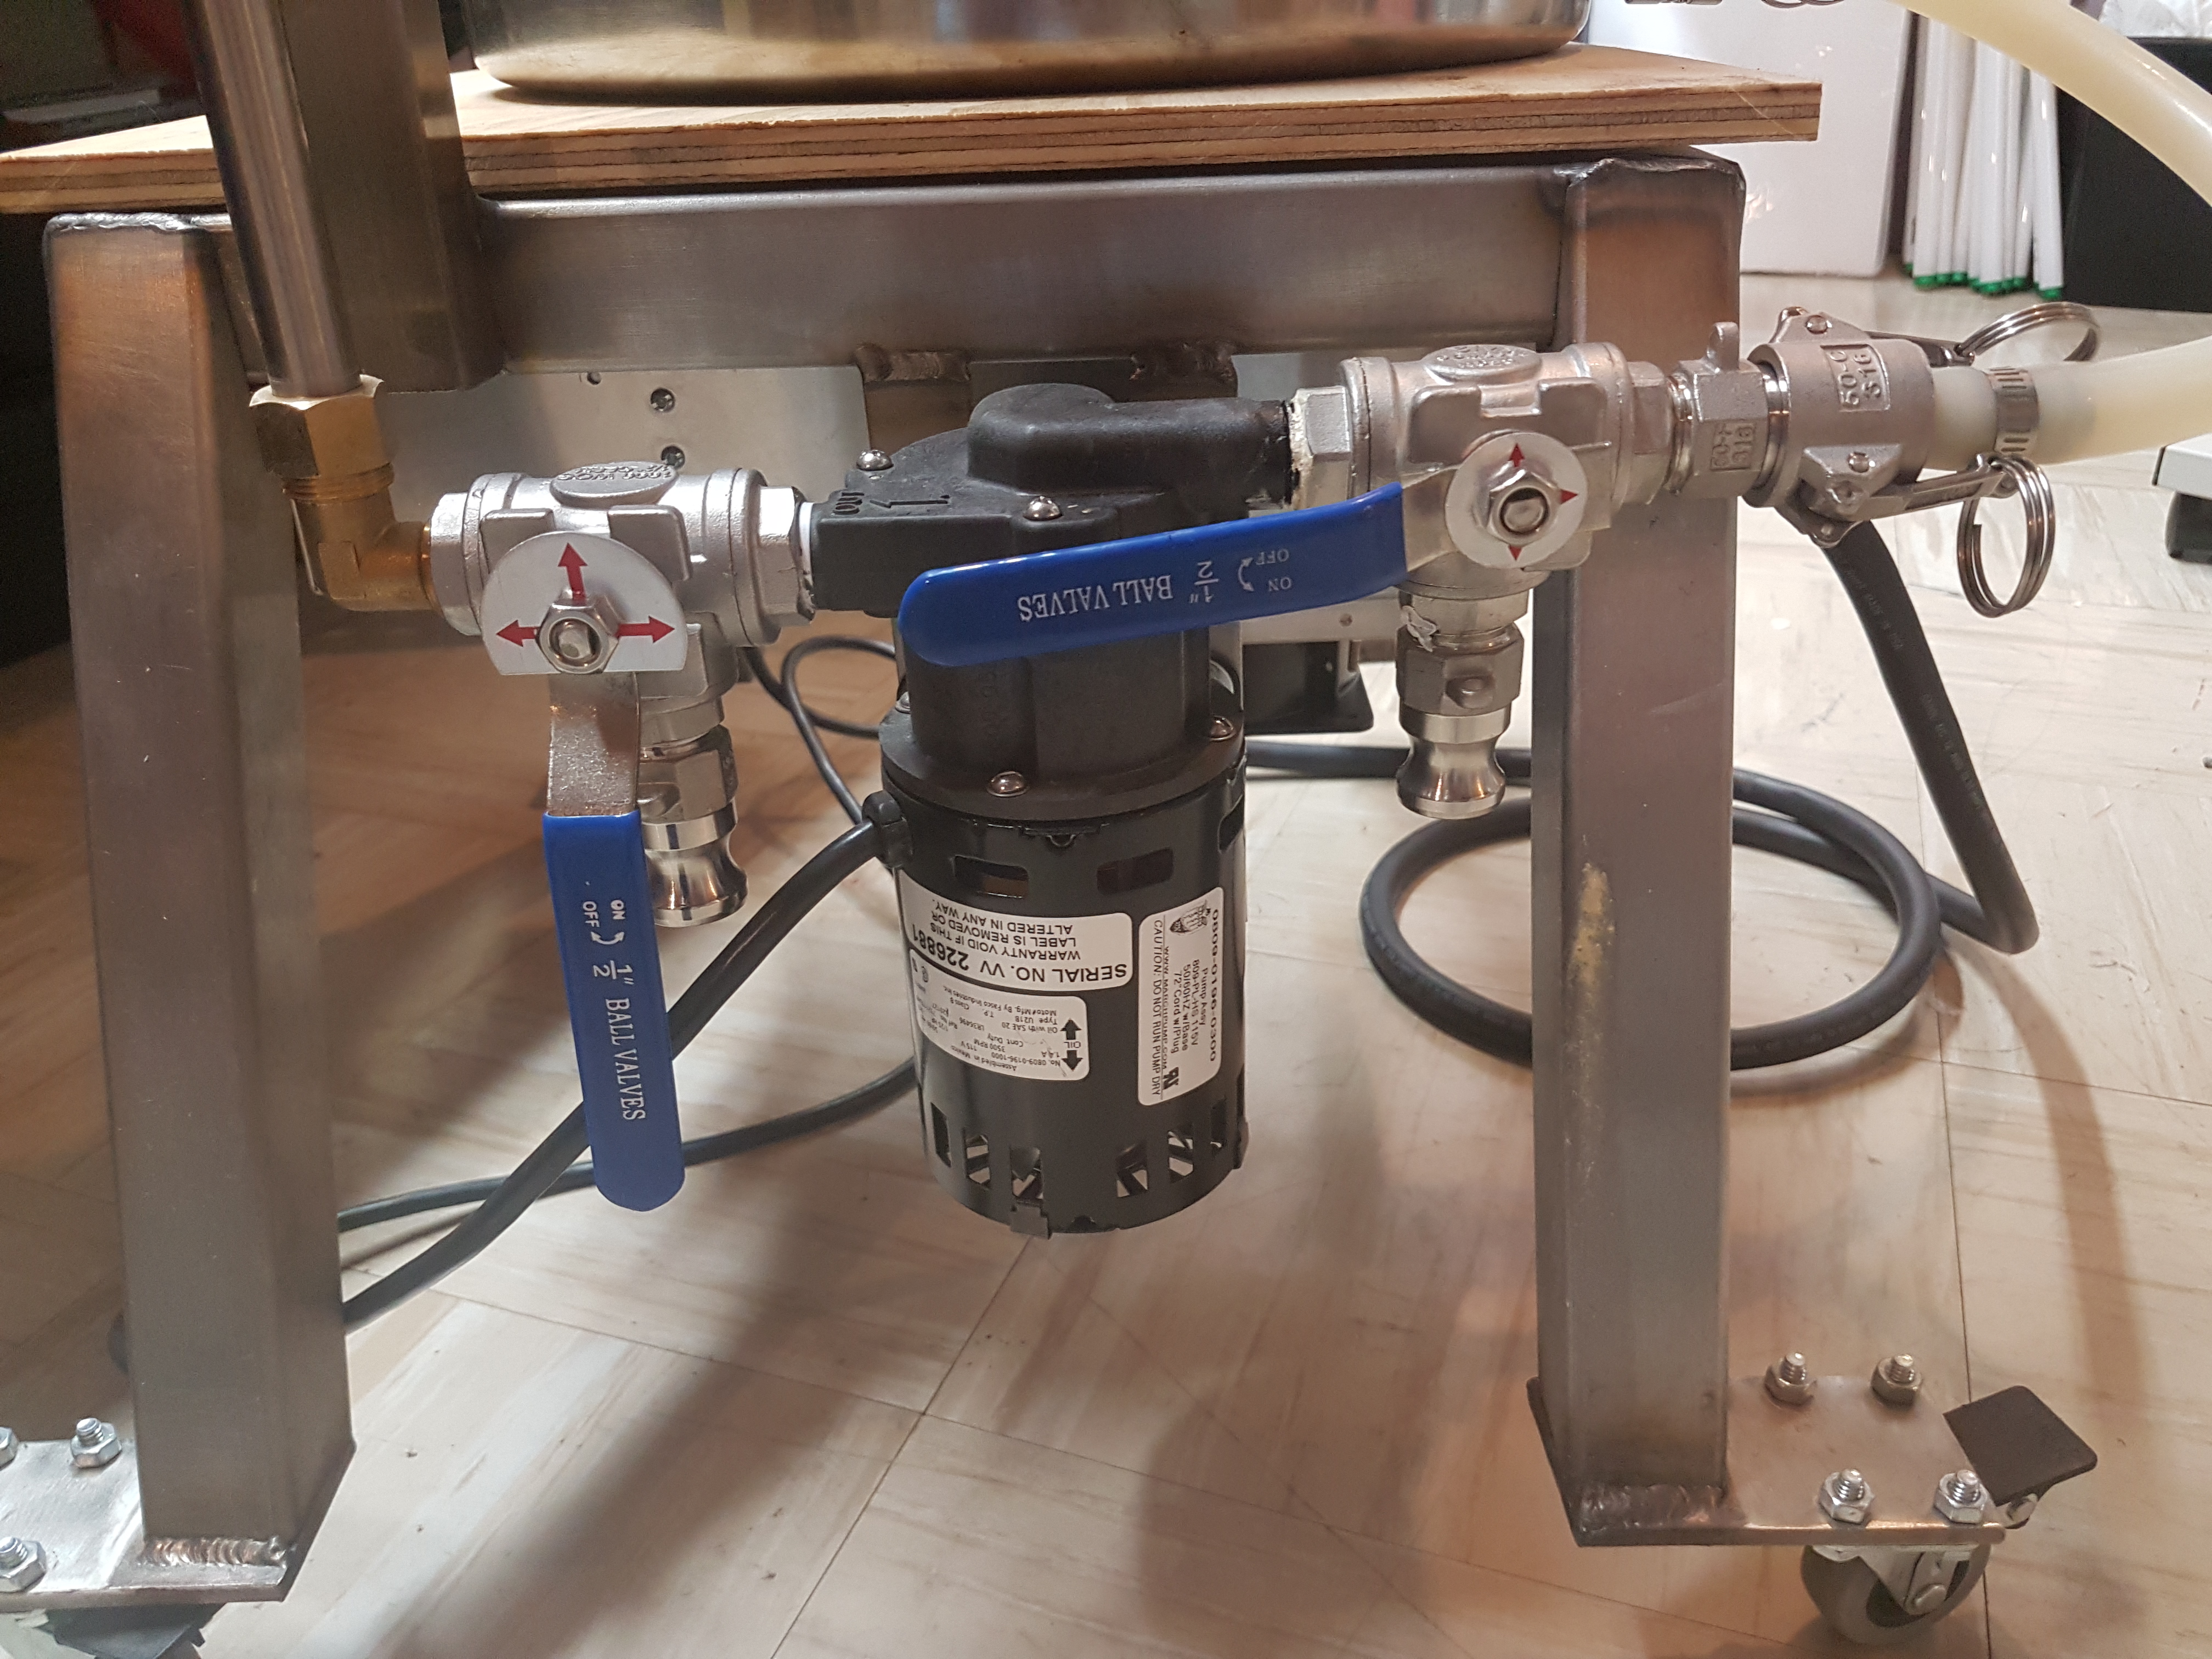
- a March pump
- a custom welded SS frame with wheels
- a 4F/minute heat rate for 6 gallons without a lid. The boil is vigorous.
I built Thing1 because I wanted an all in one brewing system for kitchen brewing and I wasn't happy with what was being offered on the market - the GrainFather, Robobrew and Mash and Boil.
I love the concept of the GrainFather - automated, compact, portable, enables hands off brewing in the kitchen, etc. I just don't like how some things were implemented on the GF and the other all in ones for that matter. So this is my custom GF if you will, a GF on steroids, the ultimate kitchen brewing system.
I'm a busy guy with kids. I don't have time to sit alone in my basement and brew. My brewing has to occur when I'm multi tasking and that means I need to brew where my family is, in the kitchen.
What I didn't like about the current all in ones:
- the grain baskets were too small
- the boil kettles were too small
- the heating elements were under powered
- they use a small custom pump prone to plugging
- the controllers offered limited programmability and connectivity.
- they sit too low. (I'm 6'1".)
- they all have niggling issues, like the hop filter on the GF falls off, etc.
I would have been fine brewing with stand alone kettles and an induction plate. The 3500w plates have decent power but there doesn't seem to be an easy way to wire a controller into them. And the coil diameter is small relative to most brewing pots. And I don't really have counter space to set up a bunch of kettles. So that was a non starter.
I also thought about using a radiant element assembly from a ceramic stove top to heat a kettle. The biggest one I could find was 3,000 watts, which would have been OK. But I worried about scorching the wort due to possible high boil kettle bottom temps. The boil kettle bottom temp should be the same on the inside surface whether using a radiant element or induction, but the difference is that induction warms the pot bottom directly whereas a radiant element gets really hot to heat the pot bottom.
I also considered using a hot water heater element in a kettle, but they generally increase the underlet volume by a lot. And I don't like BIAB. Thus I decided to give induction a try.
So I bought a stand alone induction power supply, figured out the coil design and then built a stand on wheels around it. Then I tied the pump into the stand for convenience. And then I integrated CraftBeerPi as the controller. Wala... Thing1 was born.
The mash underlet water volume on Thing1 is a bit less than 1 gallon. More than I'd like but it leaves a bit of water out of the mash for fly sparging.
The underlet volume on Thing1 is governed by the height of the hop screen in the bottom of the brew kettle. If I remove the hop screen I can set the grain basket right on the bottom and the underlet volume is essentially zero. I also thought about using a bottom drain on the kettle but decided against it because it was convenient for electrical reasons to mount the induction power supply right beneath the induction coil.
Thing1 has a larger footprint than a GF. A GF fits in a 15" circle. Thing1 has a 20x24" base. But Thing1 is on wheels and sits much higher. I'd probably build a stand for a GF if I brewed with it., so that negates any size disadvantage that Thing1 has.
I love that Thing1 is on wheels. It has a 5 foot cord and I wired a 240V GFCI protected outlet under the sink in my kitchen. I can roll Thing1 up to the sink for filling, chilling and cleaning and yet roll it out of the way if I want to prep a meal or wash things. Multi tasking, remember ?
I was worried about scorching with such a high power heating system. I measured the underside pot temp on Thing1 at full boil (208F where I live) and found it to be 240F. The underside pot temp at less than boil is typically 25ish F higher than the liquid inside.
Thing1's induction coil is 12 inches in diameter. 5,000 watts / 113 in^2 = 44.2 watts/ in^2. Ultra low watt density hot water heater elements are supposed to be 50 watts/in^2 or less, but when I calculate their area, I get more like 80 watts/in^2.
Thing1's stand is 14.5" high. The top of the boil pot is 32" high. I'm 6'1", so lifting the grain basket isn't a problem. I think this is the perfect height for both lifting the grains out and for watching the brewing process.
The 3 way valves on the pump are great for priming the pump and I can pump from an HLT to the mash bucket to fly sparge or from the boil kettle to the chiller, all with only 1 pump.
The base without the kettle weighs about 25 pounds, so there is no problem hauling it up a flight of stairs. It takes 2 trips to move it, but so would a GF with base and at least the boil kettle has handles. GFs have no handles.
The wheels make Thing1 easy to move. Everything stores nicely in a closet.
The boil kettle just sits on the base. Any induction kettle will work. The kettle has handles so it is easy to lift up to a sink to drain out.
I'm still tweaking Thing1. I've been out of brewing for a long time. Thing1 makes brewing SO easy compared to what I used to do. (Propane hermes with keggles, manual control !) I'm very happy I built it.


Last edited:




![Craft A Brew - Safale S-04 Dry Yeast - Fermentis - English Ale Dry Yeast - For English and American Ales and Hard Apple Ciders - Ingredients for Home Brewing - Beer Making Supplies - [1 Pack]](https://m.media-amazon.com/images/I/41fVGNh6JfL._SL500_.jpg)


