Mash cap and re-circulation

Homebrew Talk - Beer, Wine, Mead, & Cider Brewing Discussion Forum

Help Support Homebrew Talk - Beer, Wine, Mead, & Cider Brewing Discussion Forum:

This site may earn a commission from merchant affiliate links, including eBay, Amazon, and others.
I think this one would be good.
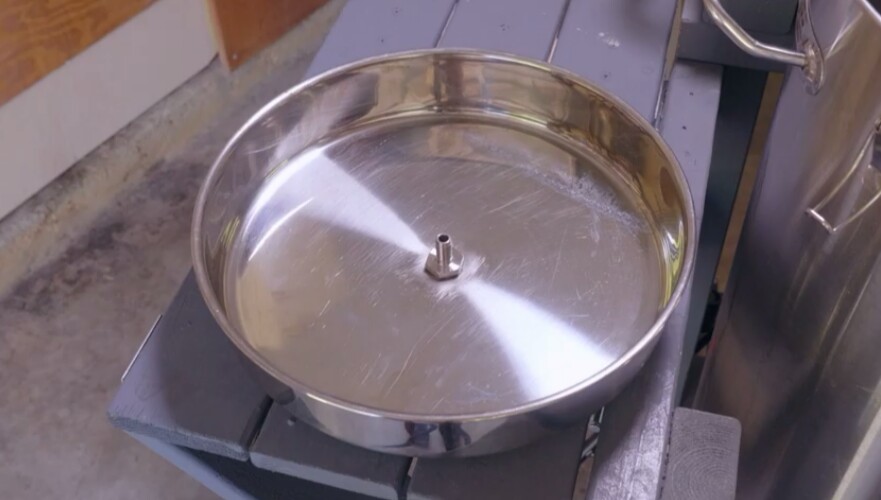
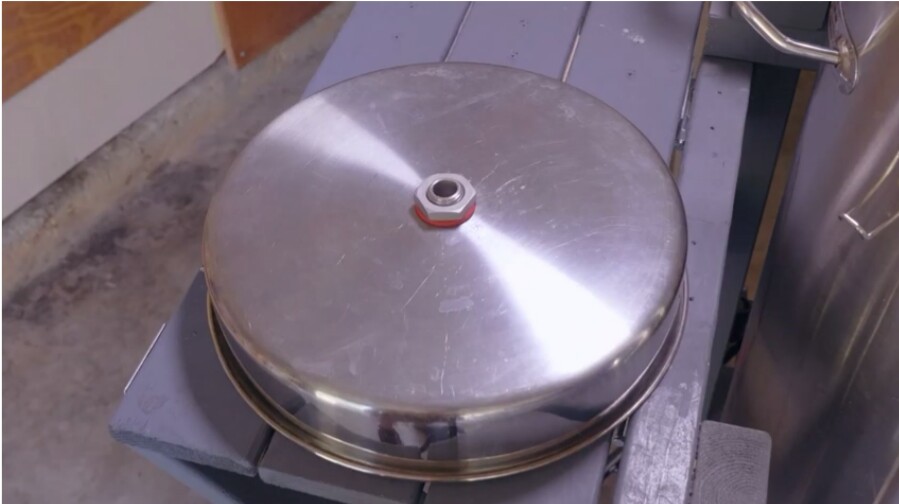
https://www.webstaurantstore.com/vi...-qt-saute-pan-20-qt-stock-pot/473SSCOVR5.htmlOnce the lip is reworked you'd have just under 12" giving you 1/2" or so clearance which is pretty good for a mashcap. I know this brand and rebending the lip up is easy enough to do with just an adjustable wrench and about 1 hour of your time.

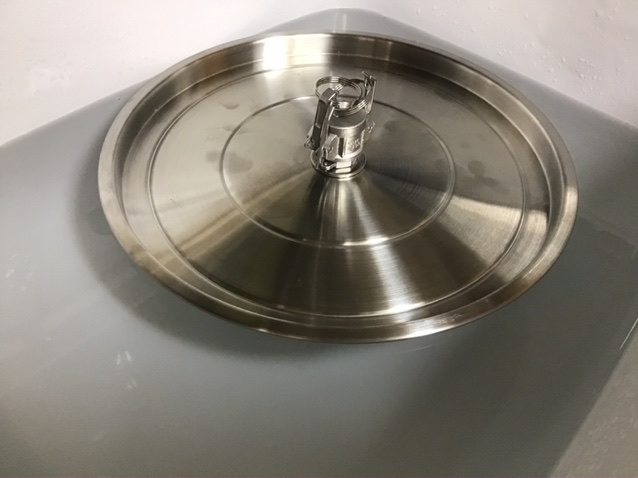
Here is a picture of the two caps of this brand I reworked. Both turned out nicely.
View attachment 682080

Good God man... They want nearly $20.00 to ship me $10.50 lid. Shipping skyrockets from there. I don't mind paying reasonable shipping costs. But I don't like it when a company profits from shipping also. It leaves a bad taste in my mouth. Like a over hopped beer.

There are a few home brew shops, like this also. That low ball their prices, then when you go to the cart and calculate shipping, you about fall out of your chair.
IMG_20200525_225733.jpg
 
Good God man... They want nearly $20.00 to ship me $10.50 lid. Shipping skyrockets from there. I don't mind paying reasonable shipping costs. But I don't like it when a company profits from shipping also. It leaves a bad taste in my mouth. Like a over hopped beer.

Or you could think of it as a $25 lid with $5 shipping. But seriously at least this way you already know it's going to be bendable and will work for the purpose intended. Any other option.. you are taking a chance.
 
Last edited:
Or you could think of it as a $25 lid with $5 shipping. But seriously at least this way you already know it's going to be bendable and will work for the purpose intended. Any other option.. you are taking a chance.

:) Yeah I know... It just seems "odd" to me. Like I said I don't have a problem with anyone making a profit, but to profit off shipping is a big question mark to.me. I know our UPS driver well, actual he's a good friend of mine. I know darn well there ain't no way a lid cost almost $20.00 to ship ups ground. I'll order the $30.00 lid. I'm going to beat it up anyways.

I have a couple of questions/verifications if you don't mind. In order to properly manipulate said lid into a mash cap.

the mash cap, must have a flat bottom, to minimize the mash to O2.

It must be able to float freely without getting bound up on the sides of the MLT

The mash cap sides should be high enough to not allow swamping

Add LODO strike and sparge from the bottom of the MLT, with minimal splashing or exposure to O2

How do you handle lautering
or recirculation with a mash cap? Is it ok to drill a hole for a barb? I would think so as long as its not to heavy to swamp the lid.
 
I found this video fairly informative wrt a recirculation return line solution. May not be the best but it's a benchmark.


I'd be using my autosparge output, but pretty much same otherwise...

Cheers!
 
I found this video fairly informative wrt a recirculation return line solution. May not be the best but it's a benchmark.


I'd be using my autosparge output, but pretty much same otherwise...

Cheers!

Thanks for the video :)

These pictures from the video is what I plan on doing after I grind the welded handle off the lid. Try and make the barb sit dead center. I'll probably fabricate some type of stainless steel defuser so I don't tunnel into the grain bed when lautering/recirculating.

IMG_20200526_231215.jpg

IMG_20200526_231255.jpg
 
The idea in the video of the up-turned arm is pretty solid. I expect it will be a challenge to do much better, but I'd love to see other solutions just the same :)

Cheers!
 
The idea in the video of the up-turned arm is pretty solid. I expect it will be a challenge to do much better, but I'd love to see other solutions just the same :)

Cheers!

I fabricated a stainless steel sparge arm/defuser for my Rubbermaid cooler MLT. It believe I'll just do the same kind of thing for the bottom of the mash cap. I think it will work ok. Just need something to prevent tunneling into the grain bed.
IMG_20200523_155432622.jpg
 
I saw one of those a number of years ago, thought some folks would go gaga over it, but it didn't seem to make as big an impact as I would have expected, given how many people complained about doing high gravity batches in a 10 gallon Rubbermaid (myself included ;))

I don't know about the price being more than triple a 10g cooler though. Ouchie. Maybe that's the hold-back.

Your idea of an "anti-tunneling plate" for lack of a better description looks like it'd work, though I'd prefer it closer to the bottom of the cap, and perhaps wider. I had been thinking of a similar idea but hadn't fleshed it out that far, so thanks for that :)

Cheers!
 
I saw one of those a number of years ago, thought some folks would go gaga over it, but it didn't seem to make as big an impact as I would have expected, given how many people complained about doing high gravity batches in a 10 gallon Rubbermaid (myself included ;))

I don't know about the price being more than triple a 10g cooler though. Ouchie. Maybe that's the hold-back...

Cheers!

Yep they are expensive (very proud of that cooler for sure). For that price I could just spring a stainless MLT or maybe a keg and turn my son loose on it. He would be more than happy to weld a few ports on it for me. Then I could step mash, using one of my LP burners.
 
I have a couple of questions/verifications if you don't mind. In order to properly manipulate said lid into a mash cap.
the mash cap, must have a flat bottom, to minimize the mash to O2.
The mash cap sides should be high enough to not allow swamping
Add LODO strike and sparge from the bottom of the MLT, with minimal splashing or exposure to O2
How do you handle lautering
or recirculation with a mash cap? Is it ok to drill a hole for a barb? I would think so as long as its not to heavy to swamp the lid.

I see you already got your answers for the drilling, return etc. I did cut the handle off off one of my lids and left it on the other, they both float but one is a bit lighter. Neither are drilled but it's a malleable grade of stainless and will drill just fine. A couple things about bending the lip.. use an adjustable wrench and just adjust it right down to the thickness of the lip. This will keep the lip from cupping. Then bend the lip a little then move over 1 wrench width and bend a little again. Do this little bending thing round and round the cap and just keep going a small amount at a time. What you are actually doing here, more than just bending the metal, is allowing/forcing it to shrink back together. This takes time and patience. The first cap I did it took a couple hours. The second one only 40 minutes because I knew how much bend at a time I could get away with. But for your maiden voyage.. slow and steady wins the race.
 
I see you already got your answers for the drilling, return etc. I did cut the handle off off one of my lids and left it on the other, they both float but one is a bit lighter. Neither are drilled but it's a malleable grade of stainless and will drill just fine. A couple things about bending the lip.. use an adjustable wrench and just adjust it right down to the thickness of the lip. This will keep the lip from cupping. Then bend the lip a little then move over 1 wrench width and bend a little again. Do this little bending thing round and round the cap and just keep going a small amount at a time. What you are actually doing here, more than just bending the metal, is allowing/forcing it to shrink back together. This takes time and patience. The first cap I did it took a couple hours. The second one only 40 minutes because I knew how much bend at a time I could get away with. But for your maiden voyage.. slow and steady wins the race.

Thanks for the pointers Blisch, I ordered the lid and yep, they also hit me for tax -:lol

I'll have to run a test it might float just fine without and bending. If not, I will bend the lip up.

If you don't have any hole in your mash cap, you must have two ports near the bottom of your mash tun to be able to recirculate? If you don't mind could you point me to a picture of your MLT?
 
I have a small amount of final leg work to do before executing my mash cap design...
Got a SS pizza pan that fits with 1/8" on each side. It's not super deep dish tho, so whatever I do needs to be light...
I'm thinking if I can drill a hole very cleanly, then I can just insert the silicone tube bare and it should seal...if that doesn't work a grommet may help.
Last resort-weldless bulkhead.
Plan is on the underside to do male barb to npt cap with holes drilled in sides...

I have all the parts...

Last step is pour water to see how much the pizza pan holds--then convert that to a weight...any hardware I use cannot weigh more than that (also including the pan).

We shall see!
 
[QUOTE="Jeff..., post: 8891247, member: 285537"
I'll have to run a test it might float just fine without and bending. If not, I will bend the lip up.

If you don't have any hole in your mash cap, you must have two ports near the bottom of your mash tun to be able to recirculate? If you don't mind could you point me to a picture of your MLT?
[/QUOTE]

You will have to debend the lip as the cap floats just at the line where the bend is.

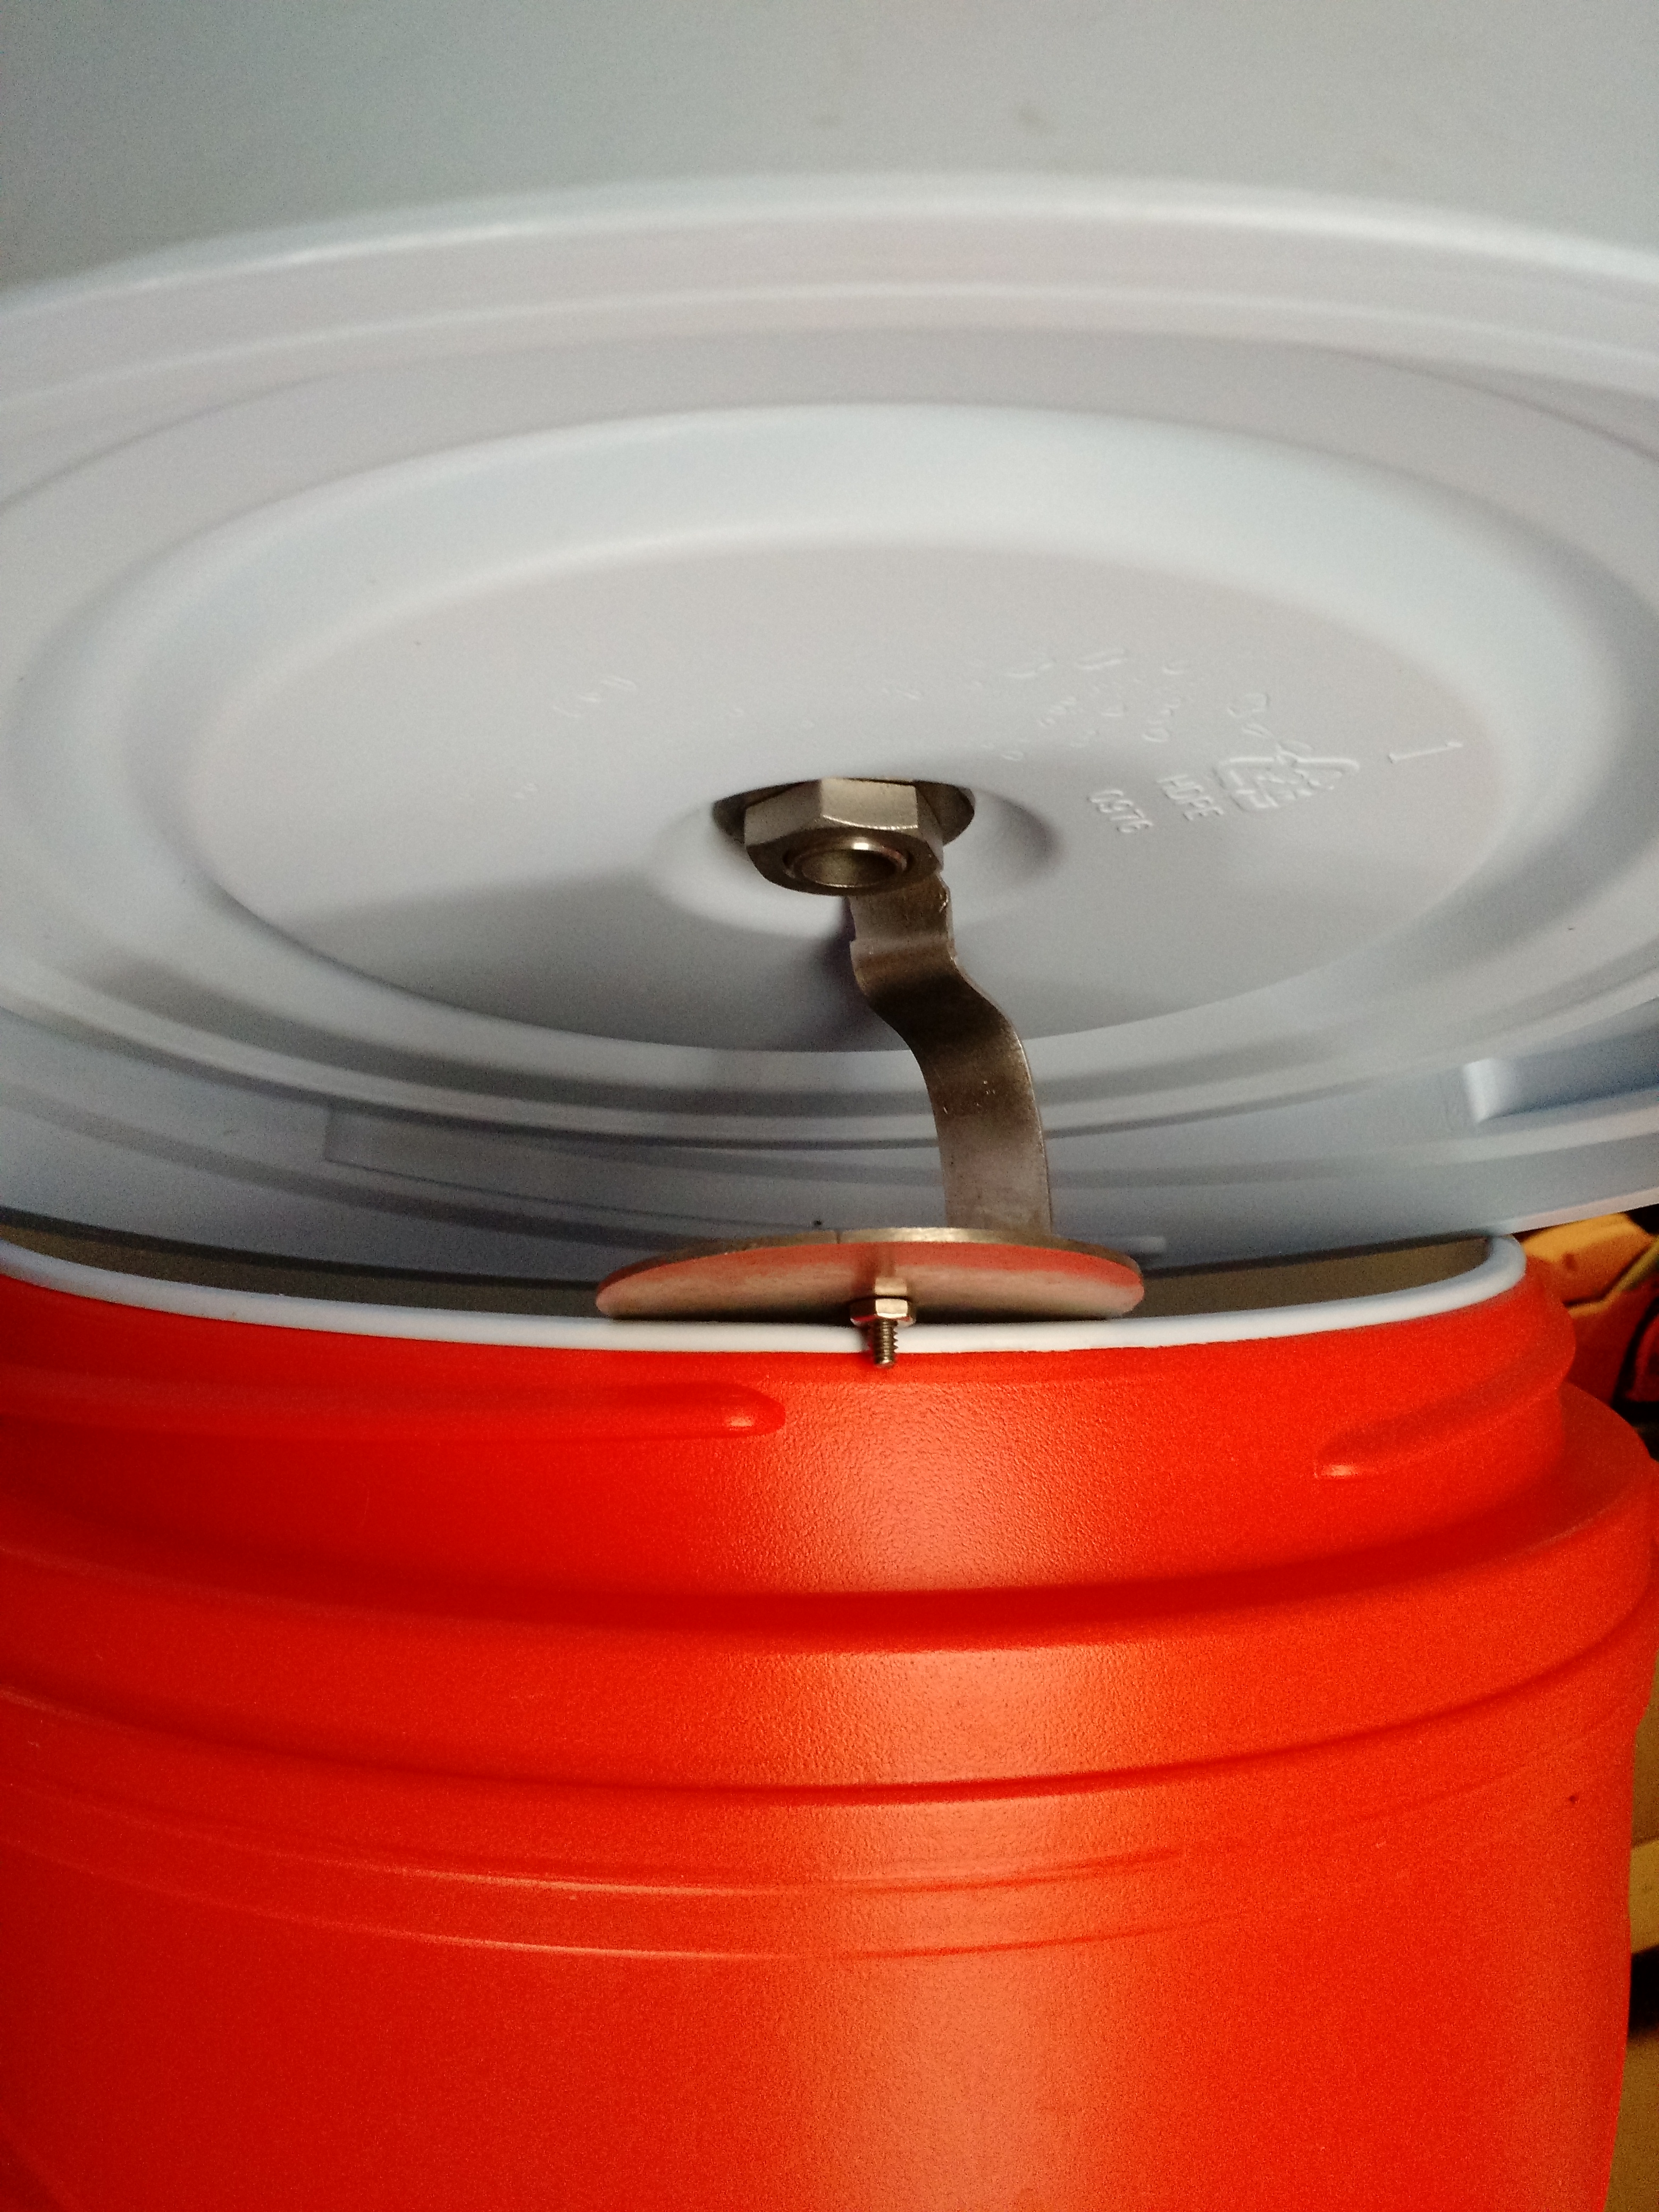
Sure.. just go back in this thread to post #27, thats what the return under the mash cap looks like. It shoots up in the center and impinges on the bottom of the cap.

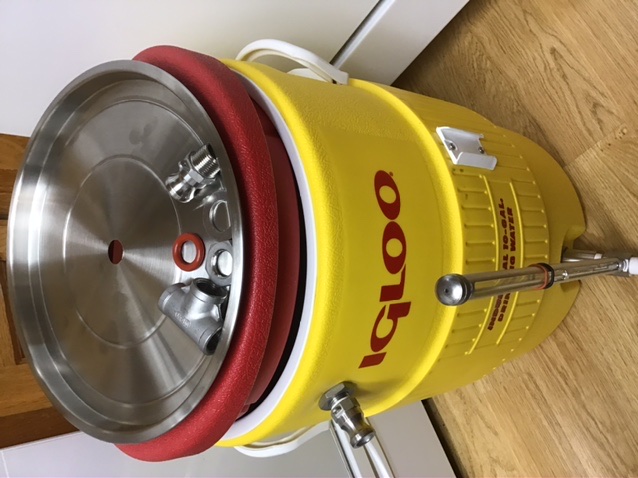
In post #36.. there is my debent mashcap in place.

And finally in post #37 is a diagram of the plumbing and pump for the circulation.
 
[QUOTE="Jeff..., post: 8891247, member: 285537"
I'll have to run a test it might float just fine without and bending. If not, I will bend the lip up.

If you don't have any hole in your mash cap, you must have two ports near the bottom of your mash tun to be able to recirculate? If you don't mind could you point me to a picture of your MLT?

You will have to debend the lip as the cap floats just at the line where the bend is.

Sure.. just go back in this thread to post #27, thats what the return under the mash cap looks like. It shoots up in the center and impinges on the bottom of the cap.

In post #36.. there is my debent mashcap in place.

And finally in post #37 is a diagram of the plumbing and pump for the circulation.
[/QUOTE]

I received the lid. I was hoping it would have a flat bottom but it is slightly concave. I may be able to make it flat once I cut the handle off of it. It fits well and I do believe it will float as is. After I make the mods, I'll test it and turn up the lip if needed. It is a nice thick gauge stainless lid though.
 
You will have to debend the lip as the cap floats just at the line where the bend is.

Sure.. just go back in this thread to post #27, thats what the return under the mash cap looks like. It shoots up in the center and impinges on the bottom of the cap.

In post #36.. there is my debent mashcap in place.

And finally in post #37 is a diagram of the plumbing and pump for the circulation.

I received the lid. I was hoping it would have a flat bottom but it is slightly concave. I may be able to make it flat once I cut the handle off of it. It fits well and I do believe it will float as is. After I make the mods, I'll test it and turn up the lip if needed. It is a nice thick gauge stainless lid though.
[/QUOTE]

Thanks for all the tips Bilsch everything is much appreciated :mug:
 
I received the lid. I was hoping it would have a flat bottom but it is slightly concave. I may be able to make it flat once I cut the handle off of it. It fits well and I do believe it will float as is. After I make the mods, I'll test it and turn up the lip if needed. It is a nice thick gauge stainless lid though.

Personally I'd leave the handle and the concave the way it is unless you are drilling a return port through it. I have two and the one with the handle works better.
 
This weekend I finally got around to trying to assemble a mash cap using this Kraftware 12” tray I bought on Amazon in 2018 - only $20 back then. Six drill bits later trying to make a pilot hole for my Greenlee punch, I gave up. Too bad because otherwise seemed perfect for my 10 gallon cooler MT. Next will try the pizza pan I bought before the aforementioned chunk of armour.
 
Get a couple of cobalt bits, use any oil you have on hand, use a ton of pressure and go slow - like a turn or two per second.
If the oil smokes, stop and let the bit cool.

If your eventual hole diameter is big enough to let you start at another point and still encircle the failure, do that as well, as you've likely hardened the original spot quite thoroughly...

Cheers!
 
Thanks, but that’s exactly what I was doing. Unlike my kettle which cut like butter, this was pre-hardened. Snapped both cobalt and standard HSS bits - cobalt bits add up in a hurry. Problem was I was trying to start with 1/16” bits and those couldn’t hold up to the pressure being exerted with a handheld drill. Was able to make progress with a 1/8” bit and worked up to a stepper bit. Just about have a 3/8” hole for the punch stud. Hopefully won’t damage the punch. Will find out tonight.
 
Hmm...many pots that have straight walls are deep draw forged, whereas it looks like your pan is spin formed...
Different amount of cold work there (in fact I bet your pot was hot forged)...
you've got the right idea, on a flat hard surface, put the punch where you want the hole and give it a good wack...
put some oil in that divot (I used canola, but 10W30 works as well 😆)
...locate the 1/8" drill and put about 10-15lb of pressure...
Work at around 3-4 rpm and rest ever 5 seconds and apply more oil if needed...
You should see small chips the size of a grain of sand...
if there are no chips, your drill bit is dull and you're just polishing your workpiece ;)
I just drilled my stainless 18ga work table last weekend with regular black oxide bits (Ryobi even...gasp!)
Granted it's not cold worked like your product, but just go low and slow...
Cobalt is good as well...
any bit with TiN coating should last a long while even against hardened 304...
I didn't want to have to progressively flare the hole because "somebody" misplaced my stepped drill bit 😳...so I just used my punch to flare it out and my cylindrical file to break the edges.
 
Last edited:
Been using spent deep fryer peanut oil. :rolleyes:

To the point where I’m a few thousandths away from clearing the draw slug on my 13/16” punch. Was originally planning to suspend a perforated SS disk below the return barb outlet using SS standoffs originally purchased for one of many Raspi projects. But for now I think I will be happy with using a 1/2“ NPT tee.
 
Success!

4910E21D-7AEB-426D-B922-1DB4E858EB21.jpeg
6EA0F791-14CD-4B0B-9E72-BB63327DDDB6.jpeg
2159A29A-CCC3-4C84-A3E8-8700A192BF76.jpeg

Almost forgot I bought a barb fitting, so the photo above does not represent the final configuration. But even with the heavier camlock fitting and cap, it still floated at least 1/4” above the waterline.
 
How do you guys flush the air out of the lines before recirculation?

On the cold side its simple to flush with CO2 and quick disconnects

I'm imagining maybe get a second small vessel to feed the initial recirculation into and then lower the tub in while its still running. However doing this without burning yourself might be challenging :)
 
Some brewers flush lines with co2 or nitrogen and are brewing in nearly closed systems. I dont have that system so I disconnect the outlet end and gravity feed the liquid through the line which pushes most of the air out then connect to the quick disconnect.
 
You can go at least two different routes with mash caps:

1.) cap with built in recirculation port
2.) recirculation port in kettle with floating lid

The former will most likely require some sort of gasket to fix it in place at the top of the mas as the fittings and recirc manifold (I use locline and SS fittings) make it too heavy to float. The latter requires only that you have a fix inlet in the kettle so the cap will float.

It’s up to you what your system will handle, whether it be retrofitting equipment or purpose built stuff. We only recommend that you do cap, the implementations are so varied that we shy away from hard recommendations.

Good luck and welcome to the conversation.

Do you have a pic of your setup?
 
I've been doing LODO since...well, before this thread started. Trying to come up with a mash cap that fits my kettle and system.

It finally dawned on me--I use a spike lid on top of my mash tun (it's not a Spike kettle, got the kettle for free, but no lid, so the Spike lid).

But I could do what Bilsch shows earlier in the thread--trim the flange off the lid that keeps it from falling into the pot, and voila! Stainless mash cap.

So I ordered a lid from Spike, ended up being about $31 with shipping as I recall. A friend has a band saw that cuts metal; he trimmed off most of the flange for me, then we used a belt sander to dress the edge and then slowly take it down to size. It's currently 13 7/8" in diameter.

I haven't brewed much this past year--had a bad fall in April, separated right shoulder resulting in torn rotator cuff (massive injury, as described by doctors), then surgery in July. I'm finally coming out of this and can brew more, so it was time.

I am ready to do another pilsner; I've done them before LODO and it's like a punch in the mouth of pilsner flavor. Astounding.

Anyway, here's the result. I finally have a nonreactive mash cap that is about as good as I can do. I may, at some point, remove the handle to just the nubs to get more clearance on top, but for now, I like it.

mashcap1.jpg

mashcap2.jpg
 
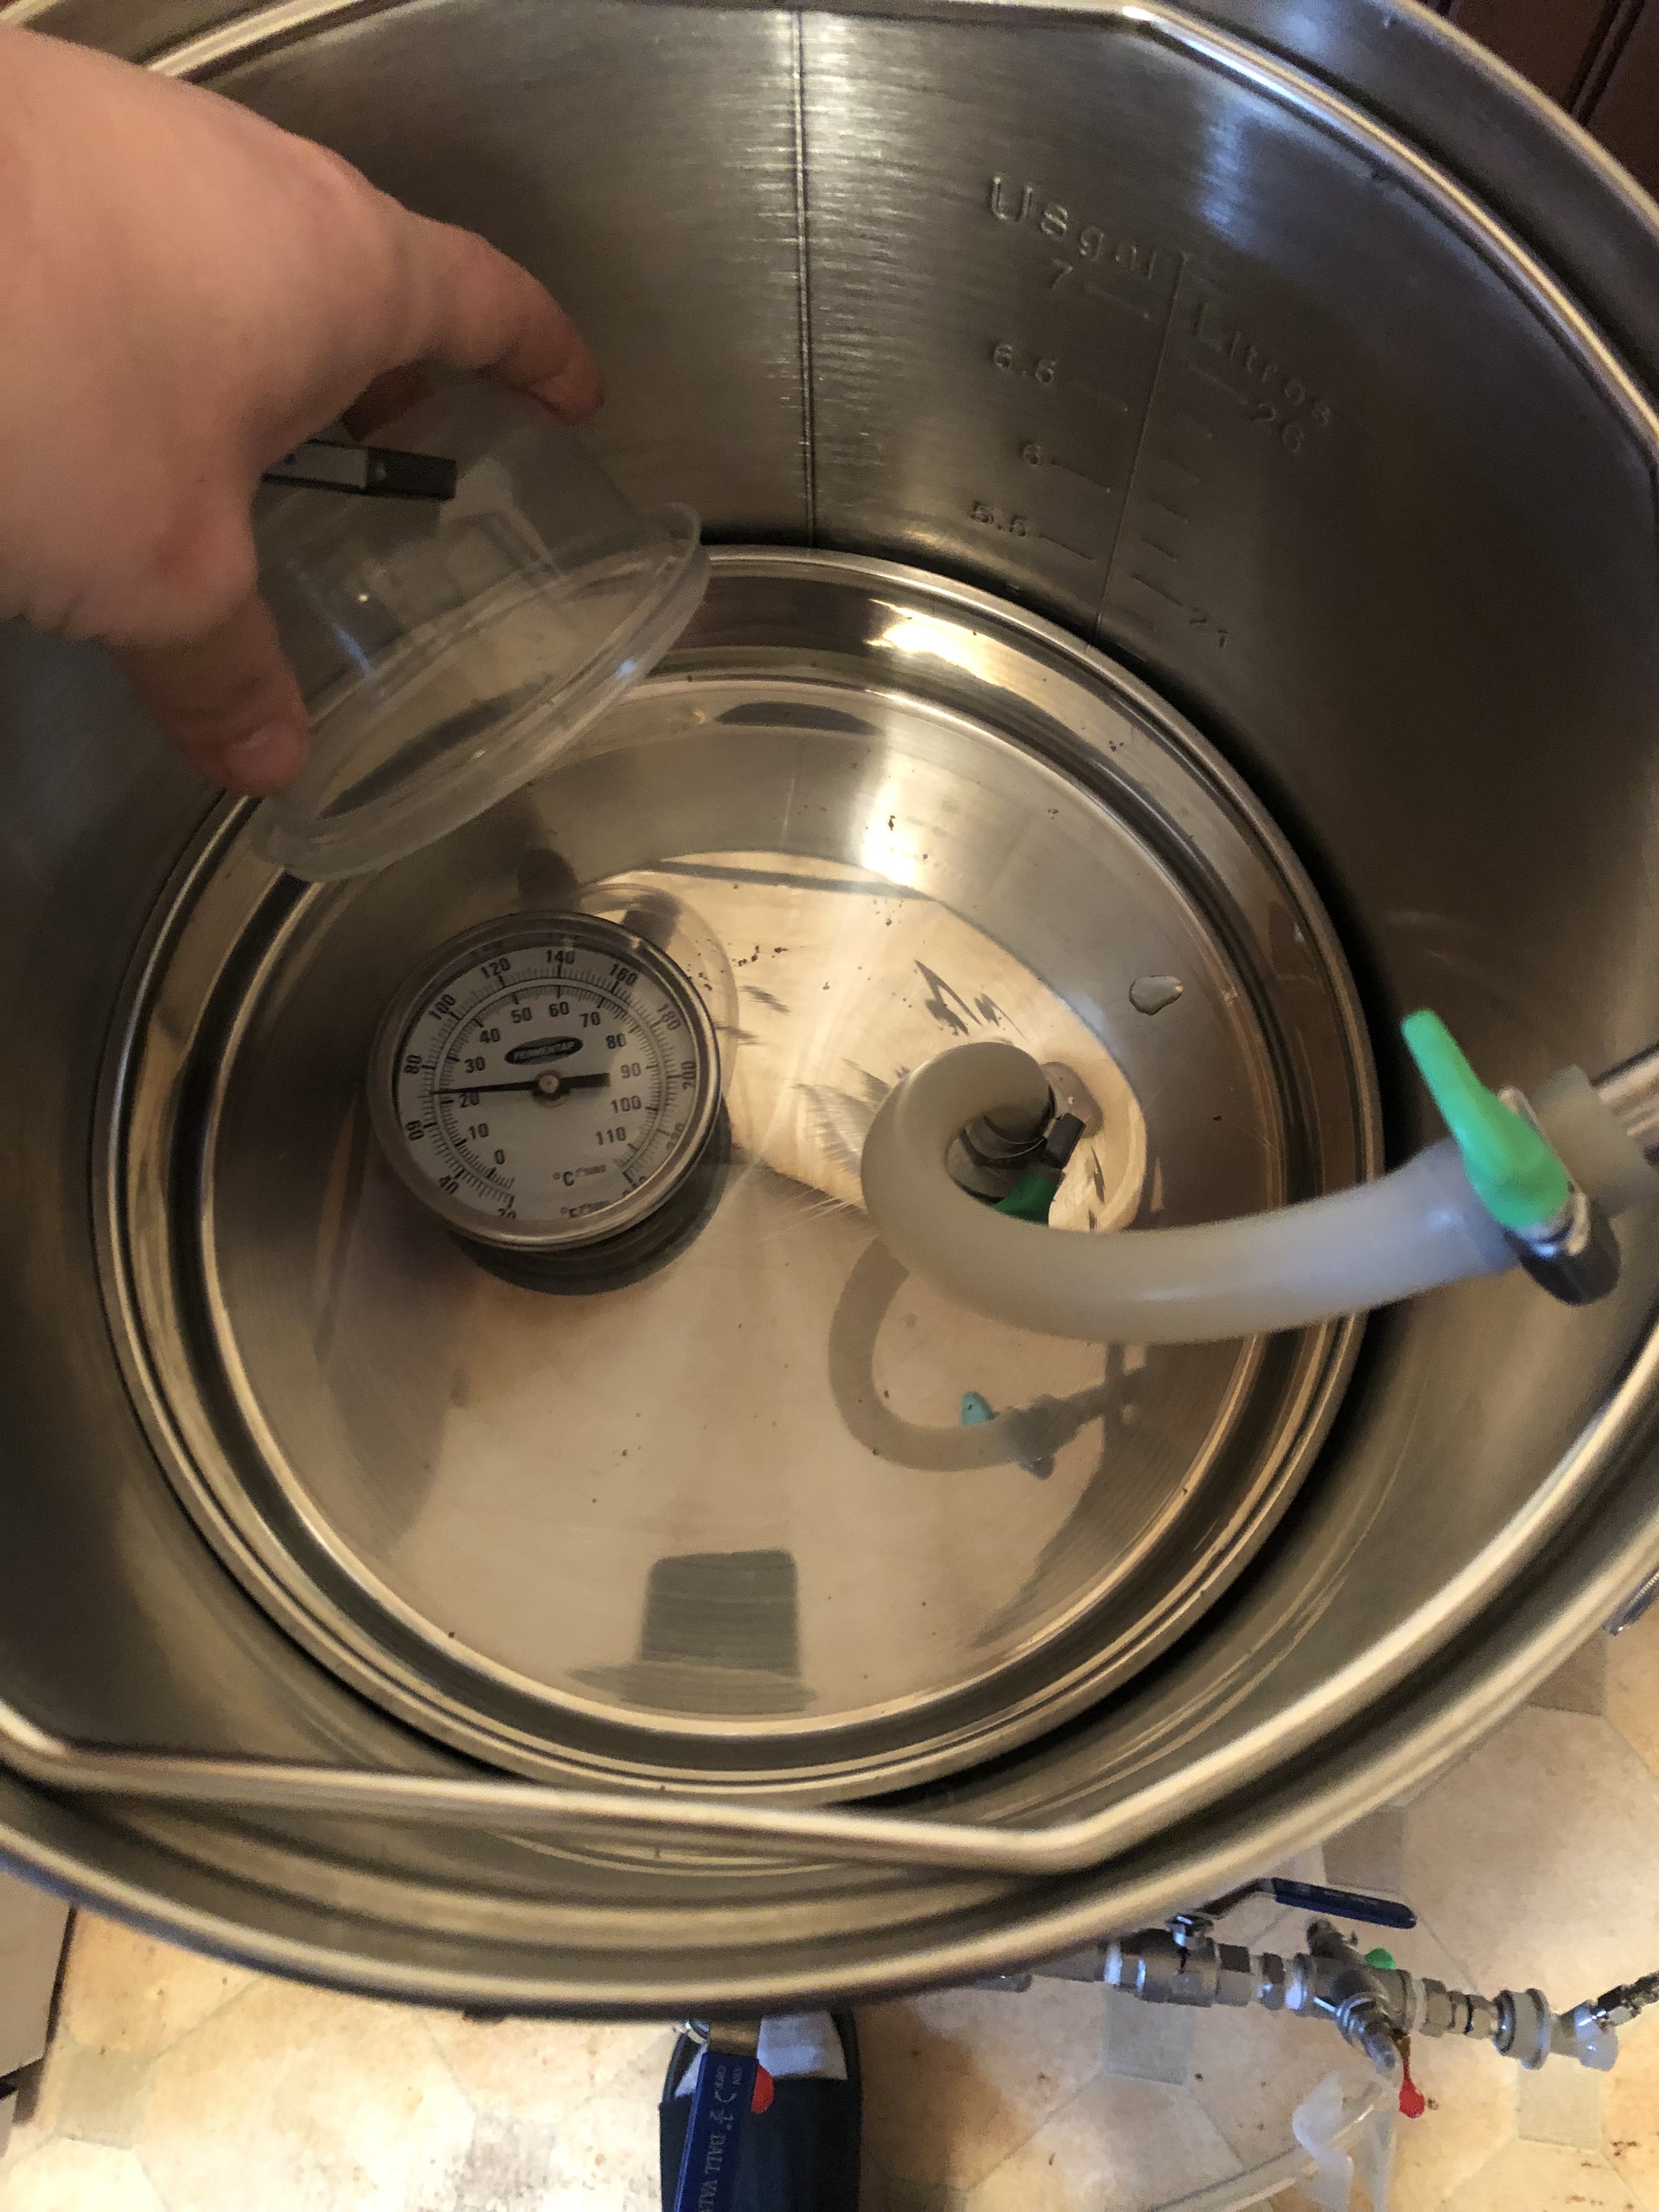
I use a ss cake pan with a thermometer i cover with a small plastic bowl cause i dont think its water proof and barb for my recirculating input
462B88D2-B4CE-4D77-9F0F-9C2AB46854B5.jpeg
 
Did LoDo for first time this weekend

Decided to go "balls deep"

@schlenkeria thanks fof the tip

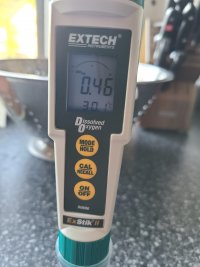
These things were amazing at limiting O2 pickup. DO readings below .7 for entire sessions

I even did a 90 min boil and 50 min hopstand.

Also did the trifecta blend
 

Attachments

  • 20220515_233906.jpg
    20220515_233906.jpg
    1.8 MB · Views: 0
  • 20220515_221606.jpg
    20220515_221606.jpg
    3 MB · Views: 0
  • 20220516_064300.jpg
    20220516_064300.jpg
    1.4 MB · Views: 0
Back
Top