• Please visit and share your knowledge at our sister communities:
  • If you have not, please join our official Homebrewing Facebook Group!

    Homebrewing Facebook Group

Knotty Pine and Cedar Log Keezer Build

Homebrew Talk

Help Support Homebrew Talk:

This site may earn a commission from merchant affiliate links, including eBay, Amazon, and others.
Thanks Starrfish. I appreciate all of the advice that you have given me over the past few months, both with brewing and most recently kegging. It's nice having seasoned vets like yourself, gracious enough to guide us noobs along the way. :mug:

Getting ready to drill the holes through the bottom of the coffin and top of the freezer and am nervous as hell for some reason. :confused: Hopefully I can make more progress that just that tonight, but it all depends on what my wife has planned for the evening. Wish me luck!

That's just looking AWESOME!
 
I'm pretty much a newb at kegging too! just passing on the info I gathered here, and other places, but glad to help.

I think going to a real 10 gallon mash tun is going to make brewing life MUCH easier as well as finally putting the drain valve in my 10 gallon kettle!!! I hate syphoning... (just picked up an auto syphon too can't wait to try that out!).

OH! Cutting oil (got some for dilling out kettle) or 3-in-one oil (I ran out when I drilled the top of my fridge) helps cutting through top of freezer. wd40 is too thin and tends to smoke, I found that put the hard way. Go slow, measure twice and you'll be fine.
 
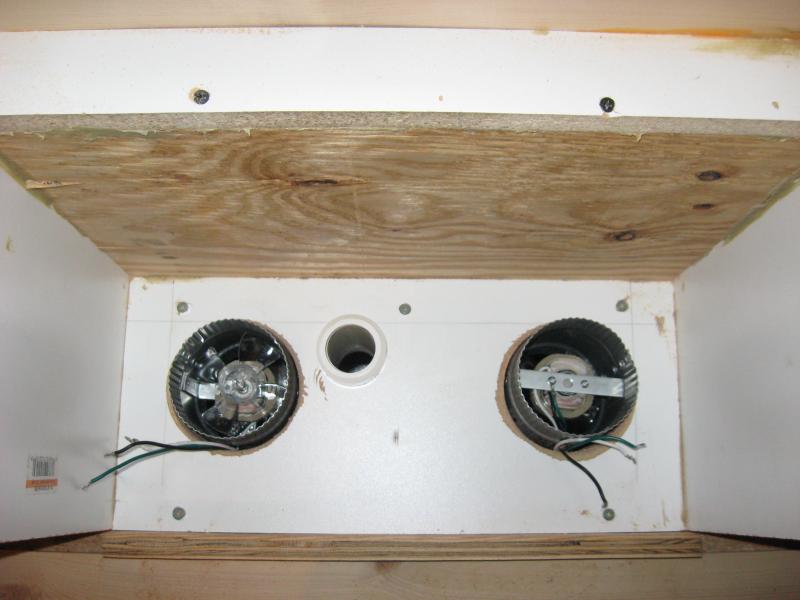
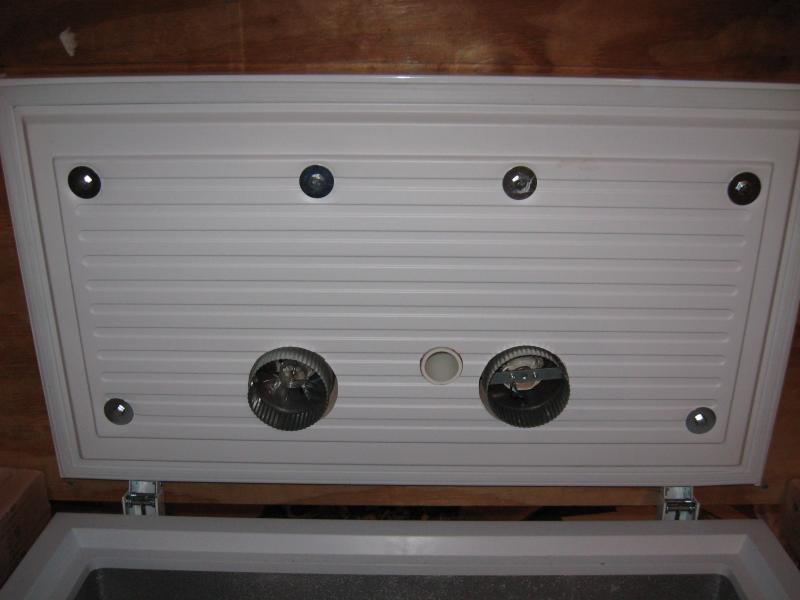
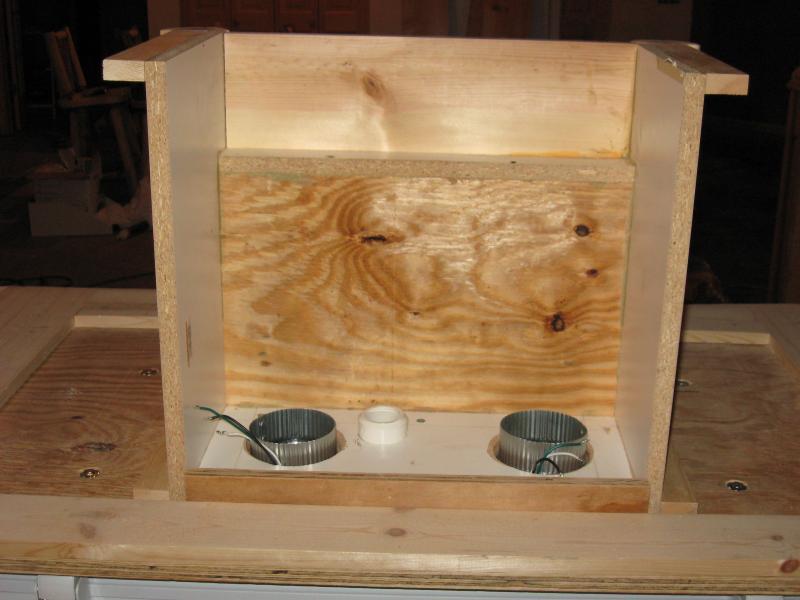
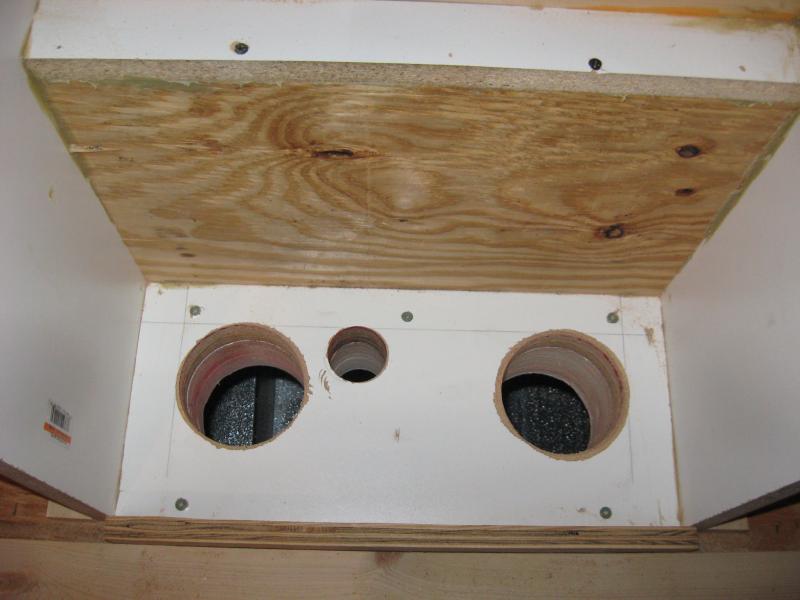
Got the holes drilled for my Inductor cooling fans for the coffin and a port for the beer lines to feed up through. I've never used a 4" hole saw before. What a b*tch! I about broke my wrist several times when the big caught. I wasn't fun, but it's done. :ban: The holes are a little oversized, but I'll find a way to get a good tight seal around the fans....maybe a little expansion foam. Plan on finishing the bulk of the coffin/shelves tomorrow.....then onto insulating. Thanks for following the thread!
IMG_2029.jpg


IMG_2030.jpg


IMG_2031.jpg


IMG_2033.jpg
 
Lookin' great man! I plan on being on this same build course very soon and I have been thinking about how to insulate the coffin. This looks really nice.
 
Thanks Toasted. I plan on stacking 1" foam insulation and drilling the same 4 inch diameter holes and the 1 1/2 hole for the beer lines in each piece to create a channel. I'll cut the space out between the left 4" hole and the smaller one, so that the beer lines travel up the same channel as the intake fan side. I essentially plan on filling the entire cavity of the coffin with styrofoam insulation with a continuous channel from the intake up to the shanks and across and back down to the exhaust fan. I just started that today, but decided to put the insulating on hold and build the shelves on the sides of the coffin instead. I also bought a rope light that plugs into 110 v. and drilled the holes for that as well. Here are a couple of pics. I'll do more of the insulating and post more pic. to give you an idea of what I'm doing. Thanks for the compliment. :mug:

IMG_2034.jpg


IMG_2035.jpg
 
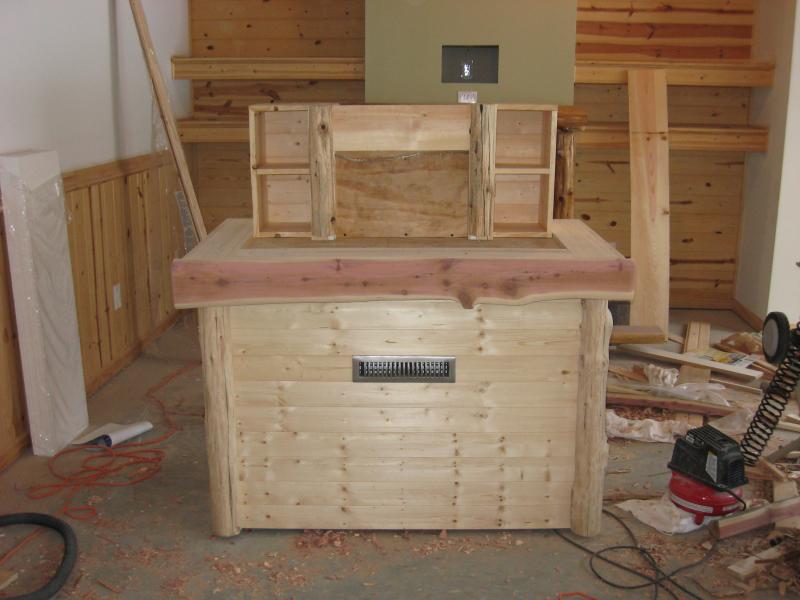
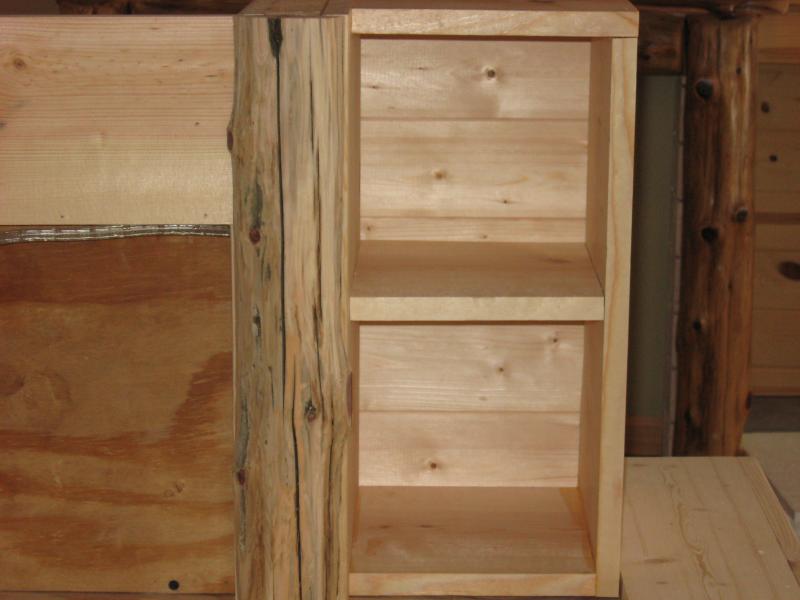
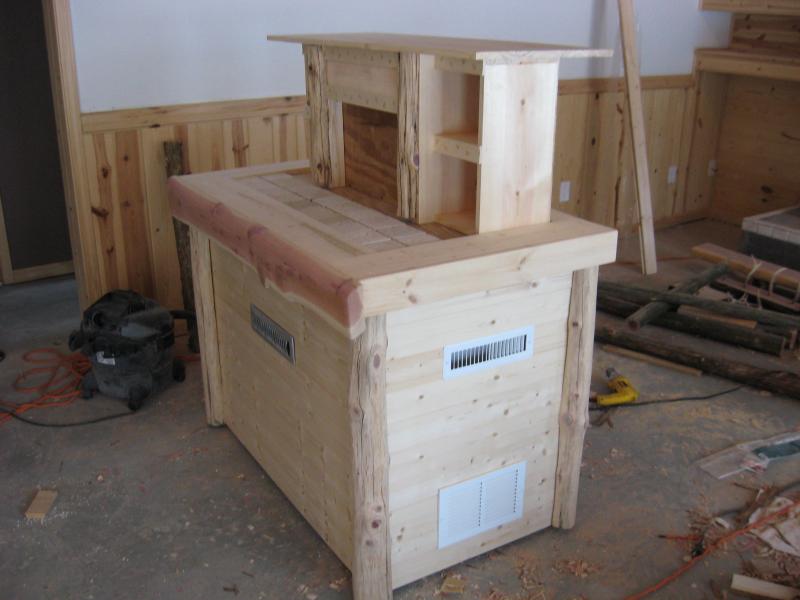
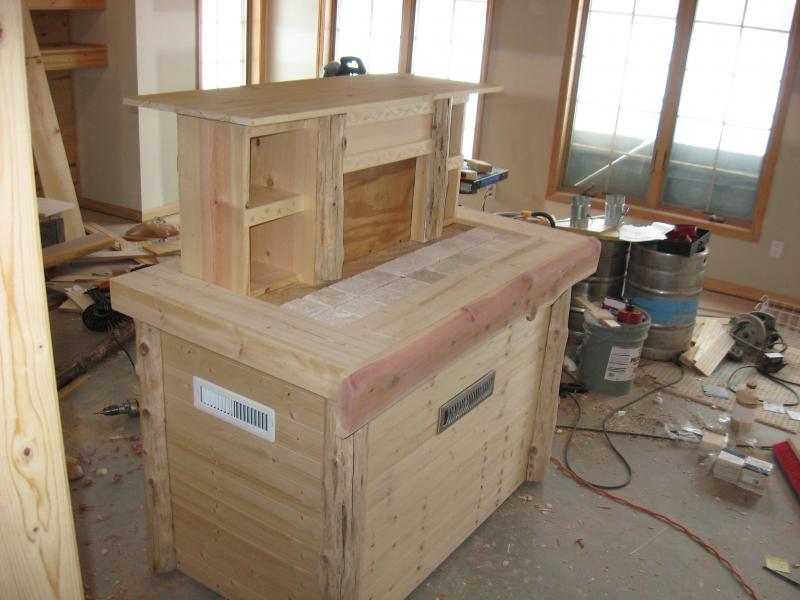
Here are a few pics of the shelves that I built on both sides of the coffin box. Thanks for the idea Keith...Jake the Hop Dog. There is a 1 1/2 gap behind the vertical logs on either side of the coffin that will also be filled with styrofoam insulation to add more R value to the coffin.

IMG_2038.jpg


IMG_2037.jpg
 
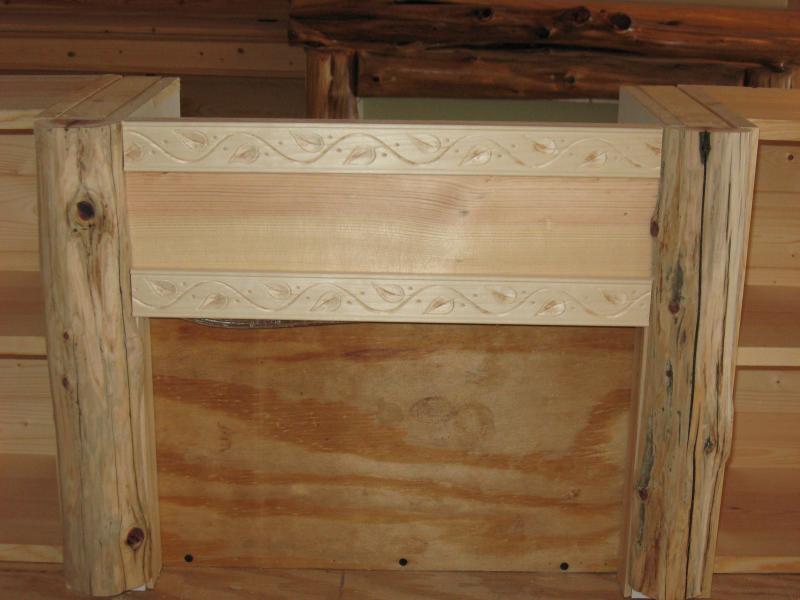
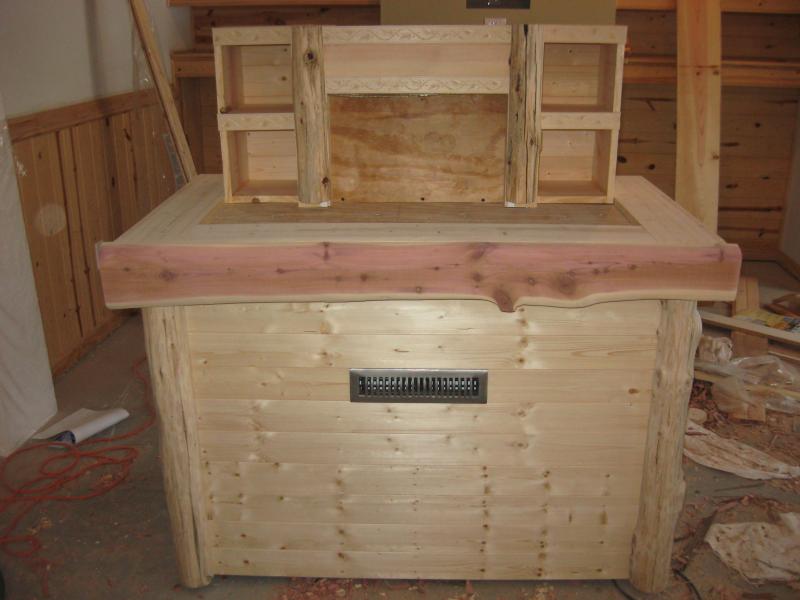
I added a little decorative trim to the coffin and shelving to spice it up a little. I needed a horizontal trim piece to hide the rope lighting behind, so I decided to add it to the front of the shelving and across the top of the coffin as well. Now I need to get a nice piece of ponderosa pine for the top and get the back enclosed. I'm going to make an access panel on the back of the coffin to get to the guts inside. Accessing through a lid on the top would be too high. Haven't figured it out completely, but like the rest of the project, I'll cross that bridge when I get there. I plan on doing the top this weekend and just using leftover plywood for the back, then I have a sh*t load of sanding to do. Bought the cement board and tumbled travertine today, so I just may be nearing the end stages of the build. Now I just need the green light from my wife to order the kegging components. :tank:

p.s. If it looks like the little shelving units on the sides of the coffin are sitting a little crooked, it's because they are not attached yet. Still need to run the cord for the rope light and insulate the cavity between the coffin and the shelves.

IMG_2040.jpg


IMG_2041.jpg


IMG_2044.jpg
 
Thanks "daaviator". How's the weather up there? It has been a rough winter here in Michigan, but nothing in comparison to what you guys go through. Can I assume by your username that your a pilot? I've been watching that show "Flying Wild Alaska" and all I have to say is......crazy b*st*rds! Thanks for the compliment....the keezer is getting there. :mug:

Very, very cool. Awesome job.:rockin:
 
What an awesome project! This thing has to be a BEAST!!! Have you thought of the beer that will be the first pint out of the tap?

I'm glad to see that someone out there has a messier basement than I do. :D
 
I know, I know....my basement was frickin' spotless before I started this keezer build. We had already painted all of the rooms in the basement except the main/family room, which was next on the agenda a few weeks back. As I mentioned earlier, my wife wanted me to finish the rest of the basement before starting this project, but I just couldn't wait. I usually do all of my knifing and sawing outside, but with 18" of snow on my patio, I decided to just make one last mess in the basement. Funny you should mention how bad of a mess is in the basement, because my wife and I just discussed this over a glass of wine this evening and we both agree that this is the worst it has ever been. Thankfully, my knifing and sawing is done....just have to sand everything and then I'll clean up the hell hole that I created. This build has been a blast and I don't regret the mess one bit. I took my son and daugther down to show them what I got done and my son said "The basement is messy right now, but is has been worse." Just the reassurance I needed! :)

I will finish the sanding on Saturday morning and the basement will be back to tip/top condition. I really just needed a break from the basement build and the keezer was exactly what I needed. Now if I can talk my wife into giving me the green light to order $500 worth of kegging equipment, I'll be all set. Thankfully, my wife supports my newfound passion with homebrewing and for the most is pretty supportive. She did mention, however, that she wants the rest of the basement done by summer. :drunk:

I have a Two Hearted/Centennial IPA Hybrid in the primary and I'll be transferring and dry hopping to a secondary this weekend. I have a Blood Orange Hefewiezen brewing this weekend and then I'm reverting back to my Amarillo Wheat for the third tap. To answer your question....most likely a kick a$$ IPA will be the first pour off of this "beast"! :rockin:


What an awesome project! This thing has to be a BEAST!!! Have you thought of the beer that will be the first pint out of the tap?

I'm glad to see that someone out there has a messier basement than I do. :D
 
Thanks Big Red! Did you ever get your basement project underway? Mine's still not 100% complete, but I've been wanting to build this keezer for a while so it jumped to the top of the priority list. :mug:

Great looking keezer!!! If I can do something half this good I'll be happy.
 
That looks awesome. Have you done any testing on the 4" fans yet? Do they keep the lines cool enough? I would think it wouldn't be a problem anymore.

Also, are those shelves big enough to hold a pint glass or two? That's exactly what I was thinking of doing. Nice build. :mug:
 
No testing yet besides hooking the fans up to an old extension cord to make sure they worked. They are both 80 cfm and they move air really well for their size. I have heard that they are traditionally noisy, but these things are whisper quiet. :rockin:

I still haven't ordered my kegging equipment, so no formal testing has been done on temperature differentials between the coffin and the keezer, or beer line temps. As you can see by the pics. I'm creating a cylindrical channel within the layers of the foam insulation for the air to move through....the beer lines come up through the smaller hole on the left and after the first two layers of foam will merge into the 4" channel. I'm essentially filling the entire coffin solid with the foam insulation in layers, creating the tunnel as I go. I think that with the cold air being confined to and directed through a small insulated cavity and exhausted back into the freezer, it should work out well.

The shelves will easily hold 4 pint glasses each. This is going to be sitting right next to my bar cabinetry, so I'm simply using the shelves to display pint glasses from my favorite breweries, not to store pint glasses for use.

Thanks for the compliment. :mug:

That looks awesome. Have you done any testing on the 4" fans yet? Do they keep the lines cool enough? I would think it wouldn't be a problem anymore.

Also, are those shelves big enough to hold a pint glass or two? That's exactly what I was thinking of doing. Nice build. :mug:
 
Kent, that is looking great! I like the shelves on the coffin. :mug:

Let me know how the fans work out, I may have to put some on mine since it may be out by the pool this summer (Faster access!:drunk:).
 
The winter has been pretty mildish...one day it is January and the next it is April. I say we could use more snow but SWMBO disagrees. I do fly helicopters and it is the most fun you can have with your pants on.
 
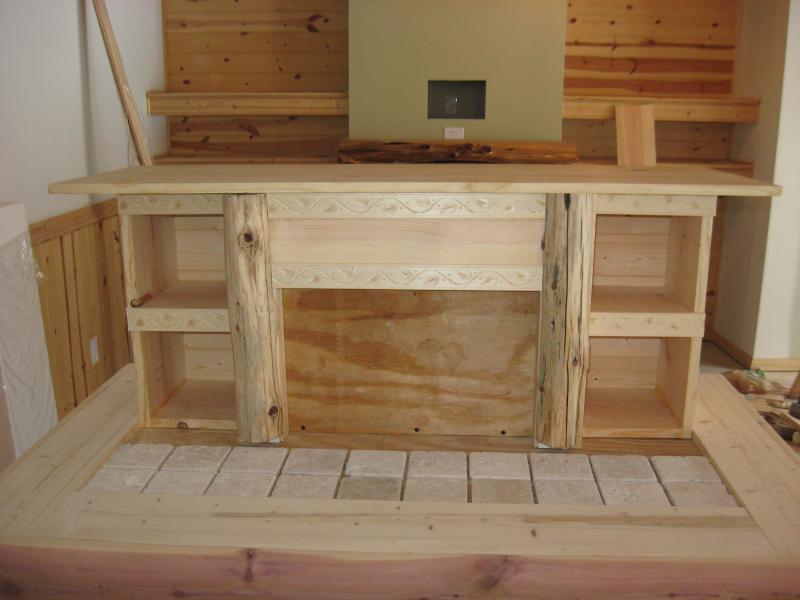
I got a little work done on the keezer today. I purchased a piece of ponderosa pine for the top....still needs to be cut to size, the edge routered and get it attached. I also bought the tile and put a few pieces on the top to see how it looks. There will be cement board under the tile, so it will sit flush with the trim on the top. Also, the travertine tile will run up the face of the coffin in the recessed area. I'm still trying to make a decision on a drip tray, but I'll most likely go with a 19" x 4" stainless one and recess it down into the tile.

Does anyone know exactly how far out the Perlick SS faucets reach out from the front of the coffin? I need to determine drip tray placement and make sure that my overhang on the top board doesn't interfere with the tap handles.

IMG_2045.jpg


IMG_2046.jpg


IMG_2052.jpg


IMG_2053.jpg
 
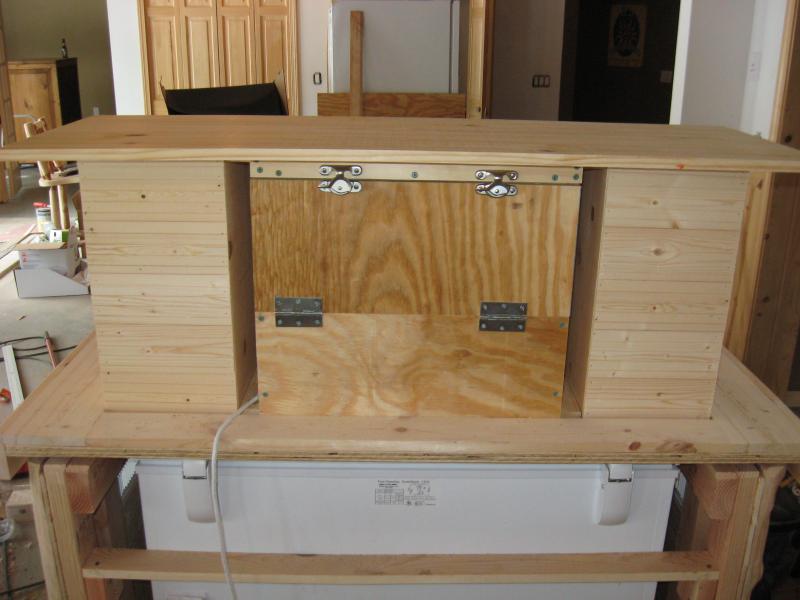
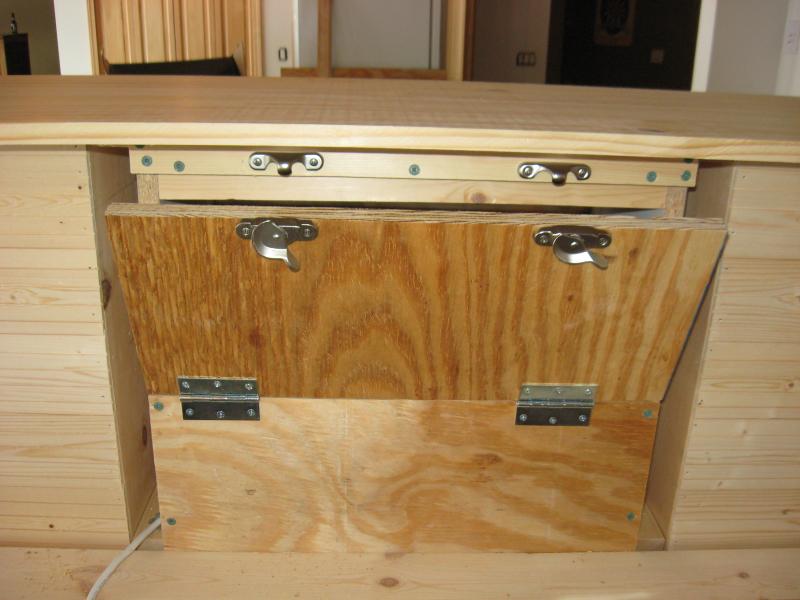
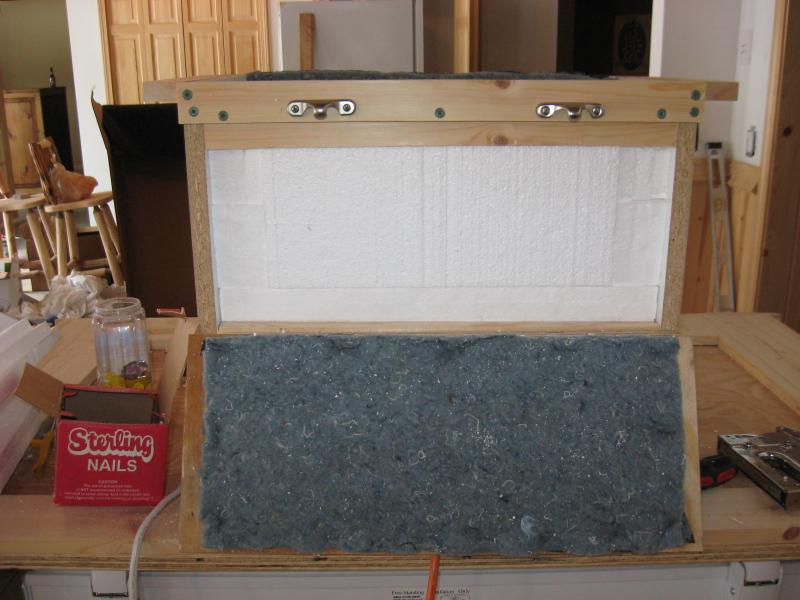
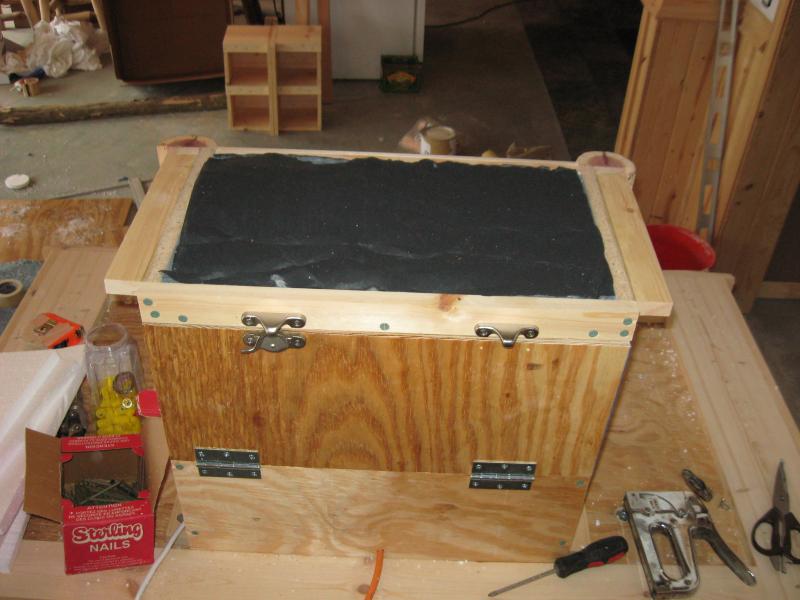
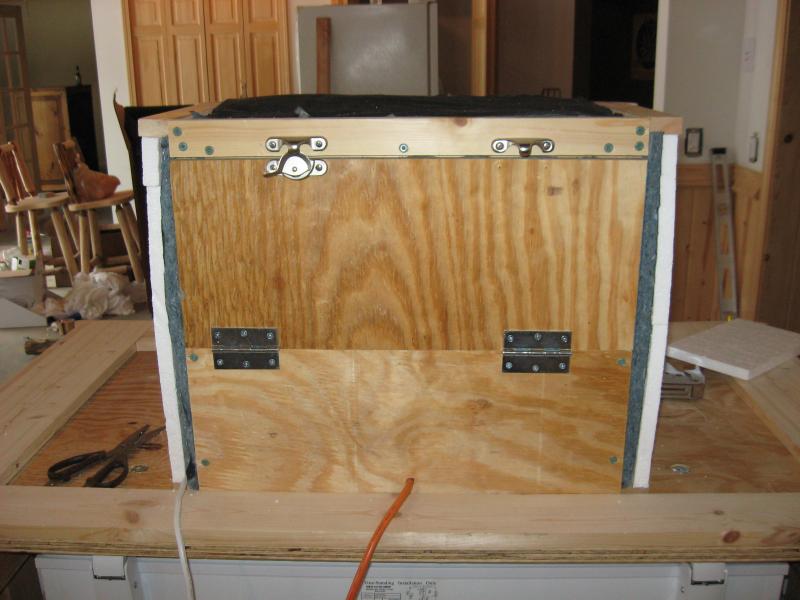
I also made a hinged access panel on the back of the coffin with compression locking mechanisms. I'll add some thin rubber weather stripping to creat an air tight seal. Now I just need to caulk the sh*t out of the inside of the coffin to make sure all of the joints are sealed and then get to work on insulating the inside of the coffin. I'm going to line the entire inside of the coffin with 1" acoustical panels for sound deadening properties (eventhough the fans are waaaaay quieter than expected).......thanks for the acoustical panel samples Ted (Gridlocked)! Once the inside of the coffin is caulked and lined with the soundproofing material, I'll then proceed with the styrofoam insuation....with air circulating channels for the beer lines.

If anyone has any words of wisdom at this point....please speak up. I'm approaching the point of no return. :mug:

IMG_2048.jpg


IMG_2049.jpg


IMG_2051.jpg


IMG_2050.jpg
 
I'm considering going with a Dual Digital Temperature Controller and running a probe to freezer to control the compressor and another probe to the coffin, right at the shanks, to control the Inductor fans for the coffin cooling. I'm thinking that I would have the best chance at keeping the temperature differentials between the coffin and the freezer at a minimum. I keep running across several versions of dual channel temperature controllers on ebay, but I'm not familiar with the manufacturers. They are quite inexpensive compared to the Dwyer Love Controllers. They ship directly from either China or Japan (3 different ones). Any words of advice on this? Any feedback would be awesome. :mug:
 
How to prioritize the things I want to say?....

1) Awesome awesome awesome.
2) LOVE it when I take the time to read through a thread like this and realize the project is still ongoing and I can enjoy some of the journey as it unfolds. This is DIY porn at its best.
3) Speaking of DIY, I almost missed this thread because it is listed in "kegging/bottling" instead of DIY...Not sure if it can be changed/moved but those of us who love making sawdust as much as making beer might miss-out on a really great read.
4) This probably should be higher than #4 but how in the heck do you manage to convince your wife to let you spend this much time on project-stuff with an unfinished basement project in mid-process?!!? You should write a book because you have clearly cracked the code! I'm lucky if I can score 3-4 hrs a week for 'projects.' Actually, the word 'project' is all but forbidden... haha
5) When I built my "pleaser-keezer," I used a small cooler to create the 'insulation' in the coffin and then just loosely built the wood around it. I didn't install any type of ventilation/fan to circulate air inside the coffin. I just figured the amount of actual beer contained in 10" of beer line isn't enough to warm-up an entire glass of beer. Maybe I should use two thermometers to check the difference in temp between the coffin interior and the floor of the freezer.... hmm..
6) What's the deal with these hose-lights?
7) Probably too late to cast a vote but I'm also not a fan of the vent in the front. With the back completely open and any space at all between the inner-sides and the outer-sides of the freezer, any hot air will rise up and go out the back. If anything, you might want to keep it away from the wall a few inches so it doesn't lead to any moisture buildup on the wall. Speaking of the wall, where is your power outlet? Hopefully you can hide the cords behind the keezer. Mine has to sit about 2 feet to the right of the outlet and the cords look tacky (rental house). In our next house, I'll either wire an outlet just for the keezer or buy a house that has the perfect spot. ;)
8) Oh, think about drip-tray removal for cleaning. It's inevitable that some will spill and having a removable drip-tray that I can just put in the dishwasher is really great.
9) I love the tile--are you going to use the same tile on the back-splash as well? I think that really ties-together with your basement since you have that same tile over behind the wet-sink. Having it on the vertical surface will show that connection from across the room and not just when you're standing in front of it pulling a handle.
10) You don't need people like me rambling on your post. This is a GREAT project and I wish you the best. *subscribed!*
 
Wow...where do I start? I guess, first of all thanks for the wonderful compliments. :tank: Yeah, I realized after I started the thread that it probably should have been in the DIY thread category. If anyone knows if I can transfer it over to that category or duplicate it in the DIY section, please let me know. I have read the majority of the keezer threads on HBT...some in the kegging/bottling section and some in the DIY section. In retrospect, most were probably in the DIY.

Honestly NewBrewB, I haven't actually devoted a ton of time to this build. Just a couple of hours here and there. My wife is pretty supportive of my new found passion of home brewing and she knows that I love to build things, so she has been tolerant. She would much rather see the rest of the basement completed before the keezer, but she know that once I get my mind set on something....there's no turning back. :D Thankfully, I own my own businesses and can manage to get out of the clinic a couple of days per week by noon'ish. Both of my kids are in school, so it allows me a few hours of uninterupted time to work on my "projects". I really try my hardest to not let these things interfere with the family activities

I am brand new to this whole kegging deal and I'm totally shooting from the hip with this build. I have simply accumulated as much information as I could through other people's threads to try to build something that is as efficient as possible. In theory, my 2 fan system that directs cold air through a tunnel system encased in insulation should work, but until I can test it out....who knows. Hell, I still don't even have the kegging components or the temperature controllers yet! :drunk: I'm totally speculating on the dual temperature controller, but in my mind it makes sense. I just want something that dispenses cold beer with minimal foaming EVERYTIME. :mug:

I assume by your question about the "hose lights" you are talking about the rope light that I incorporated. It's simply an accent lighting feature that looks cool once it's complete. If you look at the threads of some of the great keezer builders like Jester (Erik), Jake the Hop Dog (Keith), etc., they incorporated the accent lighting and it just makes the finished product cooler. In my pics, the rope lighting is not yet fastened up behind the trim piece in the recessed area of the coffin, so it's hanging down a bit. It will not be visible upon completion once fastened. I'm just leaving it loose for now until I put the cement board and tile on the face of the coffin.

That leads to my next answer....yes, the same tumbled travertine will cover the backsplash facing of the coffin. As far as the vents go, what you see is what you get. I'm leaving the brushed nickel vent in the front. I think it will work well once I get the stainless steel Perlick faucets and drip pan installed. Besides, I really don't feel like removing the knotty pine to remove the vent, as the knotty pine paneling is adhesed down as well. :cross:

Ok...let's move on. Yes I am incorporating a removeable SS drip tray and I have been searching the internet for periodically throughout the day to find the best one for my project. Yes, I have a dedicated outlet of the power supply to this keezer. In a few of my pics., I have the keezer pushed into the location where it is going to be situated and there is a dedecated plug with a 20 amp. circuit specifically for the keezer.

And....Finally, all cords will be completely hidden. I am building a control panel that will be attached to the back of the unit, completely out of sight. As I continue to progress, I plan on taking more pics right through to the bitter end! :mug: I am incorporating a switch to control the accent lighting, which will be easily accessed, but out of sight. The control panel will have a dual digital temperature controller with two probes....one to control the temp. of the freezer and one to control the temp. of the coffin. This is my plan unless someone tries to talk me out of it.

Hopefully I answered all of your questions. I plan on getting up bright and early (6 a.m) to get a couple of hours work done on insulating the coffin before my wife and kids get up. I'll post pics. as I go. Thanks again for the compliments. BTW, I checked out your "pleaser keezer" and it's kick a$$! :rockin: Love the bamboo accents.

How to prioritize the things I want to say?....

1) Awesome awesome awesome.
2) LOVE it when I take the time to read through a thread like this and realize the project is still ongoing and I can enjoy some of the journey as it unfolds. This is DIY porn at its best.
3) Speaking of DIY, I almost missed this thread because it is listed in "kegging/bottling" instead of DIY...Not sure if it can be changed/moved but those of us who love making sawdust as much as making beer might miss-out on a really great read.
4) This probably should be higher than #4 but how in the heck do you manage to convince your wife to let you spend this much time on project-stuff with an unfinished basement project in mid-process?!!? You should write a book because you have clearly cracked the code! I'm lucky if I can score 3-4 hrs a week for 'projects.' Actually, the word 'project' is all but forbidden... haha
5) When I built my "pleaser-keezer," I used a small cooler to create the 'insulation' in the coffin and then just loosely built the wood around it. I didn't install any type of ventilation/fan to circulate air inside the coffin. I just figured the amount of actual beer contained in 10" of beer line isn't enough to warm-up an entire glass of beer. Maybe I should use two thermometers to check the difference in temp between the coffin interior and the floor of the freezer.... hmm..
6) What's the deal with these hose-lights?
7) Probably too late to cast a vote but I'm also not a fan of the vent in the front. With the back completely open and any space at all between the inner-sides and the outer-sides of the freezer, any hot air will rise up and go out the back. If anything, you might want to keep it away from the wall a few inches so it doesn't lead to any moisture buildup on the wall. Speaking of the wall, where is your power outlet? Hopefully you can hide the cords behind the keezer. Mine has to sit about 2 feet to the right of the outlet and the cords look tacky (rental house). In our next house, I'll either wire an outlet just for the keezer or buy a house that has the perfect spot. ;)
8) Oh, think about drip-tray removal for cleaning. It's inevitable that some will spill and having a removable drip-tray that I can just put in the dishwasher is really great.
9) I love the tile--are you going to use the same tile on the back-splash as well? I think that really ties-together with your basement since you have that same tile over behind the wet-sink. Having it on the vertical surface will show that connection from across the room and not just when you're standing in front of it pulling a handle.
10) You don't need people like me rambling on your post. This is a GREAT project and I wish you the best. *subscribed!*
 
This looks awesome and the space you are building looks great too. Nice job!
 
Thanks guys. I appreciate the compliments. I I have a thread for my basement build that I plan on resuming once I get back on track with that build. Check it out if you get a chance. Thanks again!


QUOTE=IPAAAA;2685660]This looks awesome and the space you are building looks great too. Nice job![/QUOTE]
 
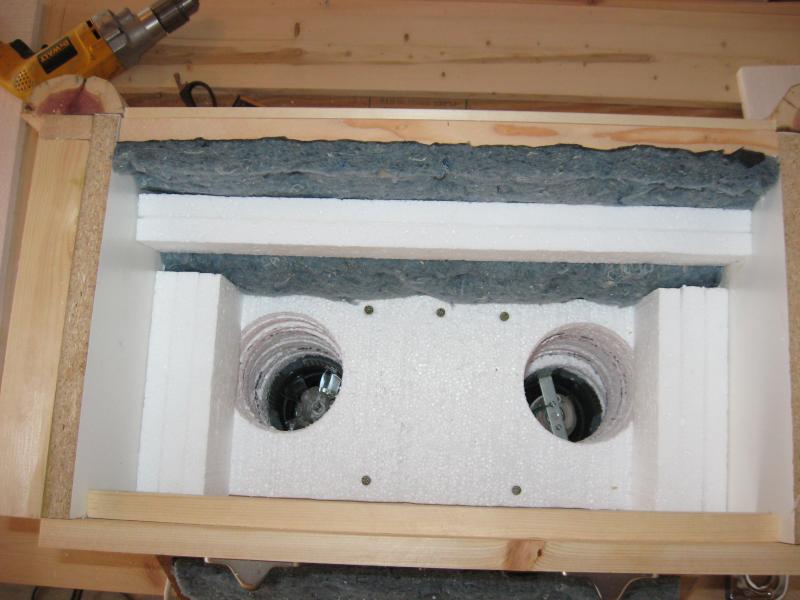
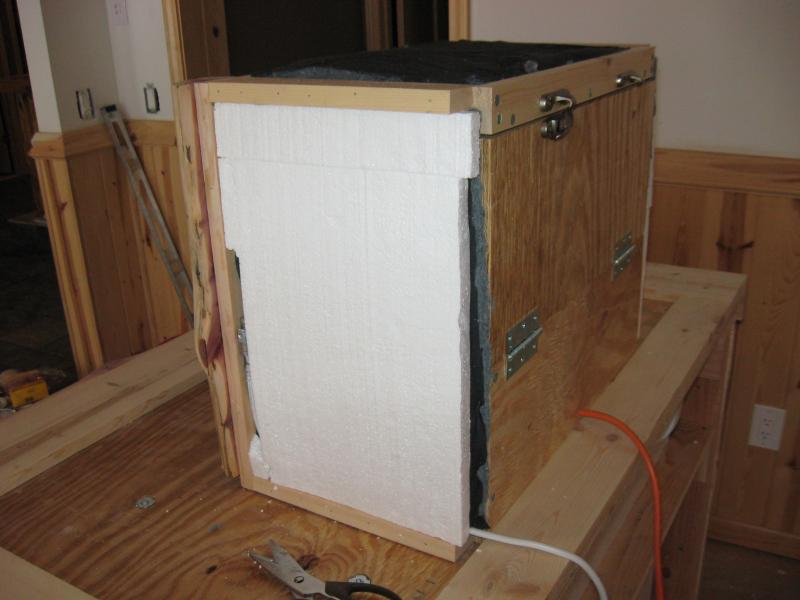
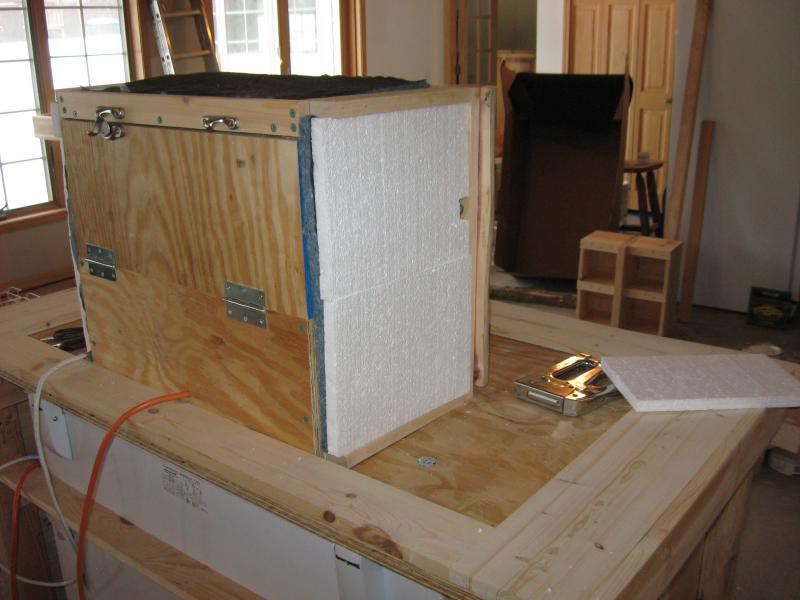
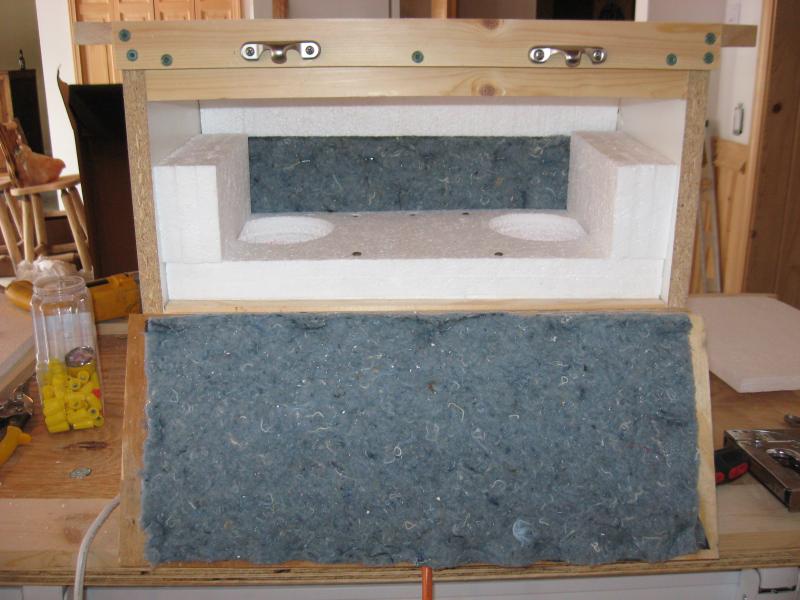
Today I got the inside of the coffin finished. I caulked all of the corners and seams making it air tight. I installed the intake and exhaust fans and got them wired. Then I lined the inside entire inside of the coffin with acoustical panels (it's the blue stuff in the pics). I then started piecing in the styrofoam insulation panels to create the tunnel for the fans to circulate the cold air out of the feezer, up to the shanks, and exhaust the air back to the freezer. Here are few pics.

IMG_2054.jpg


IMG_2055.jpg


IMG_2057.jpg


IMG_2058.jpg
 
Here are some more pics as I continued to build up the insulation layers to create the air channel. I used nails as I went to pin the layers of styrofoam insulation together. I'm not using any adhesive between the layers, because I want to be able to remove the insulation if I need to replace the fans. I am using 5 1/8" shanks to allow plenty of insulation across the front of the coffin. I made sure that I have plenty of clearance to install the components. It doesn't look real pretty, but I think it will do the trick....at least I hope. :cross: I was shocked at the amount of airflow through the coffin channel when I plugged the fans in. :ban:

Oh yeah, I broke the locking mechanism on the right cranking it too hard, so I need to get a replacement at HD tomorrow. Also, I am getting weather stripping to seal the access panel when it closes.

IMG_2059.jpg


IMG_2061.jpg


IMG_2062.jpg


IMG_2063.jpg
 
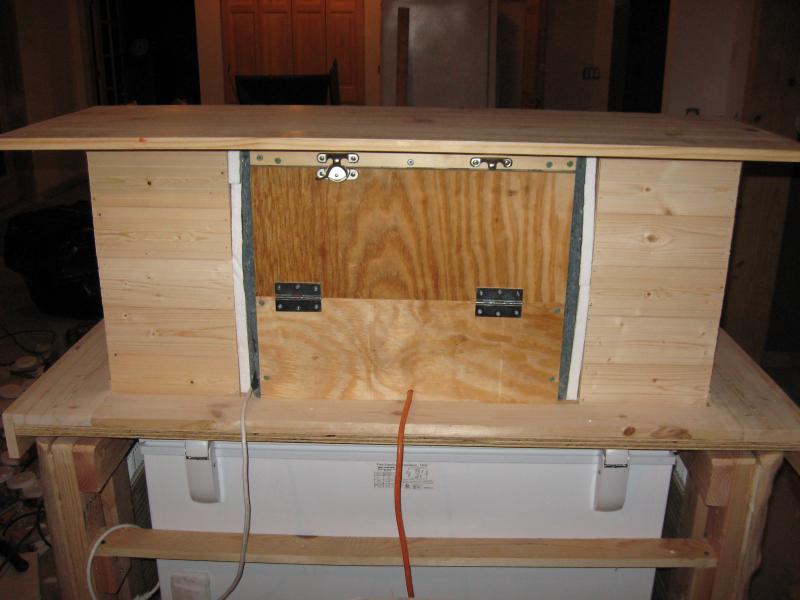
More pics. I also added a layer of the acoustical paneling and insulated the outside of the coffin in the 2 1/2" airspace between the coffin and the shelving units on either side. Once I sealed up the compartment and plugged in the fans, only a subtle hum can be heard....way quieter than I expected. I want to thank Ted (Gridlocked) again for the acoustical material. :mug:

I also drilled the holes for my 3 tap system, but left room on either side just incase I want to add additional taps in the future. I took measurements and the freezer will fit 4 kegs on the floor and the CO2 and a 3 1/2 gallon keg on the hump if I ever want to increase my "pipeline". :rockin: Now I just need to do some finish sanding, install the cement board and tile, and finish the woodwork. Oh yeah, the kegging components and temp. controller might be useful as well. :eek: Just waiting for my wife to give me the green light to place my order. Should be sometime this week.

IMG_2064.jpg


IMG_2065.jpg


IMG_2067.jpg


IMG_2069.jpg
 
MAN, this thing is looking great! I'm glad the stuff helped, but it looks like you may have been fine without it. :) In the pic above with the hinged door - will you be putting any plywood over the areas to the left and right of the door to seal up that area? Not that it matters at all but the blue side usually goes against the structure and the black side is out. The black fabric is used to keep the cotton particles from becoming airborne. Also, it's usually good to have the product on the wind-swept side of the insulation so the sound doesn't reflect off of the structure (or styrofoam) but again, its not a deal breaker.

This is really a VERY cool project and you're doing an awesome job!
 
Back
Top