• Please visit and share your knowledge at our sister communities:
  • If you have not, please join our official Homebrewing Facebook Group!

    Homebrewing Facebook Group

Knotty Pine and Cedar Log Keezer Build

Homebrew Talk

Help Support Homebrew Talk:

This site may earn a commission from merchant affiliate links, including eBay, Amazon, and others.
An update on the build..... I'm supposed to go out of town to visit my parents this weekend. I was going to pick up the cedar logs to trim this out. My daughter (6 y/o) came home from school yesterday with the flu. She was up all night vomitting and is still not feeling great, so we may have to postpone the trip until next weekend. My son (8 y/o) also has a nasty cough, so it's a big germ fest. at my house right now. :( If my daughter starts to miraculously feel better throughout the day, we may leave later tonight or tomorrow morning, but I'm not holding my breath.

I need the vertical corner trim logs installed on the cabinet before I can size the top, so about all I can do in the meantime is start designing and building the coffin for the top.
 
I was able to make it down to my parents to visit and get some cedar logs. Working 14 hours today, but 1/2 day tomorrow. I plan on getting some work done on the keezer starting tomorrow. Just waiting for some of the snow to melt, so I can rip the logs on my table saw outside on my patio. I'll post pics tomorrow of the progress. :mug:
 
I'm going to start milling logs today when I get home from work to trim this thing out. Once they are fitted and installed, I can then size my top and get to work on the top end of the unit.

Are any of you guys really good with the electronics side of things? I'm ordering a Love controller (TS model) for temperature control over my keezer. I haven't a frickin' clue how to overide the existing thermostat controls. If any of you guys could offer some "how to" advice or point me in the right direction on HBT, I would appreciate it.

I also went to HD this a.m. and was looking around the heating/cooling department. I found 4" booster fans for in-line duct installation. They are called the Inductor Booster Fans and are 80 cfm. I was thinking about using a couple of these to cool my coffin on top. I was going to cut two 4" holes through the bottom of the coffin and the freezer top one at either end. These fans are already mounted in 4" ductwork. I was going to have one side be the intake for cold air from the freezer chest into the coffin and one as an exhaust to circulate out of the coffin and back into the freezer.

I guess I'm wondering if this is overkill? Is there anyway to wire them to a speed controller to slow them down? Is there a way to tie them into the Love controller, so that when the freezer compressor kicks in, they come on? Should I wire them to a seperate thermostat inside of the coffin, so that they kick on as needed to keep the coffin temp constant?

Sorry if these are stupid questions, but this is my first go around with thermostatic controls. Any advice would be great. Thanks guys. :mug:
 
As for the wiring of the Love controller this is the thread that I used to wire mine up just this past weekend:
https://www.homebrewtalk.com/f11/love-temp-controller-series-ts-wiring-diagram-2008-a-88369/

I did the TSS2-2100 since I was doing a fermentation chamber and needed heat and cool temps. But there are diagrams for all the models on that thread. There should be a wire diagram on your freezer that should lead you to the wire you need to connect to.

Awesome job so far on the keezer!

LoveWiring2.jpg


Oooor if you want you could do something like this: https://www.homebrewtalk.com/f51/another-tss2-controller-box-build-195713/

I actually went with the controller box method for my setup. It's quick and very portable. Just plug the fridge in and unplug if you want it to be normal again. With a Keezer I would just do 1 plug for cooling. Or you could do an 'Always On' and plug your fans into that. Or if you have a double outlet you could plug the fridge into 1 and the fans into the other, which would give you the fans turning on with the compressor. :) Lots of options.
 
THANK YOU!!! :tank: Just the information that I need. I already have a bunch of outlets and romex left over from wiring the rest of my basement. I might just as well go with the second option and not have to start cutting and splicing into the keezer's power cords. This is exactly what I was looking for and I appreciate you taking the time to provide this for me. I'll keep you posted.:mug:
As for the wiring of the Love controller this is the thread that I used to wire mine up just this past weekend:
https://www.homebrewtalk.com/f11/love-temp-controller-series-ts-wiring-diagram-2008-a-88369/

I did the TSS2-2100 since I was doing a fermentation chamber and needed heat and cool temps. But there are diagrams for all the models on that thread. There should be a wire diagram on your freezer that should lead you to the wire you need to connect to.

Awesome job so far on the keezer!

LoveWiring2.jpg


Oooor if you want you could do something like this: https://www.homebrewtalk.com/f51/another-tss2-controller-box-build-195713/

I actually went with the controller box method for my setup. It's quick and very portable. Just plug the fridge in and unplug if you want it to be normal again. With a Keezer I would just do 1 plug for cooling. Or you could do an 'Always On' and plug your fans into that. Or if you have a double outlet you could plug the fridge into 1 and the fans into the other, which would give you the fans turning on with the compressor. :) Lots of options.
 
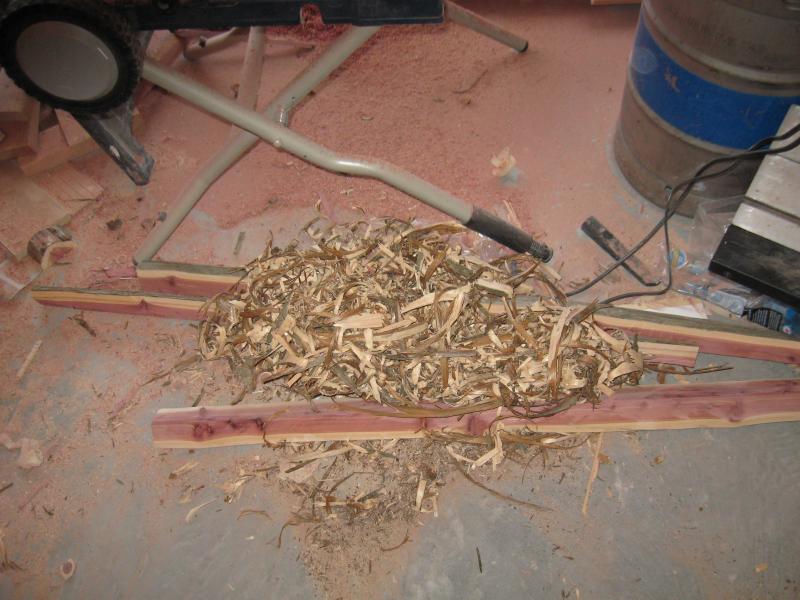
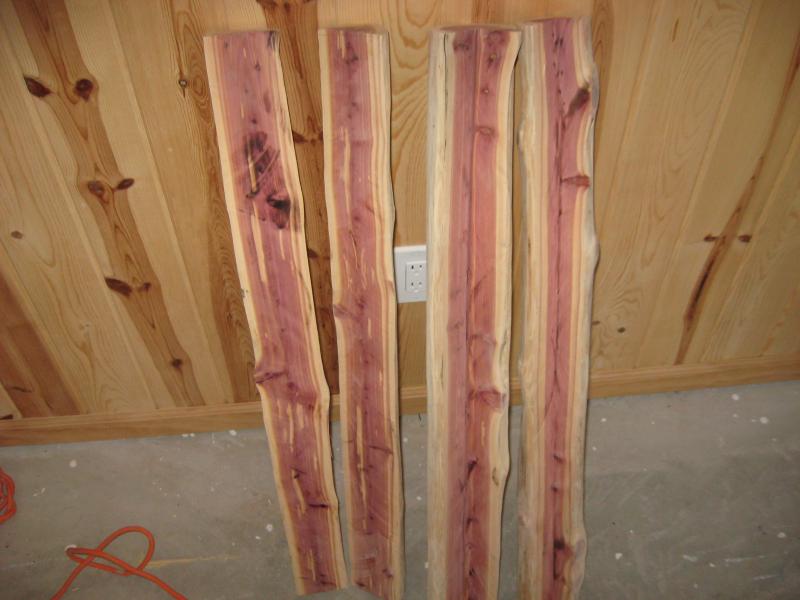
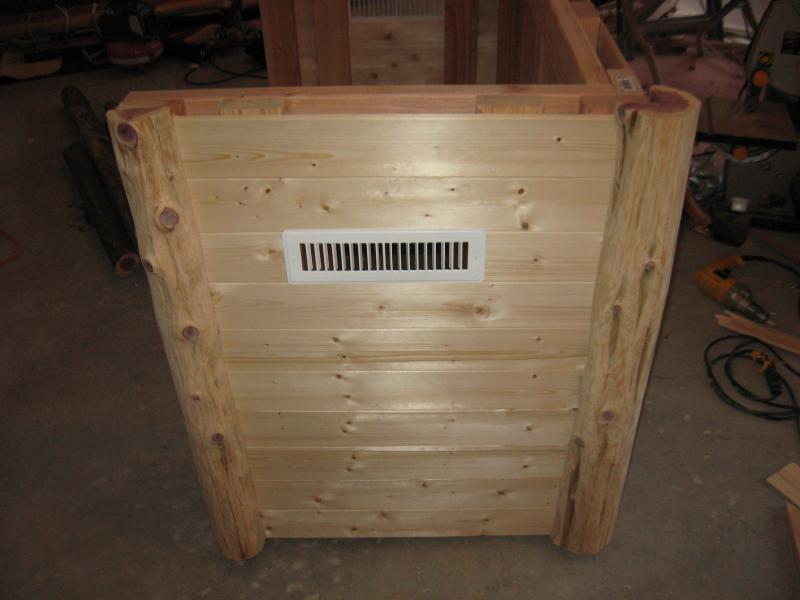
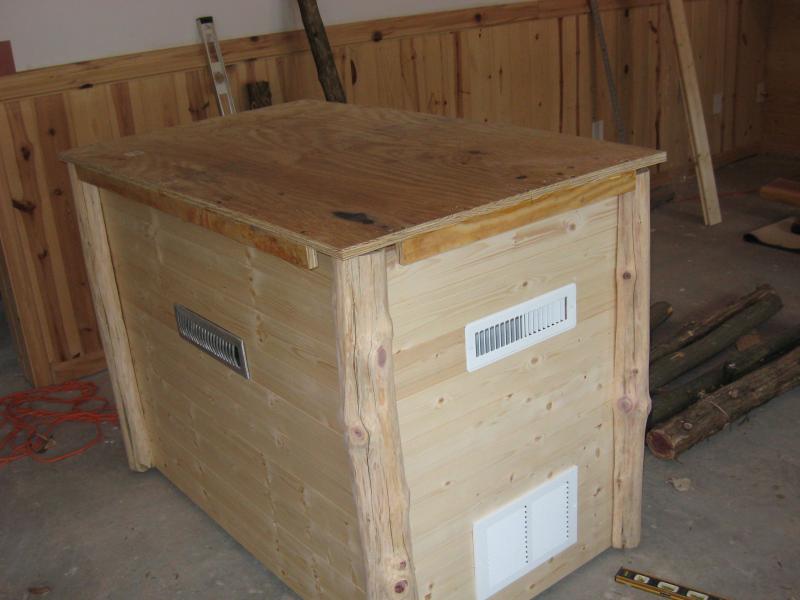
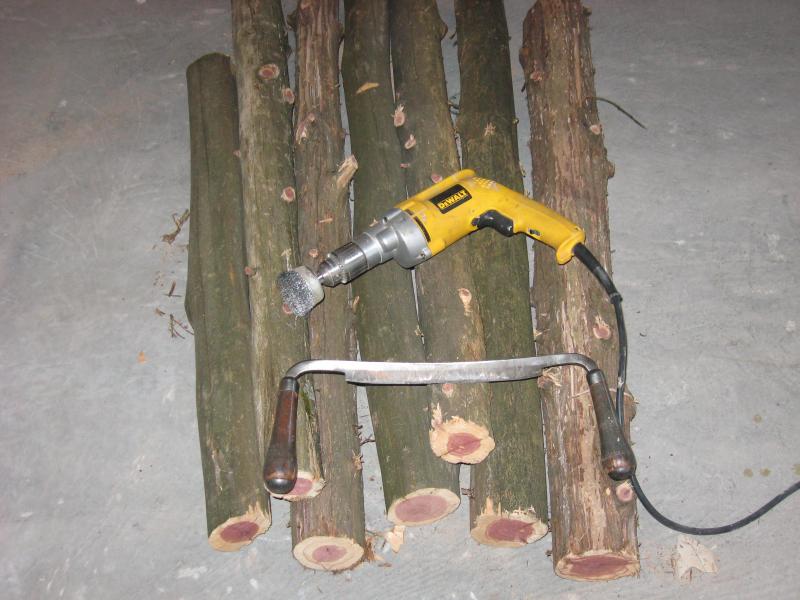
I made a little more progress on the keezer today and one hell of a mess in my basement! :( It was waaaaay too cold to do this outside and my lower patio has about 18" of snow on it, which I was too lazy to shovel off. My basement was clean before I started this project, but now it's a nightmare! I knifed the cedar logs, sanded, and milled them for my verticle trim pieces on the cabinet. What a pain in the a$$! I used an my antique double handled knife to strip the logs like in the rest of the basement, which worked great. Then I used a table saw to rip the two rear verticle logs and to make a 90 degree notch out of the front logs. This is always a chore to get nice straight cuts. I only wasted one log and it took me a while, but I got the job completed. I have a buddy with a Wood Mieser milling maching, but these logs are too small in diameter to waste the time setting it up. Attached are a few pics.

IMG_1988.jpg


IMG_1990.jpg


IMG_1989.jpg


IMG_1991.jpg
 
Cool, subscribed.........
...... and I like the vent. If your wife likes the vent, I really like the vent.
 
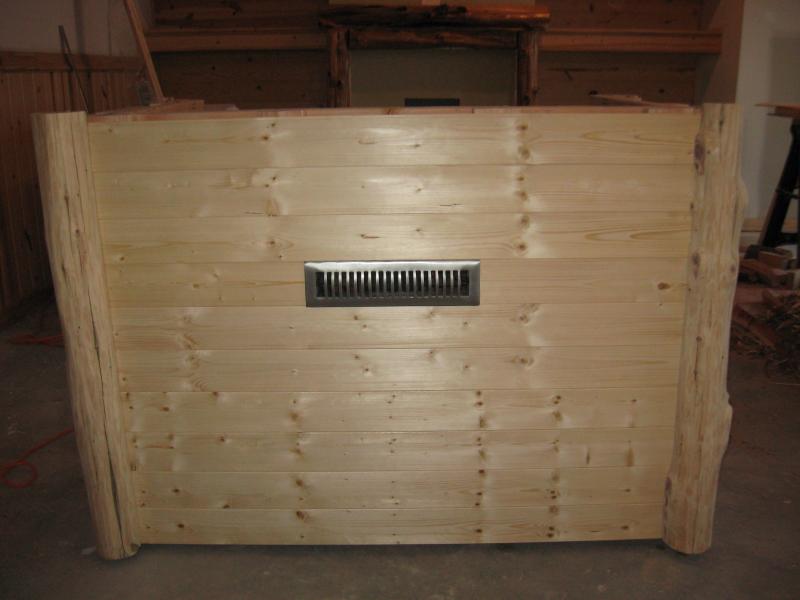
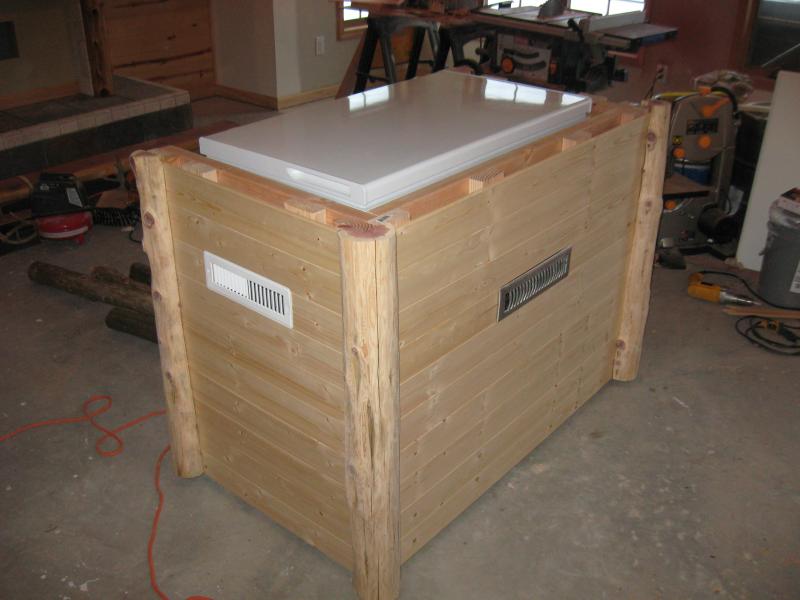
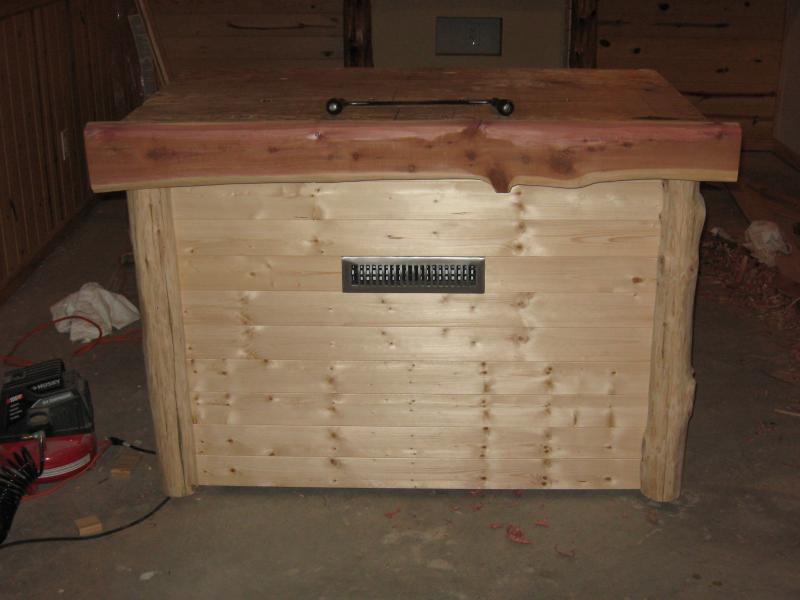
Here are the vertical trim logs fastened to the corners of the cabinet. Once I got them on, I realized that the left front log doesn't have a hell of a lot of character. :( I really wish it had more knots and character, but I am not in the mood to strip and mill another log. Overall I'm happy with it so far. :mug:

IMG_1992.jpg


IMG_1993.jpg


IMG_1994.jpg
 
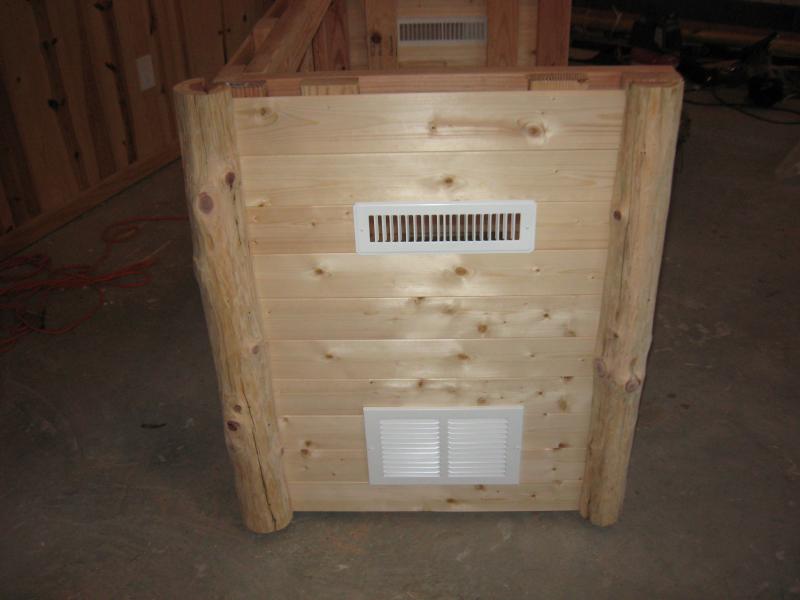
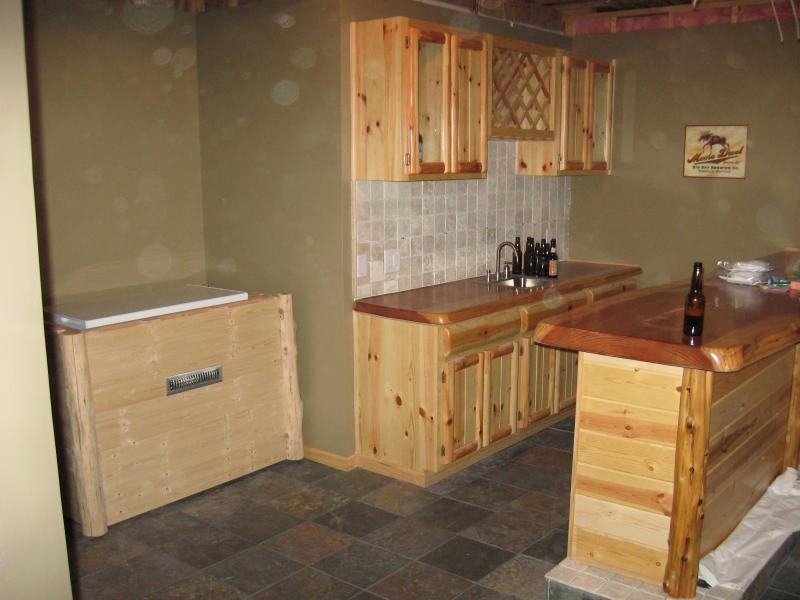
Pics with the freezer slid back into the cabinet. I can't wait to get the semi-gloss poly on the cedar logs and the satin Sikkens on the knotty pine. It will make the logs pop and really stand out like the bar base. This thing is getting much larger than I originally planned. I oversized the cabinet to let the unit breath and with the vertical logs in place, it's already 52" at the widest point. Next, I will size the top and then rip 1/2 logs and miter the corners to create a horizontal log trim across the front and sides of the top. Once it is all put together, the total width will be about 56" to 58" depending on the thickness of the logs after ripping. :confused: I only have a 60" space to slide this into, so I'm cutting it pretty close, but I have faith it will fit in the end! :tank:

IMG_1997.jpg


IMG_1998.jpg


IMG_1999.jpg
 
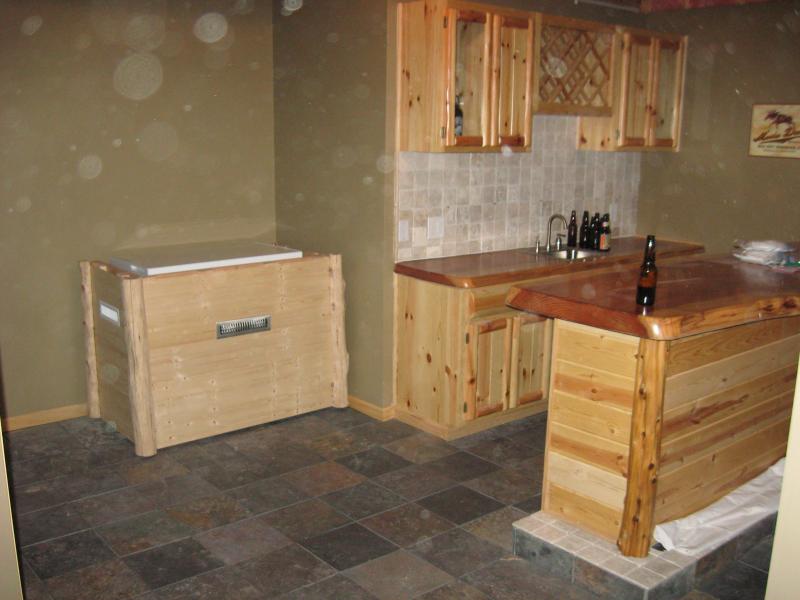
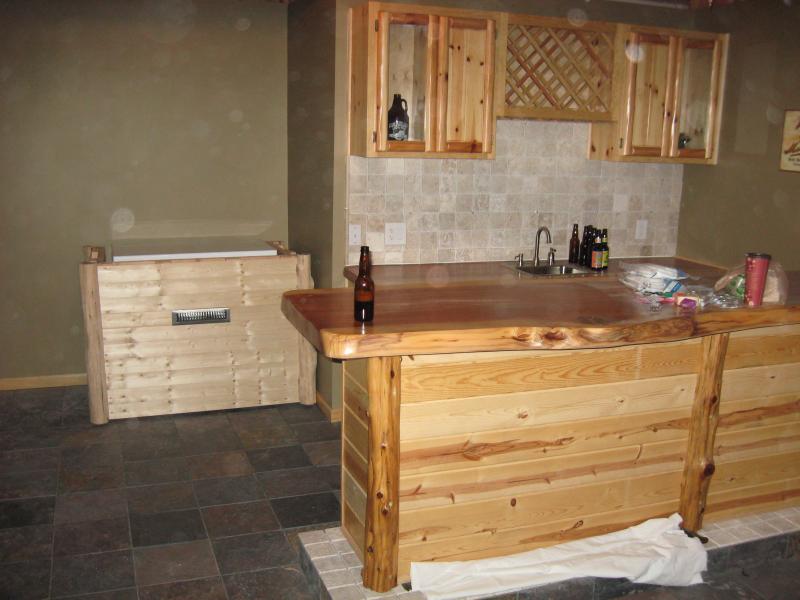
Here is the cabinet rolled into it's final resting place when it is finally completed. I put it into the space to make sure that there is going to be enough room to slide the side by side fridge next to it. There "should" be plenty of room. :D Not sure what the hell happened with the camera, but there appears to be spots in the pics. They look like orbs...:confused:... I hope my basement isn't haunted.

OK....that's all for tonight. I'll work on the top on Thursday and will try to get the other logs milled and attached. I plan on using plywood with the log trims across the edges, then 1/4" cement board, then tumbled travertine to match my bar backsplash, then the coffin. It's going to weigh a ton, but I have been assured by many that the hinges will hold up... at least I hope. Still lots of work to do, but I'm having fun doing it. :mug:

IMG_2001.jpg


IMG_2003.jpg


IMG_2004.jpg


IMG_2006.jpg
 
Thanks stp. Hopefully tomorrow after work I can make a quick trip to HD to get the plywood, cement board, cedar boards, etc. to start the top and coffin. I'm getting excited to see how the top turns out. I really don't have a blueprint to work off, I just build and add to it as I go. I'll try to keep the thread updated. Sorry the last few pics. suck so bad :( Not sure if it was just dust flying around or a dirty camera lense. Thanks for the compliment :mug:

Awesome! Nice progress today and definitely something to be proud of.
 
those circles are from dust or other debris in the air and the flash is reflecting off them.

-= Jason =-
 
Yeah, that part of the basement is darker, so the flash went off. Your right...probably just dust particals. Lord knows that I had enough cedar dust floating around down there to choke a horse. There are a bunch of windows in the other part of the room where the other pics were taken, so the flash must not have went off for those. The basement was fairly clean prior to my log ripping rampage yesterday. Thanks for the feedback. :mug:

those circles are from dust or other debris in the air and the flash is reflecting off them.

-= Jason =-
 
The straight rips are fairly easy to do with a nice new 40 tooth combination blade. With my 10" table saw, I can rip through almost 4" diameter logs. I basically find the flattest part of the log and that side goes down flat onto the table saw platform. I take a 4' long level and lay it down the entire length of the log on the top and use a sharpie to make a pefectly straight line down the center of the log. With the blade ripping all of the way through the log, it's fairly easy to guide the log so the blade bisects the line on top. The key is to not force the log, just let the blade do the work.

Milling the 90 degree wedge out of the corner log trims is another story. I'll be honest, it's a pain in the a$$! Since the blade depth has to be lowered to rip only through 1/2 of the log's thickness, you don't have a line to follow. I just sit down on a bucket and pick a reference point in the distance and a reference point on the log. I just keep the reference points in line and let the blade do it's work as I slowly feed the log through. I then flip the log 90 degrees and line the first cut up with the top my ripping guide on the table saw. I just try to be careful not to let the log twist. It's best to keep the angle cuts straight and the angle should be 90 degrees of even a little more acute. If the angle gets too obtuse (greater than 90 degrees) then your screwed, because the edges won't lay flush on the face of the cabinet. I wasted one log and was pi$$ed that I had to knife and mill another, but the second one went smoother. For other projects with log trim, I have had to use a hand planer to straighten the edges, but it wasn't necessary this go around. After my first screw up...I just basically got lucky. :rockin:

how did you rip those logs so perfectly on a table saw?
 
i have a feeling luck had very little to do with it.

I'm scared of my table saw when i'm ripping a flat 2x4, much less sitting with my face right behing the log!!

I'm impressed - keep up the good work.
 
Thanks shroom! I'll bypass PM'ing you this time and ask the question here. I like the idea of the HD Inductor fans to cool the coffin when completed, especially because they are 120v and I can handle the wiring of them. The 80mm computer fans that you mentioned move the same amount of air, are quieter, and cheaper. I assume that there would be a transformer involved to power these things. Could you give me a little tutuorial on how to wire a transformer into the mix? I'm electronically challenged! :confused:

Dat's a pretty snazzy keez ya go there!!! Love the bar too!

SUBSCRIBED--ARE YOU KIDDING ME?
 
Stopped by HD at 6 a.m. this morning to get the materials for the top......... plywood, foam insulation, knotty pine boards, and fasteners to secure the top. This will get me underway, but I'll still need cement board and tumbled travertine....this thing is going to weight a ton! :eek: Hopefully I'll have a few hours today to work on the top before getting the kids off of the bus.

On the HD website, they have the 4" Inductor booster fans for $14. They are $27.98 in the store. The associate said that there must me a mistake on the website, but he gave two of them to me for $14 each! It's worth a shot at this price to see if they do the job cooling the coffin when complete. Now I need to get my hands on a 4" hole saw, without having to buy one. The 4" bimetal hole saws are $30 each + $12 for the mandrel. :mad: I'm gonna ask around to see if anyone has one. I only need the damn thing for 2 holes! Hopefully, I'll post pics later today with the progress. Wish me luck.
 
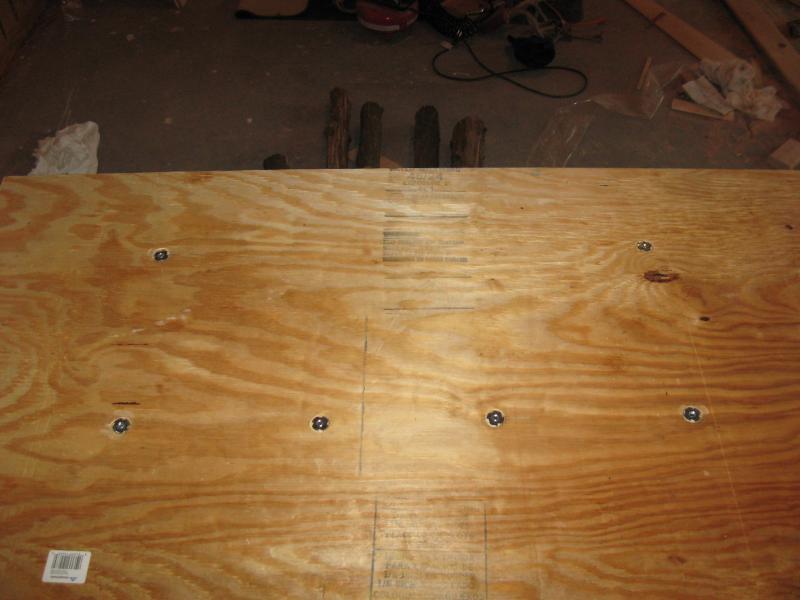
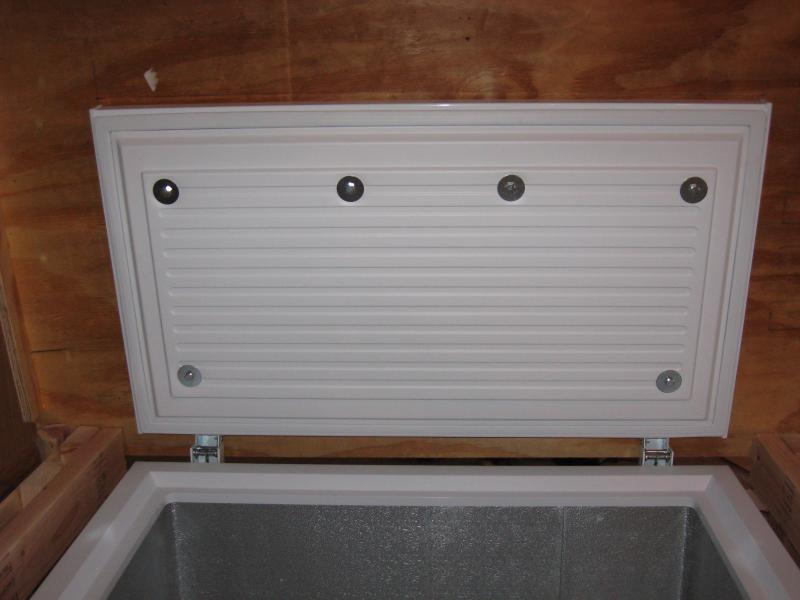
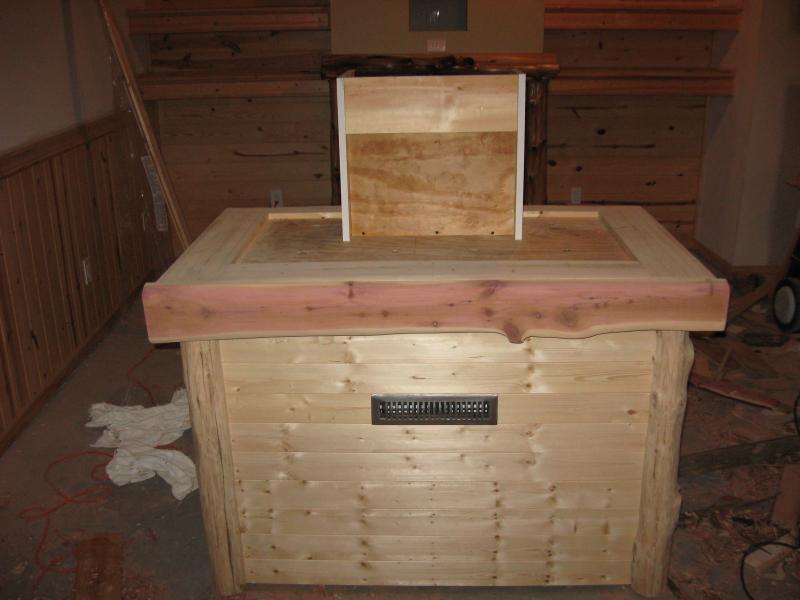
I had a couple of hours today to get the plywood top cut, log backers on, and fasteners. I used 3 1/2" long 5/16" bolts, oversized washers and t-nuts to fasten the plywood to the top. A spade bit was used to countersink the t-nuts into the plywood, so that trim boards and cement board can be applied to the top and sit nice and flush to the surface. I have to rip down a few more logs for the horizontal cedar log trims across the front and sides. I only have one more log left that is long enough to span the width, so one screw up and I'm toast :(. I'll try to get some more done and post updates tonight, but gotta get the kids off of the bus.

This thing is turning into a frickin' beast!

IMG_2009.jpg


IMG_2010.jpg


IMG_2011.jpg


IMG_2012.jpg
 
Well, the inevitable happened...:mad:... the only log that I had that was long enought to span the width of the top for the horizontal trim piece didn't work out so well. I ripped it down the center straight as an arrow and discovered that 1/2 of the interior of the log was punky and dried out. As I started to knife the bark off of the log, portions of the log started to disintegrate, so I scrapped it. :( I have no plans of going back down to my parents in the near future to get another log, so it's on to plan B. I have a long (8') 2" thick red cedar slab left over from when my buddy slabbed the log for my liquor shelf. I was going to make a big Cedar Hollow Brewing sign out of it and hang it by chains for my bar, but not anymore. I guess I am going to try my hand at ripping it down to a smaller width and then knifing it down into a log shape. What a royal PITA!
 
Thanks Yukon and Butcher. I only got a little done on the keezer this weekend. I wanted to get coffin built and cooling fans installed, but my wife was a little irritated by the amount of time I have been spending on it. I spent several hours brewing a Two Hearted IPA clone yesterday, so I wasn't going to press my luck. :D

Very impressive, you have given me a few ideas!
 
A little progress was made on the keezer Friday night, but not as much as planned. I got the leftover cedar slab ripped to width, cut to size, and fastened across the front. I started knifing the piece into a log shape, but ran out of steam. I planned on working on it more over the weekend, but my wife had other ideas. I will finish trimming out the sides and then will get the coffin framed.

I wired the two 4" Inductor fans that I purchased from HD to an old extension cord to test them. I will be using them to cool the coffin once insulated. One will draw cold air into the coffin and the other will exhaust air back to the freezer. I have always heard that these in-lin duct booster fans were noisy, but these things are whisper quiet and at 80 cfm move quite a bit of air. I'm pleased with the purchase, especially since I got them for $14 each. :ban:

Here is a pic. of the cedar slab that I started to knife into a log shape. Still got a lot of work to do on it, but it's coming together. :mug:

IMG_2013.jpg
 
Trimmed out the rest of the top, finished knifing/shaping the front cedar trim log, and built the coffin box. Building shelves on either side of the coffin to dress it out tonight and tomorrow. A patient of mine had a complete set of industrial hole saws, so I'm also drilling the 4" holes through the bottom of the coffin and top of the freezer for the Inductor fans. I'll also drill the hole for the beer lines and the 3 holes in the front of the coffin for the tap shanks. I'll post more pics. later.

IMG_2018.jpg


IMG_2019.jpg


IMG_2023.jpg


IMG_2025.jpg
 

Latest posts

Back
Top