hvrtaxi
Member
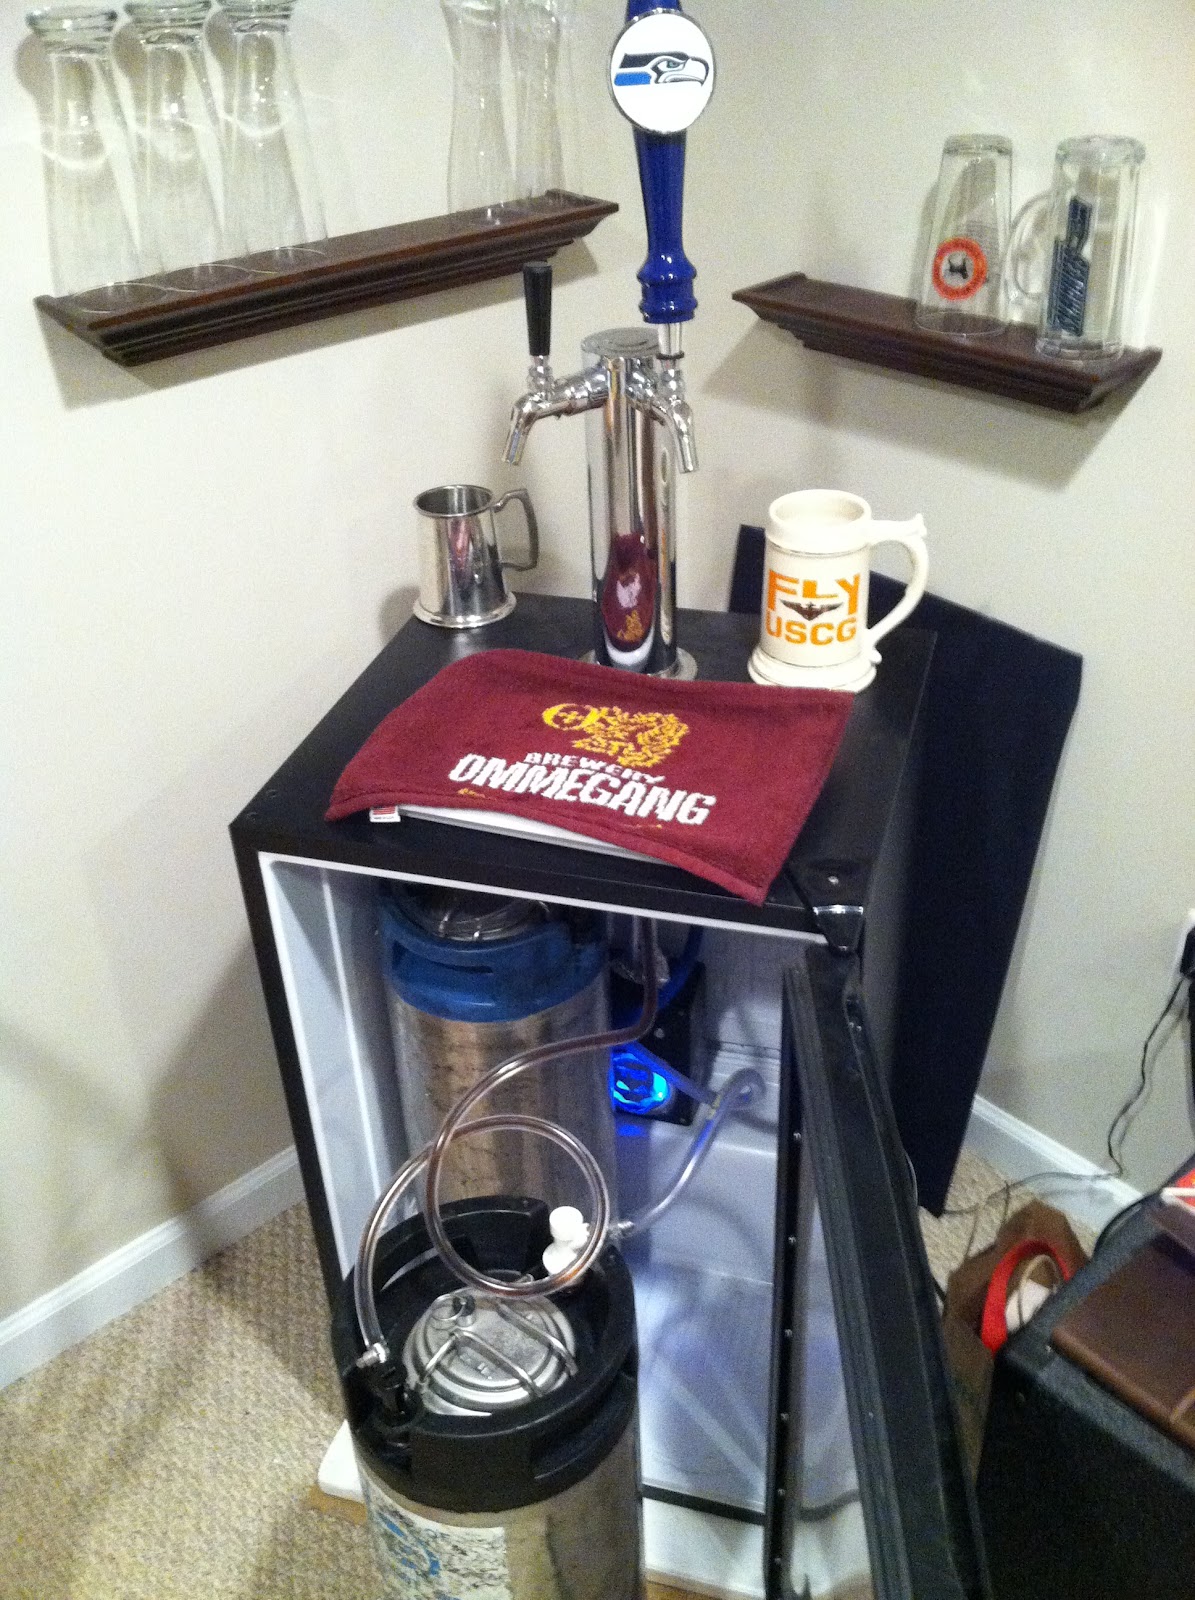
I have reached the beer dispensing stage with my DANBY 440BL conversion and wanted to provide a supplement to the various threads and websites out there. I'm not a welder, electrician, or really even that smart so take this for what it's worth!
1. I chose the Danby because it was cheap ($180ish at Wally's) and acceptable to my wife. I had limited space and had to match some existing furniture. I would have preferred a keezer but I only have 49% of the vote when it comes to appliances! Also, if highly recommend you read the refrigerator manual section on how long to let the thing sit prior to plugging it in. Returning a unit that fails to work because of compressor oil or refrigerant issue because it hasn't sat long enough after handling = sucks. Not that I know, but I have a friend that...
2. I heavily relied on the kegkits website: Danby Homebrew Kegerator . Great info there.
Lessons:
-I tried to use a wood hole saw to cut the tower beer line hole. It was more trouble than it was worth. I would take the time to buy a metal holesaw. Right tool and all that, I know. I admire the patience of those that drilled and used shears.
-Ensure you are careful measuring the baseplate line up prior to drilling. In my fridge there was very little room for error between the cooling plate, the light fixture, and where the mounting bolts need to go. I also dorked up my alignment (45 degress off) but the tower baseplate covered my mistake.
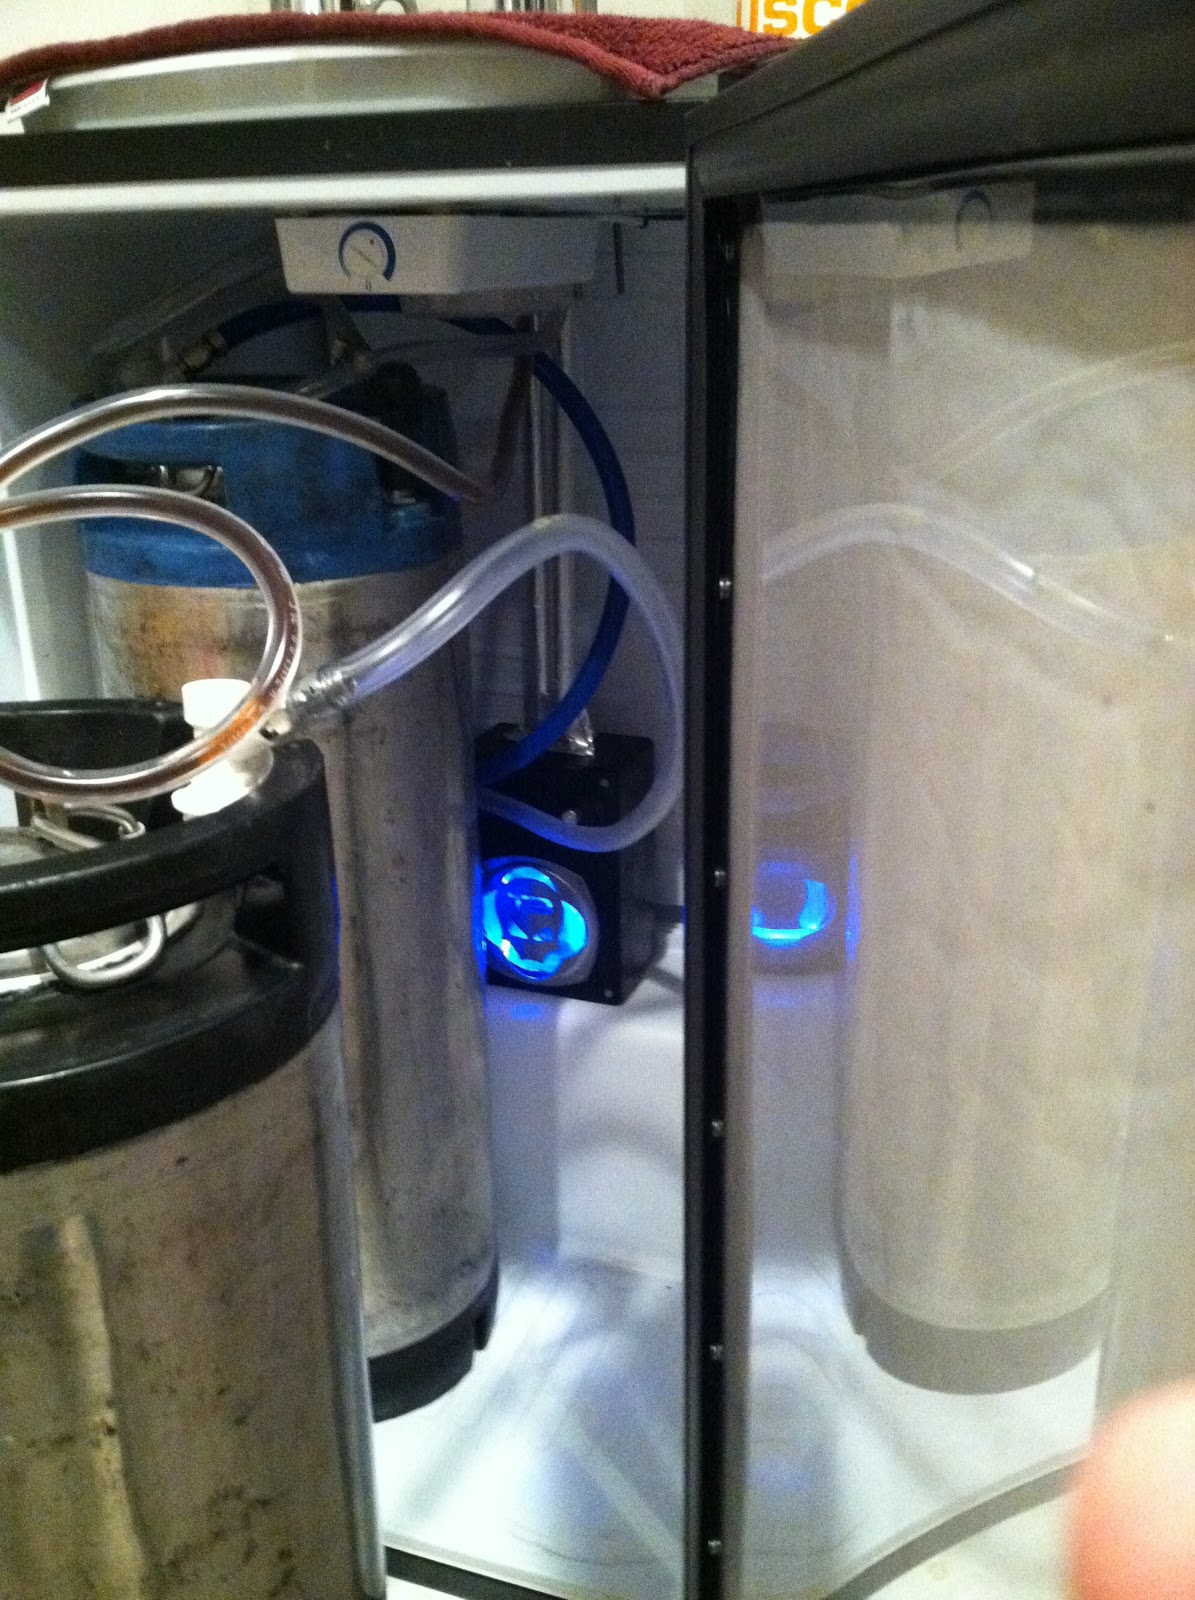
3. I decided to keep my CO2 outside. There's lot of discussion on using grommets or silicone in the bulkhead hole. For unexplained reasons I opted to go rogue. I ran dual CO2 lines through the 'hump' in the back of the 'fridge. Here's what I ended up with.
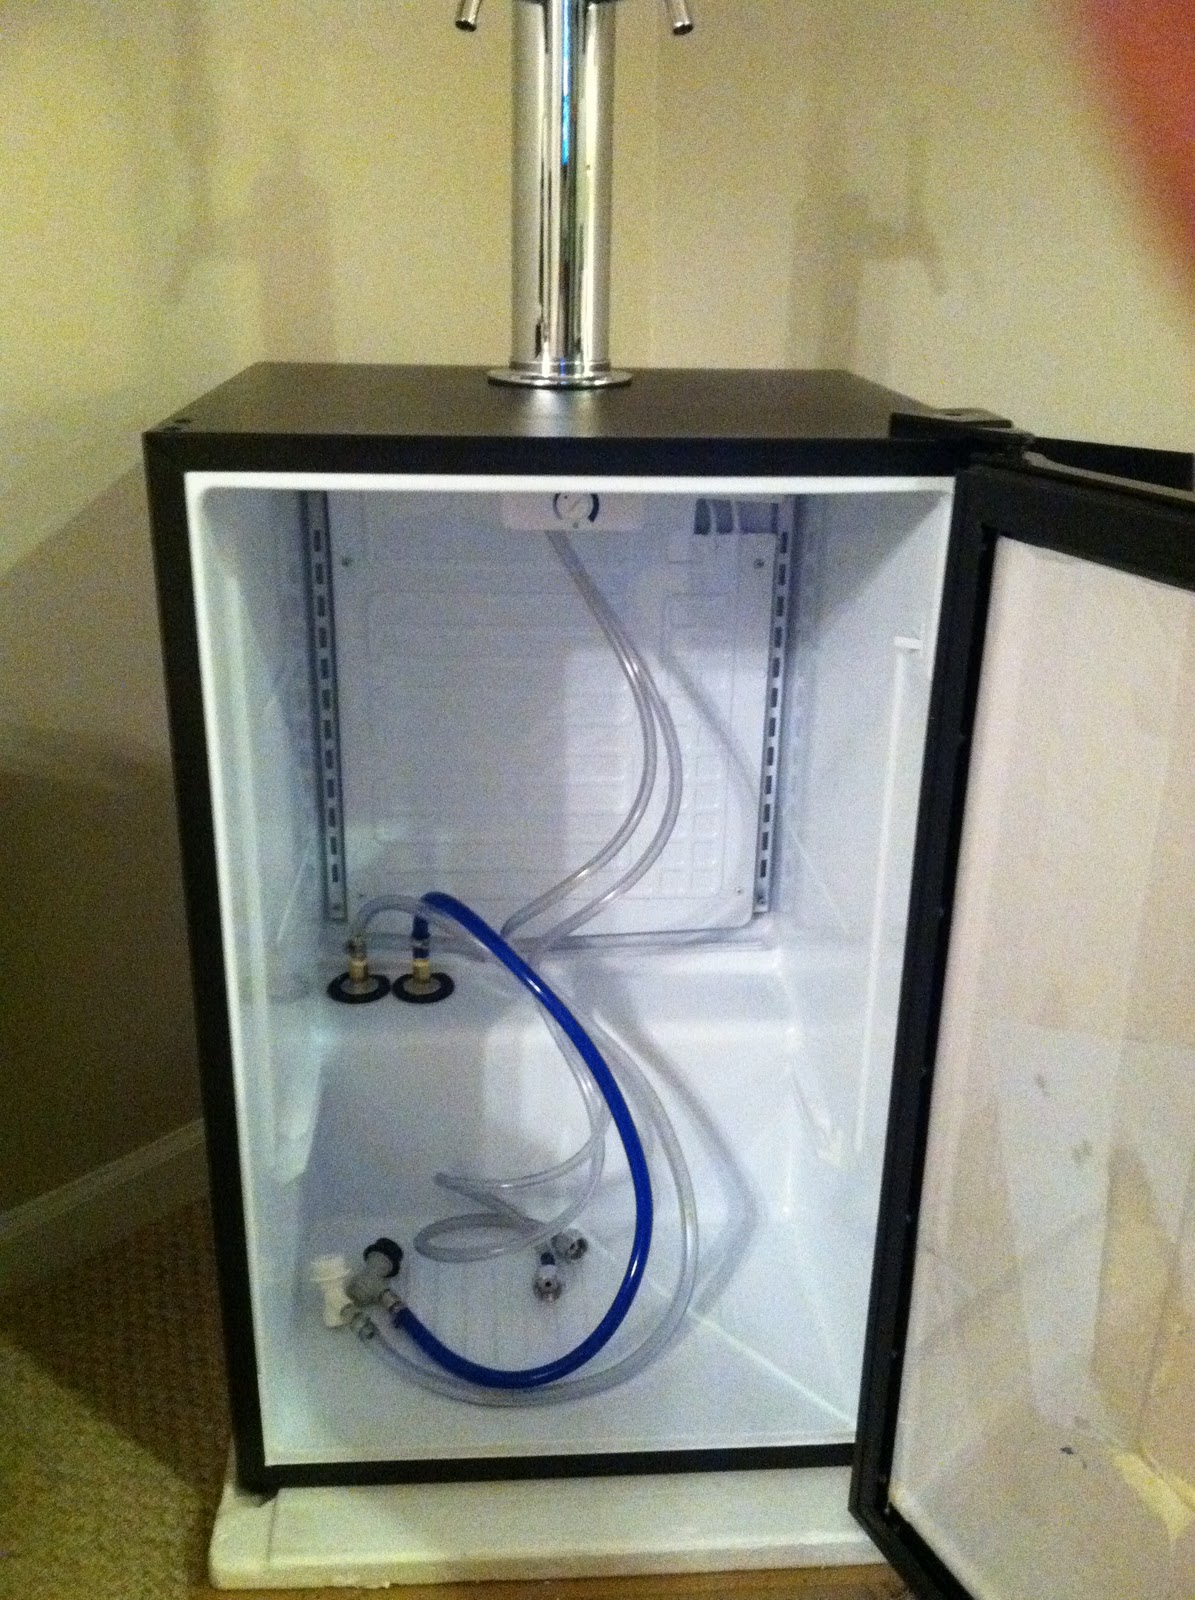
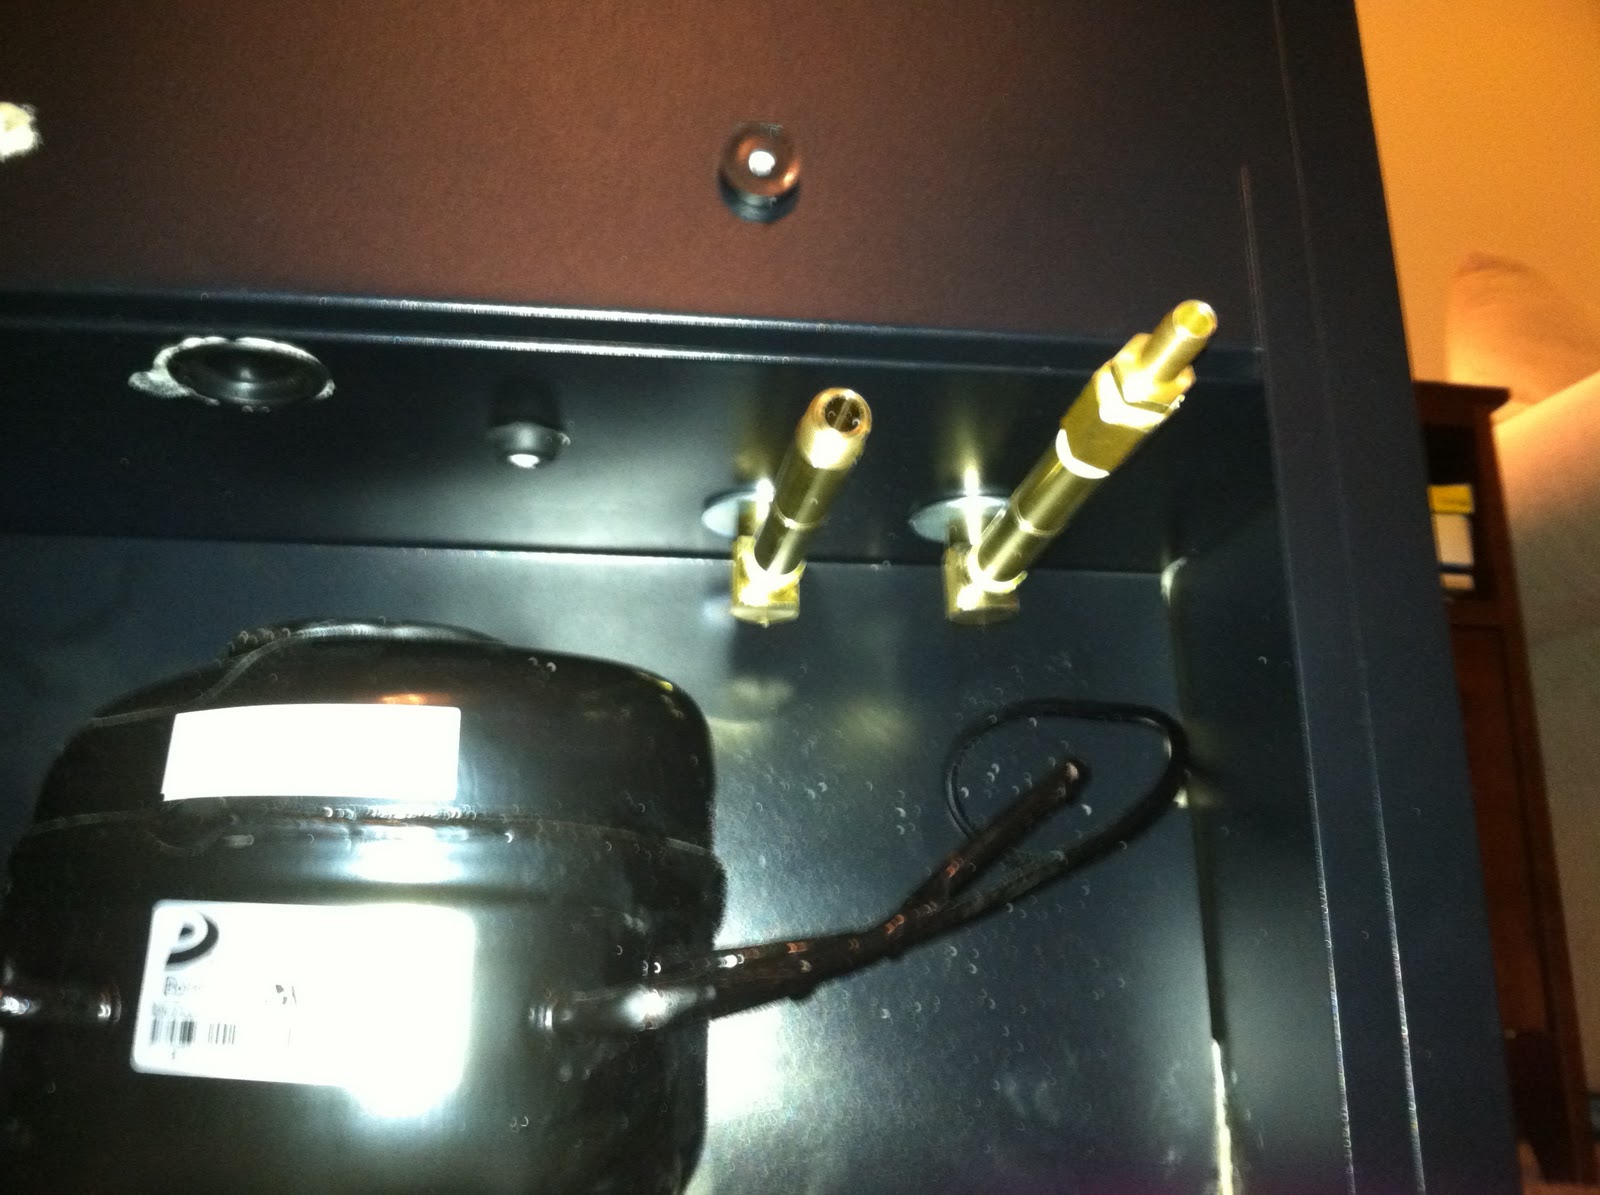
Parts: Each CO2 bulkhead fitting starting at the 'hump', procured at a big box home improvement store:
- 5/16" barb-1/4"MIP
- 1/4"FIP coupler
- 1/2" steel washer
- 1/2" rubber washer (specialty drawer in hardware)
- 3" 1/4" pipe nipple
- 1/2" steel washer
- 1/4" Female-Female elbow
- 4" 1/4" pipe nipple
- 1/4" FIP coupler
- 5/16" barb-1/4"MIP
*Lessons
-After measuring the thickness of the 'hump' bulkhead I still didn't get the bulhead nipple pipe length right (I originally bought a 2-1/2" pipe). The 3" nipple was perfect.
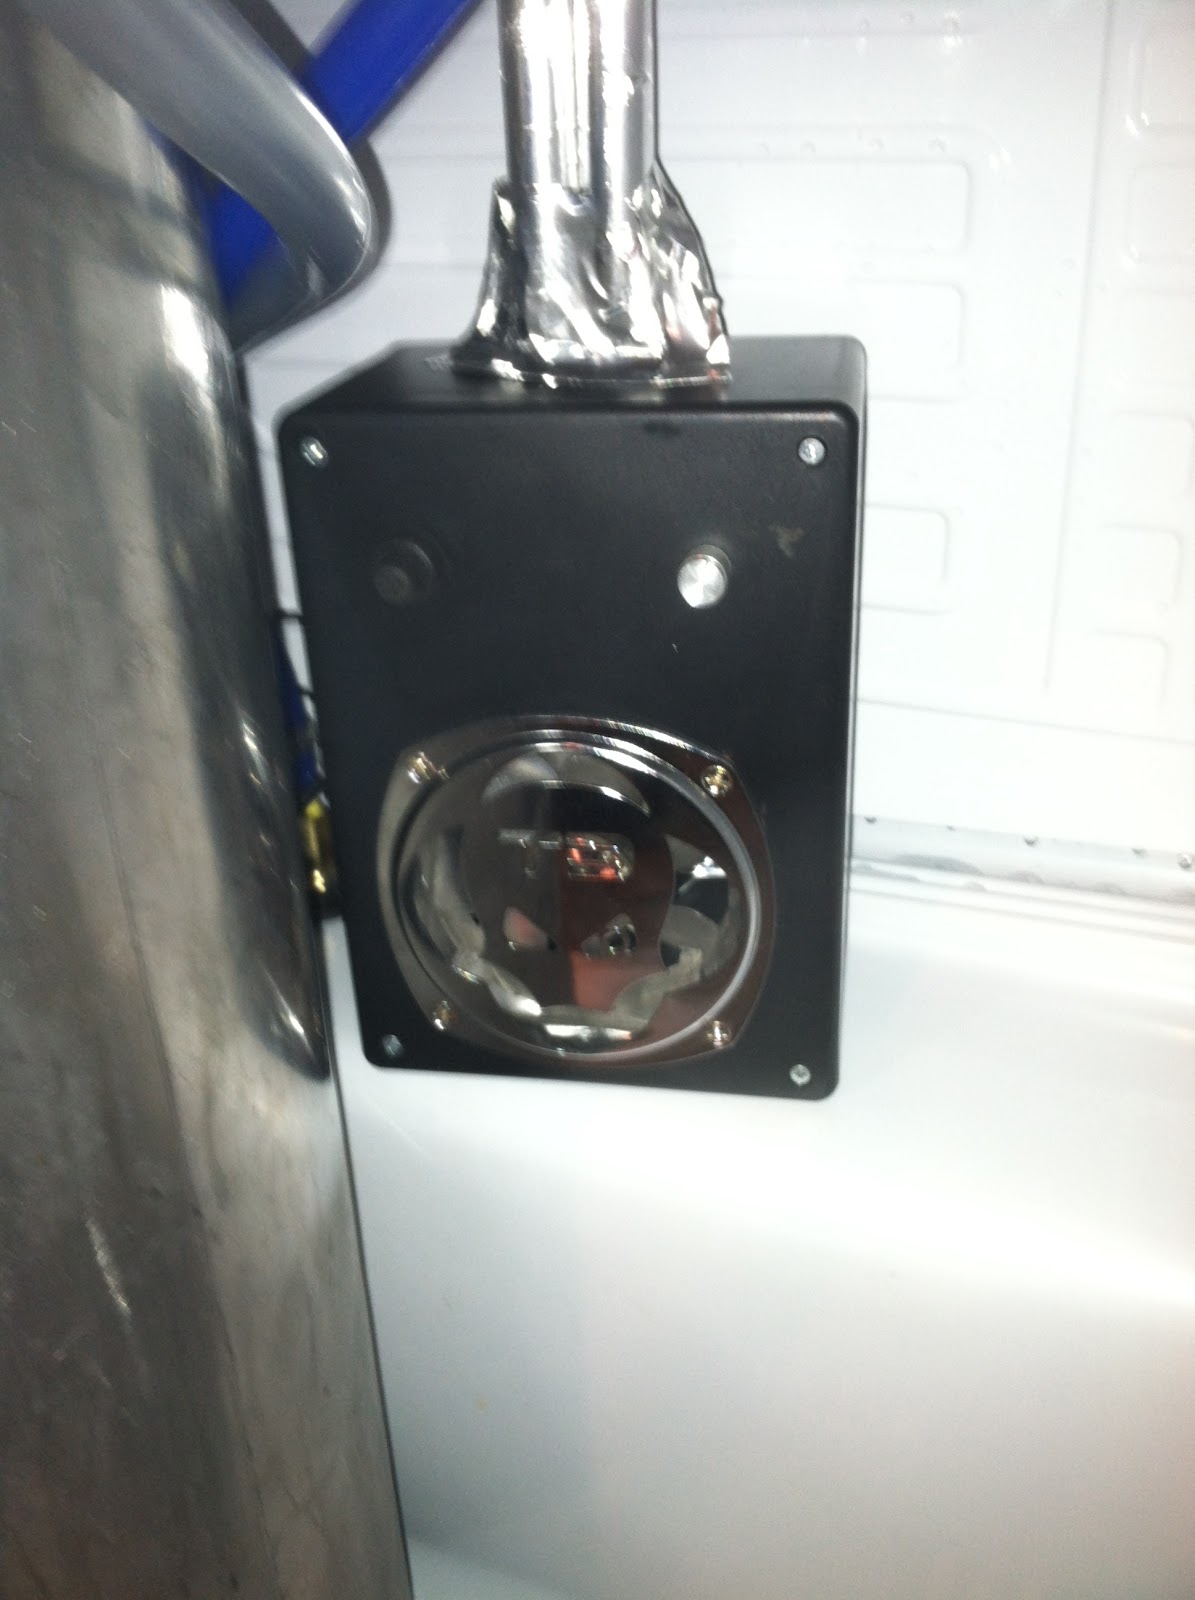
-I chose to put both fittings near each other so the CO2 would be close to both exits. Give yourself enough room to attach the fittings (I had to trim my rubber washers a bit) but also note the location of the drain pan over the compressor. I had to angle one fitting slightly to avoid the pan.
I plan to install a tower cooler but for now I'm enjoying my first kegerator. I especially enjoy pulling beer from my sweet tap handle. I look forward to many kegerator induced Beast Mode rampages in my basement!
Cheers!
1. I chose the Danby because it was cheap ($180ish at Wally's) and acceptable to my wife. I had limited space and had to match some existing furniture. I would have preferred a keezer but I only have 49% of the vote when it comes to appliances! Also, if highly recommend you read the refrigerator manual section on how long to let the thing sit prior to plugging it in. Returning a unit that fails to work because of compressor oil or refrigerant issue because it hasn't sat long enough after handling = sucks. Not that I know, but I have a friend that...
2. I heavily relied on the kegkits website: Danby Homebrew Kegerator . Great info there.
Lessons:
-I tried to use a wood hole saw to cut the tower beer line hole. It was more trouble than it was worth. I would take the time to buy a metal holesaw. Right tool and all that, I know. I admire the patience of those that drilled and used shears.
-Ensure you are careful measuring the baseplate line up prior to drilling. In my fridge there was very little room for error between the cooling plate, the light fixture, and where the mounting bolts need to go. I also dorked up my alignment (45 degress off) but the tower baseplate covered my mistake.
3. I decided to keep my CO2 outside. There's lot of discussion on using grommets or silicone in the bulkhead hole. For unexplained reasons I opted to go rogue. I ran dual CO2 lines through the 'hump' in the back of the 'fridge. Here's what I ended up with.
Parts: Each CO2 bulkhead fitting starting at the 'hump', procured at a big box home improvement store:
- 5/16" barb-1/4"MIP
- 1/4"FIP coupler
- 1/2" steel washer
- 1/2" rubber washer (specialty drawer in hardware)
- 3" 1/4" pipe nipple
- 1/2" steel washer
- 1/4" Female-Female elbow
- 4" 1/4" pipe nipple
- 1/4" FIP coupler
- 5/16" barb-1/4"MIP
*Lessons
-After measuring the thickness of the 'hump' bulkhead I still didn't get the bulhead nipple pipe length right (I originally bought a 2-1/2" pipe). The 3" nipple was perfect.
-I chose to put both fittings near each other so the CO2 would be close to both exits. Give yourself enough room to attach the fittings (I had to trim my rubber washers a bit) but also note the location of the drain pan over the compressor. I had to angle one fitting slightly to avoid the pan.
I plan to install a tower cooler but for now I'm enjoying my first kegerator. I especially enjoy pulling beer from my sweet tap handle. I look forward to many kegerator induced Beast Mode rampages in my basement!
Cheers!
")