• Please visit and share your knowledge at our sister communities:
  • If you have not, please join our official Homebrewing Facebook Group!

    Homebrewing Facebook Group

Keg-O-Vision

Homebrew Talk

Help Support Homebrew Talk:

This site may earn a commission from merchant affiliate links, including eBay, Amazon, and others.
+1 on the mirror pros.

I've cut both glass and mirrors in my checkered past, and it really only takes a slight error - a change in the cutter pressure, a wiggle in the score, etc. - to trash what is sure to be a fairly expensive piece of mirror. Plus you can ginsu yourself right into the ER very easily with a pane that size. When those things let loose, they don't always just crumble top the floor. Sometimes they literally explode and blow glass shards all over the place.

I've cut that stuff before...and I'd take it to a glass shop. I wouldn't do it myself, personally.

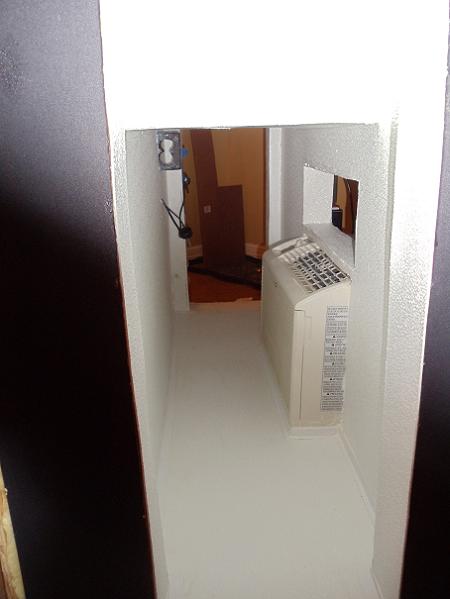
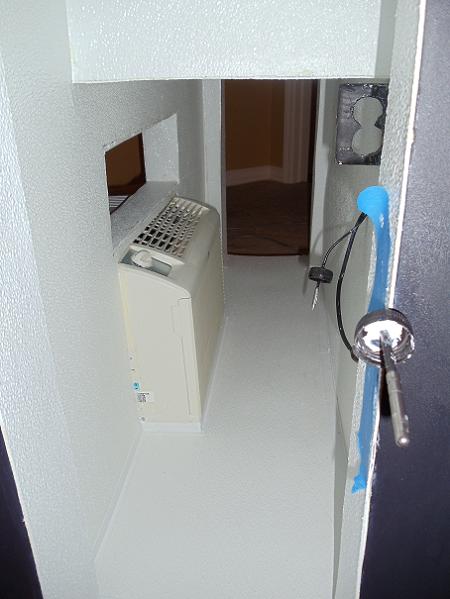
Yeah, I'm learning how truly difficult it is to do this...Especially when you add a couple of holes and right angles. I had enough trouble making the cut below tonight...and it's still not perfect. I did have a lot of mirror to practice on, but...I pretty much used it all for that one imperfect square. I may make one other square for the other side (and if I have enough, one more for this side) but I'll probably either go with plexi-mirror or pro cut mirror on the back wall. I really like the way it will look though.

4545-4096.jpg

SideMirror
 
I'm not sure if you mentioned this already because I didn't read the whole thread, so sorry if you have already discussed it.

The ac unit I use in my fermentation chamber (which actually looks identical to yours) has a thermostat probe in the front where the air is drawn in that turns the unit off when the temp in the chamber gets down to like 50 something degrees. That may not be cool enough for your application. You may have to move the probe to the outside to get your temps lower than that.
 
Looks like your making some real progress. Awesome project by the way can't wait to see it finished! Subscribed!
 
I'm not sure if you mentioned this already because I didn't read the whole thread, so sorry if you have already discussed it.

The ac unit I use in my fermentation chamber (which actually looks identical to yours) has a thermostat probe in the front where the air is drawn in that turns the unit off when the temp in the chamber gets down to like 50 something degrees. That may not be cool enough for your application. You may have to move the probe to the outside to get your temps lower than that.

I actually rewired the AC entirely. I directly connected the compressor to the power in (bypassed the thermostat). I plugged it into a love controller that I mounted on the back. You can see the controller in the lower right of this post. It's a black project box with the white outlet cover on top.
 
Well then, I guess you have it all taken care of! Sweet build!
 
Yup...Until I find something else I failed to take into account. I appreciate the bit of knowledge though. There are lots of pit falls and I probably wouldn't have tried this build without this forum. At this point the only thing I'd change is get an ebay temp controller instead of a Love to save some $$ but the $40 is pretty small change compared to the keg setup and stereo in this thing.
 
At this point the only thing I'd change is get an ebay temp controller instead of a Love to save some $$ but the $40 is pretty small change compared to the keg setup and stereo in this thing.

No crap. I bought a Love for my fermentation chamber. I needed it asap, of course, so I got it from Grainger and paid like a million dollars for it. Then about a week or so later I found out about the ebay temp. controller. Oh well!
 
pics of this wife who is master of tools and electronics.

no way my SWMBO would be doing any of that. she's good Gofer though... hey babe hand me that phillips screw driver.. what one...the one thats not flat oh ok...

-=Jason=-
 
Got quite a bit done tonight and over the past couple of weeks.

First we finished up the inside. With the FRP over everything, and PVC piping running down the tap tower holes, everything is sealed up tightly. I didn't show it but the doors are done as well.

4789-4303.jpg

InsideRight

4788-4302.jpg

InsideLeft

Next we got most of the mirroring cut and dry fit. We will get the big piece professionally done because our equipment can't handle something that large, but I'd say it came out pretty good for a DIY. It's a little hard to see some of the mirrored pieces because of the reflections, but the front view gives it a good shot I think.

4785-4299.jpg

FrontMirror

4787-4301.jpg

RightMirror

4786-4300.jpg

LeftMirror
 
I think we passed a large milestone on this one this weekend.

Got all the mirrors cut and hung. No professionals involved at all. About $100 in mirrors total (including all the crap we broke learning) and another $20-$30 in tools, not including a wet tile saw. I think it looks pretty good. All the spots and stuff are actually reflections from the base, which will clean up nicely.

The stereo is also installed. I just have to dress the cables in.

4882-4395.jpg

FrontMirrored

Here's a shot of the side mirrors, better showing the spots were on the shelf, not the mirror. And a shot of my helper.

4883-4396.jpg

SideMirrored

The to-do list is now short enough to even post:
(1) Install the front paneling.
(2) Install the tap towers.
(3) Dress in / finalize installation of the wiring.
(4) Install countertop.
(5) Paint touch up.
(6) Install speaker cover.
(7) Pull the first pint.
(8) Enjoy.
 
Sorry it's been so long since I've last posted. We were coming down the home stretch and I was so excited I barely remembered to take any pictures.

Without further ado (I've always wanted to say that), here is the finished product.

5157-4644.jpg

FinishedWOutLights


5156-4643.jpg

FinishedWLights

And just for fun, here is a build shot I thought was cool. This was when the marble was set in place with an epoxy mortar.

5158-4645.jpg

MarbleInPlace

If anyone has any good ways to take pictures of mirrored surfaces, please let me know. I'm traveling for the next 2 days but if I remember, I'll try to take some without the flash in daylight on Saturday.
 
Wow, that is amazing!

The night pic is even better!!

Awesome job. I'm sure it was a lot of work, but man, that's unbelievable. And totally moveable! Color me jealous. :mug:
 
It doesn't look like you have the stereo on in the pictures. :D Those speaker grills have functional speakers behind them, correct?
 
Now I wish I had saved that old wood-cased TV. It would have been perfect for something like this, and I could have easily mounted the tap-tower on top (try saying that five times fast).
 
Thanks all. It was a ton of work but with 8 gallons of red ale and 5 gallons of a blue moon clone ready to be put through it, I'm sure it will be worth it. The bad part is that I'm traveling so much, I haven't even pulled the first pint yet.
 
magnacasa said:
Now I wish I had saved that old wood-cased TV. It would have been perfect for something like this, and I could have easily mounted the tap-tower on top (try saying that five times fast).

I thought the same thing about my grandparents old tv. I like the final result on this one but I continually worried it was going to be too modern for my tastes. As my wife says "[I'm] an old man."
 
Finished product is awesome, I love it! Hmmm, I've got an empty stand up arcade game cabinet that I have been looking for a use for, this might be perfect.

SpamDog
 
That could be awesome. You may even get 2 kegs (or more) into it, if you can do a 2 tiered thing with a 5 gal corny in front and a 3 gal, with the CO2 on back.
 
Well done. One of the most creative projects I've seen to date.

Thanks.

We pulled the first few pints off of it last night. I need to dial in my pressure, and I probably will force carb my next few batches to see how much things change. Right now I have 2 taps that flow somewhat slowly and one that pours almost all foam because of the carbonation in the keg. I figure if I drink enough, eventually it will balance out.

Edit: Oh and the ac runs for 5-10 minutes for every 60 minutes it's off. The only problem is it's kinda loud. Need to figure out how to dampen the sound, but luckily we know some acoustics engineers.
 

Latest posts

Back
Top