It......LIVES!!! Stovezilla is born

Homebrew Talk - Beer, Wine, Mead, & Cider Brewing Discussion Forum

Help Support Homebrew Talk - Beer, Wine, Mead, & Cider Brewing Discussion Forum:

This site may earn a commission from merchant affiliate links, including eBay, Amazon, and others.

DeafSmith

Supporting Member
HBT Supporter
Joined
Jan 28, 2009
Messages
1,444
Reaction score
40
Location
Richardson, TX
I'm making the move to all-grain and trying to get my equipment together. I want to go electric, but I really wasn't happy with the idea of drilling a hole in my kettle and mounting an element, even though a number of people here seem to be perfectly happy with that method. I saw a post by Wayne at Bargain Fittings in which he showed how he had taken three coil elements from an electric stove and mounted them close together so he can get plenty of heat in a small area.
https://www.homebrewtalk.com/f51/alternative-electric-solution-144016/index4.html#post1665600

I liked the idea and decided to build my own version of it. I had mentioned this in an earlier post and got a few laughs - someone even called it "Stovezilla" (thanks to "diatonic" for the name). I'll admit that it is not the most efficient method in terms of either time or money, but based on initial testing, I think I'm going to be very happy with it.

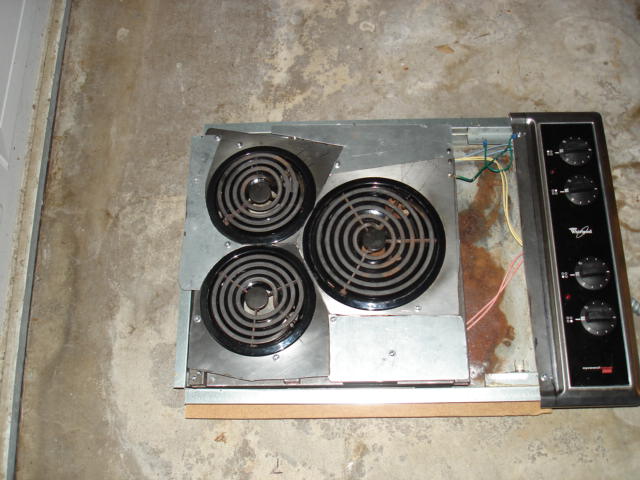
I got an old drop-in range top cheap from CL. Whirlpool unit with stainless steel top - 2 2600 watt coils and 2 1500 watt coils.

Stovezilla-002w.jpg

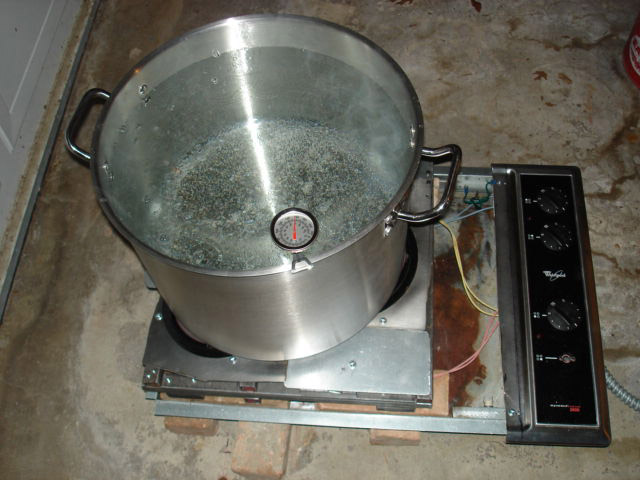
I could have built mine like Wayne, but I don't have a welder. I wanted to use the original reflector pans, hoping that would help to concentrate the heat - these pans are mounted in large holes in the top. I could have taken a large piece of steel plate and cut the holes in that, but I don't have a torch or plasma cutter. What I decided to do was to build a frame from one inch and 3/4 inch square steel tubing (screwed together, not welded), use my angle grinder to cut up the stainless top, and screw three of these pieces, containing one large hole and two small holes to the frame. Also, I wanted to use the original control panel and wiring.

Stovezilla-004w.jpg
Stovezilla-005w.jpg
Stovezilla-006w.jpg
Stovezilla-010w.jpg
 
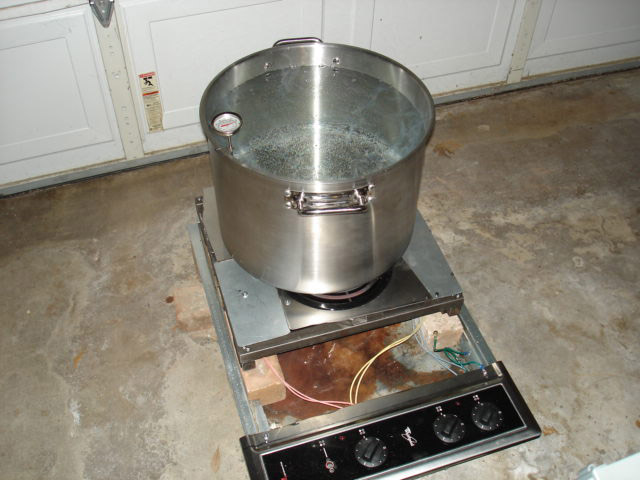
When I first hooked this up, the GFCI kept dropping out - I couldn't find the problem, but I was anxious to find out how well it would heat, so I isolated the frame and burners from ground so I could test it - that's why I have the frame up on bricks inside the box. Of course, I had to be damn sure not to touch anything during the test, as the frame, kettle, and water were all "hot".

https://www.homebrewtalk.com/attachment.php?attachmentid=15587&stc=1&d=1273522694

https://www.homebrewtalk.com/attachment.php?attachmentid=15588&stc=1&d=1273522694

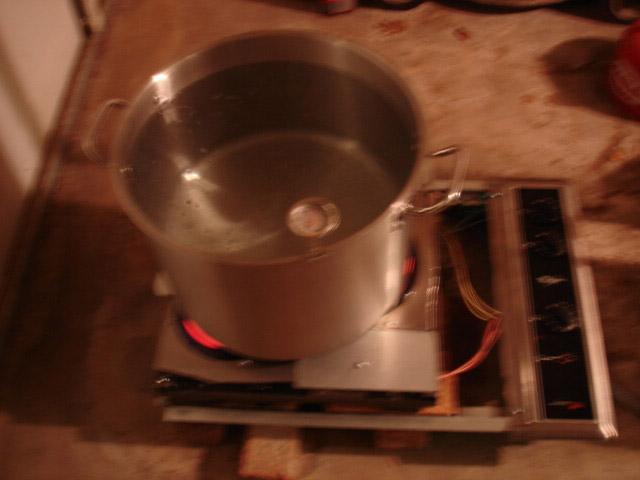
Here's a bad out-of focus pic, but it shows how much of the coils extend beyond the edges of my 10 gallon Megapot.

https://www.homebrewtalk.com/attachment.php?attachmentid=15589&stc=1&d=1273522694

The test worked great - 8 gallons of water from 80 degrees F to boiling in 48 minutes, and I could maintain a good rolling boil with the power turned down a bit. The pot was uncovered during the entire heating process and ambient temp was probably about 75 degrees.

Interestingly enough, the next day I reconnected the frame to ground and turned it on and the GFCI did not trip (I only let it go for 10 or 15 minutes, but before the boil test I had only been able to go for a minute or less before the GFCI dropped out). I'm wondering if there was some grease or moisture in the wiring, the insulation internal to the elements, or in the connectors which the elements plug into that was conducting enough electricity to trip the GFCI and that got burned off or evaporated during the test.

Yet to do:

*Make sure the GFCI problem is solved
*Build a stand
*Add some sheet metal to extend further over the edges to help prevent a boilover from leaking into the box, and to cover up the area between the coils and the control knobs.

Stovezilla-016w.jpg


Stovezilla-017w.jpg


Stovezilla-019w.jpg
 
The start of this thread looks like a "Jeffery Dahmer serial killer" attacked that stove. Go for it Steve I bet you'll get some great results plus the price is right. Keep us posted. Carl.
 
Stovezilla is catchy, but its really more of a Stovenstein. Or Frankenstove. Or the Range of Frankenstein...
 
This is clever man. I really like the idea for maintaining the temperature in a HLT, which is one of my upcoming projects. I'll cite you if I go the electric range route.

I just bought a propane burner because I couldn't stand brewing on my electric stove - the coils would bend out of shape and I'd get really low efficiency in the heat transfer form the coils to the pan. Definitely could barely boil, it was kind of pathetic. It took us about an hour to get to a boil.

Don't mean to bash your idea - if our burners were that close together and made of some hard metal I wouldn't be complaining.
 
I think chs9 has a good point, with those coil burners, having maximum contact surface area is what will get the most energy into your kettle.
Since your setup is screwed together, you could shim each burner for maximum contact area. I would test for this with a full kettle and get underneath the burner to check for gaps (with the stove unplugged, of course)
 
I did check to be sure the coils were all level, and yes, I did have to use a few shims (washers worked well). The Megapot I'm using has a nice flat bottom, so I can get good contact all the way across. I didn't have any problems with the coils bending - each turn of the coil is supported at three points spaced 120 degrees apart.
I will say that this idea might not work as well for a stove with a thinner top. The stainless top I had is very stiff - all I had to do was support the three pieces around the edges and they were plenty strong and stiff enough to hold the load without bending. The load goes from the coils to the drip pans to the stainless steel pieces to the steel frame. I was able to use small screws (#8-32) because none of the screws is weight bearing, they only hold things together with the weight being carried by steel tubing stacked on top of steel tubing. It turned out to be a bit of a kludge because I had originally designed it to have three layers (the bottom two 1 inch tubing and the top 3/4 inch) but then decided I needed more height to keep the heat away from the wiring, so I tacked another layer of tubing onto the bottom. I might have built it a little differently if I had known that beforehand, and it certainly would have been different if I had a welder. But it's "good enough for government work".
 
I just came across these pictures of the finished unit and realized I never uploaded them.

The first two pictures show the cart I built for Stovezilla.

Stovezilla and cart 001.jpg

Stovezilla and cart 004.jpg

This one shows the stalk attached to the back with the 240 volt switch box with on/off handle - the GFCI is a spa panel which is at the far end of the 240 volt cord where it plugs into the receptacle (not shown). The orange 120 volt extension cord piled up on top of the stalk is used only for the pump.

Stovezilla and cart 002.jpg

This is from the back side of the stalk. The 240 volts plugs into the blue box on top and is then wired through the bottom of that box into the top of the switch box just beneath it. The bottom box with the toggle switch and two receptacles is for 120 volts only - the bottom receptacle is switched and is used for the pump - the top one is not switched and I use it for a fan underneath the cart to keep the bottom of the stove cool - probably not really needed, but makes me feel better.

Stovezilla and cart 006.jpg

This shows the plumbing mounted to one end of the cart. What looks like a metal strip just above the valves is actually the edge of a big sheet metal shield over the top of the pump to keep spills away from the motor. I put in two ball valves with plans to use them both - now I only use one, but the other one is handy for a bleed valve in case I lose prime.

Stovezilla and cart 007.jpg

I have wheels on the bottom of the cart so I can move it close to my table to drain the mash tun, move it away a couple of feet to boil, then move it a couple of feet more so it is close to the sink to use my immersion chiller. I also put 4 wheels (leftovers from a scrapped chair) on the end of the cart opposite the pump. This allows me to remove the stalk and electric boxes (just attached with 2 wing nuts), lift the stove off the cart, then upend the cart - its much easier to roll around and store on end than flat as in the pictures.

I've done two all-grain brews on this and it works very nicely - no trouble at all getting 7 1/2 gallons up to a boil and maintaining it (I have to turn it down a bit during the boil). It's nice to have infinite degrees of control on all three burners. The only problem I've had is that the burners accumulate moisture inside and will trip the GFCI when I first turn it on, so I have to bypass the GFCI for about 10 minutes to bake out the moisture (I don't do anything else with the stove during this period - only start brewing after I've reenabled the GFCI). I simply put a normal 30 amp breaker in the spa panel right next to the GFCI breaker and wired the two outputs together. I can use either breaker, but not both at the same time, of course.
 
Dude, you got it figured out! I love the ingenuity, and you have skilz with the framework underneath.
I know you can't rest now, you have more to do!
Put elements in the kettle!
 
Kinda funny that stovezilla looks like Mickey Mouse...

Good job man, one of the most original ideas I've seen in a while (yeah, I know you sorta borrowed the idea).
 
This is insane and awesome

Definitely insane - if I had realized how much work that was going to be, I wouldn't have done it. But I'm glad I did - it really works well!

Dude, you got it figured out! I love the ingenuity, and you have skilz with the framework underneath.
I know you can't rest now, you have more to do!
Put elements in the kettle!

But those elements aren't water proof! :eek: Or if you mean water heater type elements, I'm limited by the current I can pull - already pulling 23.3 amps from a 30 amp circuit with all burners on high.

HAHA just now saw this for the first time! Great stuff.

Thanks.

Kinda funny that stovezilla looks like Mickey Mouse...

Good job man, one of the most original ideas I've seen in a while (yeah, I know you sorta borrowed the idea).

Mickey Mouse - LOL. I never thought about that, but now that you mention it........
 
Back
Top