
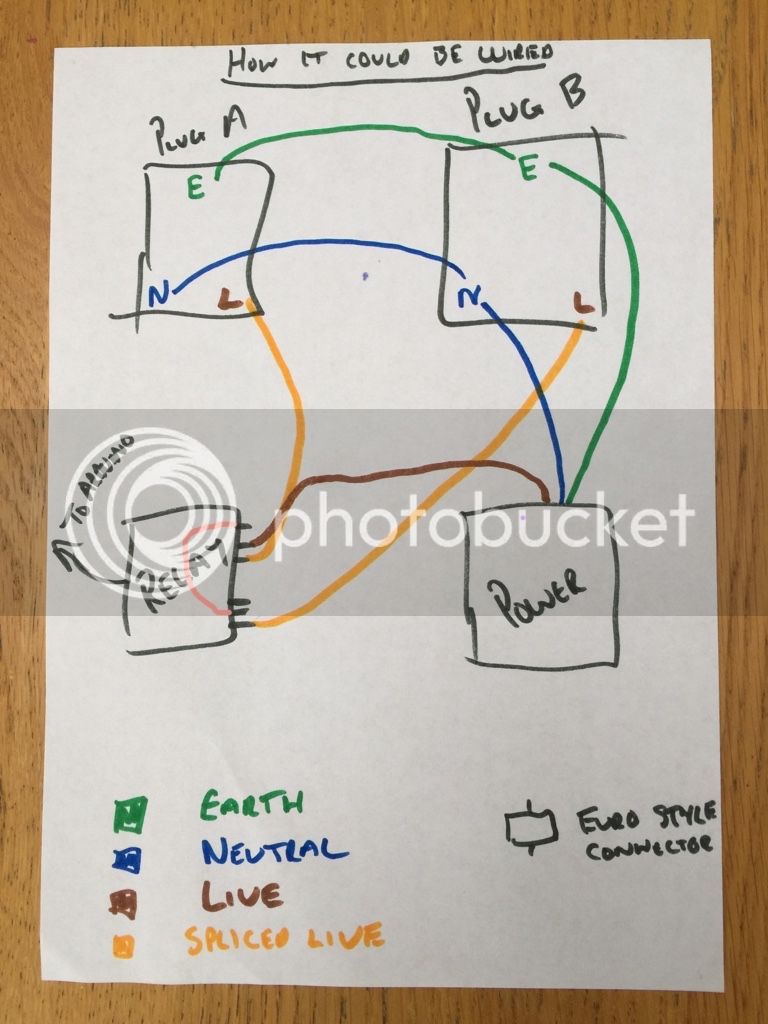
You can make that even cleaner - wire the second relay's hot leg from the NC side of the first relay. That way when the first relay is not energized the second relay has power. When the first relay is energized it breaks that and goes to it's NO pole.There is also an option to completely avoid the need of the Euro style connector by running the live direct to the relay and then join the two middle relays pins.
Technically this is a better setup since it ensures there's no way to energize both at the same time.
")


![Craft A Brew - Safale S-04 Dry Yeast - Fermentis - English Ale Dry Yeast - For English and American Ales and Hard Apple Ciders - Ingredients for Home Brewing - Beer Making Supplies - [1 Pack]](https://m.media-amazon.com/images/I/41fVGNh6JfL._SL500_.jpg)


