HOWTO - Make a BrewPi Fermentation Controller For Cheap

Homebrew Talk - Beer, Wine, Mead, & Cider Brewing Discussion Forum

Help Support Homebrew Talk - Beer, Wine, Mead, & Cider Brewing Discussion Forum:

This site may earn a commission from merchant affiliate links, including eBay, Amazon, and others.
Status
Not open for further replies.
Success! 7.5v Uno wall wart eliminated, everything's running on a single 5VDC 3A brick.

Pics:

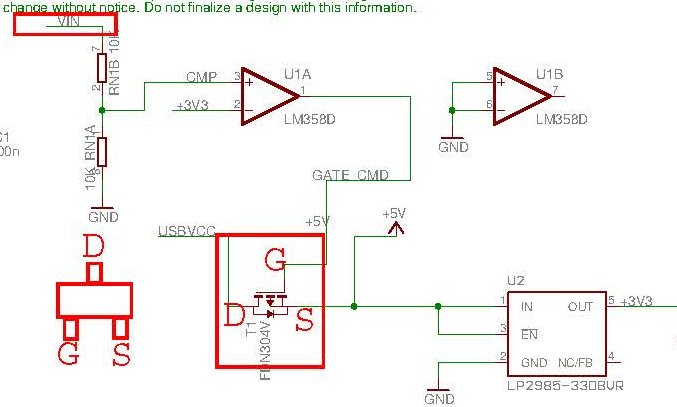
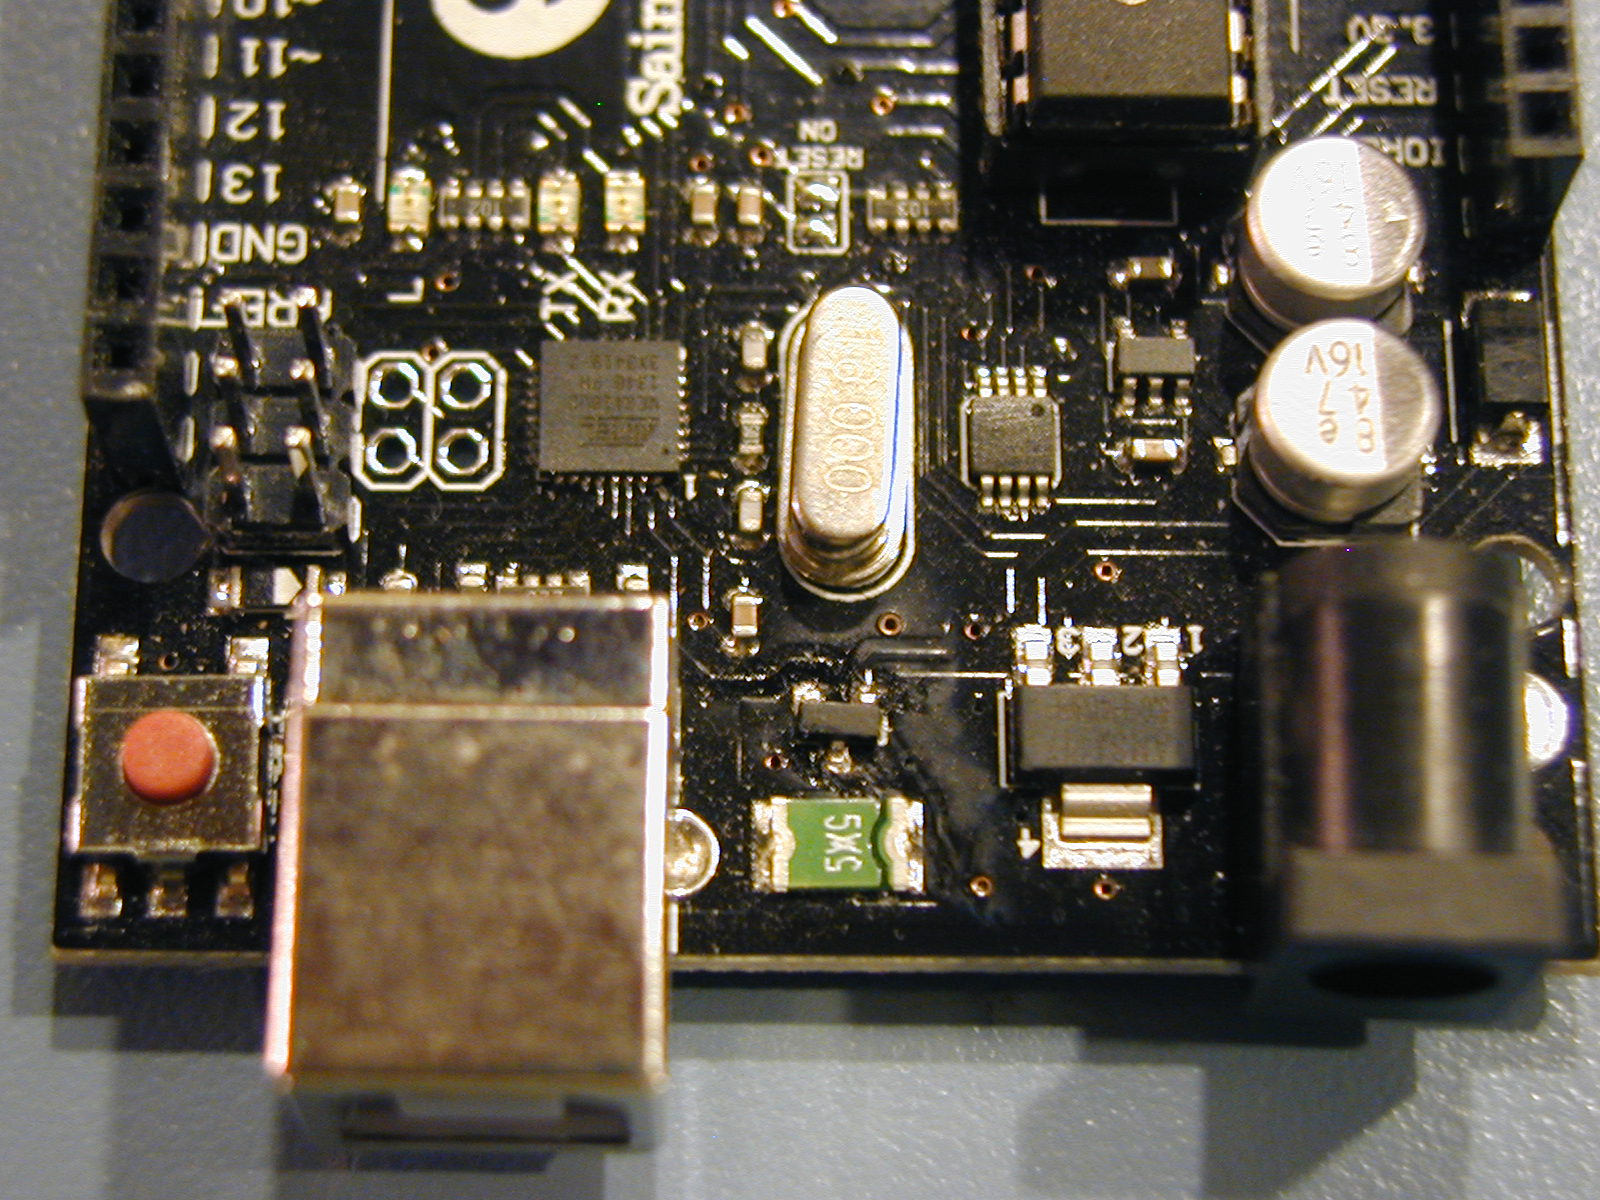
The offending circuit that would tie a directly-connected 5V supply to the USB socket pins on the R3 Uno by Sainsmart. Not a good thing. Removing that fet solves that problem.

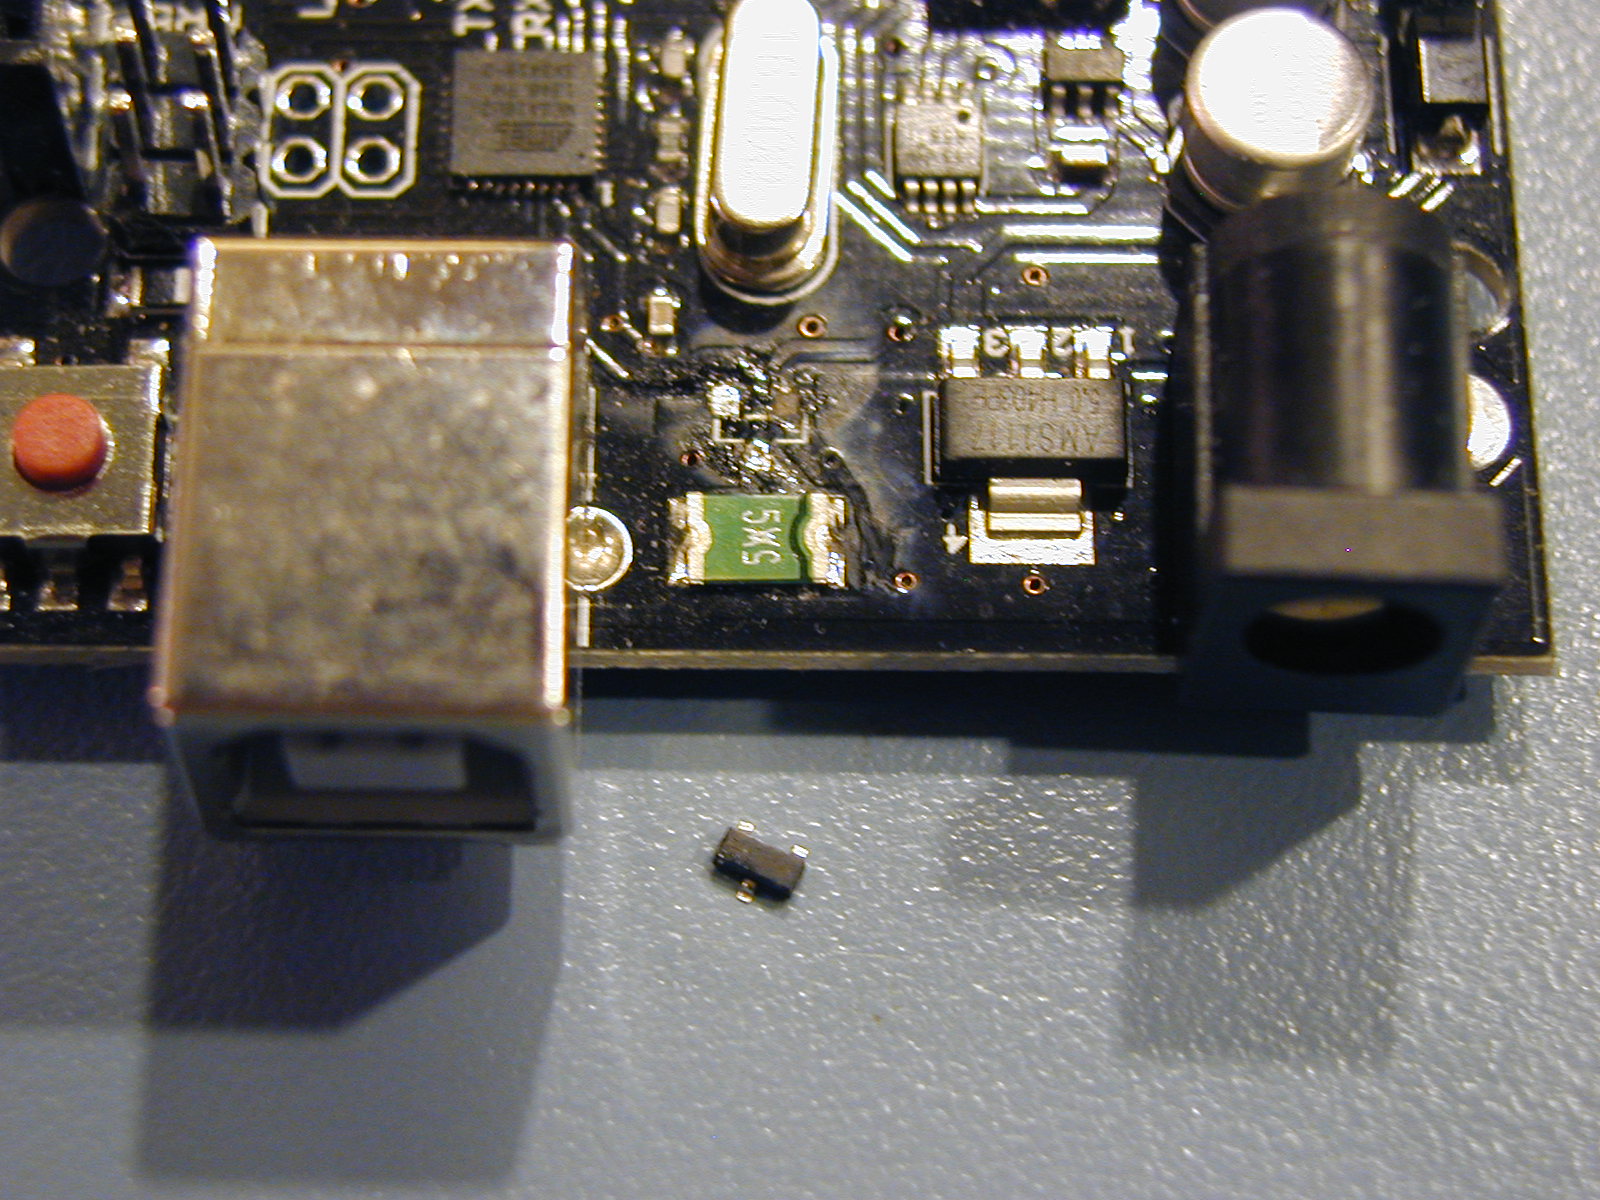
Then there's the fet - before and after.

There's an unused pin on one of the Uno headers that is now an extra 5V pin.

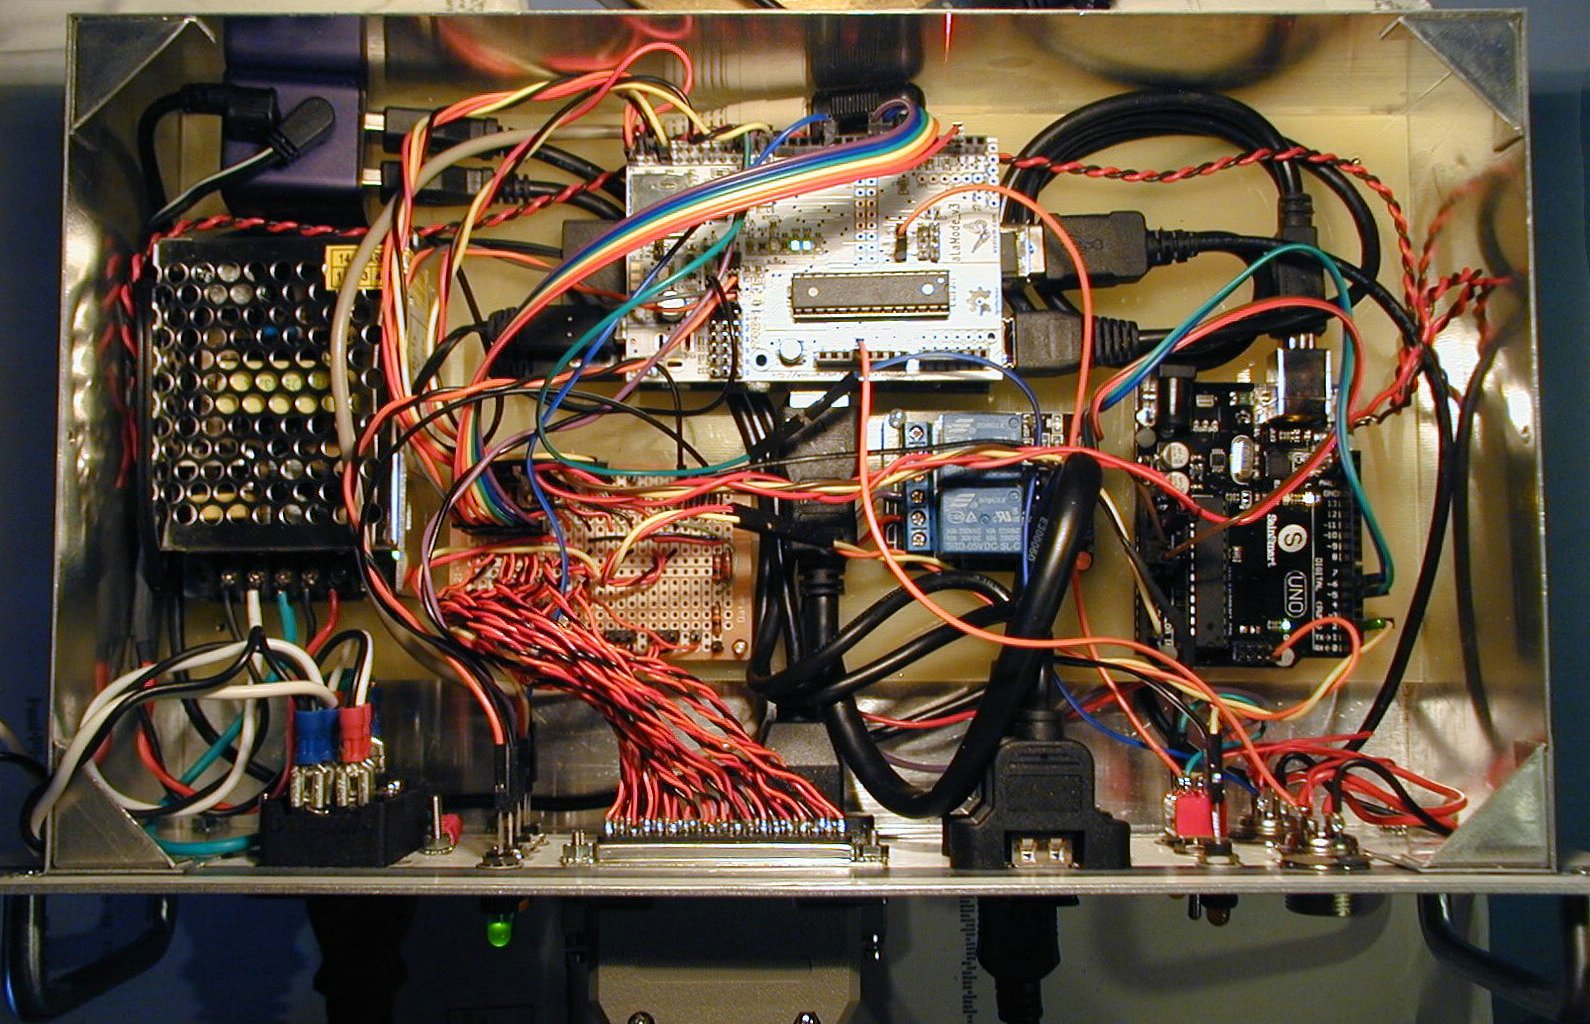
And there's now a big chunk of open space where the wall wart used to be, that will be home to a low speed 60mm 5VDC fan...

Cheers!

arduino-uno-schematic.jpg


brewpints_10.jpg


brewpints_11.jpg


brewpints_12.jpg


brewpints_13.jpg
 
ImageUploadedByHome Brew1414929842.826038.jpg
Success! After a long day of troubleshooting my scripts, I finally got BrewPi up and running.

ImageUploadedByHome Brew1414929949.794737.jpg
Now I just need to test my relays, mount the electronics in a project box and buy a fridge/freezer off craigslist.

This thread is awesome. Many thanks.
 
So in lue of brewing in a panic this last weekend, I set up my ferm chamber and put 12 gallons of water in the fermenter. After it got the water down in to the sweet spot it's kept it with in .05C of beer setting. Pretty impressive really. My setup uses a 20 cu ft freezer i just picked up on craigslist and lasko my heat heater. I use to use a reptile heating mat similar to ferm wrap. I may through this in the other freezer where it's still installed and see how it does as well.

Screen Shot 2014-11-03 at 6.49.48 PM.png
 
Cool. What's the ambient temp? Does it change much?


Sent from my iPhone using Home Brew
 
It's in the the garage and it's gotten cold. Here is the whole chart with room temp which is just sitting on top of the freezer.

Screen Shot 2014-11-03 at 7.27.01 PM.png
 
Last edited:
can see why you're heating.My sheds a bit warmer currently. But still holds the brew temp

AustPaleAle.JPG
 
Has anyone used thermal paste in their thermowells?

I am going to have some leftover from my SSR heatsink and thought I might put some on the temp probe before sliding it into the thermowell.

Good idea? Bad idea? Just a waste of time?
 
I imagine it could get a bit messy when it comes to removing and replacing the probes on every brew
 
I wouldn't bother with anything. The first brew I used silicon paste on the bottom. I pulled it out because I remove the thermowell when I clean up. Out came most of the paste as well. I didn't bother putting it back and after another 4 brews I haven't really noticed any difference in temp performance so now I don't worry.


Sent from my iPhone using Home Brew
 
Boring! ;)

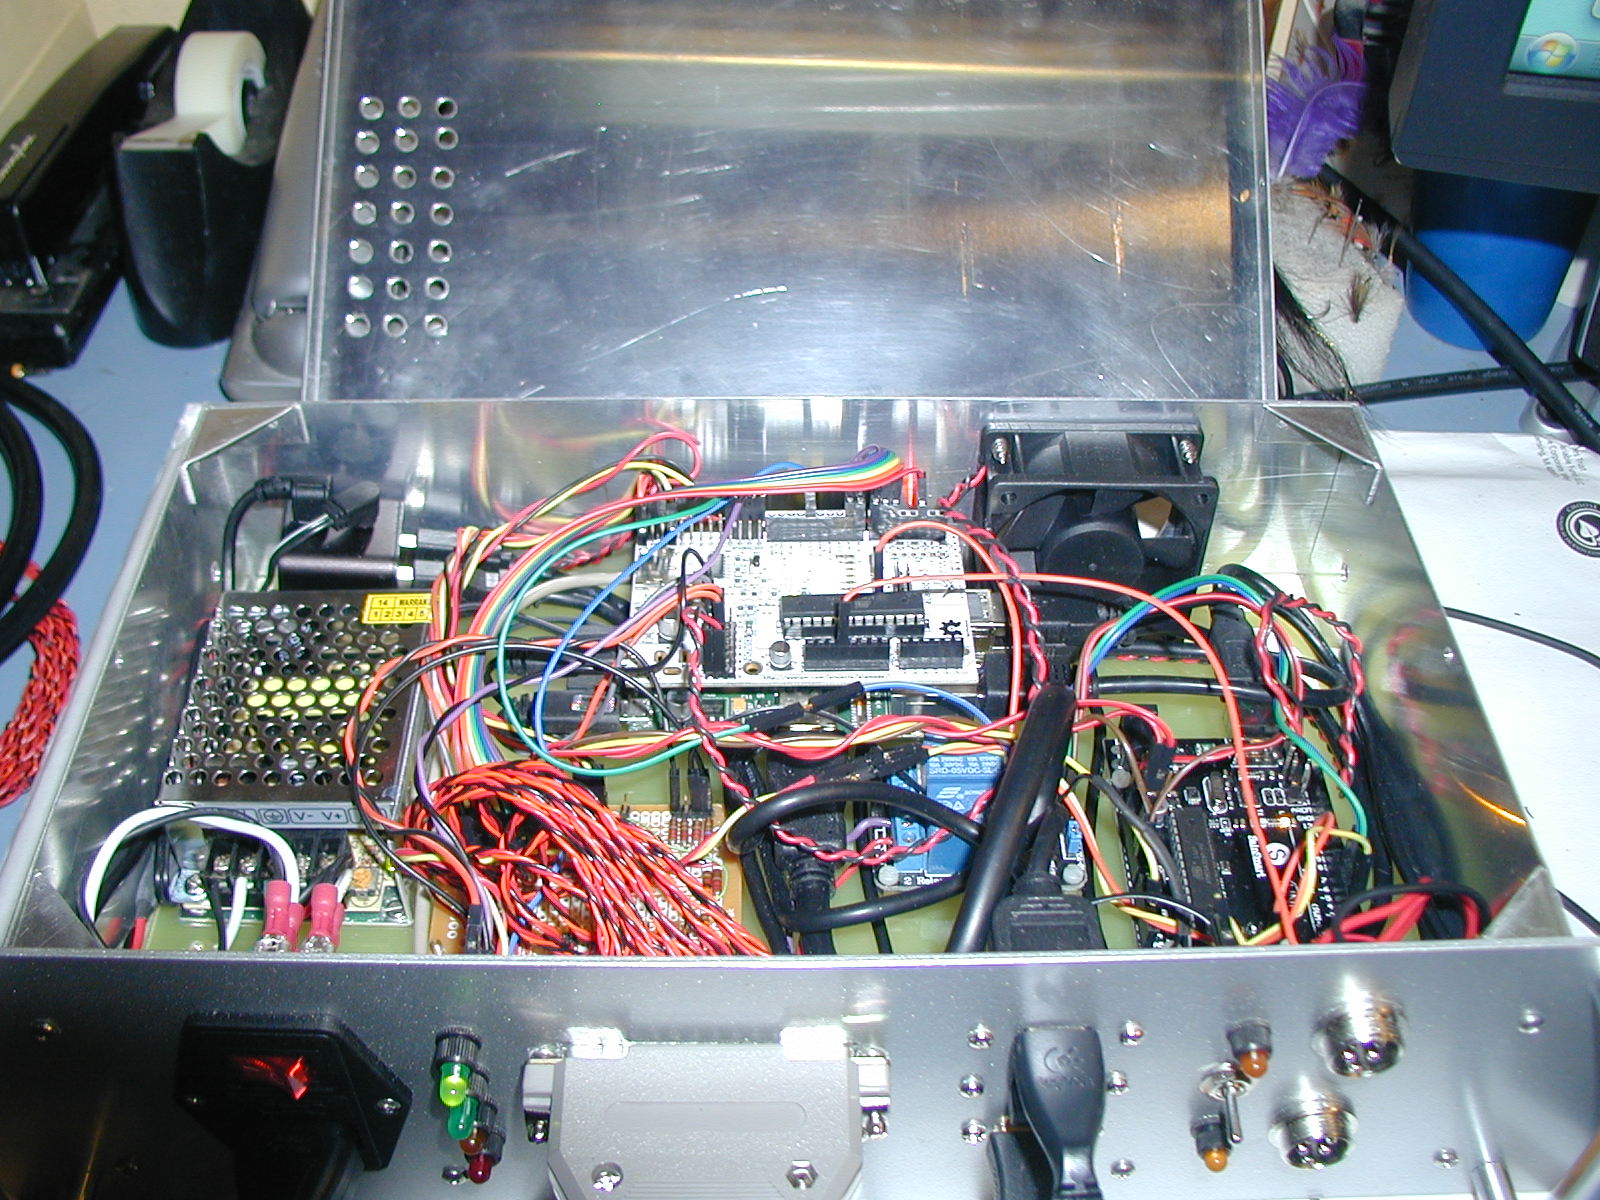
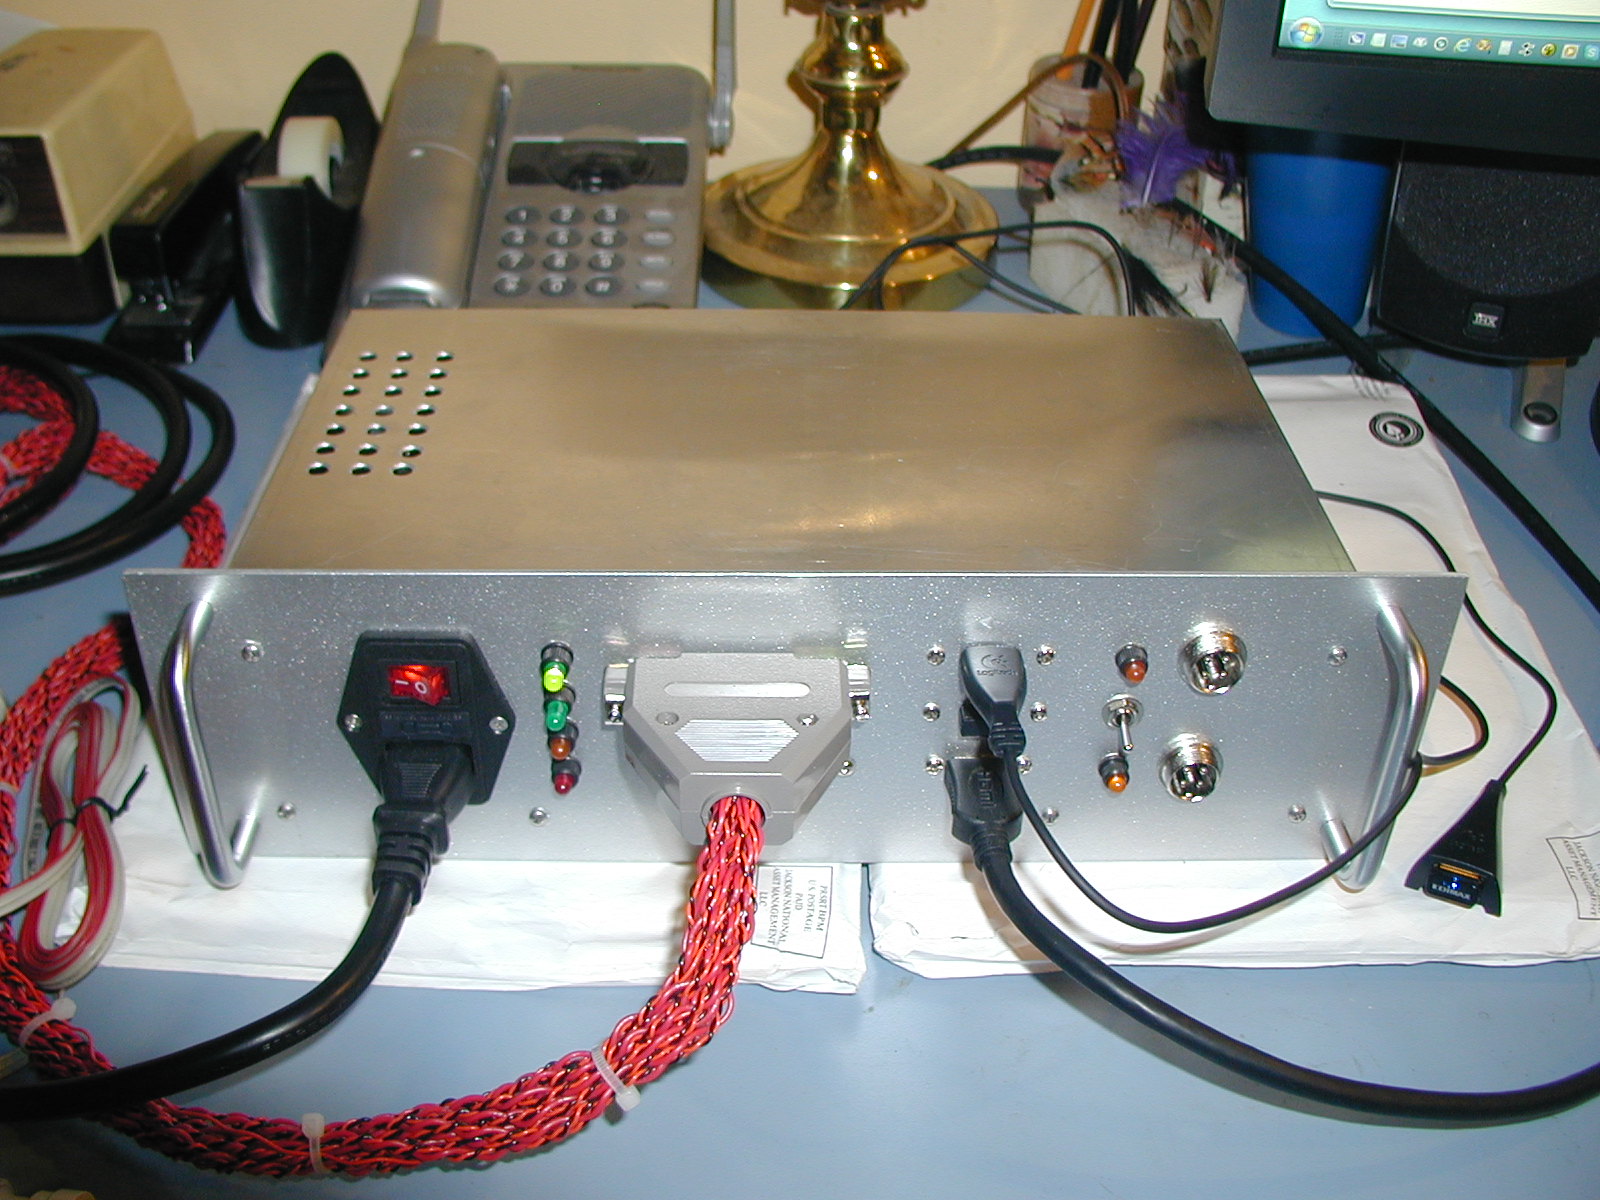
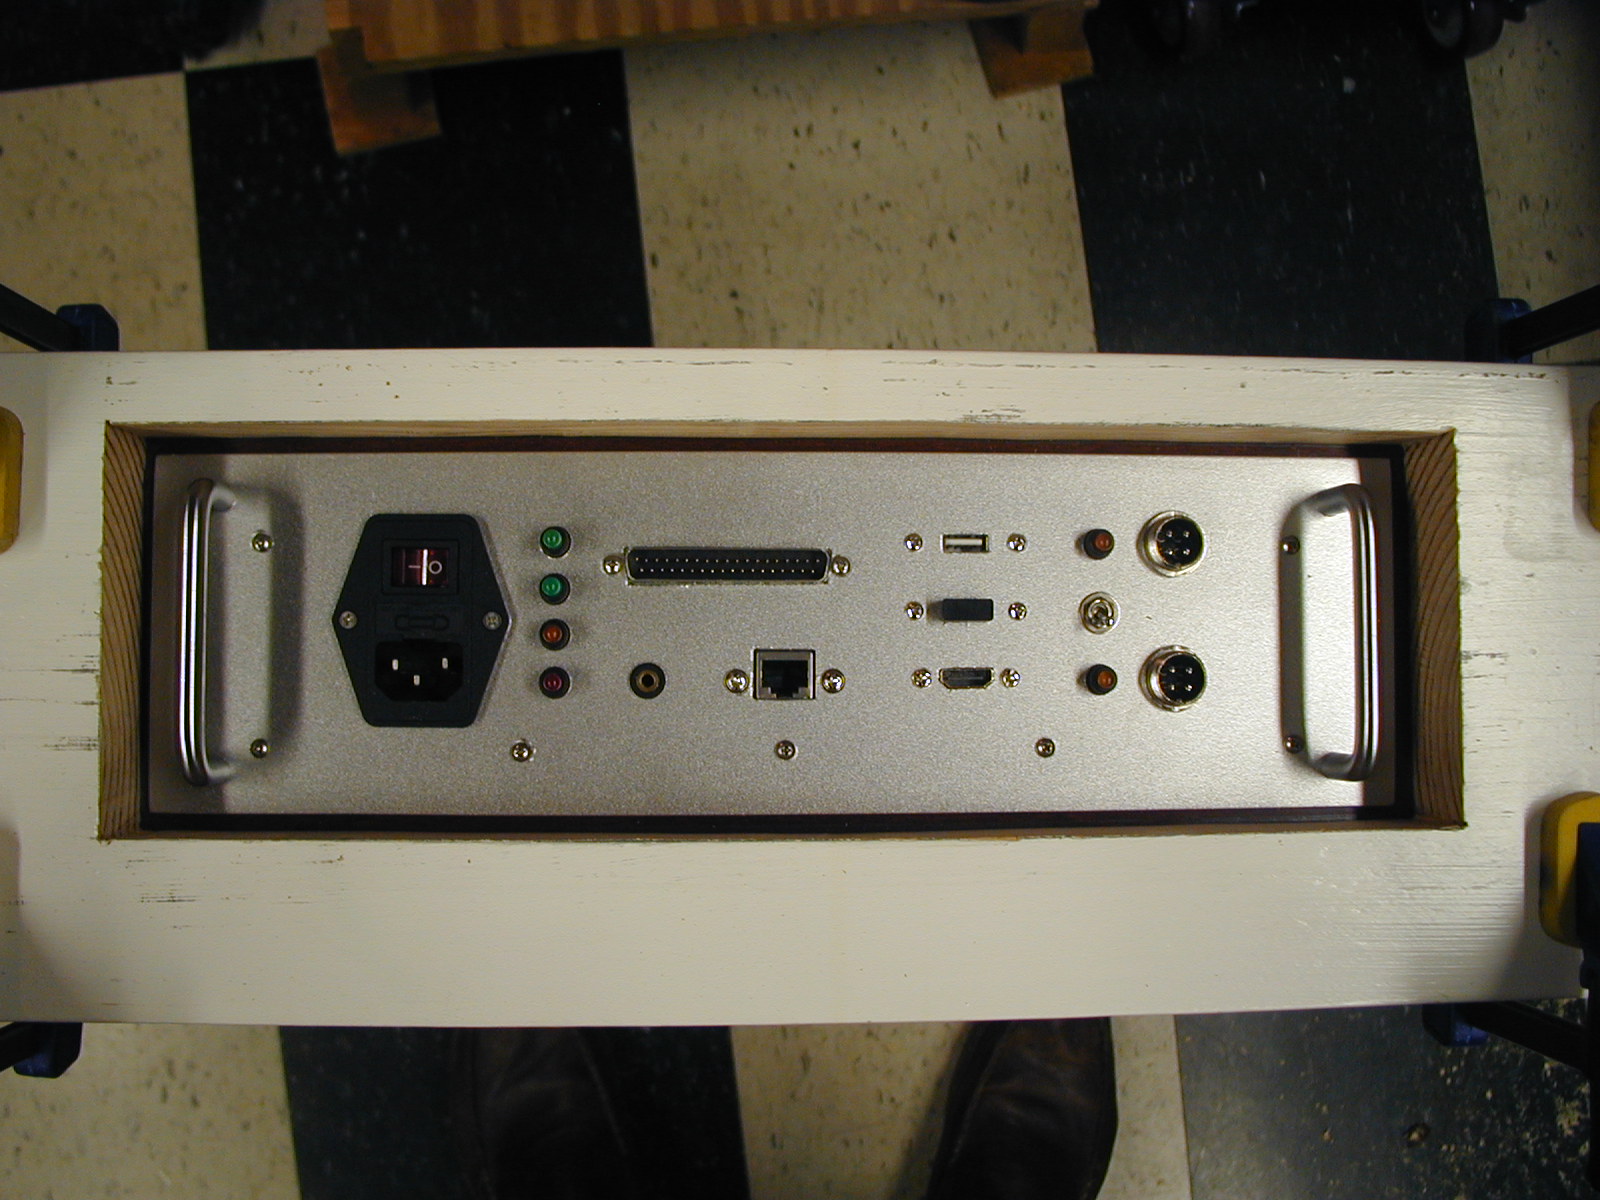
Took my system apart and installed a low-noise 60mm 5vdc fan, blew a bunch of 1/4" holes in the lid above the power supply for an air inlet, and added mounting holes for the glide rails for when I mount the works in the keezer dolly.

Hooked the fan to the 5V rail, watched it spin (very quietly), felt the air moving nicely...and realized this just wasn't going to do at all.

I couldn't just drive the fan straight from the 5V rail - that would be so wrong when it could be easily complicated with a bit more hardware and a little software! :D

The RPi soc - like most - has its own built-in temperature sensor, and the standard Raspbian distro has a routine to read it and return a Centigrade value (as a string). And I wasn't using half of the Sainsmart dual relay board (this is a keezer controller after all) thus I had a free relay to play with.

So I cobbled up a Python fan control driver that reads the soc temperature and turns the fan on and off via the relay under control of the rpi gpio24 if settable thresholds are crossed, with plenty of hysteresis built in. After making sure that worked as intended last night I set it up as a system service and let it rip.

It was fairly warm in my office today and the fan was turning on roughly every half hour - for about a minute. The fan is very quiet, couldn't be happier about that as every 40mm and 60mm fan I had laying around the shop was noisy as hell and made the entire enclosure resonate at one frequency or another. No such issues with this fan.


Otherwise...I've been testing having the Edimax wifi dongle at the end of a 5 foot long USB extender cable (see second pic). It's been working perfectly for a week now. I may not need to use it but it's good to have the option - this controller will be on the opposite side of the keezer from all three of my wifi access points and one story below as well. Raising the dongle up to lid level might be necessary to save me the trouble of running CAT6 to it (I do have the RJ45 on the panel if necessary, but hopefully it'll go unused).

Next step: separate dolly from keezer and start hacking away at the former...

Cheers!

brewpints_18.jpg


brewpints_19.jpg
 
Thanks Heide264, I will look into that tonight. Elco asked me to get him some data so I will do that first.:

Can you tell me the output of:

git status


ls -ahl

And please check the apache logs for errors:

tail -30 /var/log/apache2/error.log


Also try starting a new brew (click on the beer name under the logo).

Hey. I was just wondering if you still needed me to follow up with this? I had to redo my setup to incorporate a 2nd brewpi server. Do you still need more info?
 
Hi everyone, I'm in the middle of trying to install BrewPi, and am running into some issues with the install script. I run "sudo ~/brewpi-tools/install.sh" like the instructions say to do, and everything starts just fine.

Near the end though, The script starts trying to pull files from raspian.org but gets 404'd. I checked in my web browser, and indeed the files that the script points to do not exist. Is something just down? Do I try again tomorrow?

This is what it displays near the end of the script-

After this operation, 119 MB of additional disk space will be used.
Err http://mirrordirector.raspbian.org/raspbian/ wheezy/main php5-common armhf 5.4.4-14+deb7u14
404 Not Found
Err http://mirrordirector.raspbian.org/raspbian/ wheezy/main libapache2-mod-php5 armhf 5.4.4-14+deb7u14
404 Not Found
Err http://mirrordirector.raspbian.org/raspbian/ wheezy/main php5-cgi armhf 5.4.4-14+deb7u14
404 Not Found
Err http://mirrordirector.raspbian.org/raspbian/ wheezy/main php5 all 5.4.4-14+deb7u14
404 Not Found
Err http://mirrordirector.raspbian.org/raspbian/ wheezy/main php5-cli armhf 5.4.4-14+deb7u14
404 Not Found
Failed to fetch http://mirrordirector.raspbian.org/raspbian/pool/main/p/php5/php5-common_5.4.4-14+deb7u14_armhf.deb 404 Not Found
Failed to fetch http://mirrordirector.raspbian.org/...ibapache2-mod-php5_5.4.4-14+deb7u14_armhf.deb 404 Not Found
Failed to fetch http://mirrordirector.raspbian.org/raspbian/pool/main/p/php5/php5-cgi_5.4.4-14+deb7u14_armhf.deb 404 Not Found
Failed to fetch http://mirrordirector.raspbian.org/raspbian/pool/main/p/php5/php5_5.4.4-14+deb7u14_all.deb 404 Not Found
Failed to fetch http://mirrordirector.raspbian.org/raspbian/pool/main/p/php5/php5-cli_5.4.4-14+deb7u14_armhf.deb 404 Not Found
E: Unable to fetch some archives, maybe run apt-get update or try with --fix-missing?


*** ERROR ERROR ERROR ERROR ERROR ***
----------------------------------
See above lines for error message
Setup NOT completed
 
I'm looking forward to giving this a try but I think I may be in over my head. I've got a couple old PC's and hope to repurpose one with linux instead of the raspberry pi. My first attempt to install debian via usb boot failed--the computer just loads to a command prompt--but I've got a couple more to burn. That should have been the easy part, though, right? haha. I'm probably not tech savvy enough to do this--when a suggested answer to a problem is "$ sudo apt-get update" I think, "huh?"--but its worth a try. I can always just fall back on the good ol' STC-1000.
 
I'm looking forward to giving this a try but I think I may be in over my head. I've got a couple old PC's and hope to repurpose one with linux instead of the raspberry pi. My first attempt to install debian via usb boot failed--the computer just loads to a command prompt--but I've got a couple more to burn. That should have been the easy part, though, right? haha. I'm probably not tech savvy enough to do this--when a suggested answer to a problem is "$ sudo apt-get update" I think, "huh?"--but its worth a try. I can always just fall back on the good ol' STC-1000.

Just PM'd you my step by step used on Dell laptop for this with the nitty gritty detail keystrokes that I needed to keep for when I couldn't remember what I did in an operating system I'm unaccustomed to.

It's really easy to do. But if you have trouble translating "Run sudo apt-update" into "Select applications from upper left, choose system, choose Terminal, type in sudo apt-update" then it could be a bit daunting.
 
Also this forum is just a sub of the main git documentation that has every step needed to run a simple one fermenter setup. If you intend to take on this task I employee you to go there and follow all the steps to get brewpi up and running then if you run into a road block come here for quick answers or go to the brewpi forums for developer level answers.
 
...or implore :)
But 2200 some odd posts into this, I sometimes wish it had split out the multiple-instance from the single-instance.
 
$ sudo apt-get update

Then retry the package installation...

Cheers!


Yes, that worked thanks! I wonder why that command isn't in the regular install instructions, but whatever. Thanks a bunch. Wow, I really thought the hardware build was going to be the hardest part of this. I think I spent 8 hours just trying to get this whole pi+arduino thing setup.


There's only one thing bugging me still. My Pi's IP address isn't starting with the conventional 192.168.xxxxx. It's set at 10.0.1.x which seems very odd to me. The web interface is working fine, I even managed to go onto google and confirm that the internet connection is working.

Should I bother trying to fix this? Also, setting the "static IP" seemed extremely difficult in the directions. Is it something I should bother setting up? I don't want to lose access because the pi randomly decides to change address.
 
Yes, that worked thanks! I wonder why that command isn't in the regular install instructions, but whatever. Thanks a bunch. Wow, I really thought the hardware build was going to be the hardest part of this. I think I spent 8 hours just trying to get this whole pi+arduino thing setup.


There's only one thing bugging me still. My Pi's IP address isn't starting with the conventional 192.168.xxxxx. It's set at 10.0.1.x which seems very odd to me. The web interface is working fine, I even managed to go onto google and confirm that the internet connection is working.


Should I bother trying to fix this? Also, setting the "static IP" seemed extremely difficult in the directions. Is it something I should bother setting up? I don't want to lose access because the pi randomly decides to change address.


It is in in the online instructions… on page 1 section 5 to be exact.

http://docs.brewpi.com/installing-your-pi/rpi-setup.html
 
[...]My Pi's IP address isn't starting with the conventional 192.168.xxxxx. It's set at 10.0.1.x which seems very odd to me. The web interface is working fine, I even managed to go onto google and confirm that the internet connection is working.

Should I bother trying to fix this? Also, setting the "static IP" seemed extremely difficult in the directions. Is it something I should bother setting up? I don't want to lose access because the pi randomly decides to change address.

As a rule, I don't like devices that have unexplained addresses ;)

Network devices are set up in /etc/network/interfaces.
Take a look at yours.

Code:
$ sudo nano /etc/network/interfaces

If there's a static IP declared you'll find a command, the ip address, the netmask, and the gateway addresses (the lan side of your router) in four lines that look like these:

Code:
iface eth0 inet static
address 192.168.1.244
netmask 255.255.255.0
gateway 192.168.1.251

Note that etho is for the default wired interface, and will be wlan0 instead if you're using a wifi dongle.

If you don't see a setup like the above, then your network interface is using DHCP, and is getting that private LAN address from a router or WAP...

Cheers!
 
Yes, that worked thanks! I wonder why that command isn't in the regular install instructions, but whatever. Thanks a bunch. Wow, I really thought the hardware build was going to be the hardest part of this. I think I spent 8 hours just trying to get this whole pi+arduino thing setup.

I went ahead and added that command to my instructions to make sure people run it.
 
I went ahead and added that command to my instructions to make sure people run it.

Don't you have to run sudo apt-get upgrade, too? I had to run both, as some kind soul informed me a few pages back, to get my install to work.
 
Don't you have to run sudo apt-get upgrade, too? I had to run both, as some kind soul informed me a few pages back, to get my install to work.

Not really - the OP's problem was stale links to resources.
"Update" fixes that problem.
You don't need to upgrade every installed package just to install what you need to move forward.

While it's not a bad idea to periodically do broad package updates, it's prudent to do an SD card image backup beforehand, just in case things go pear shaped...

Cheers!
 
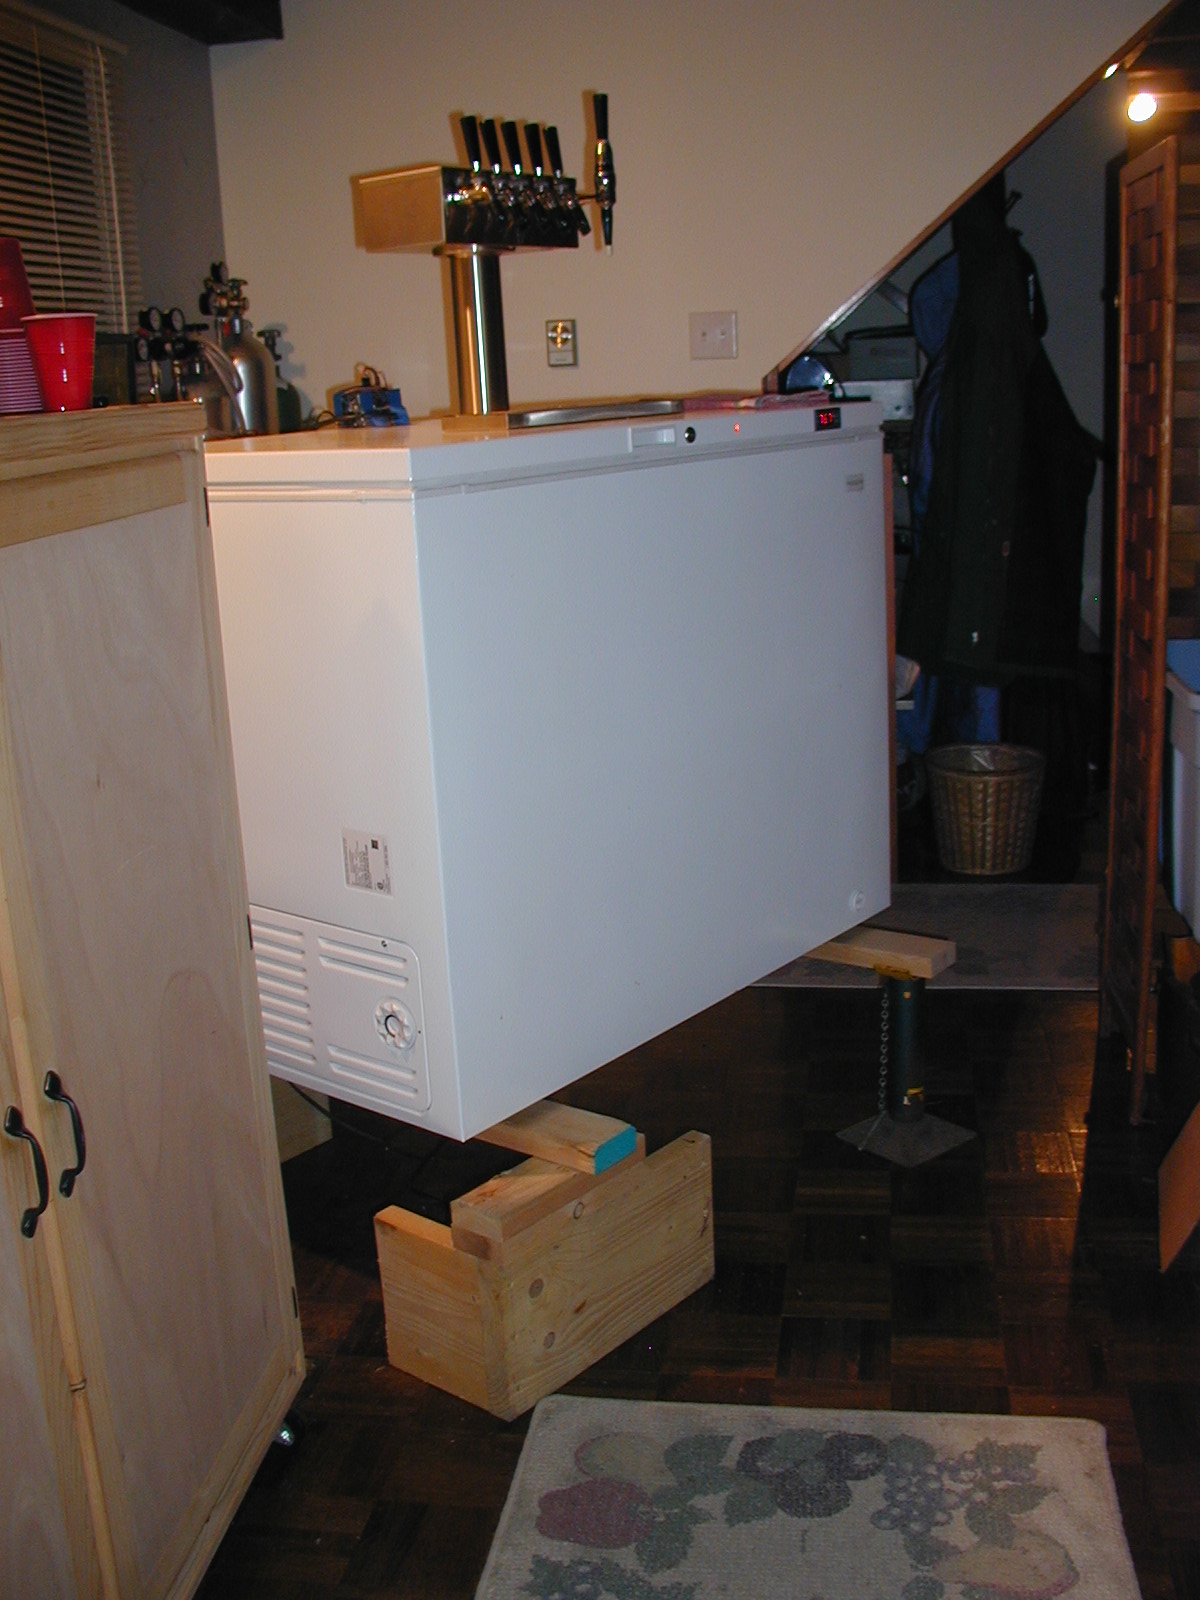
Football game was hella awful so I decided to jack the keezer and extract the dolly. Lotsa blocks, a low-profile jack, whatever I could find as props - and most of the second and third quarters - and that phase was complete.

Hacked a hole in the dolly for the BrewPints crate, cut a chunk of 3/4" plywood for a backer/stiffener, then did a test fit. That's gonna work just fine.

Tomorrow I'll add the rails for the sliders, then it gets glued and screwed and repainted.
With a little luck it'll be up and running Saturday - though there's a big lid retrofit to do to integrate all the sensors...

Cheers!

brewpints_21.jpg


brewpints_22.jpg


brewpints_23.jpg
 
I'm new to all this electronic stuff but happy to give it a go. My question is is there any reason why I couldn't use a dual plug socket with usb integrated to power the Pi? This would leave me with a spare wall socket to power the arduino separately? I'm just unsure as whether the usb sockets will end up being controlled by the arduino I.e on with heat and off with cool, does anyone know if the USB sockets draw an isolated source?
 
Status
Not open for further replies.
Back
Top