And he could just have the relay side wired backwards
I agree.
Cheers!

And he could just have the relay side wired backwards
And they have plenty of room for 2 jacketed cables meaning I can cut down on the amount of connectors needed to finish out my project.
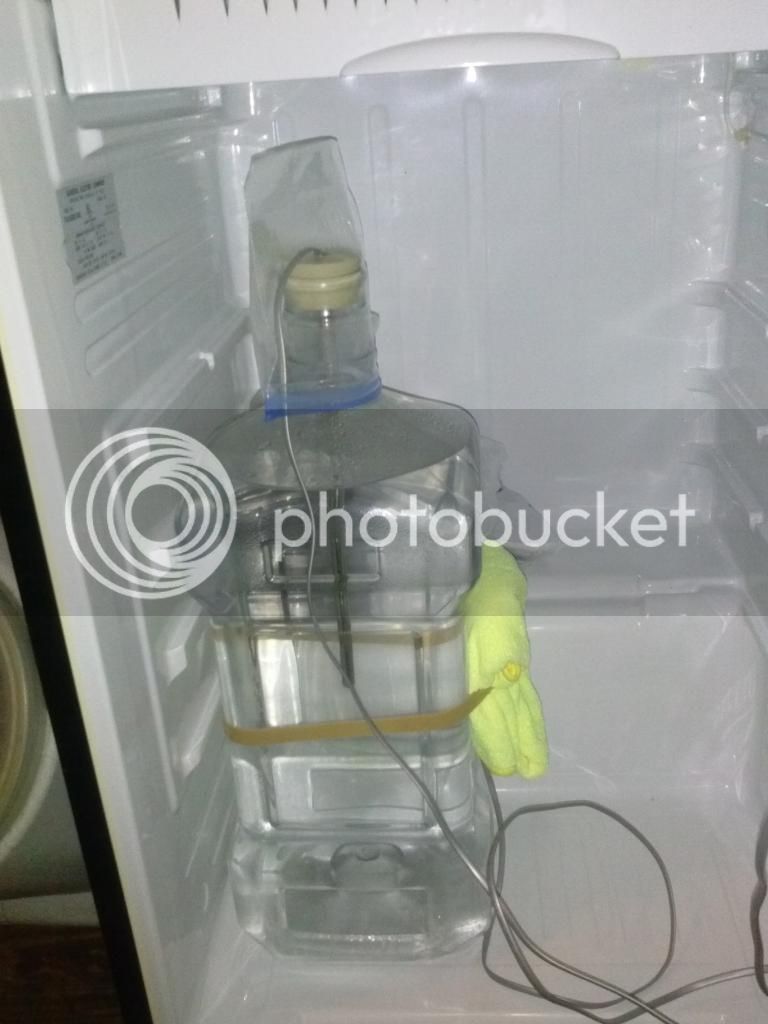
While we're talking about probe placement, has there been any discussion on the best place to place a thermowell with respect to the sidewalls of the fermenter? If you had a thermowell in the fermenter, but up against the wall, it would be similar to having a probe insulated to the outside of the fermenter. In contrast, you could put the thermowell dead center. This would result in longer cycle times (probably). Which would provide the best approximation of the overall beer temperature? I'm sure this has been studied by someone at some point, whether they were brewers or chemists doing something totally different, but I'm not familiar with any actual studies. It seems to me that about about 1/4 to 1/3 of the diameter of the fermenter from the wall would be better than either dead center or up against the wall, but that is a total guess!
")


![Craft A Brew - Safale S-04 Dry Yeast - Fermentis - English Ale Dry Yeast - For English and American Ales and Hard Apple Ciders - Ingredients for Home Brewing - Beer Making Supplies - [1 Pack]](https://m.media-amazon.com/images/I/41fVGNh6JfL._SL500_.jpg)


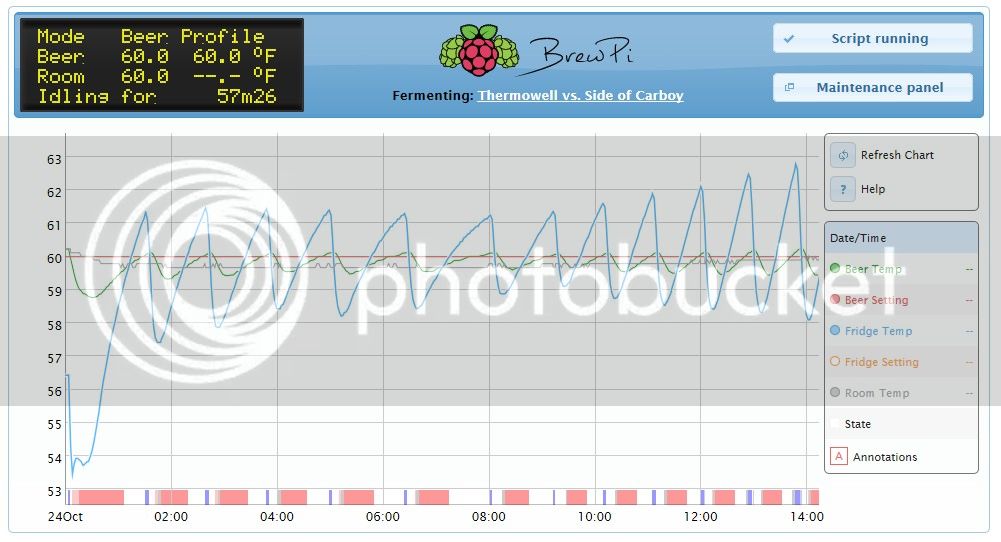
So crashing is 7 degrees per day? I thought it would be faster.
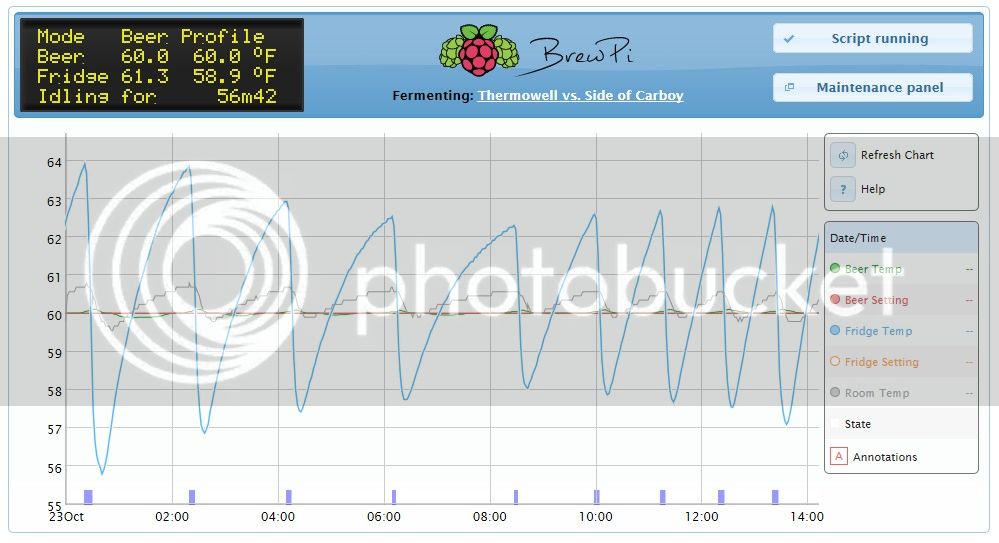
Looks good, I get more cycles but the beer temp is stable to 0.2-0.3F even on the crashes, but I am only doing 2F a day on my water run. I am cutting it off this Sat. on my right unit to do a lager, Urquel clone run, 10 gallon batch. This will be my first wort/beer run on the BrewPi but my water test runs on both units is rock solid. I would be interested if you tailored the cycle items in the config settings, if so what did you set them to?
Thanks
Mike
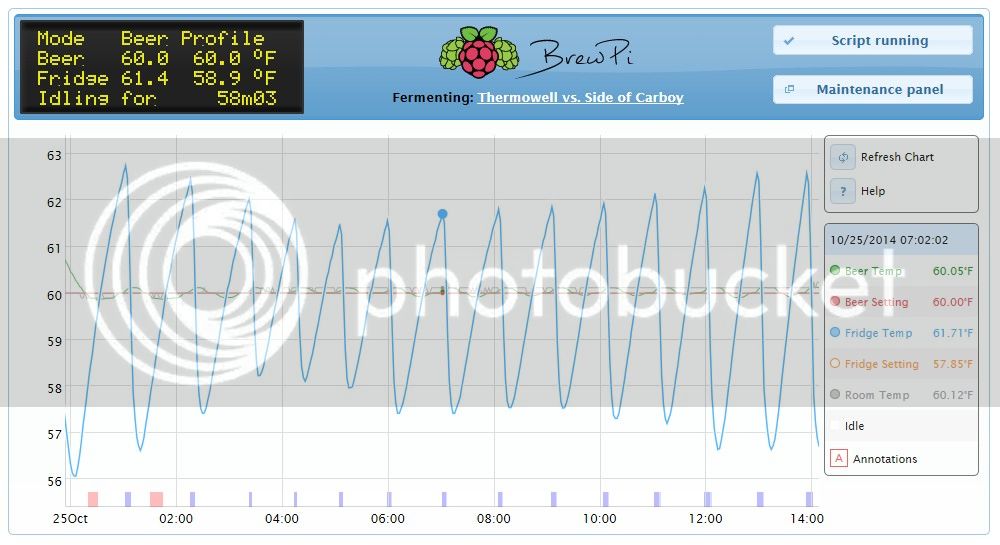
Update: Did a 48 hour sample so scales are similar.
Hmm, is this only for switching a door light, or will you also control the compressor with that? It can only switch a max of 2A. Probably okay for a couple of Fermwraps though.
SON OF A ****** I didn't notice that! Arrrgh, back to the drawing board.
Ya I'm just going to stick with the SainSmart but add transistors to reverse the output so the LEDs work they way I want.
Ya I'm just going to stick with the SainSmart but add transistors to reverse the output so the LEDs work they way I want.
Yeah, sorry to point that out. I just didn't want you burning something up. I'm not really sure how an overloaded SSR responds. I know that the typical SSR failure mode is to keep the circuit on, which would likely lead to overheating, so this could be dangerous. Also, SSRs running near their max current rating produce plenty of heat, and those SSR boards don't have a provision for easily adding heat sinks. It's probably best to just stick with the standard 2 (or 4) relay boards. They will eventually fail from repeated cycling, but I think I'll probably get a year or two out of mine based on the published specs for the relays.

It's alive!
Cheers!

Very sharp. Nice work man, now brew some damn beer!
what type of shield is that on your Arduino?
Seeduino Proto Sheild that is custom wired.
What is the reed relay for?

[...]
Before I did so, my situation was that I was hoping to warm up a pils for a diacetyl rest, but the fridge was constantly running despite saying it was heating. I did not have a heating element attached. I confirmed that both heating and cooling outlets were simultaneously trying to fire.[...]
I don't understand that last part. It reads like it was expected behavior - but I'm pretty sure it isn't at all normal for BrewPi.
If you used a duplex outlet for your two switched outlets, did you remove the hot-side bridge?
Cheers!
I don't understand that last part. It reads like it was expected behavior - but I'm pretty sure it isn't at all normal for BrewPi.
If you used a duplex outlet for your two switched outlets, did you remove the hot-side bridge?
Cheers!


