HOWTO - Make a BrewPi Fermentation Controller For Cheap

Homebrew Talk - Beer, Wine, Mead, & Cider Brewing Discussion Forum

Help Support Homebrew Talk - Beer, Wine, Mead, & Cider Brewing Discussion Forum:

This site may earn a commission from merchant affiliate links, including eBay, Amazon, and others.
Status
Not open for further replies.
You need to add the pi user to both groups. That was my specific problem. And I assume that since you have the same problem that that is also what's going on for you. And daytrippers instructions include this step where the online docs do not.
 
Also daytrippers instructions have you creating the cron jobs with the same name as the instances where the online docs use different file names, but I didn't think it was a problem but it was another change I noticed.
 
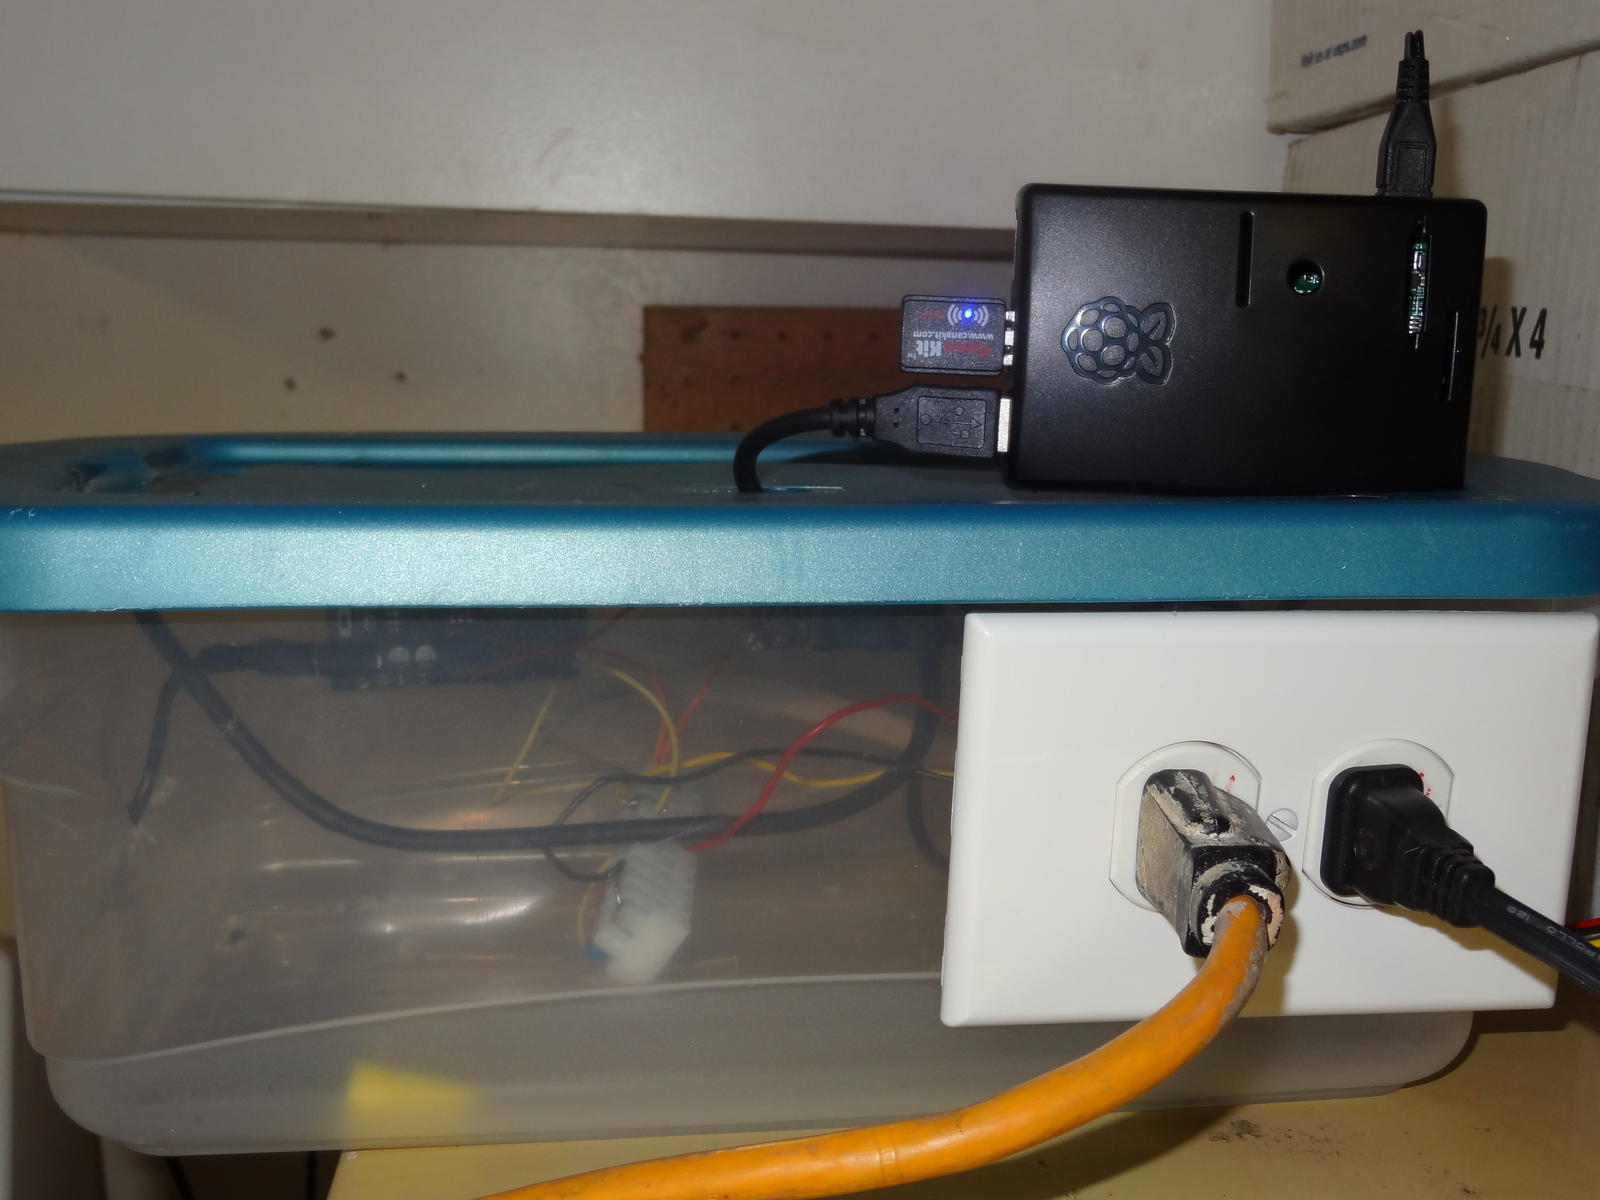
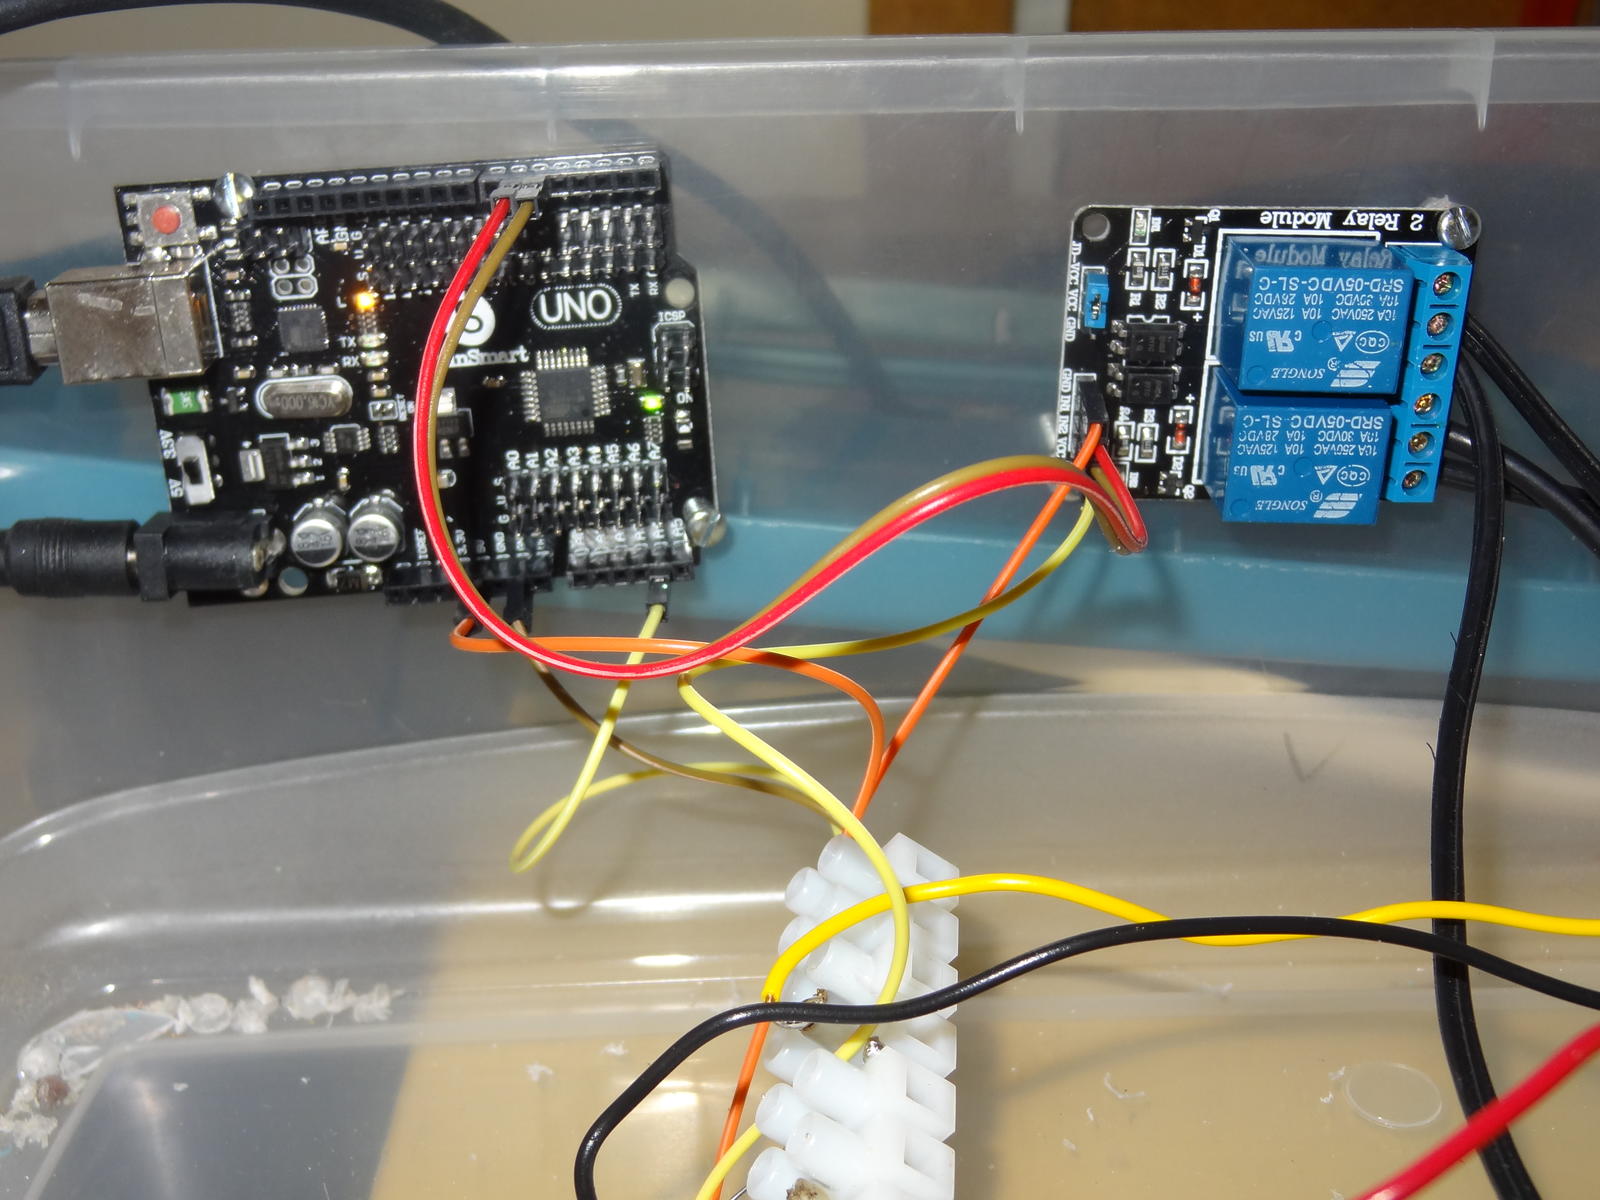
One of the great bonuses for me of being a homebrewer is that I get to hang around people who are smarter than myself. The amount of information contained here and the support from Fuzze and others is insane to see the least. I have finished my BrewPi following these directions and while it sure isn’t pretty to look at (see pictures), it is holding my test carboy of water at 68F like a champ.

Prior to this project I have had zero experience with soldering, electronics, or Linux. Yet, with an amazing tool built by the genius BrewPi guys, this guide and responses to all of my questions within hours of asking, I have a kick ass fermentation chamber. I thought it might be helpful to others who, like me, may not be 100% comfortable with a project like this, to list out what I purchased to make this happen. These are prices as of early September 2014. Of course this is not the only way to do it. I’m just providing what I purchased and what it cost me to make my functioning BrewPi.

Below is the itemized list. A few of the items like power cord and outlet I already had on hand. I’ve included tax and shipping where appropriate. I am a Prime member so some of the items I bought on Amazon shipped free. I did not use a laptop, I purchased the CanaKit RasPi setup which was crazy easy to setup and configure.

Rasberry Pi CanaKit http://www.amazon.com/gp/product/B008XVAVAW/?tag=skimlinks_replacement-20 $62.95
jumper wires: http://www.amazon.com/gp/product/B00J5NSOVA/?tag=skimlinks_replacement-20 $7.00
Uno:http://www.sainsmart.com/sainsmart-...ent-board-compatible-with-arduino-uno-r3.html $26.98
Wall wort for uno: http://www.amazon.com/gp/product/B003XZSZWO/?tag=skimlinks_replacement-20 $4.99
Relay: http://www.amazon.com/gp/product/B0057OC6D8/?tag=skimlinks_replacement-20 $11.15
2 temp probes:
http://www.ebay.com/itm/331111738688?_trksid=p2059210.m2749.l2649&ssPageName=STRK:MEBIDX:IT $7.76
Thermowell:
http://www.brewershardware.com/16-Stainless-Steel-Thermowell.html $16.81
Terminal block:
http://www.amazon.com/gp/product/B005248LKU/?tag=skimlinks_replacement-20 $4.63
4K resistor and solder. Dont have a link, purchased at local Radio Shack. $5.00

Total = $147.27

I’m excited to try this out on a DIPA I’m brewing in 2 weeks!

DSC02474.jpg


DSC02475.jpg
 
Last edited by a moderator:
Looking at where your jumpers connect from the Uno below (to the socket array) you have all three pins correct.

That socket array on the protoshield - do you know for certain if it has bussed tracks running horizontally? Because the bare shield board only commits the outside rows (one for 5V the other for GND) and all the other vias in between are completely uncommitted. (edit: Didn't realize that the proto socket array is just stuck to the shield with adhesive - I thought it was soldered down ;) )

Anyway, if you don't know for certain that your wires actually connect to each other, it would only take a few minutes to wire one probe directly to your three jumpers and eliminate the socket array from the equation...

Cheers!
 
Personally I got sick of proto shields and **** acting like it wasn't connected. That's why I opted to just solder my 4.7k resistor directly to the board then you can hook things up directly to the arduino to make sure they work. All it takes is a bad jumper wire(and I found several along the way) and everything goes haywire. I just got a roll of ribbon cable to bring all my connections to one point. And I'm thinking real hard about hardwiring everything to the arduino out to a cat5 jack then all I got to do is run network cabling into my fridge.
 
Can anyone look at this and see if they see anything wrong with the wiring...sort of at wits end and have gotten nowhere....changed to new sensors with no difference and also added power to the UNO directly so don't think it's a power issue.....any think else I can test? thanks


https://www.homebrewtalk.com/f51/ho...roller-cheap-466106/index155.html#post6341982

First of all, lets make sure that you arent having the same problem someone else did.

That log message your seeing is saying it didnt detect INSTALLED devices. You have not installed any devices yet that BrewPi knows about so it will always say that.

Check the box in the top right corner that says read Values near the refresh button, Hit refresh, and scroll through the DETECTED devices section.

Look for a device that says A4(OneWire) as the Arduino pin its on. There should also be a value listed there, if you havent changed your BrewPi to Fahrenheit it will be in Celcius and read something like 17-20 or whatever your ambient is. There should be two of them both with similar values assuming your probes are near eachother.

If you have two of these your probes are installed properly you just havent actually told BrewPi what they are yet. Assign them each to the same chamber and beer, give them their own slot numbers, and assign one to beer temp and the other to chamber temp. Then hit apply for both of them(its best to set them up one at a time and apply) and then refresh and they should show up in your installed section.

Something like this, which is my setup.
brewpi-ds18b20.png


I think tonight i'll rewrite the BrewPi setup instructions because they are a bit vague.

If you do this and you see a -- or 0 or something in place of where the value should be then it isnt reading your probes properly and your circuitry is wrong.
 
One of the great bonuses for me of being a homebrewer is that I get to hang around people who are smarter than myself. The amount of information contained here and the support from Fuzze and others is insane to see the least. I have finished my BrewPi following these directions and while it sure isn’t pretty to look at (see pictures), it is holding my test carboy of water at 68F like a champ.

Prior to this project I have had zero experience with soldering, electronics, or Linux. Yet, with an amazing tool built by the genius BrewPi guys, this guide and responses to all of my questions within hours of asking, I have a kick ass fermentation chamber. I thought it might be helpful to others who, like me, may not be 100% comfortable with a project like this, to list out what I purchased to make this happen. These are prices as of early September 2014. Of course this is not the only way to do it. I’m just providing what I purchased and what it cost me to make my functioning BrewPi.

Below is the itemized list. A few of the items like power cord and outlet I already had on hand. I’ve included tax and shipping where appropriate. I am a Prime member so some of the items I bought on Amazon shipped free. I did not use a laptop, I purchased the CanaKit RasPi setup which was crazy easy to setup and configure.

Rasberry Pi CanaKit http://www.amazon.com/gp/product/B008XVAVAW/?tag=skimlinks_replacement-20 $62.95
jumper wires: http://www.amazon.com/gp/product/B00J5NSOVA/?tag=skimlinks_replacement-20 $7.00
Uno:http://www.sainsmart.com/sainsmart-...ent-board-compatible-with-arduino-uno-r3.html $26.98
Wall wort for uno: http://www.amazon.com/gp/product/B003XZSZWO/?tag=skimlinks_replacement-20 $4.99
Relay: http://www.amazon.com/gp/product/B0057OC6D8/?tag=skimlinks_replacement-20 $11.15
2 temp probes:
http://www.ebay.com/itm/331111738688?_trksid=p2059210.m2749.l2649&ssPageName=STRK:MEBIDX:IT $7.76
Thermowell:
http://www.brewershardware.com/16-Stainless-Steel-Thermowell.html $16.81
Terminal block:
http://www.amazon.com/gp/product/B005248LKU/?tag=skimlinks_replacement-20 $4.63
4K resistor and solder. Dont have a link, purchased at local Radio Shack. $5.00

Total = $147.27

I’m excited to try this out on a DIPA I’m brewing in 2 weeks!

Good stuff man! Glad you got it working.
 
Last edited by a moderator:
That aside the temp probes normally show up first…

True, but in his screen shot he was not reading the values. So he probably didn't even notice the probes if they were there.

His circuitry looks right, its not that complex of a setup and the chances of getting 2-4 bad probes is infinitely small.
 
Bit it could be any number of issues. When you start building your own shield. I can't lie I did it at first too, then I removed that from the equation and my troubleshooting went down to a minimum. He could strip and tin a bit of wire on one temp probe and hook it directly to the arduino. The resistor leads are usually small enough to be shoved in there too. This would be the best place to start troubleshooting. If he can get 1 probe running then maybe he can trace his steps from there and find out what the problem is.
 
If you use the app it will slide to the next pic in the thread without warning. It's gotten me a couple times too.
 
Got some more temp probes in today from an American vendor. Believe it or not they actually used common sense when deciding what wires go where. Red 5v, black gnd, yellow data

ImageUploadedByHome Brew1409789203.662228.jpg
 
I took a bunch of screenshots and updated the first post with more detailed instructions on setting up the devices to hopefully prevent any further confusion. A few of my statements in the old instructions were false, like the devices showing as Temp Probe or Switch actuator, when they dont do that until you install them. I had written the instructions after i already had mine up and assumed that was always there :)
 
Is anyone using their brewpi for mashing? Would like to see some pics including your brewpi screenshots.
 
Got my panel Mount USB connector installed. Going to start testing it with my keezer this weekend. I've got plans to update the collar and would love to use this with Rpints.

I also used Velcro to mount the pi, relay board, perf board and arduino.

1409800896874.jpg


1409800958090.jpg
 
Is anyone using their brewpi for mashing? Would like to see some pics including your brewpi screenshots.

It would require a bit of modification to the Arduino code itself, by default i think it has specific wait timers to heat/cool that i dont think you can modify from the front panel.
 
This one?
https://www.homebrewtalk.com/f51/ho...roller-cheap-466106/index140.html#post6314307
I'm following that, and everything works except launching the script from the web interface.

Also, it's probably worth noting that (if you are going to update the github user docs) that using "kernels == blah" isn't the best approach for udev rules, using the attrs{serial} is happier because it's unique to the device, not the usb port. YMMV on the TTYACM* devices, but my ftdi devices are happier that way.

Here's my rules for /etc/udev/rules.d/99-arduino.rules

Code:
SUBSYSTEM=="tty", KERNEL=="ttyUSB*" , ATTRS{serial}=="A902TDXG", SYMLINK+="arduino_fridge", GROUP="brewpi"


I'm going to go back through the instructions linked above. What should I be looking for permissions/ownership wise to launch the script from the web interface?

Okay, wiped everything and reinstalled from git, redid permissions etc. It now works. Also, I suspect that I should have named my cron file the same as my script location (e.g. 'fridge') having done all that, it now works. Thanks daytrippr, et al!:rockin:
 
Thanks a bunch for the replies....I'll check into those suggestions....a little short on time to troubleshoot but will get back.....

Forgot to mention that I did check the Read Values box every time I was retesting to see if I had found the problem with results as shown.....going to try without the board and just one wire and see what happened...
 
so I am trying to get multiple arduino's set so that I can control multiple heat wraps during fermentation. I was following day_trppr's instructions that he posted and everything appears to go well until:
sudo usermod -a -G www-data pi at this point i get this error and was wondering if anyone can help.
usermod: user 'pi' does not exist
 
adduser pi
_____________

passwd pi
(enter and verify a password for pi)

_____________

usermod -a -G www-data pi
 
Thank you RyanSweeney. That appears to have worked. Now I have a new error. When I try to clone the repositories i get this error.

error: server certificate verification failed. CAfile: /etc/ssl/certs/ca-certificates.crt CRLfile: none while accessing https://github.com/BrewPi/brewpi-script/info/refs
fatal: HTTP request failed

According to the internets this is due to a bad certificate(obviously) are you installing on a Debian box or a RPI?

Apparently this can also happen if your system clock is wrong as certificates are time sensitive, so make sure your date and time on your system are set properly.
 
[...]Apparently this can also happen if your system clock is wrong as certificates are time sensitive, so make sure your date and time on your system are set properly.

Good call, I've seen the same thing when I've flown overseas and didn't adjust the time on my laptop and phone. Certificates are definitely time-sensitive...

Cheers!
 
So I used my brewpi to log my keezer activity for a day. It appeared that my freezer would turn on twice an hour. Just following the swing of the two probes that I had inside.

I hooked the brewpi up to my keezer over night to see if it would cycle my freezer less. Checked it this morning and the freezer only kicks on once for about 10 minutes ever hour.

I have the PDF some posted (sorry cant track down the post to give credit but thank you). So I may follow his direction and see if I can get it to cycle a bit less for this application. If that works then I'll be replacing my stc with one of these.
 
day_trippr and FuzzeWuzee

You are brilliant! It was indeed system date and time issue. Unfortunately I ran out of time and have not been able to complete the process yet. There is a fair chance that I will need further help but, as of now things are great and you are golden.
 
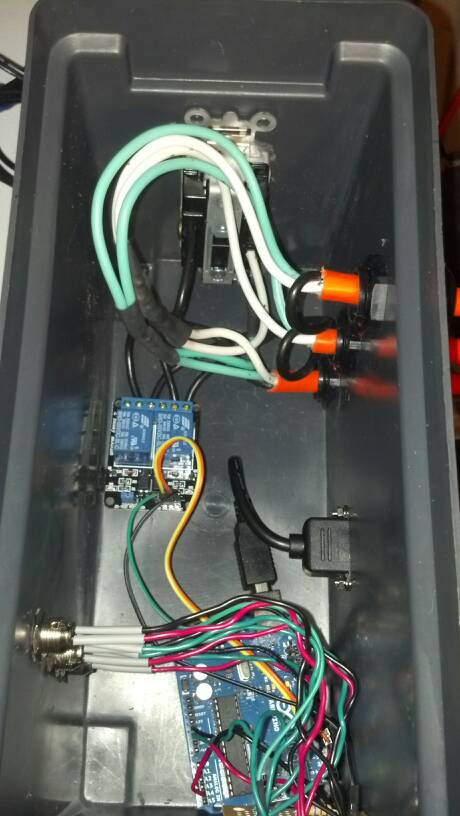
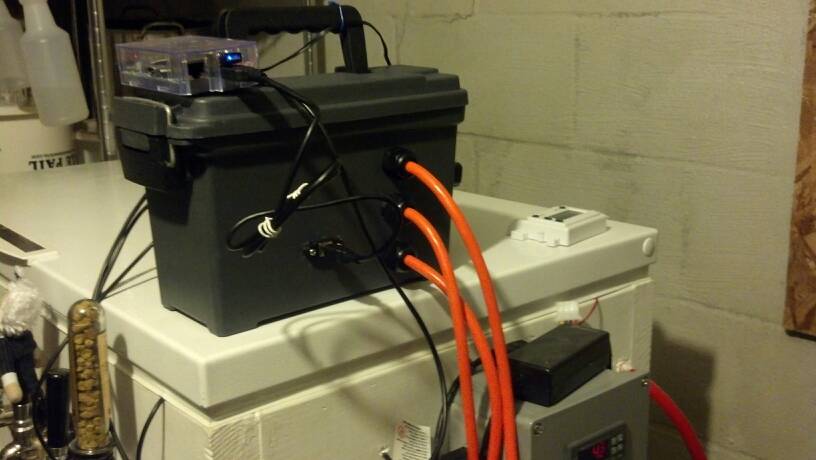
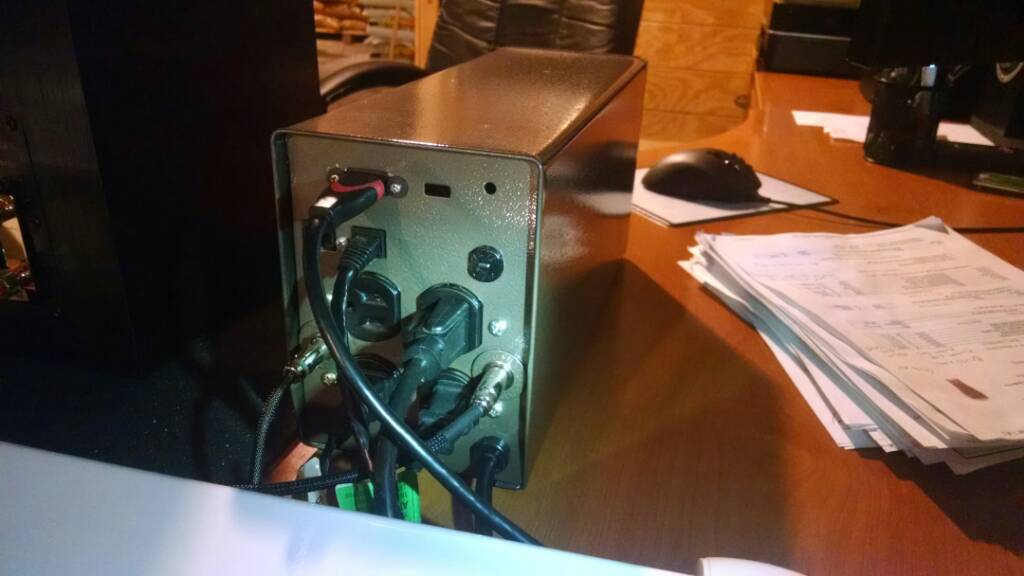
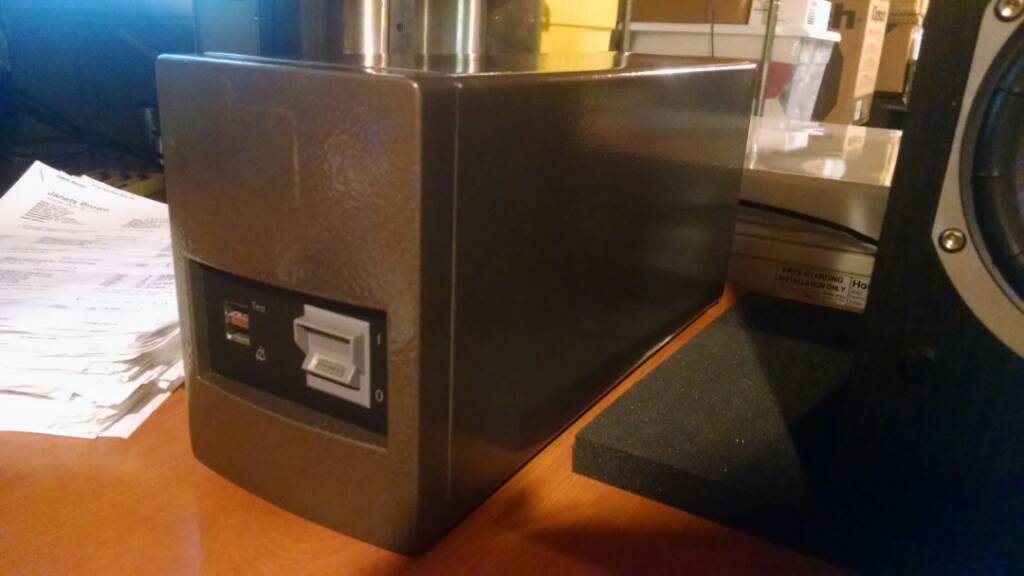
Finally got the pi all enclosed and wired up in an old ups enclosure. Gave it a rattle can paint job, added an HDMI receptacle to the back, soldered into the existing Ethernet port for a LAN connection, added a dual front USB jack and attached some xlr mini jacks for the temp sensors. The existing 120v receptacles made it a snap to wire everything in. 2 plugs are for cooling, and 2 are for heating. I actually didn't even have to drill a single hole in the case. Whoever recommended the xlr mini jacks - cheers to you, they are awesome!

1409977961561.jpg


1409977985542.jpg
 
Awesome re-use of the UPS. I almost have my enclosure finished and now I am jealous of your setup, since I also have an old UPS that would work perfect.
 
Love the recycling. I'm currently looking for a good enclosure. Gotta find something that will hold 4 arduinos and a USB hub.…
 
My Ras Pi took a dump yesterday so I'm sending it back to Amazon and ordered a new one. When I get my new pi will I need to update the UNO and re-setup my devices?
 
Should be able to hook everything up like before and reuse your original sdcard
 
So I have been following day_trippr"s instuctions and FuzzeWuzze's help and have managed to get to the very last steps and end up with Webpage not available.

I am using debian weezy on an old pd with a wired connection and a static ip assigned from the router. Any ideas where I can go from here to get the sytem up and running?
 
Status
Not open for further replies.

Latest posts

Back
Top