• Please visit and share your knowledge at our sister communities:
  • If you have not, please join our official Homebrewing Facebook Group!

    Homebrewing Facebook Group

HOWTO - Make a BrewPi Fermentation Controller For Cheap

Homebrew Talk

Help Support Homebrew Talk:

This site may earn a commission from merchant affiliate links, including eBay, Amazon, and others.
Status
Not open for further replies.
All,

I installed everything per the guide and confirmed I am able to control the actuator by switching from inverted to not inverted on the PIN type.

However, when I do something as simple as set the fridge constant temp to 30 (currently at 55), nothing happens.

Thoughts?

Check in the maintenance panel under advanced settings. In the bottom area you will see a min and max. Set it to whatever you want, just realize you can freeze your beer.

Also a setting you may want to fiddle with is the PID Maximum. This is the allowed maximum delta between your fridge temp and beer temp. So if its set to say 10F and your beer constant is set to 60F but your beer is at 65F the coldest your fridge will go is 55F, then when your beer hits 64F it will lower the fridge to 54F, etc etc... Under normal brewing conditions you want this to be small like 10F, this keeps your fridge/freezer from overshooting too drastically. I think the default is like 18F which is a nice medium between chilling too slowly and overshooting.

But, when you are doing things like cold crashing, or chilling warm wort so that you can pitch your yeast it can make the process take a lot longer than it needs too. For example if my wort was at 80F in my bucket, it would only chill the freezer down to 62F(using the default 18F setting). Obviously this isnt much of a delta and it will take forever for the beer to lower down as apposed to if the PID max was set to 30F, my freezer would get a much chillier 50F and get it to pitching temps faster in a matter of an hour instead of many hours. If you need to chill super fast i recommend changing this to what your beer setting will be -5. So if you want your beer at 30F, set the PID max to 25F and it will get your freezer down to 5F, higher delta means it will get there faster. I only say this -5 thing because at one point there was a bug that if the value of your beer temp minus your PID max went below 0 that it rolled over and set your fridge to its maximum temp. This didnt result in heating, but it results in the cooling never coming on either. I believe this bug was fixed, but not knowing when you installed or if its in the live version yet i recommend sticking to that rule if your going to mess with the PID max.

Just dont forget to change it back when you go to ferment! Or else you will notice that your freezer cycles on and off a lot more often because it will overshoot and then heat(if you also use a heater) to compensate, and it will just go back and forth doing this wasting energy and bouncing your beer temp around +-1F instead of the +-.2F it should be doing.
 
Ive read all the posts and this may have been covered but I just received my probes I ordered from ebay today. Their length is surprisingly short so I'm going to have to length them. Is there a specific gauge of wire I should use to extend the three leads?
 
Ive read all the posts and this may have been covered but I just received my probes I ordered from ebay today. Their length is surprisingly short so I'm going to have to length them. Is there a specific gauge of wire I should use to extend the three leads?

Not particularly, but just try to match it as closely as possible.
 
Ughhhh! So, so close. After many hours of messing with the Pi and the Uno. I have everything installed. I have installed my two temp sensors and have them assigned correctly but I am not seeing this:

Under DETECTED DEVICES You should also have two device types of “Switch Actuator”, one on Arduino Pin 5(Act2) and one on Arduino Pin 6(Act 1).

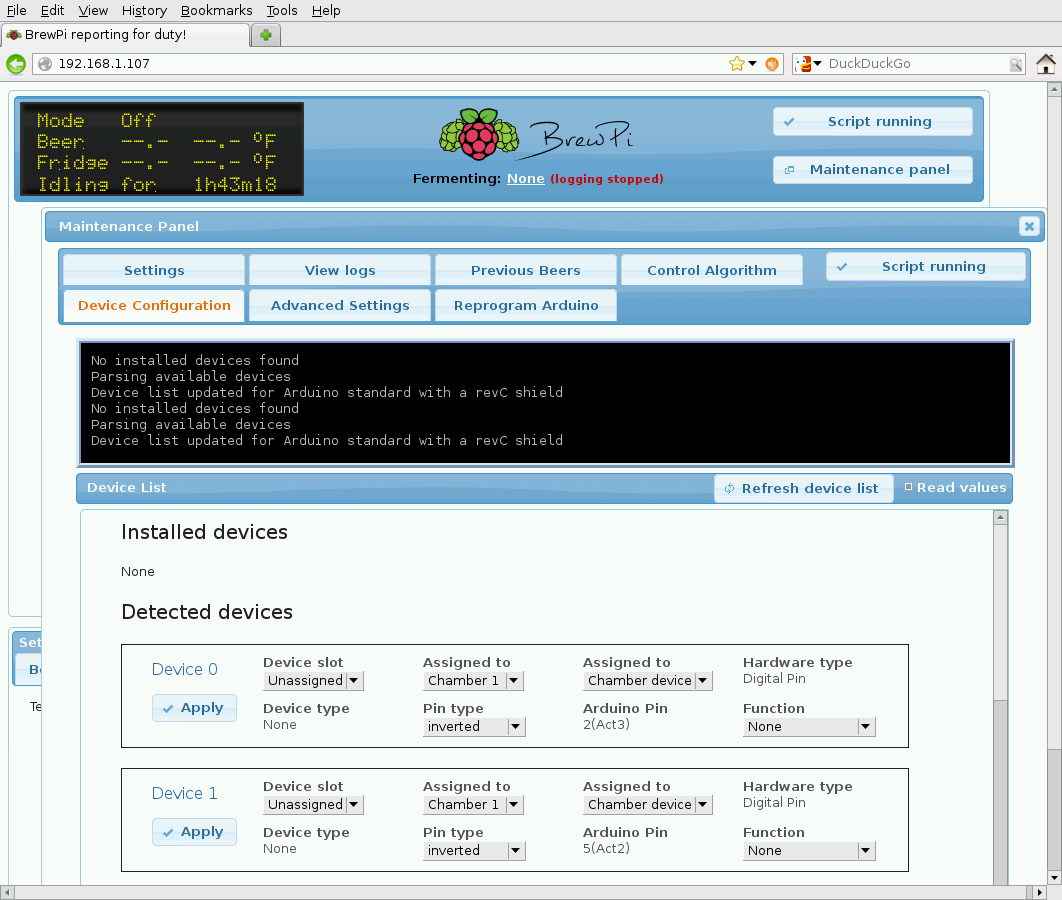
I see pins 5 and 6 but not the device type of Switch Actuator. It just says device type = None Any thoughts?
Thanks!
 
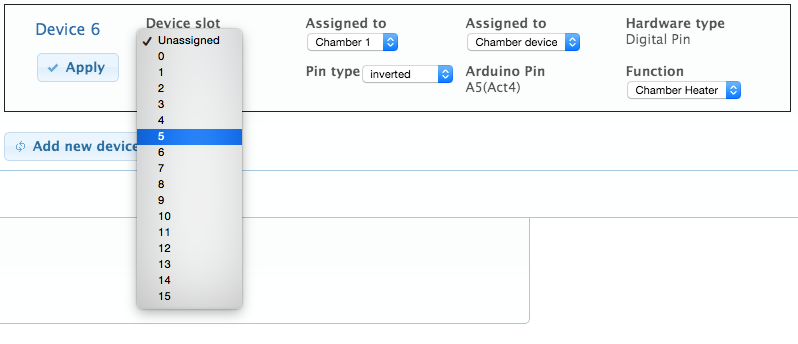
It doesn't say "Switch Actuator" until you select either "Chamber Cooler" or "Chamber Heater" using the Function dropdown menu, and assign it a Device Slot.

Screen Shot 2014-08-29 at 10.29.26 AM.png


Screen Shot 2014-08-29 at 10.30.21 AM.png
 
After you do the above, click "Apply", then refresh the device list. You'll see it listed as a "Switch Actuator" after that.
 
Also I've found that things like this that seem to be obvious can dumbfound even the best of us when we've been up all night banging our heads against the keyboard trying to get these thing setup. One time I was trying to get CTRL+ to zoom my entire webui but it wouldn't work, only zoomed the text not anything else. Messed with it for 2 hours and put in a call to all the forums for help. Went to bed at like 2am. Woke up at 7 walked into my office opened up ice weasel settings hit the ticker that says something like zoom images with text. And I was done. It just never occurred to me while I was delirious.
 
I am planning on building one of these controllers for myself. I see 153 pages of posts here to go through so please forgive me if my questions are already covered. First, are the parts list on the first page current and up to date? The technology is moving fast on this stuff and I want to make sure i'm not going to be outdated already on some items. Secondly, has there been any talk about integrating any live video for viewing your fermentation locks/blow-offs and fermentation activity?
 
1) Yup the parts list is still current, although if your familiar at all with electronics there are other ways to hook up the circuitry than using twist caps.

2) Yes, someone has already done it, give me some time ill fly through a bunch of the pages and actually update the main topic with links to the good stuff people have posted..ive been meaning to do this.
 
I am planning on building one of these controllers for myself. I see 153 pages of posts here to go through so please forgive me if my questions are already covered. First, are the parts list on the first page current and up to date? The technology is moving fast on this stuff and I want to make sure i'm not going to be outdated already on some items. Secondly, has there been any talk about integrating any live video for viewing your fermentation locks/blow-offs and fermentation activity?

Hey Felix,

I was using Motion on my RPi, but it kept locking up the BrewPi service. I moved Motion to an older mini-PC I had lying around.
 
Alright, ive gone through all 150 pages in the last hour or whatever its been and put together a list that i attached to the bottom of the Original post for new people that should contain all of the links to the more important things discussed in this thread, particularly instructions people wrote out on how to add new things or fix issues. If i missed something you think i should put in let me know, i just skimmed through very quickly but think i got everything.

I also posted all the installed BrewPi setups that people have posted, so others can get inspiration on containers to put their stuff in and the various connectors you guys have used to make your final box looks clean! I'll try to keep the list up to date as we add more completed builds ;)
 
Dude lay off the adderral. Nobody expected you to do all that.
 
Dude lay off the adderral. Nobody expected you to do all that.

I did ;) Theres too much good information people have posted throughout the last few months, i'd hate for it to get lost in the sea of other debugging and build problems we have throughout the thread :mug:
 
Everything works but the heater to use link. It brings you to a generic amazon page.
 
I did ;) Theres too much good information people have posted throughout the last few months, i'd hate for it to get lost in the sea of other debugging and build problems we have throughout the thread :mug:

Fuzze, you are my hero!
We should actually have a wiki for this stuff, rather than a couple o' forums, etc

I'll post up some dual 'duino side by side fridge action as soon as my new supplies come in from spamazon :)
 
Everything works but the heater to use link. It brings you to a generic amazon page.

I get sent to a link with all the Lasko heaters do you not see that?

I didnt show the specific product because they are all the same thing, but sometimes white is cheap sometimes blue, etc. So you can just pick whichever color is cheapest.
 
Just wanted to show the newcomers just what is needed to setup the 1-wire io as simply as possible. It doesn't take up any space. You don't have to build a special board for it. And it can be done in seconds.

ImageUploadedByHome Brew1409363320.183294.jpg

Just flip over the arduino and solder the resistor directly to the board. This is just about all I've done to create a "shield" for my brewpi. Since I using all 1-wire devices all I have to do is pull 3 wires from the board to wherever all my 1-wire devices will hook up inside the fridge. I'm working on building a small 5v power supply unit inside my fridge so that would alleviate 1 of my wires pulled from the arduino leaving me with only data and gnd needed.

I'm using multiple arduinos in my setup, meaning I have to pull these wires in from all 4 arduinos. Given that I already have 5v inside the fridge, and 1 gnd wire pulled from the first arduino, I can reduce the wires down to only needing 1 wire pulled from 3 arduinos and 2 from the fourth (in reality I'll most likely pull a common ground across all 4 arduinos but only 1 will travel into the fridge). All this meaning I only need 5 wires going from my control box to the inside of my fridge to control 4 fermenters. Not bad…
 
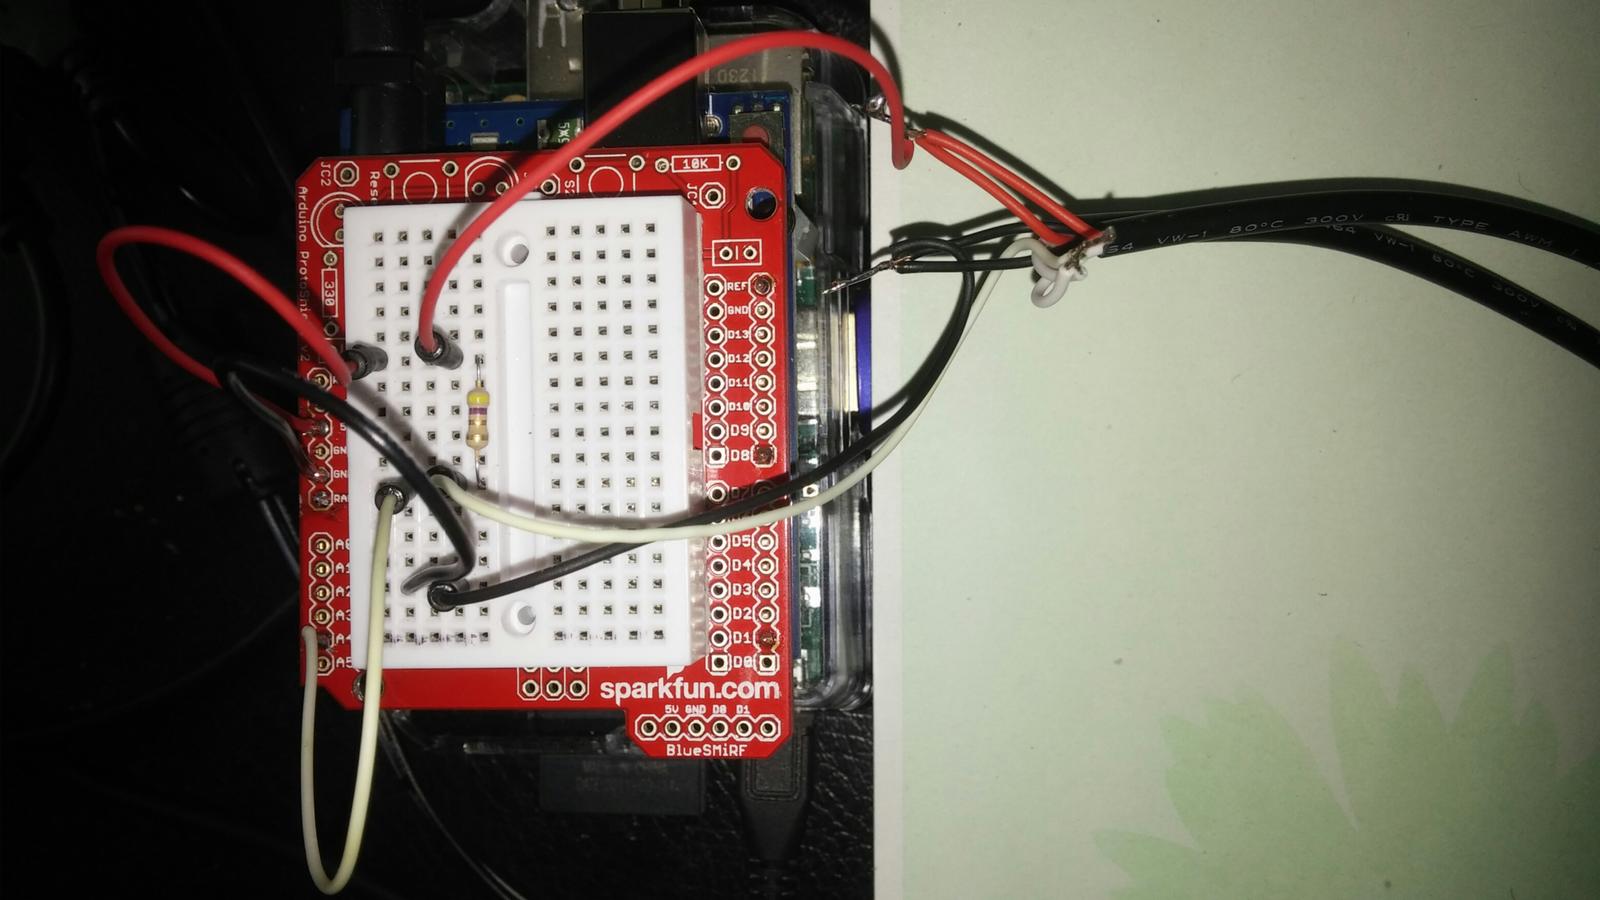
I have previously submitted a pic and ask if the wiring was correct but it didn't seem clear enough to make and remarks about so here is another pic which I hope is better and one of the console.....can't get the temp probes to show up when I scan for hardware....any comments most welcome. thanks

BrewCheapWiring.jpg


BrewCheapScreenShot.png
 
Was that everything you needed, or did you need more?

I think that's all, however I'm now at the point of connecting the Pi and relay module and soon a fridge, but have to figure both of those parts out.

But first, the temperature reading on the two probes seem to rise and fall at a similar rate when placed into different temperatures. One in cold water, one at room temp, yet they both rise together. The readings are a few degrees different. Not sure how or what is happening... but it has me wondering if I got them placed in the wrong location on the board. :confused:
 
If you're seeing the two probes via the gui, they're plugged in and configured correctly - even if they don't agree with each other.

I recently received a pair of probes that read 1.5°F different from the other 10 probes I have in use - consistently through the tested range (ice water to room temperature). I ended up adding an adjustment function to my python scripts to cope...

Cheers!
 
I think that's all, however I'm now at the point of connecting the Pi and relay module and soon a fridge, but have to figure both of those parts out.


But first, the temperature reading on the two probes seem to rise and fall at a similar rate when placed into different temperatures. One in cold water, one at room temp, yet they both rise together. The readings are a few degrees different. Not sure how or what is happening... but it has me wondering if I got them placed in the wrong location on the board. :confused:


Toss an ice cube or two into the one with water. See if it drops quite a bit. Otherwise, post a pic of your wiring.
 
You're all correct, thanks! The time it takes to reflect temp change is not what I was expecting. Now just waiting for the project box and M->F wires to arrive tomorrow, so I can connect the controller without soldering... just have to figure out what connects to the breadboard from the SSR.

If anyone has a diagram for that portion, it would be super helpful. My brain can't comprehend the earlier sketches... running on fumes, and not enough beer at the moment :p

One stupid question, which outlet does the fridge plug into? It's probably in the OP and I somehow skipped it.

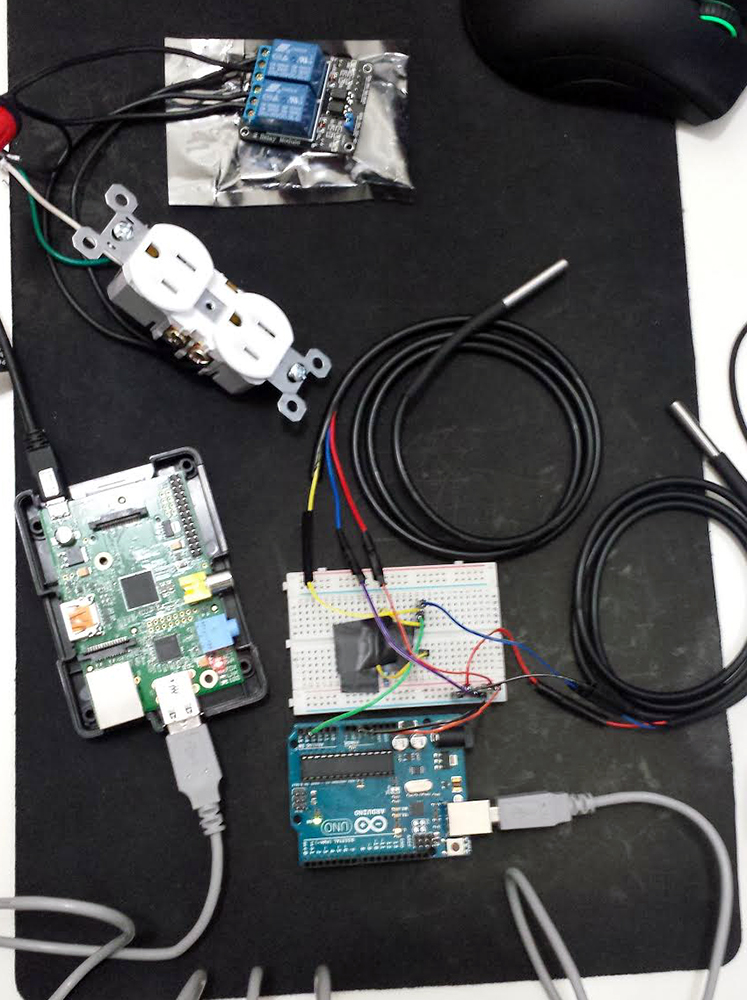
brewpi.jpg


Untitled-1.jpg
 
Whichever 1 you have assigned to cooling. Invert the pin assigned to cooling, whichever relay lights up is the one attached to cooling.
 
And looking at that picture it seems you haven attached the relay board to the arduino yet.
 
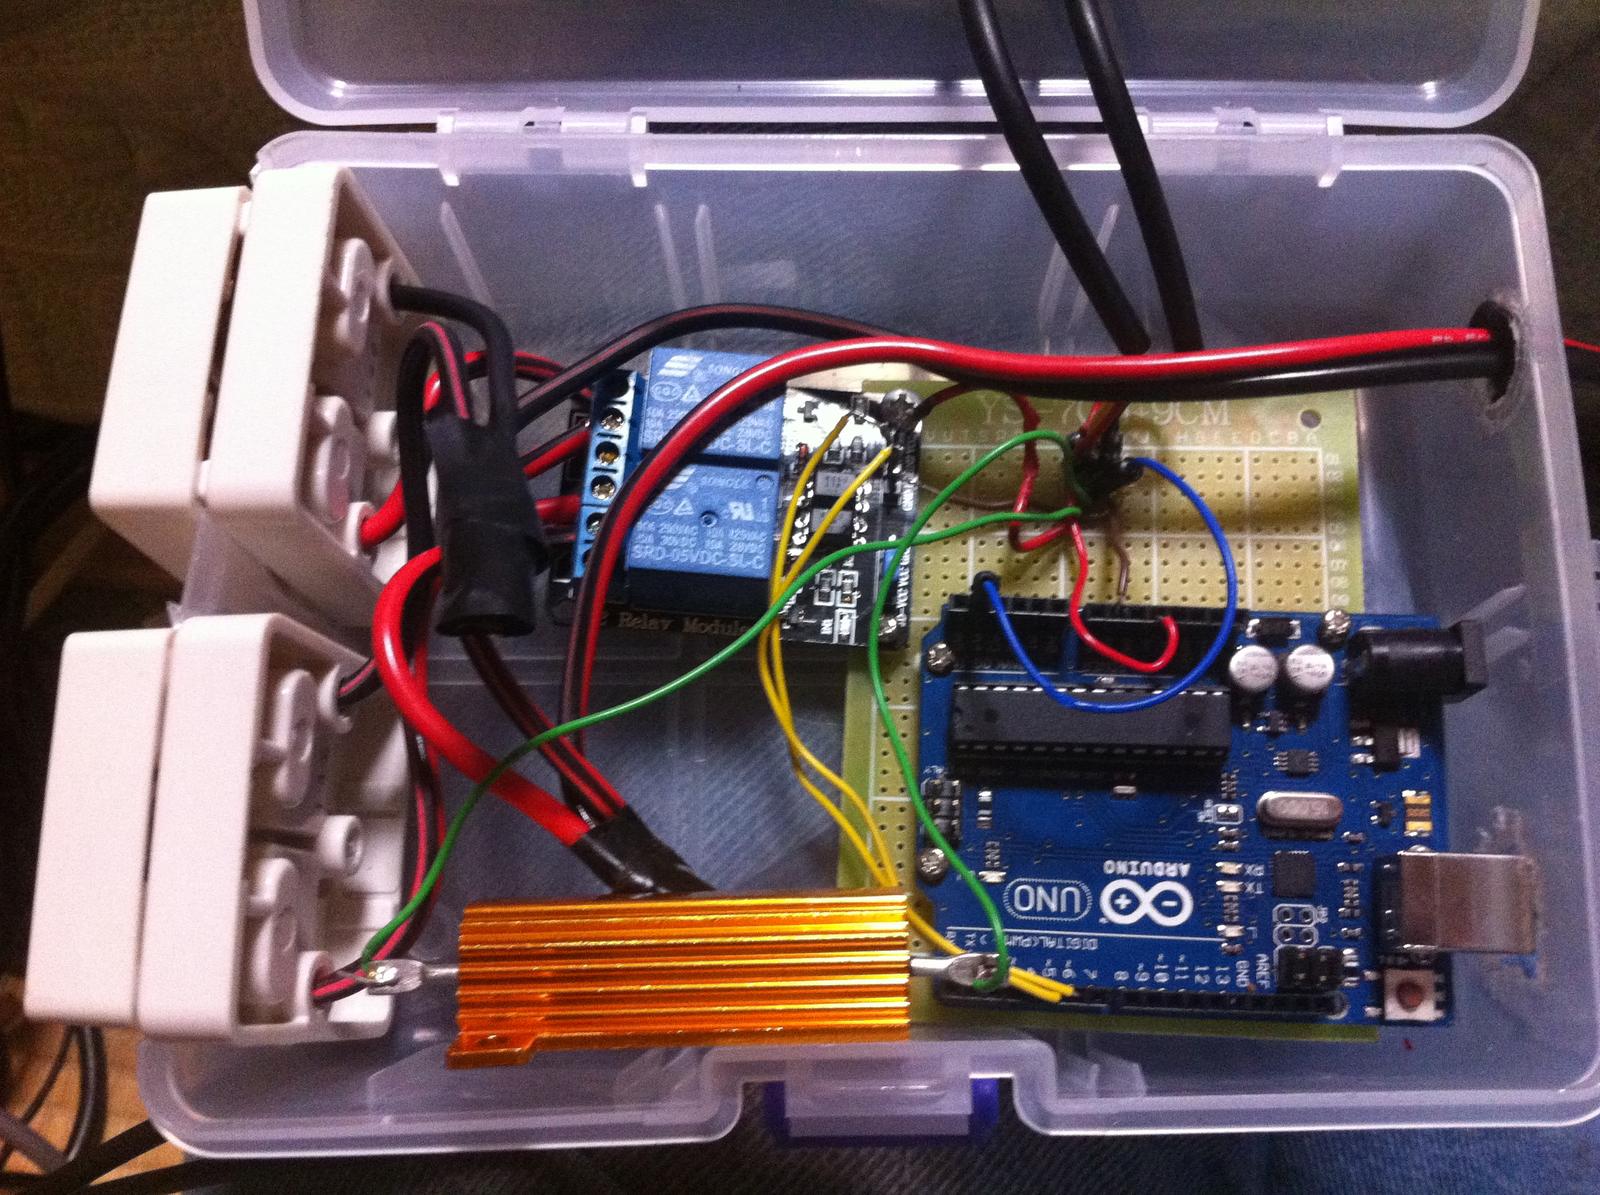
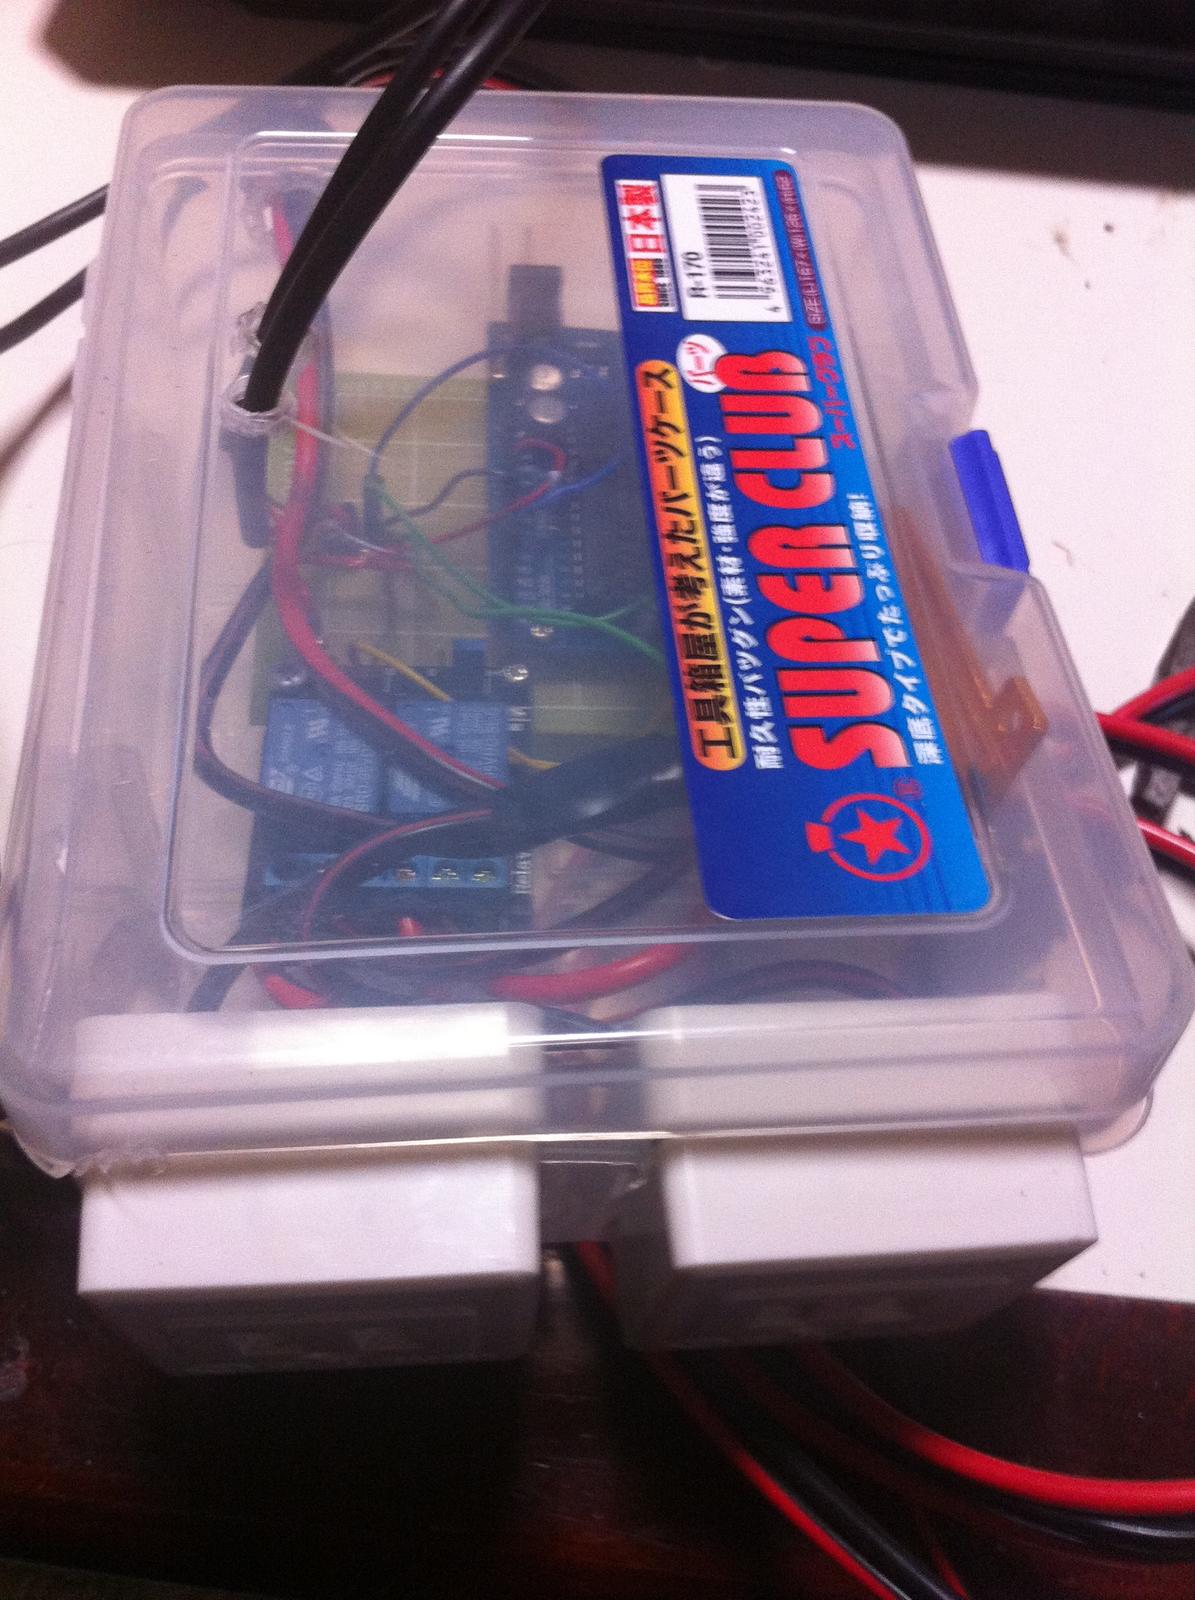
Here is my finished device. The big gold thing is the only 4.7K resistor I had so I used it.

I ordered my parts from a Chinese site, but being Japan I usually get stuff from there in 2 weeks.

My cost breakdown

Arduino Uno $12
Relay $3.5
Temp Probes $10
Circuit Board $1
Outlets $2.5
Case $4

Total $33 Shipping included

Fantastic thread! I never would have done this so inexpensively without reading about this here.

IMG_3950.jpg


IMG_3953.jpg
 
Here is my finished device. The big gold thing is the only 4.7K resistor I had so I used it.

I ordered my parts from a Chinese site, but being Japan I usually get stuff from there in 2 weeks.

My cost breakdown

Arduino Uno $12
Relay $3.5
Temp Probes $10
Circuit Board $1
Outlets $2.5
Case $4

Total $33 Shipping included

Fantastic thread! I never would have done this so inexpensively without reading about this here.


Good deal. I'm not going to get into my costs. But before custom thermowells I'm probably still cheaper with 4 arduinos than buying 1 shield with shipping from brewpi.
 
Way to go cb in Tokyo. Another one is alive!
When you start using it I would be interested in knowing the heater size and type and the pid settings
 
Way to go cb in Tokyo. Another one is alive!
When you start using it I would be interested in knowing the heater size and type and the pid settings

Still looking for the right freezer to go with it. So it will likely be another 2 or 3 weeks before I start using it, but will certainly update.

I picked up a thermowell, but I also ordered a few of these

http://www.melexis.com/Infrared-Thermometer-Sensors/Infrared-Thermometer-Sensors/MLX90614-615.aspx

I am going to see if I can get these working with this setup and then compare temperature readings with the thermowell readings. I think it would be great if I could use an IR thermometer and not have to stick a thermowell in my bottles.
 
Status
Not open for further replies.
Back
Top