I have completed a 1500 watt heat stick that does not leak and uses no JB weld or epoxy or glue and is cheap and can be disasembled for element replacement. It's really no different than most cheap builds except for the gasket and sealing method and the PVC attachment to the waste line piece.
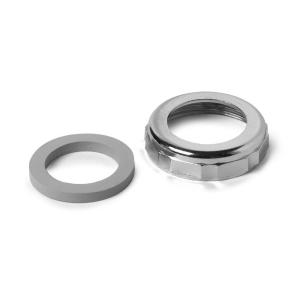
A guy at Home Depot steered me to a packaged collar nut with a different gasket; flat that fits perfectly around the terminal block of the heating element. So the gasket sits extremely tight in the waste line piece and the element is then pressed against the gasket and secured with the lock nut. I used a pipe wrench to tighten it. I immersed it in water for 3 days without leaks, took it apart, re-immersed it for a couple more days and then last night heated about 4 gallons of water without leaks. I was going to put the HD part number for the collar nut/gasket but SWMBO cleaned up and threw out the package") . I plan to build another one and will definitely get more pics as I do...but this one has been assembled and re-assembled three times so that could be the life of the gasket...don't know and not going to find out.
. I plan to build another one and will definitely get more pics as I do...but this one has been assembled and re-assembled three times so that could be the life of the gasket...don't know and not going to find out.
A guy at Home Depot steered me to a packaged collar nut with a different gasket; flat that fits perfectly around the terminal block of the heating element. So the gasket sits extremely tight in the waste line piece and the element is then pressed against the gasket and secured with the lock nut. I used a pipe wrench to tighten it. I immersed it in water for 3 days without leaks, took it apart, re-immersed it for a couple more days and then last night heated about 4 gallons of water without leaks. I was going to put the HD part number for the collar nut/gasket but SWMBO cleaned up and threw out the package
. I plan to build another one and will definitely get more pics as I do...but this one has been assembled and re-assembled three times so that could be the life of the gasket...don't know and not going to find out.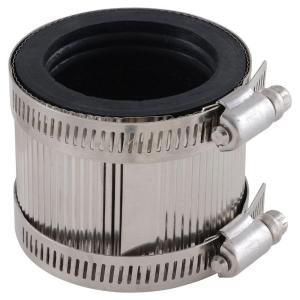


![Craft A Brew - Safale S-04 Dry Yeast - Fermentis - English Ale Dry Yeast - For English and American Ales and Hard Apple Ciders - Ingredients for Home Brewing - Beer Making Supplies - [1 Pack]](https://m.media-amazon.com/images/I/41fVGNh6JfL._SL500_.jpg)