• Please visit and share your knowledge at our sister communities:
  • If you have not, please join our official Homebrewing Facebook Group!

    Homebrewing Facebook Group

Got a welder, now the fun begins...

Homebrew Talk

Help Support Homebrew Talk:

This site may earn a commission from merchant affiliate links, including eBay, Amazon, and others.
You could also try asking around at some small job shops.
They always have scraps lying around, and may give you some.
It will probably be carbon steel but any time under the hood is gonna help.
Don't call ahead just show up. It's easier to tell someone "no" over the phone than face to face. Tell them that your learning how to weld and they most likely will oblige you.

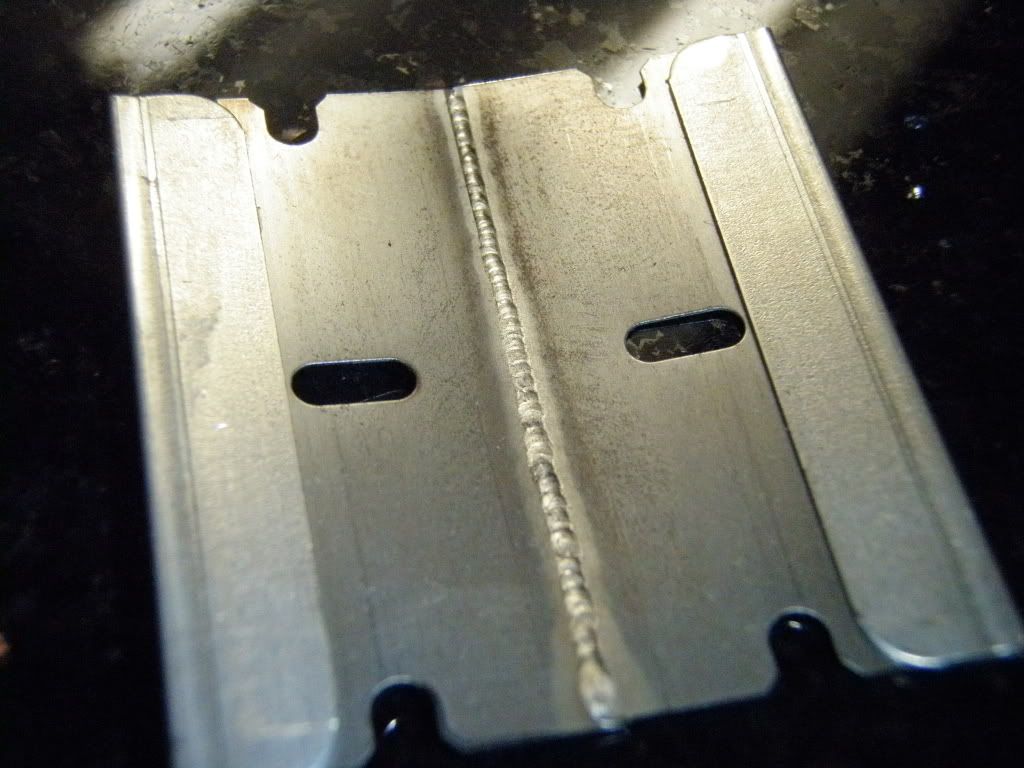
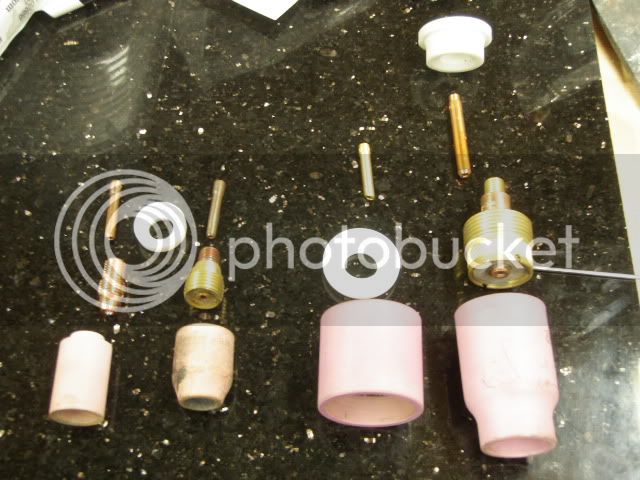
For welding in AC mode the way you sharpened the tungsten was good but in dc mode I find a sharp point focuses the arc better.
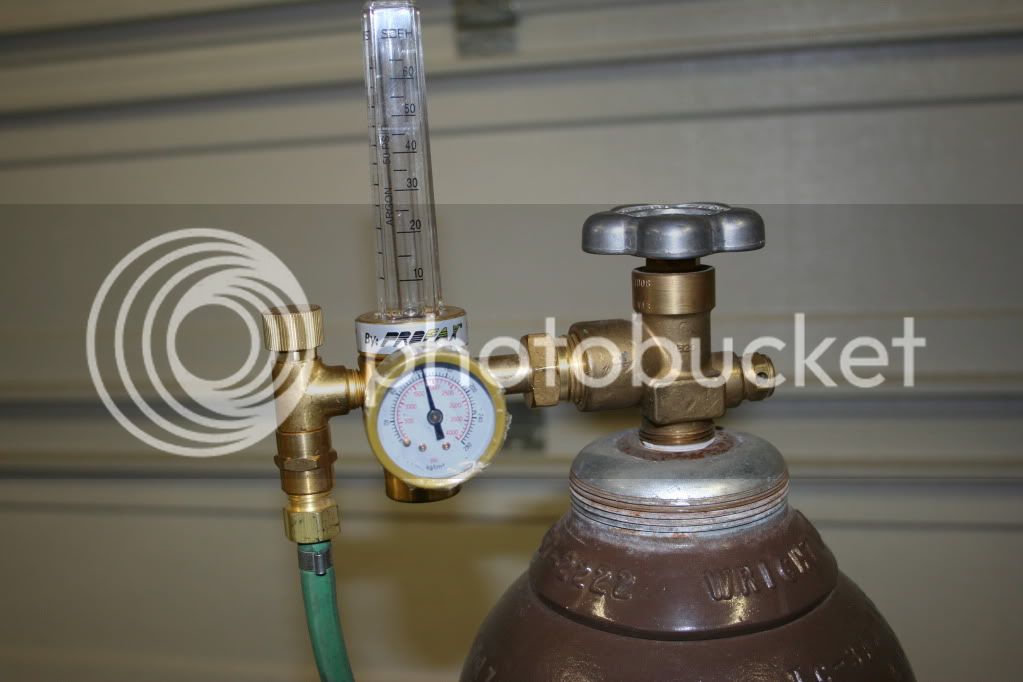
I ordered a "T" from the local welding shop that connects to the bottle and bought a cheap flowmeter off of ebay to supply backgassing. I was afraid that with a "T" after the flowmeter I could not be sure of the flow to the torch.

That's a good point. You may get a lot further ahead if you agree to bring back the scrap after your done with it. They may just let you pilfer the scrap bin all you want.

The local college auto shop instructor always collects exhaust pipe scraps for his students, the scrap man gets what's left.

Ed, save that scrap with holes for filling holes shut later.
As I told you before is to tap off for back gassing before
the flow meter to not starve the torch like mentioned above.
You get a Vee Neck sunburn yet?

There is a couple muffler shops close... I will drop in and see if they have any scraps they will "loan" me.

I'm kinda leaning toward an extra bottle for back purging (but it will probably be a while). I'm not sure how to split my current line and still maintain the set flow to the torch. An extra tank would also serve as a backup.

BB - No sunburn yet, I pretty quickly thought of a long sleeve collared shirt ;)

Thanks for the input guys, I hope to get in some more practice today.

Ed
 
Ed,
with the size bottle you have I would add a Tee just after the regulator to branch off to the torch flow meter, the other leg to a needle valve or another flow meter for the purge. I have used a needle valve for years for a light back gasing flow it's not a critical flow amount just a displacement gas.
Save some money before the wifey wacks you in the head.
 
GM,

Thanks! I have some SS (keg cutouts and 1/2" tubing) and some aluminum. I thought I would be better off working on my coordination with mild steel before wasting the "good stuff" ;) Anything you can put together would be appreciated. Just let me know, I'll be happy to cover shipping.

Ed


I'll be in touch. This is my last week of work for the year. So I'll gather what ever I can for you.

I would be careful about the exhaust tubing. Make sure it isn't galvanized. I'm not sure there is much of that out there, just a thought.
 
Ed,
with the size bottle you have I would add a Tee just after the regulator to branch off to the torch flow meter, the other leg to a needle valve or another flow meter for the purge. I have used a needle valve for years for a light back gasing flow it's not a critical flow amount just a displacement gas.
Save some money before the wifey wacks you in the head.

My regulator and flow meter are one in the same (see picture below).
Not sure how I can tee off before the flow meter. I kinda think I am money ahead for getting a bottle below the LWS price. So eventually, I could see getting another maybe an 80cf. I don't think I'm going to rush it... so that may help with not getting wacked ;)

IMG_3456.jpg


Ed
 
My 1/6" tungsten got pretty rough.
This was with the current set to 100amps and 15cfh gas.
Do you think too much current or too little gas?

IMG_3450.jpg


IMG_3452.jpg


Ed
 
I do not have a gas lens, just the collett holder. Not sure if that is the same as a gas diffuser? Ed

I'm sure you know this but, I figure it will be good info for the thread.

I took a pic of part of my collection showing the differences.
I run a 2 series torch, Starting on the left is the basic collet, next is a gas lense, next is another type of gas lense, and the far right is the gas lense I use all the time.
P1010179.jpg


This shot just shows the difference in them. I switched up the order to keep every one guessing. Sorry. The two on the right in the first pic have been switched.
P1010180.jpg
 
I switched back to the 3/32" tungsten which seemed to hold up much better.
Here's my latest grind (60 grit belt, followed by a 180grit disk):
IMG_3455.jpg
 
I'm sure you know this but, I figure it will be good info for the thread.

I took a pic of part of my collection showing the differences.
I run a 2 series torch, Starting on the left is the basic collet, next is a gas lense, next is another type of gas lense, and the far right is the gas lense I use all the time.

This shot just shows the difference in them. I switched up the order to keep every one guessing. Sorry. The two on the right in the first pic have been switched.

GM,
Thanks for the pictures, that really helps!
I only have the basic collets. Right now I only have 1/6" and 3/32". Do you suggest I get a gas lense? I will probably be ordering some tungstens, should I stick with Thoriated?

Ed
 
All yes to the above questions Ed plus it's a good idea to have a spare cup as they can be broken when one does something not thinking or in a hurry moving around, trust me on this one.
Heck my friend gave me a couple .040" tungstens, i'd like to add .020" also and try them someday on thin low amp projects.
 
GM,
Thanks for the pictures, that really helps!
I only have the basic collets. Right now I only have 1/6" and 3/32". Do you suggest I get a gas lense? I will probably be ordering some tungstens, should I stick with Thoriated?

Ed

2% is all I buy and use. I have tried using the others but, to be honest. I didn't see any real difference for what I do. I'm sure others will disagree with me a bit on this. Also, being in aerospace we can't use or do anything that the weld schedule doesn't allow. In other words, if the weld schedule says 40 amps max. I legally can't go over that amperage. Having said that, ALL our weld schedules say to use 2%. So, prior to my current position. I never bought in to the different tungsten. Now I can't use any of the other tungsten. (at work)

Now, 2% doesn't hold up worth a darn when pulse welding. I just sharpen more often.

As mentioned earlier, A gas lens will help. The screen makes the gas come out in a column rather then a couple of streams. A gas lens will give much less turbulence when the gas leaves the cup. Yes I suggest picking up a gas lens. I wouldn't say that your basic parts are no good though. There will be times you need them cause they are much more thin in diameter.

Here is a chart for tungsten
http://www.ckworldwide.com/tech-4.pdf

Here is the whole tech book. Page 6 shows the gas lens comparison.
http://www.ckworldwide.com/technical_specs.pdf
 
All yes to the above questions Ed plus it's a good idea to have a spare cup as they can be broken when one does something not thinking or in a hurry moving around, trust me on this one.
Heck my friend gave me a couple .040" tungstens, i'd like to add .020" also and try them someday on thin low amp projects.


I run razor blades on 1/16" and a number 10 shade in my lid. No filler.

Edit; No pulse either. Just a back-n-forth motion.
P1010140.jpg
 
Here is the project that got the welder purchase approved.
SWMBO bought this "pumpkin" candle holder at a craft show. One of the welds broke and she asked me over a year ago if I could weld it. I told her no way with the stick welder I have. When I floated the idea of the TIG welder, her first question was "Can you fix my pumpkin?" I told her the welder could do it, and with practice, I might be able to make the welder do it... So here is the project that justified the welder:

IMG_3447.jpg


IMG_3448.jpg


IMG_3449.jpg


Tips / Hints / Suggestions?
So what do you think my chances are?

Ed
 
I think your chances are great. Put in just a bit more time, then grind the paint off. Using a small clamp hold the pieces together, then just fuse them together. The material will flow from the broken piece to the base. Once you done, blast it with air to cool things down fast and not damage any more paint then necessary.

Question.
Is the really riveted, or are they just for looks?
 
I think your chances are great. Put in just a bit more time, then grind the pain off. Using a small clamp hold the pieces together, then just fuse them together. The material will flow from the broken piece to the base. Once you done, blast it with air to cool things down fast and not damage any more paint then necessary.

Question.
Is the really riveted, or are they just for looks?

One rib on each side is welded (one of the two is broken), the rest are riveted. The riveted ribs swivel to collapse for storage.

So you think just fuse it with no filler?
I assume I will have to grind a bit of paint off somewhere to get a ground connected.
 
One rib on each side is welded (one of the two is broken), the rest are riveted. The riveted ribs swivel to collapse for storage.

So you think just fuse it with no filler?
I assume I will have to grind a bit of paint off somewhere to get a ground connected.

A fusion should be just fine IMO.
By grinding the paint off of the bottom of the weld joint, (since it will burn off anyway) the piece will ground through there. Just place it on a piece of plate, attach the ground to the plate.
 
Clamping a mini C clamp that has a point instead of cup on the threaded shoe will ground thru paint then attach the welder ground clamp to the C clamp. This results in minimum damage to painted surfaces vs removing paint.
 
Thanks for the input guys.

My fear is that I start an arc and the entire thing instantly melts into a puddle.

I worked on my coordination a bit today. For whatever reason, I started with the pedal on my left foot. I'm right handed so today, I tried the pedal right footed and it felt much more comfortable.

I bought a couple pieces of 6" x 18" 22ga steel from Lowes to practice on.
I cut a couple small pieces off and ran a bunch of beads on the small pieces.

I read that you should set the amperage about 20% higher than the current for the material being welded and plan to weld at 80% pedal with room for a little extra if needed. Does that sound right?

Ed


I can understand your fear about it all turning into a puddle. Perhaps you could set things up so you can start the arc on another piece and then once you get a stable small arc, you can move onto the pumpkin. Then you can slowly increase the heat to get things to fuse.

Yea, I have read and been told the same on the amperage setting too. The one thing I have to go back to is, the fact that your TIG welding. You have pretty much complete control over the heat being applied.
 
I must be different, I like settings of 40% over range not having the pedal
almost floored during welding.
I like it set this way to heat up quicker forming the puddle with less heat soaking the surrounding area.
 
I can understand your fear about it all turning into a puddle. Perhaps you could set things up so you can start the arc on another piece and then once you get a stable small arc, you can move onto the pumpkin. Then you can slowly increase the heat to get things to fuse.

Yea, I have read and been told the same on the amperage setting too. The one thing I have to go back to is, the fact that your TIG welding. You have pretty much complete control over the heat being applied.

I guess my question is, if you are welding something that requires say 60 amps, do you set the dial to 60, or where would you set it?

I know you could crank the dial all the way up, put it seems that would make the pedal real touchy.

Ed
 
I must be different, I like settings of 40% over range not having the pedal
almost floored during welding.
I like it set this way to heat up quicker forming the puddle with less heat soaking the surrounding area.

BB,

So you tend to have plenty of heat left in the pedal? With my inexperience, I have already seen myself focusing on the torch/arc and standing on the pedal, then trying to speed up the travel to keep up. Then realizing, it was too hot.

Another question on the same line. Is it better to heat and get a puddle quickly and maybe slightly overheat or slowly ramp up the heat until the puddle appears which may take longer to heat?

Ed
 
I guess my question is, if you are welding something that requires say 60 amps, do you set the dial to 60, or where would you set it?

I know you could crank the dial all the way up, put it seems that would make the pedal real touchy.

Ed

Yes, it would make it touchy. In general, a 60 ampish weld would see about 100 on the machine. Now there are some variables that go along with that decision. Does the weld at hand have holes in it like your practice piece, or does part of the weld at hand, cover up a section that has a piece of another member running across the back of it, sucking away the heat? Am, I purging the weld with a gas pocket, copper, or alum shoes?

So, my question to you is......with the welding you have done so far. How do you like the pedal to feel? Do you like to have a lot more amps available or, do you like to be pretty much maxed out? I guess what I'm getting at is, its all up to you and what you like to have at hand........or foot.LOL. Maybe you could find a setting that kinda resembles the car or truck you drive. Its kinda the same thing, more pedal means more heat or, you go faster.
 
It's a hand eye coordination thing everyones different I just get into it and weld not thinking about the foot control.
Made me laugh Ed, my comfort zone foot control is the left foot right never felt good. I drive stick shift vehicles plus left and right shift bikes go figure?
 
BB,

So you tend to have plenty of heat left in the pedal? With my inexperience, I have already seen myself focusing on the torch/arc and standing on the pedal, then trying to speed up the travel to keep up. Then realizing, it was too hot.

Another question on the same line. Is it better to heat and get a puddle quickly and maybe slightly overheat or slowly ramp up the heat until the puddle appears which may take longer to heat?

Ed


IMO, try not to focus on the arc so much. Stay tuned into the puddle. I find myself using the tungsten at times as a reference to the width of the puddle. When your punching through the material (on purpose) I look for the puddle to flatten out. That lets me know I'm getting drop through.

Just a thought here. Maybe this will help, but it might hurt too. IDK. My thought is to weld with the pulse on. Set the pulse on about 60 or so. That will be fast enough that you can't see the flashing of the arc staring and stopping but, you will hear it. As you weld the sound will change as you get further away from the puddle. The same will happen if you should drift toward the puddle. This might make things more familiar to arc welding. It won't give you the frying egg sound but it will be audible.
 
It's a hand eye coordination thing everyones different I just get into it and weld not thinking about the foot control.
Made me laugh Ed, my comfort zone foot control is the left foot right never felt good. I drive stick shift vehicles plus left and right shift bikes go figure?


That's weird. When I weld on my bench I tend to use my left foot more. I never thought of it feeling more natural though, as I weld with both feet and both hands.
 
IMO, try not to focus on the arc so much. Stay tuned into the puddle. I find myself using the tungsten at times as a reference to the width of the puddle. When your punching through the material (on purpose) I look for the puddle to flatten out. That lets me know I'm getting drop through.

Just a thought here. Maybe this will help, but it might hurt too. IDK. My thought is to weld with the pulse on. Set the pulse on about 60 or so. That will be fast enough that you can't see the flashing of the arc staring and stopping but, you will hear it. As you weld the sound will change as you get further away from the puddle. The same will happen if you should drift toward the puddle. This might make things more familiar to arc welding. It won't give you the frying egg sound but it will be audible.

I don't have pulse on my welder :(

As I get more experience, I think I will want more pedal. For now, having the pedal pretty much maxed is like a safety for when I fall asleep on it.

Like I said, when I first set the pedal down, it was on my left. Until it becomes second nature, it just seems to feels better on the right.

"The puddle flattening means drop through" is great to know.

I really appreciate all the input you guys are giving.

Ed
 

Latest posts

Back
Top