Glycol Chiller Build Help...wiring?

Homebrew Talk - Beer, Wine, Mead, & Cider Brewing Discussion Forum

Help Support Homebrew Talk - Beer, Wine, Mead, & Cider Brewing Discussion Forum:

This site may earn a commission from merchant affiliate links, including eBay, Amazon, and others.

sudndeth

Well-Known Member
Joined
May 3, 2010
Messages
311
Reaction score
11
Location
Charleston
Well, I've assembled all parts for my build. I've wrapped the fermentor in copper, insulated and I'm waiting on my jacket ing.

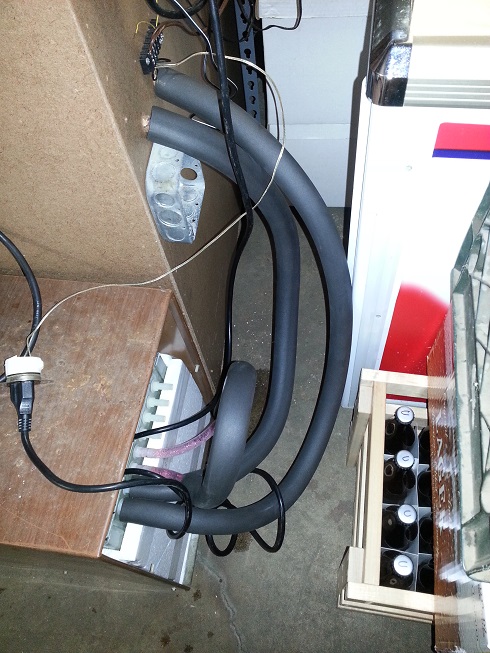
Now I need help wiring the 3 pumps, 3 STC 1000's and A/C unit. I'm working on gently bending the condenser into the ice chest. Here are some pictures. If anyone can help me out with where to start that'd be fantastic. ImageUploadedByHome Brew1405194070.430295.jpgImageUploadedByHome Brew1405194113.572662.jpgImageUploadedByHome Brew1405194132.856149.jpgImageUploadedByHome Brew1405194149.758210.jpgImageUploadedByHome Brew1405194210.662652.jpg
 
Well, I know it's a hack job, I have the ac and cooler mocked up. Had to cut a lot to get the cooler close enough to get the radiator close to the bottom. Cut the cover to short too. ImageUploadedByHome Brew1405297578.347485.jpgImageUploadedByHome Brew1405297598.452420.jpg

Those are the pumps I'm using. Debating hardwiring the pumps to the STC's, or doing a plug. Need to figure out how to over ride the AC's temp controller and how to wire it too.
 
Debating hardwiring the pumps to the STC's, or doing a plug.

If you leave the plug on the end of the pump cords and instal a receptacle for each controller, then it's quick and easy to swap out any pump that fails. Troubleshooting a bad pump will be easier too.

It does add a bit of cost for receptacles and enclosures. It's also possible that space limitations could be your deciding factor.


Need to figure out how to over ride the AC's temp controller and how to wire it too.

Do you have any wiring diagrams for the AC unit?

Does it remember its set point after a power failure and does it power up in the run mode?

Can it be set at or below your desired glycol temp?
 
I don't have any diagrams.

The unit does have a power outage memory on it. I'm wanting to override and wire in a STC I have to control it.
 
If it will power up in the run mode, you can try just having the STC turn the whole thing on and off. So long as the AC unit is set for a temp below your room temp, and the sensor of the unit is in the room (not in the glycol), then it should stay running as long as the STC has it powered.


If it won't power up in the run mode, then you need to rewire everything to bypass the built in controls.
 
I don't have any diagrams.

The unit does have a power outage memory on it. I'm wanting to override and wire in a STC I have to control it.

You need to remove the AC control entirely from the system to have proper control. You need it to cool the water/glycol sufficiently below the fermentation temp to have enough temp differential that it works efficiently (or at all). With the length of coil on that keg you may be hard pressed to get there regardless of the glycol temp.

The compressor will likely have only 2 wires, hot and neutral (and maybe ground). They would be powered from the STC cool relay, but you will likely need a higher power relay/contactor than the STC can handle. I could hand draw a diagram, but have no tools to do it electronically, sorry.

The fan will likely have 4 wires, neutral, high, med, low, and maybe external capacitor wires. You will have to figure out which is which. This would be driven from the same relay as the compressor so they run together, at which ever speed you choose. You'll want to remove the evaporator fan too.

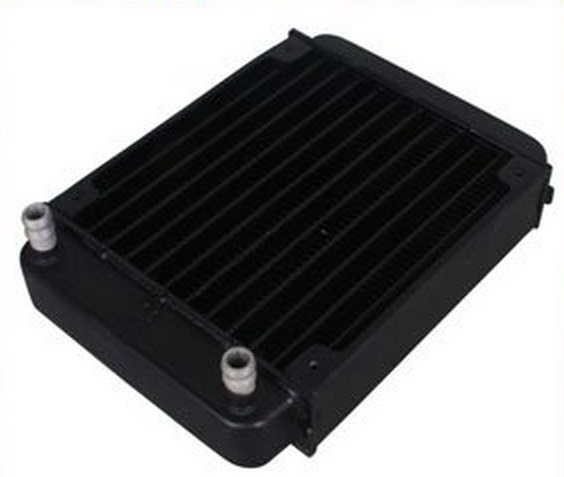
I'm doing a similar build using an old dehumidifier, and did the trial run last night with positive results. This unit has no temp control, so I'm going to use an STC to keep the glycol as far below 32F as I can without slush forming, so I can lager. I bought some radiators that look like the ones in a car, and they mount 4" muffin fans directly to them. They are used in water cooled CPU systems for hard core gamers/overclockers.

I'm mounting the fan & radiator in my ferm cabinet (in 2 of 4 chambers for now) and using the pond pump to circulate the cold glycol. In my trial run I had the water (no glycol yet) down to 40 in about 15 min, and the chamber quickly followed. The biggest concern I have is keeping the glycol moving so it won't freeze up on the coils. I'll add an extra pond pump if that becomes an issue. I will position the circulating pumps to maximize the flow through the coils when cooling is needed in the chambers and that could be enough if the temp sensor is close enough to the coils.

I've got a DIY build post going, but I've not added this project yet. I will link to it when I do add it.

John
 
Thanks for the responses. I'm going to plug the pumps and AC into outlets. Easy enough. Here's the box I built. My first time making everything and thought I'd add a few lights too. ImageUploadedByHome Brew1406411066.329334.jpg

I have outlet covers too.
 
Center will turn on AC and pump in the glycol. Two outer are for the fermentors. I'll also hook up a heat belt, but not until I move from the south. Wanted the option.
 
You need to remove the AC control entirely from the system to have proper control. You need it to cool the water/glycol sufficiently below the fermentation temp to have enough temp differential that it works efficiently (or at all). With the length of coil on that keg you may be hard pressed to get there regardless of the glycol temp.


The compressor will likely have only 2 wires, hot and neutral (and maybe ground). They would be powered from the STC cool relay, but you will likely need a higher power relay/contactor than the STC can handle. I could hand draw a diagram, but have no tools to do it electronically, sorry.


The fan will likely have 4 wires, neutral, high, med, low, and maybe external capacitor wires. You will have to figure out which is which. This would be driven from the same relay as the compressor so they run together, at which ever speed you choose. You'll want to remove the evaporator fan too.


I'm doing a similar build using an old dehumidifier, and did the trial run last night with positive results. This unit has no temp control, so I'm going to use an STC to keep the glycol as far below 32F as I can without slush forming, so I can lager. I bought some radiators that look like the ones in a car, and they mount 4" muffin fans directly to them. They are used in water cooled CPU systems for hard core gamers/overclockers.


I'm mounting the fan & radiator in my ferm cabinet (in 2 of 4 chambers for now) and using the pond pump to circulate the cold glycol. In my trial run I had the water (no glycol yet) down to 40 in about 15 min, and the chamber quickly followed. The biggest concern I have is keeping the glycol moving so it won't freeze up on the coils. I'll add an extra pond pump if that becomes an issue. I will position the circulating pumps to maximize the flow through the coils when cooling is needed in the chambers and that could be enough if the temp sensor is close enough to the coils.


I've got a DIY build post going, but I've not added this project yet. I will link to it when I do add it.


John


If like to see this build. I'm trying to picture the fans and radiator.
 
I spent most of today getting this cooler done. Here are as few pics, and the highlights.

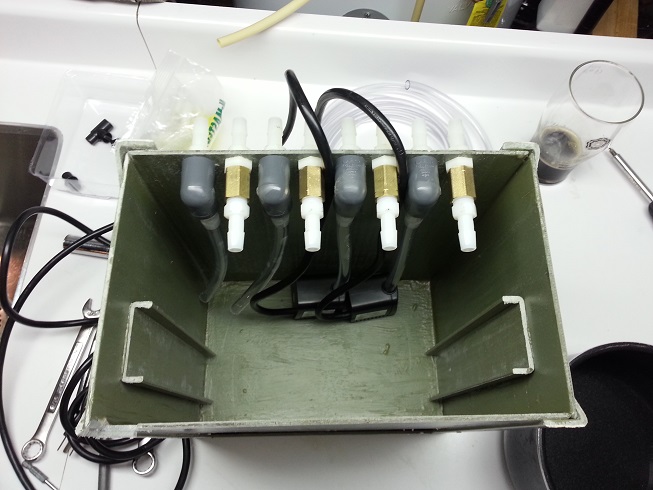
The glycol reservoir is made from 1/8" fiberglass panel, ell and channel (McMaster Carr). I used a 24x24 sheet and made it as big as possible from that. It ends up holding about 3 gallons. It's 10.5" wide x 12" high by 6" deep, where the width was determined by the evaporator width. The cost was about $90 for this material and a qt of resin from Home Depot. The channel was a perfect fit to slide the evaporator down to keep in in place.

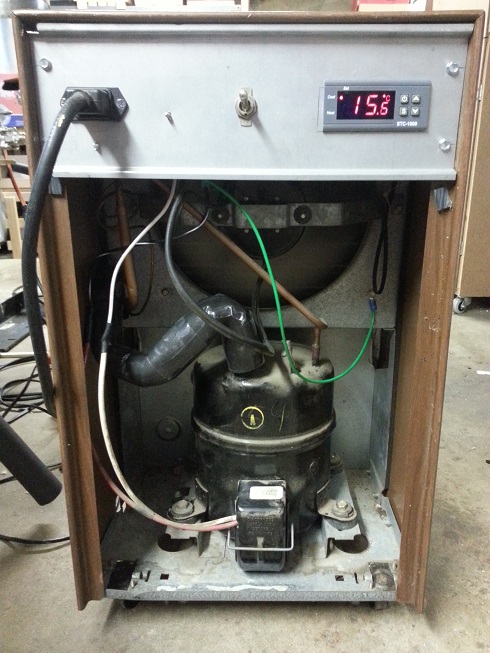
The cooler is an old, very very old, dehumidifier I've had for 25 yrs, and used only occasionally during that time. As may be typical the evaporator and condenser were back to back above the compressor and water tank. I carefully finagled the evaporator 90 degrees down to where the water tank was, and managed to do so without causing a freon leak. Due to the design there was VERY little slack in the tubing, and this was quite a challenge.

I used 3/8 tubing bullhead barbs, elbows, and straight barbs for the pump outlets with tubing going down to the fountain pumps, and bulkheads couplings and straight barbs for the returns which pass over the evaporator to the far side. The fittings were about $25 (McMaster) and pumps are about $19 each (Home Depot). I only have 2 pump so far. I will be looking at bigger ones as the one I have running so far had issues getting the air pushed out, and 2 chambers are 24" higher.

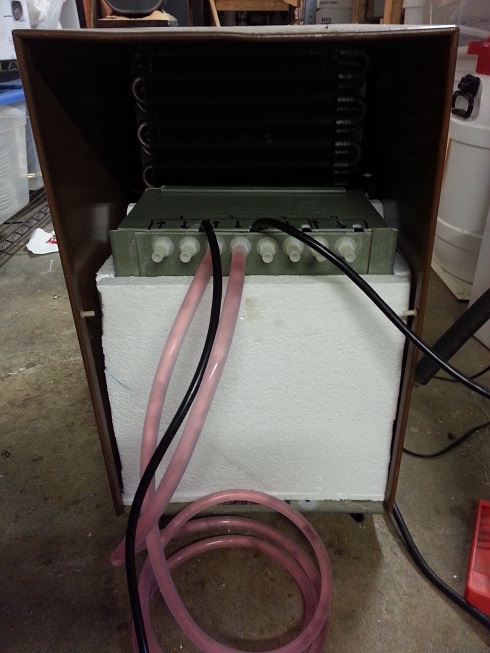
It took about 20 min to get the glycol down to about -4C then it basically stopped. Seems the evaporator froze up, even though I was using 1 pump to circulate with a loopback tube. Once I shut off the compressor it settled down, and is happy at -5C right now. I will probably add a pump just for circulation and a distribution tube to keep the whole return side of the evaporator moving.

The fermentation chamber has a 4" muffin fan and the mini radiators to circulate the cold air. I have a lager, at room temp for a d-rest, that's been chomping at the bit to get to lagering. I'm going to drop it 5C per day till I get to 35F. The fans are std 4" muffin fans ($9 Surplus Center), and the coolers are cpu coolers ($25 from ???). They look like mini car radiators. The fans mount directly to them.

I still have to get the wiring on the fans/pumps finalized. You can see a bare metal box in the last pic which will be for 2 duplex receptacles, 1 for each chamber. The pumps will plug into these. The looped tube in that pic is to keep the glycol moving all the time, for now. As I noted I will probably add a pump just for this, and wire it with the compressor.


Cheers!

cooler.jpg


Chiller1.jpg


Chiller.jpg


Chiller2.jpg


Chiller3.jpg


Chiller4.jpg
 
Did a test run and it worked. Get my welder tomorrow and I'm going to build a Stand. I'll post pics as I get them.
 
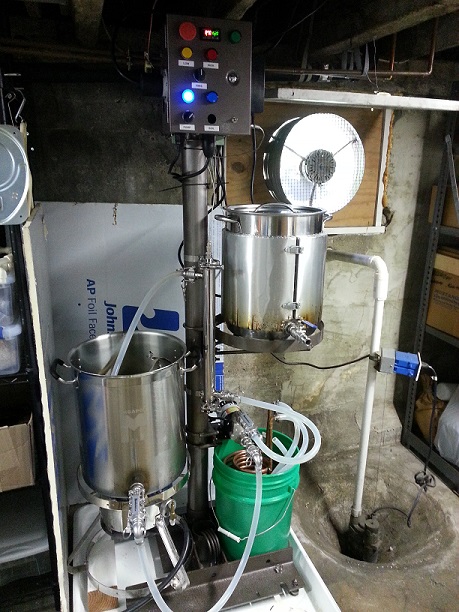
Started my stand. Here's the initial mock up. Building the controller mount and keg stand in the next few days. BTW, I never welded before and this is my first project. Looks good and way overkill I know. ImageUploadedByHome Brew1415540498.971410.jpgImageUploadedByHome Brew1415540529.350504.jpg
 
I love the welder. Got a good deal on it. Welds are getting better. Learning some great lessons for the next one.
 
Here's the latest project with my welder, the shelves on the central tube, and pump mount. The base is 3/8 angle, and too thick for it.

BrewingTree3.jpg
 
Thats the mash pot, and its a diy roof flashing & insulation jacket. Flame resistant too.
 
That's what I meant, mash tun. What is it fastened with? Did you use a foam type insulation, or the bubble wrap looking stuff? I'm still working the jacket for my fermentor. Looks as if my SS jacket fell through.
 
The jacket is an inner and outer layer of aluminum roof flashing and has 1/2" of 1200F ceramic blanket inside. All edges are riveted and the hinges and latches have a 1/16" aluminum rail inside to give it strength. It took 3 tries on 1 of the 4 pieces to get all the bends in the correct direction, in respect to the notch for for the valve, so the labor was ridiculous. (I had 2 extra for one side!)

The pot started as my full volume boil for extract, then I went BIAB and made the jacket to help keep temps more stable. Then I moved on to all grain and bought the second pot, so this one became the mash post. The jacket makes a big difference in keeping temps stable, plus I have a RIMS heater as well.

The jacket handled the propane burner heat with no issues when it was the boil kettle. I take it off to wash the pot, but it goes right back on. The flashing is flimsy and easily damaged, but the price was right compared to even slightly thicker stuff. Off the shelf at Home Depot. Having a bending brake and a small hole punch were the primary reason it was possible to make it.
 

Latest posts

Back
Top