GPSaxophone
Member
- Joined
- Feb 20, 2014
- Messages
- 11
- Reaction score
- 6
Or as my kids call it, my "Beer Dungeon"
I've been looking at several threads on fermentation chambers and using SketchUp to model it. Thanks for the great ideas, I've incorporated several of them into my own design and look forward to building it soon.
Requirements:
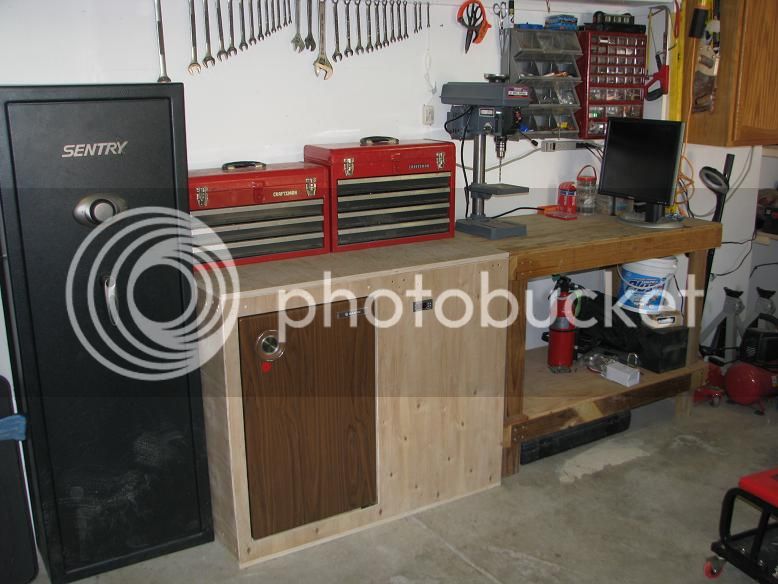
- This will go in my garage next to an existing workbench. The height of this chamber should match the workbench. The chamber should be solid enough to hold two 20" toolboxes (up to 100 lbs each). I always run out of workbench space and don't have a rolling cart for the toolboxes, so I'll use the top surface of the chamber for the toolboxes to save workbench space.
- I have a maximum width of 42" to work with next to the workbench. The chamber must fit there.
- I want enough room inside the chamber to hold 2 fermenting buckets. Any "leftover" space can be used for freshly bottled beer so it's also temperature controlled.
- The garage ranges from 80s in the summer to 50° in the winter (worst case).
Supplies:
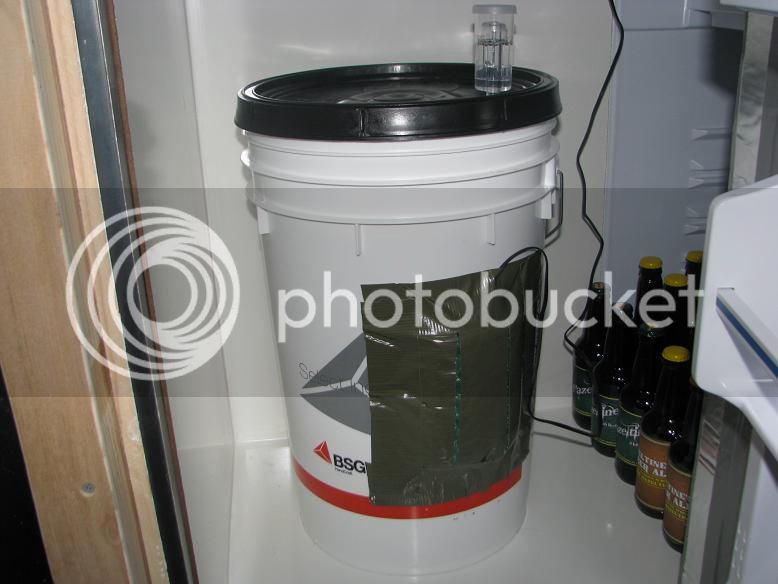
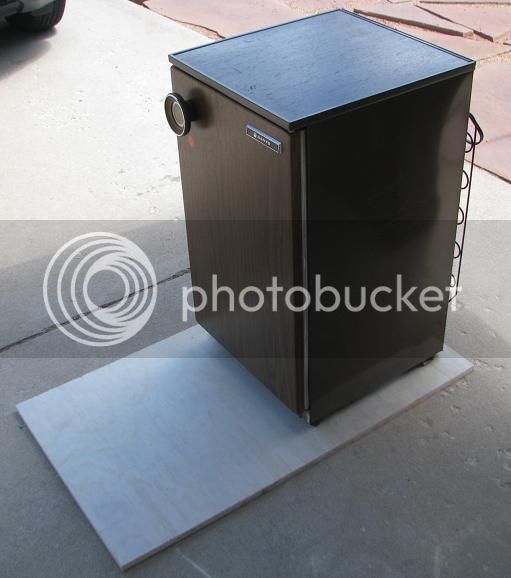
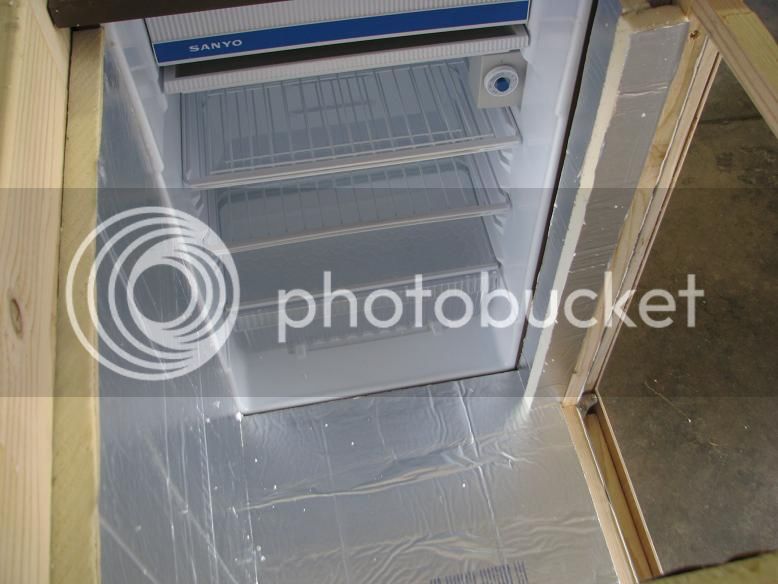
- I was able to secure a mini fridge at Goodwill for $40. I tried looking on CL but most working units in this area were $100 and up.
- I also have an STC-1000 for temperature control.
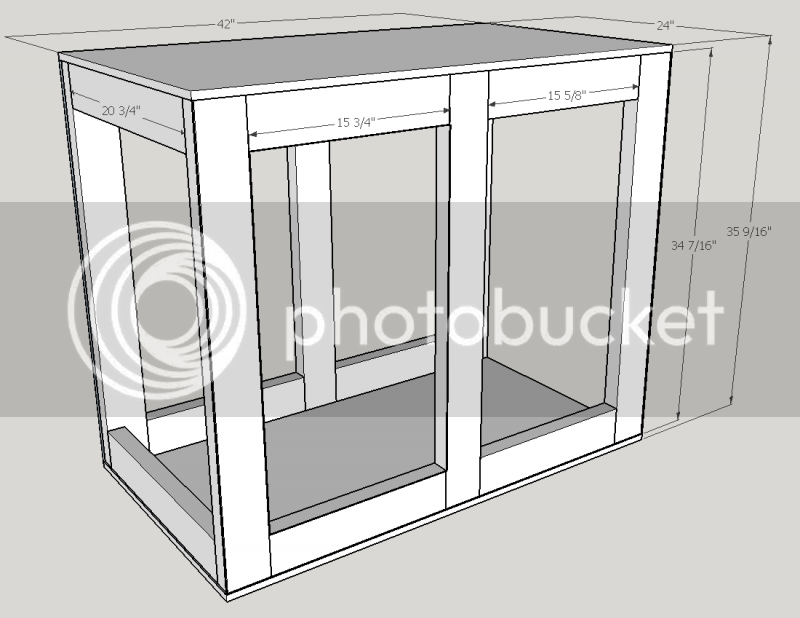
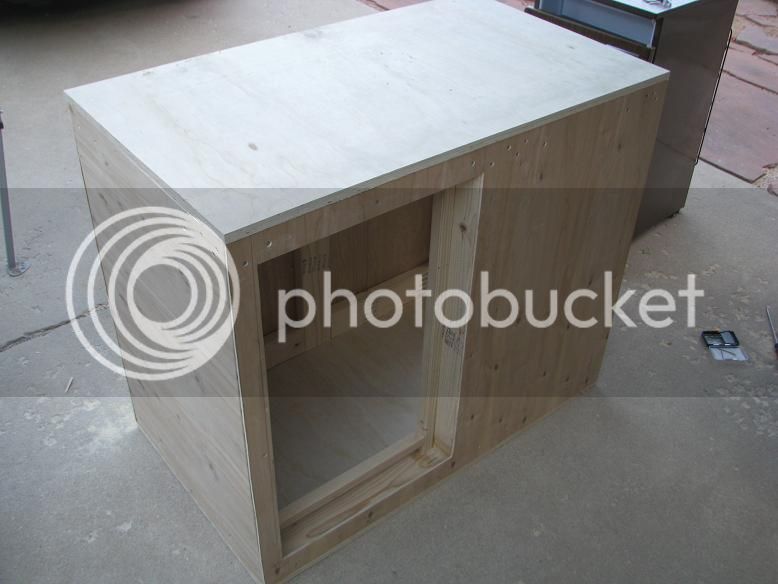
Because of the height restriction, I opted to not use casters in the design. Instead, I have a solid plywood base. I don't expect to move it, but if it becomes necessary I have a handtruck available. Instead of 35" legs, I had to account for 9/16" plywood on the bottom to match the workbench height. The workbench is 24" deep, so that's what this will be. The center post makes the left side opening match the interior dimensions of the minifridge. I also had to offset the framing from the edges of the plywood by 1/8" to account for the side panels or skins. This was a bit of work learning how to do it in SketchUp, but I managed.
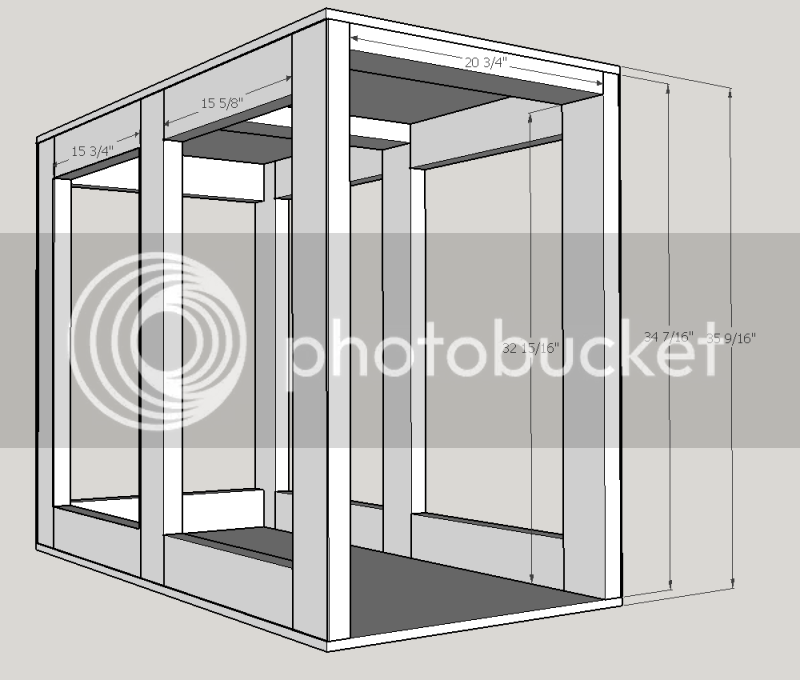
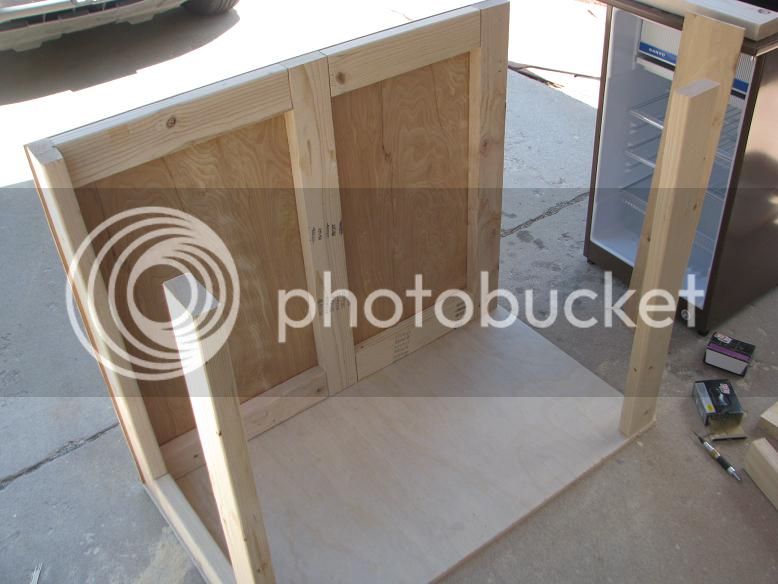
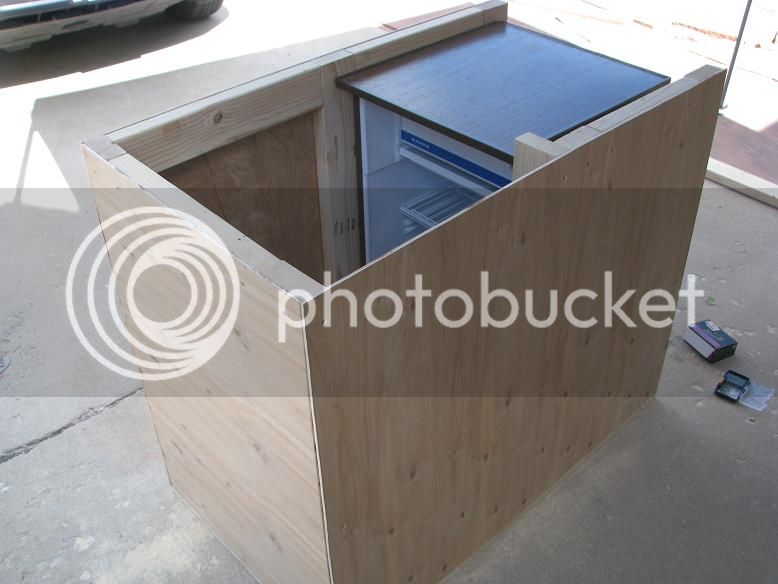
The skins don't cover the end where the minifridge goes, so the framing is flush on this end. The coils on the fridge are on the back, so they'll be exposed on the workbench side of the chamber. The top crossbraces are horizontal to allow the fridge to fit. I can remove the feet of the fridge if necessary, but I was thinking of drilling 1" holes in the plywood base to set them in. This way the fridge wouldn't be able to slide around at all.
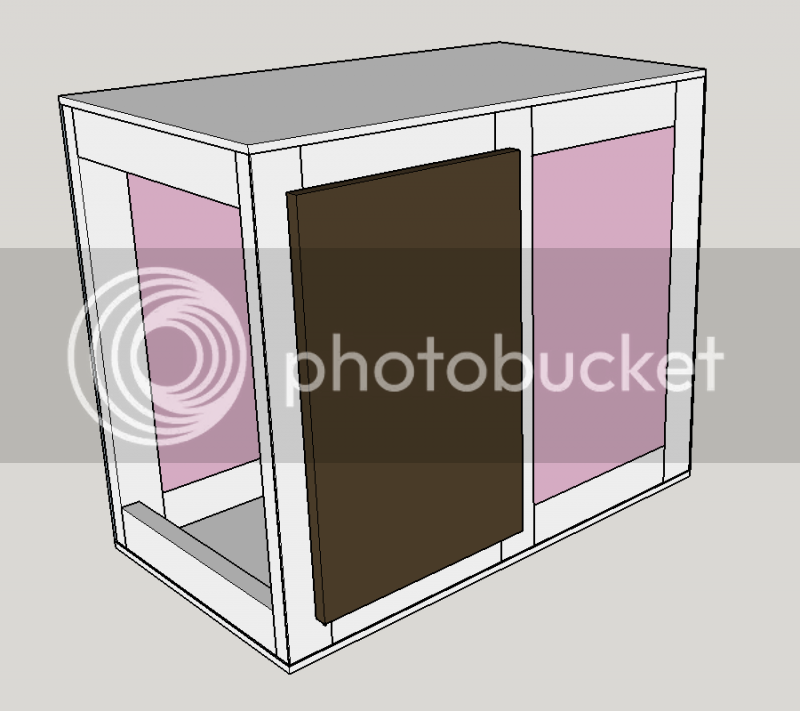
Since I'm using 2x4s (which are actually 1 1/2 x 3 1/2) there is room for 1 1/2" foam in the side panels and on the end (left open in this image on purpose). The fridge door will be used instead of making a custom one.
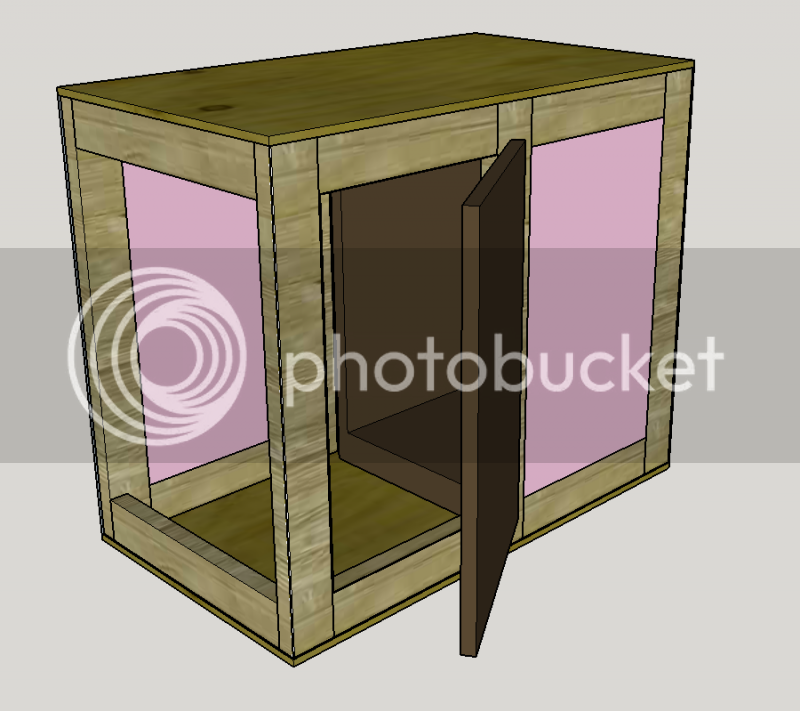
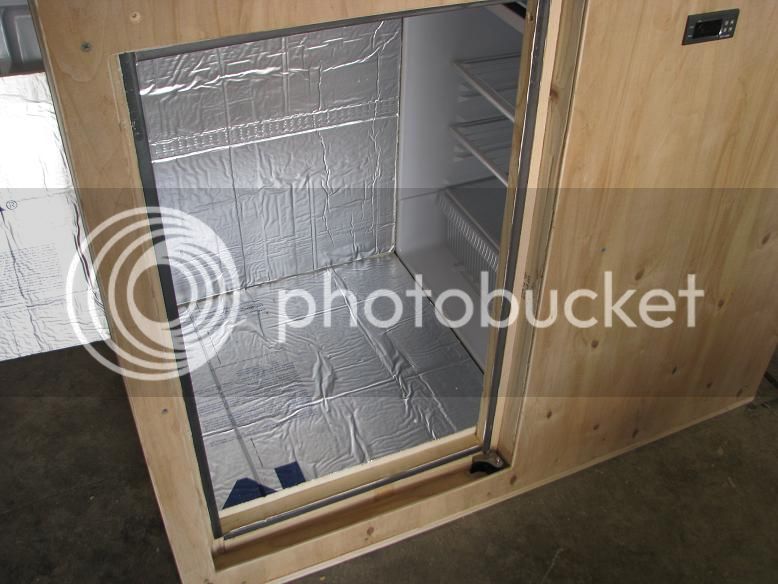
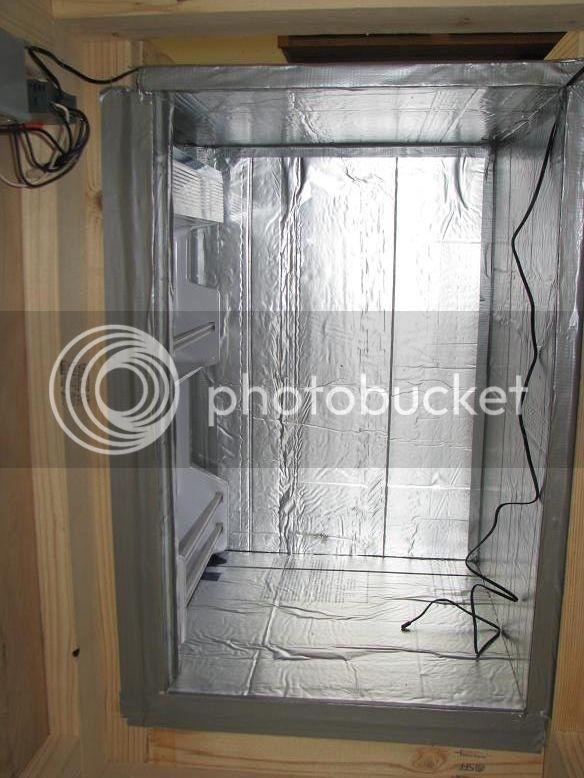
There is about an inch between each side of the fridge and the framing for more foam insulation. Those gaps may be useful if I have to get another mini fridge and it isn't the same size - I don't want to rebuild the entire cabinet. I'll also build the floor up to match the inside bottom of the fridge and finish the inside with melamine. Using sketchup, I should have enough room for 2-3 buckets or 2 buckets and several bottles. I may use the shelves in the fridge for bottles so I can fit more in.
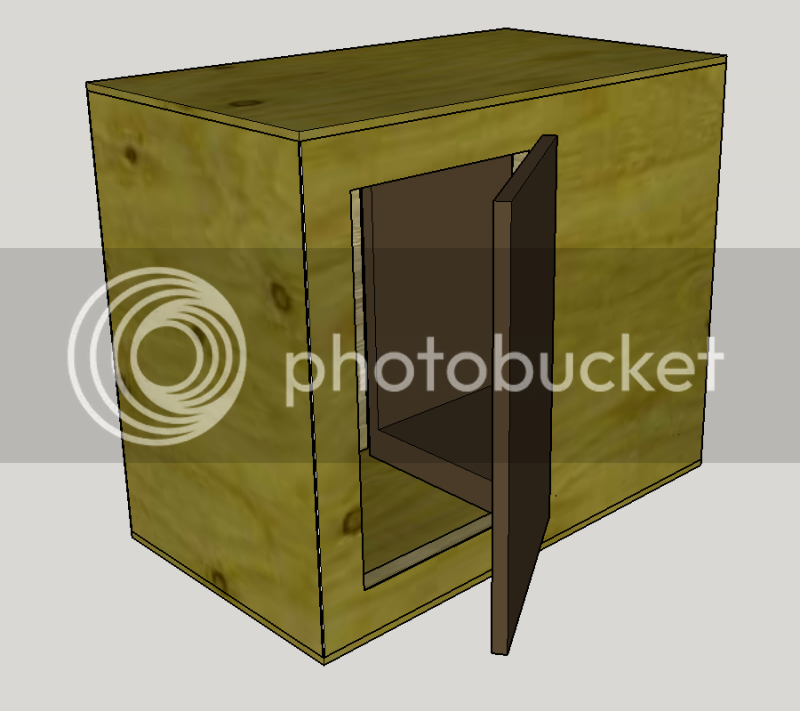
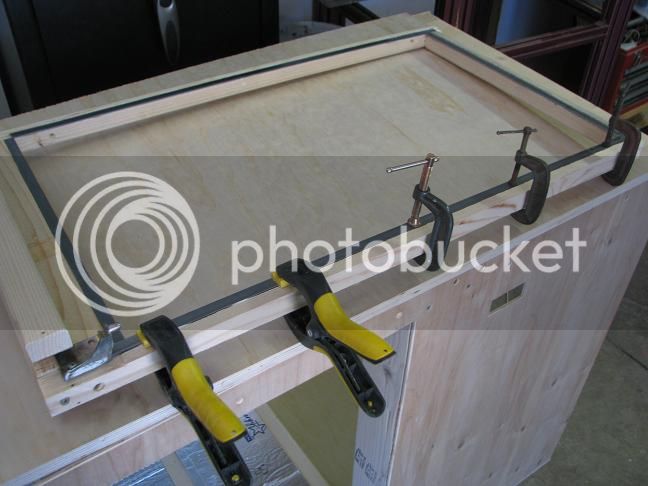
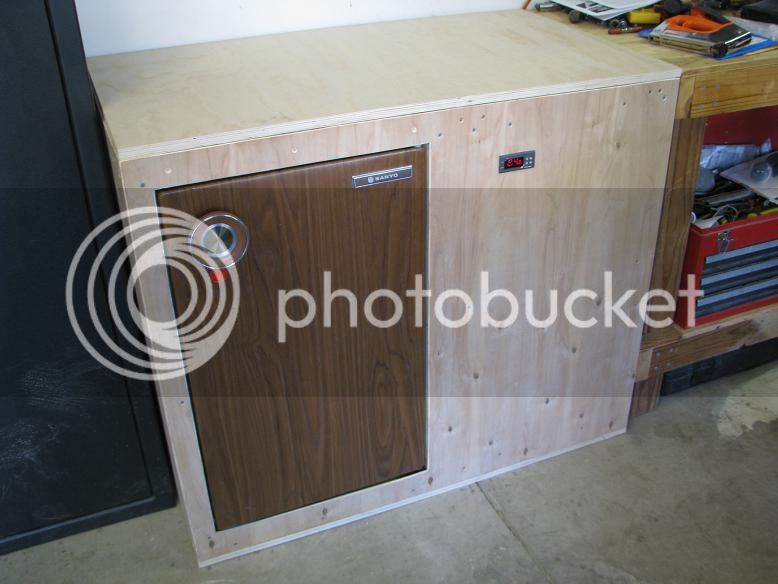
Looking at the completed design, I may end up taking some space away from the inside so the door is flush with the front edge of the workbench and cabinet. I can't start building it for at least another week, so that gives me time to think about it. Now that I have some experience with Sketchup, it shouldn't be too hard to try out some variations.
I've been looking at several threads on fermentation chambers and using SketchUp to model it. Thanks for the great ideas, I've incorporated several of them into my own design and look forward to building it soon.
Requirements:
- This will go in my garage next to an existing workbench. The height of this chamber should match the workbench. The chamber should be solid enough to hold two 20" toolboxes (up to 100 lbs each). I always run out of workbench space and don't have a rolling cart for the toolboxes, so I'll use the top surface of the chamber for the toolboxes to save workbench space.
- I have a maximum width of 42" to work with next to the workbench. The chamber must fit there.
- I want enough room inside the chamber to hold 2 fermenting buckets. Any "leftover" space can be used for freshly bottled beer so it's also temperature controlled.
- The garage ranges from 80s in the summer to 50° in the winter (worst case).
Supplies:
- I was able to secure a mini fridge at Goodwill for $40. I tried looking on CL but most working units in this area were $100 and up.
- I also have an STC-1000 for temperature control.
Because of the height restriction, I opted to not use casters in the design. Instead, I have a solid plywood base. I don't expect to move it, but if it becomes necessary I have a handtruck available. Instead of 35" legs, I had to account for 9/16" plywood on the bottom to match the workbench height. The workbench is 24" deep, so that's what this will be. The center post makes the left side opening match the interior dimensions of the minifridge. I also had to offset the framing from the edges of the plywood by 1/8" to account for the side panels or skins. This was a bit of work learning how to do it in SketchUp, but I managed.
The skins don't cover the end where the minifridge goes, so the framing is flush on this end. The coils on the fridge are on the back, so they'll be exposed on the workbench side of the chamber. The top crossbraces are horizontal to allow the fridge to fit. I can remove the feet of the fridge if necessary, but I was thinking of drilling 1" holes in the plywood base to set them in. This way the fridge wouldn't be able to slide around at all.
Since I'm using 2x4s (which are actually 1 1/2 x 3 1/2) there is room for 1 1/2" foam in the side panels and on the end (left open in this image on purpose). The fridge door will be used instead of making a custom one.
There is about an inch between each side of the fridge and the framing for more foam insulation. Those gaps may be useful if I have to get another mini fridge and it isn't the same size - I don't want to rebuild the entire cabinet. I'll also build the floor up to match the inside bottom of the fridge and finish the inside with melamine. Using sketchup, I should have enough room for 2-3 buckets or 2 buckets and several bottles. I may use the shelves in the fridge for bottles so I can fit more in.
Looking at the completed design, I may end up taking some space away from the inside so the door is flush with the front edge of the workbench and cabinet. I can't start building it for at least another week, so that gives me time to think about it. Now that I have some experience with Sketchup, it shouldn't be too hard to try out some variations.


")