FastFerment conical fermenter??????

Homebrew Talk - Beer, Wine, Mead, & Cider Brewing Discussion Forum

Help Support Homebrew Talk - Beer, Wine, Mead, & Cider Brewing Discussion Forum:

This site may earn a commission from merchant affiliate links, including eBay, Amazon, and others.
It's certainly a risk but you would only need two per side... The odds are in your favor though. Many more square inches without tubing in the wall than with.

Isn't that akin to what golfers say, a tree is 90% air? If it's 90% air why do I hit that $&@!?

If you go this route put a stop on your bit at 1/8" and use a small screwdriver to dig out the insulation in your path through and you'll be fine. Worst case is you discover you indeed are too close to a line and you move your hole. It'd be covered by your wood anyway.
 
isn't that akin to what golfers say, a tree is 90% air? If it's 90% air why do i hit that $&@!?

If you go this route put a stop on your bit at 1/8" and use a small screwdriver to dig out the insulation in your path through and you'll be fine. Worst case is you discover you indeed are too close to a line and you move your hole. It'd be covered by your wood anyway.

^^^^^^^^^^^^^^^better idea^^^^^^^^^^^^^^^^^^^
 
Haha, I am done with this POS (Hey *****ebags, maybe you should have replaced the lid)! Sold on ebay for $76 knowing and disclosing that that a new $15 lid was needed.
Good luck to y'all! And good luck with manufacturer support:ban:
 
I don't know what your lid issue was, (I didn't read back to find your trouble) but seriously, it's a $90 conical. Pretty good deal. All I had to do was file the flashing on the threads and shave the top where the lid mates. Done deal. It worked first time.
It sucks you had trouble, but getting a conical for $90 shipped, I'm more than willing to make a couple minor fixes on my own. Now, if your lid is broken, then I agree, they need to send you a new one.
IMO, this was the perfect vessel to spend a couple bucks on to see if I want a conical. If it works well for me, I can decide if I want to save money for the real deal stainless conical.
 
I didn't think about the seam until I had the hole done, and looked in it. Oopsie, should have moved off to the side. The vertical position was based on it not sticking out further than the widest point of the conical.
The gasket should be more than sufficient. The valve was screwed on tight, lined up, then the outer bulkhead nut tightened, and it looks good. A water test to come.

Parts:
Valve, $13.49
Coupling - any 1/4 NPT coupling will do.
Bulkhead

My McMaster specs seems wrong, the valve is 1/4 NPT and the bulkhead link is 1/8 NPT. No clue why, as it is 1/4 NPT to fit the valve. Just measured my fittings, 1/4 NPT is .500 OD, 1/8 NPT is .400. This part is .500 OD, so can't be 1/8 NPT, weird.
 
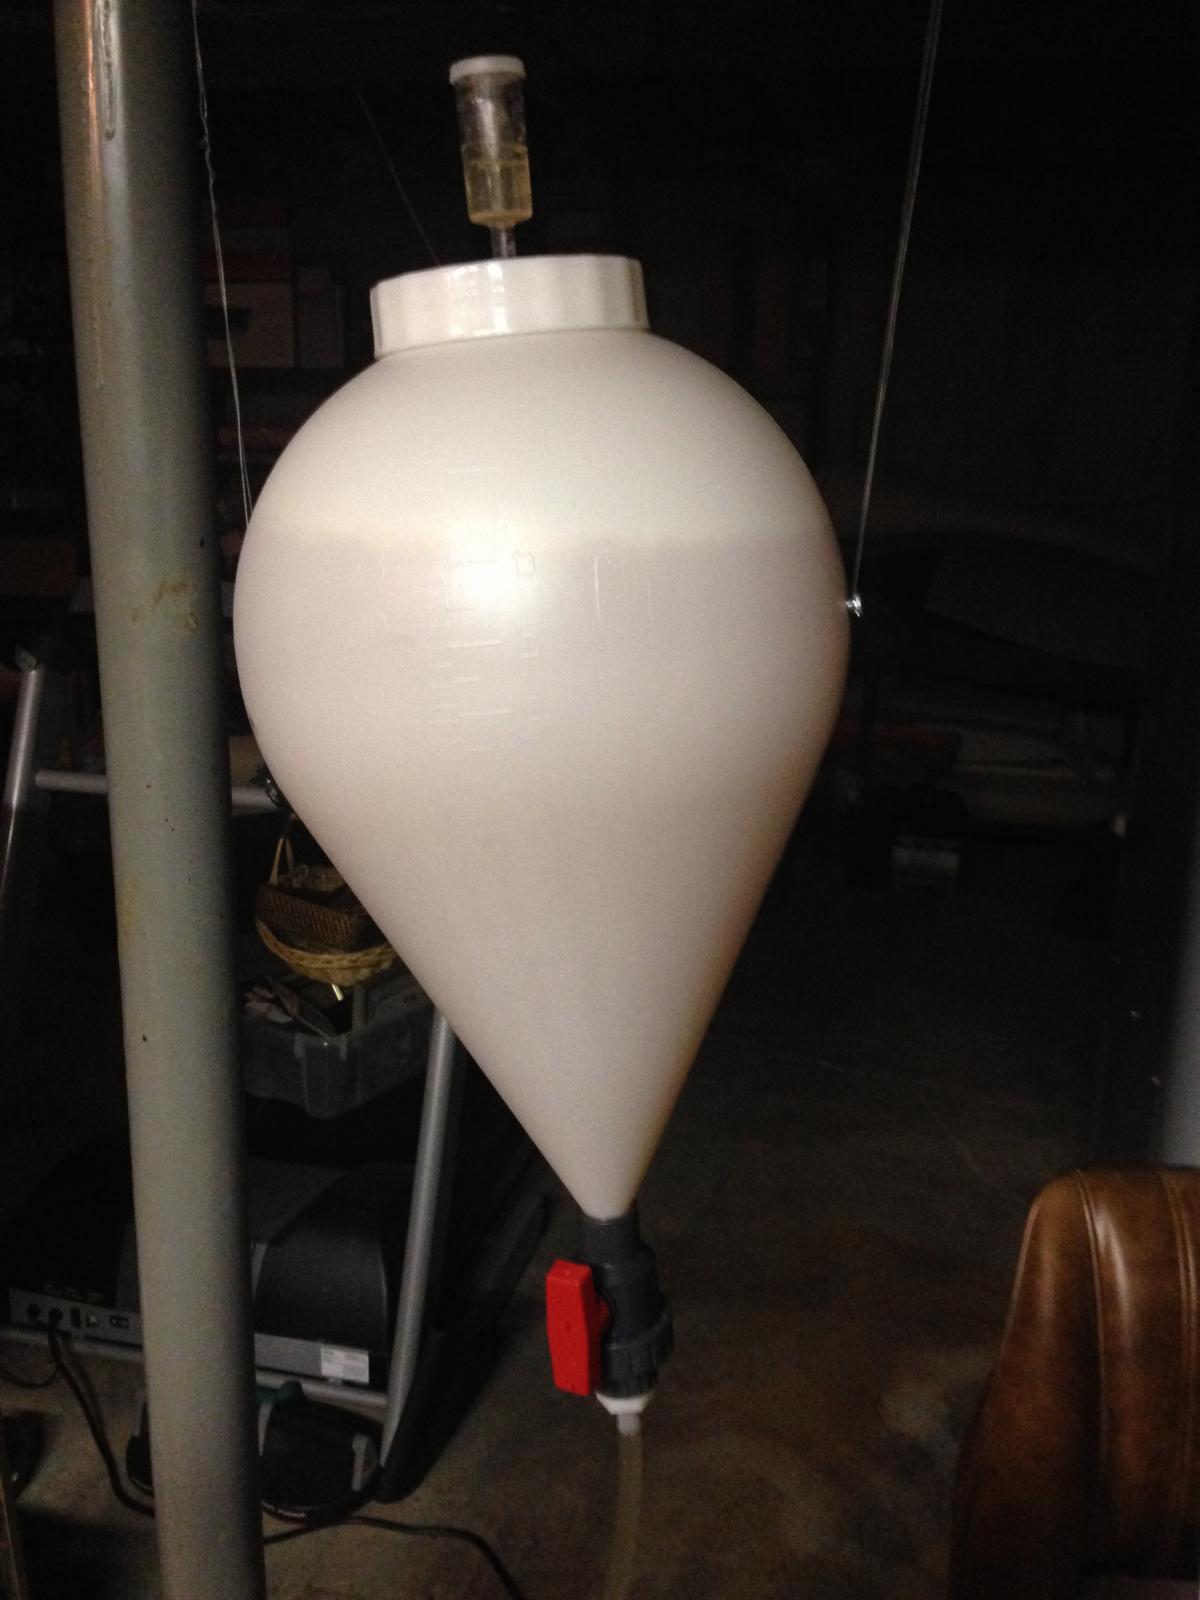
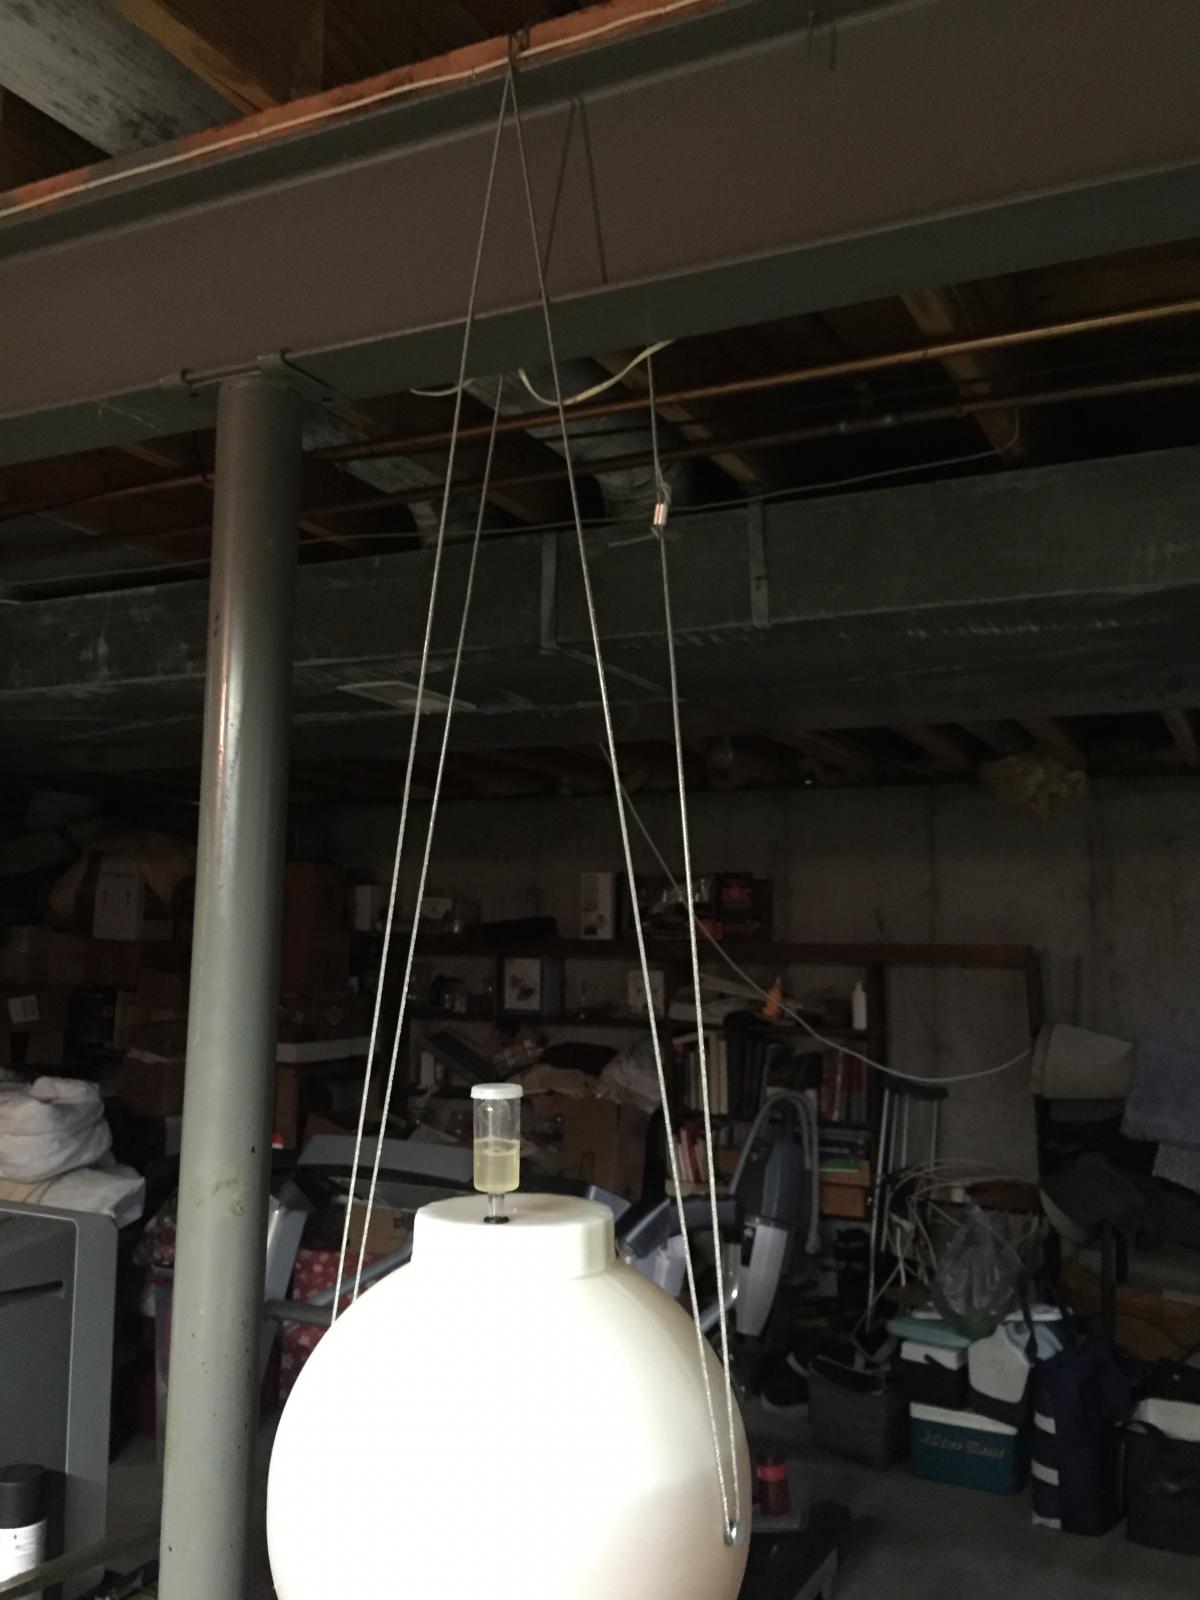
S00o0o0o0o while agitating my batch of mead by shaking the fermenter that is suspended from the ceiling with wire (see pic below).... and guess what.... the wire broke and the whole batch fell to the ground. now that I have picked every thing back up and re rigged the situation I find my self pondering new ways to secure my fast ferment

I have seen a couple ideas on this thread, just wondering what every one likes the most. Thanks!

IMG_2084.jpg
 
yup did great!
fluid came out from the lid and from the hole for the bubble valve and thats it, fell from about four feet and bounced off the ground
 
S00o0o0o0o while agitating my batch of mead by shaking the fermenter that is suspended from the ceiling with wire (see pic below).... and guess what.... the wire broke and the whole batch fell to the ground. now that I have picked every thing back up and re rigged the situation I find my self pondering new ways to secure my fast ferment

I have seen a couple ideas on this thread, just wondering what every one likes the most. Thanks!

Sorry to hear about your mishap. But sounds like no harm no foul?? At least that's what I'm hoping for you!?

I may have a fix. Was thinking it was kinda of a crazy build, but after my own experiences as well as others, it might not be so crazy after all??

I built a FF conical lift/transport mechanism. It's all done except for one part that I'm waiting on, a set of drawer slides. Once I get the drawer slides in, I'll mount them and post some photos.

Man it's hard to type when you've had 1 more HB than you should have!?!? :drunk:

Stay tuned...
 
yup did great!
fluid came out from the lid and from the hole for the bubble valve and thats it, fell from about four feet and bounced off the ground

A little spewing is fine. As long as the effort as a whole is intact... ;) :ban:
 
I don't know what your lid issue was, (I didn't read back to find your trouble) but seriously, it's a $90 conical. Pretty good deal. All I had to do was file the flashing on the threads and shave the top where the lid mates. Done deal. It worked first time.
It sucks you had trouble, but getting a conical for $90 shipped, I'm more than willing to make a couple minor fixes on my own. Now, if your lid is broken, then I agree, they need to send you a new one.
IMO, this was the perfect vessel to spend a couple bucks on to see if I want a conical. If it works well for me, I can decide if I want to save money for the real deal stainless conical.

True. The stuff you really need for this hobby really isn't all that expensive, it's the trial and error that kicks your financial ass and I chalk up my fastferment to that . I'm sure you will be going to ss soon as I have.
 
Have you ever had an itch you just had to scratch? This project can probably go in that category...

Handling a FF conical when it's full can be a bit of a challenge. It's awkward at best. I ferment in a chamber so when fermentation is finished, I need to pull the FF stand near the door of the chamber, then I can pick it up by the top ring on the stand and set it outside the chamber on the floor.

So here is the FF sitting in it's stand on the floor outside the chamber. It has 7 gallons of water in it for demo purposes.

1.jpg


Once I get it outside the chamber, I still need to elevate it so I can rack into a keg or bottling bucket. So I started thinking what I could do to make moving and lifting the FF easier.

Several good folks on this forum built stands using 2x4s. I was inspired by your design and built one too using the factory wall brackets provided.

2.jpg


The stand I built has casters, is a little taller and happens to have a trailer winch mounted on it.

3.jpg


Now I'm able to pick up the FF, move it to where I need it and elevate so I can rack into a keg or bottling bucket. :rockin:

4.jpg


Was this project necessary? No.
Can you move the FF without one? Yes.
Will it be more convenient to move the FF around and lift it with the Beast? I hope so!?

Honestly, I'm wondering if the convenience of using The Beast will out weigh the inconvenience of storing it, working around it and the floor space it takes up. I didn't name it The Beast for nothing... ;)

BUT. It's an idea I had bouncing around in my head and I just had to get it out. On to the next project!

:mug:
 
S00o0o0o0o while agitating my batch of mead by shaking the fermenter that is suspended from the ceiling with wire (see pic below).... and guess what.... the wire broke and the whole batch fell to the ground. now that I have picked every thing back up and re rigged the situation I find my self pondering new ways to secure my fast ferment

I have seen a couple ideas on this thread, just wondering what every one likes the most. Thanks!

Bob, There are several different versions of stands in this thread as well as other FF DIY threads. Just do some searching and browsing and I'm sure you'll find something that works for you.

As for aerating the wort, shaking this conical is not a good idea. I shook my first batch and I knew I was one hand slip away from disaster... Someone on this thread suggested an aquarium pump so I went to wally world and picked one up and a couple of aeration stones for $20. Just drop in the stones in the wort and let the pump run 20-30 minutes.
pump & stones.jpg


Just keep an eye on it. It will foam up on you if your not watching it...

Overflow.jpg
 
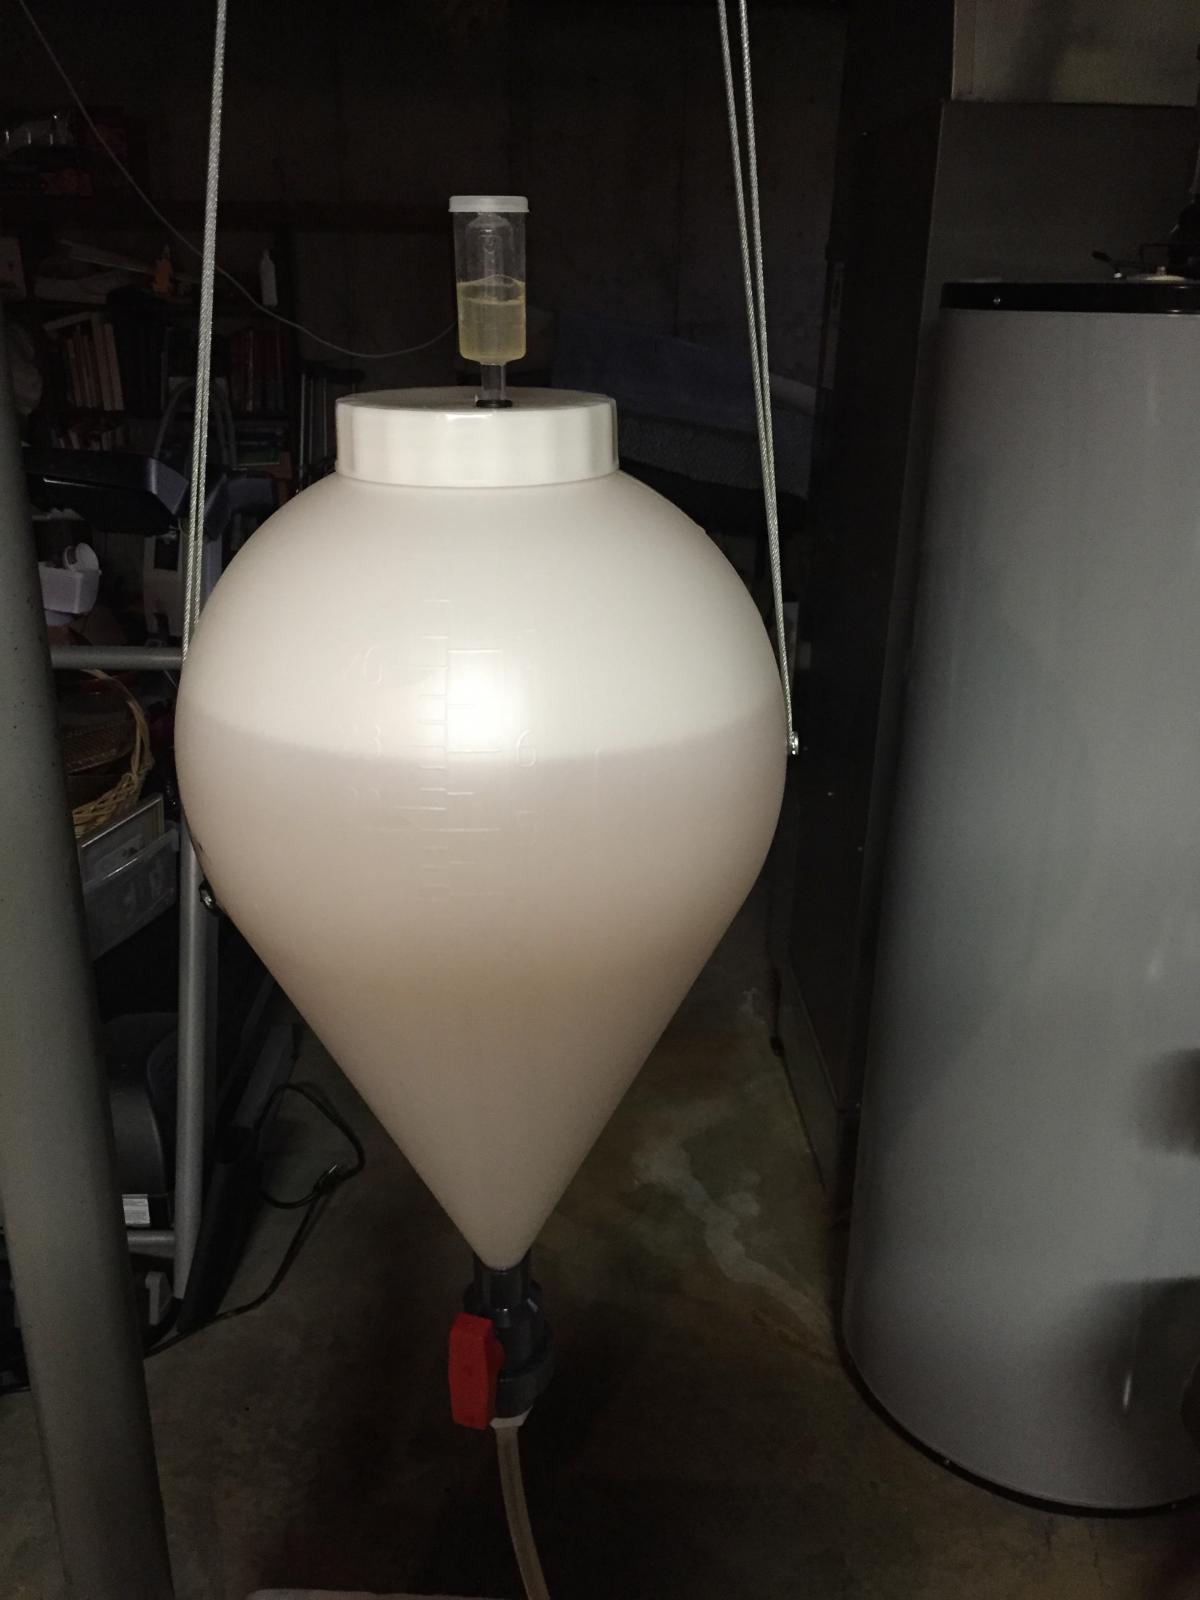
While the beast is a thing of beauty, and truly inspiring (seriously man that thing is awesome) I have decided to go with a cleaner simpler method... just beefing up the gauge of the wire and securely binding with a crimp connector.... I think it looks sharp and works great, I can move the whole rig up and down by pulling up the slack, and shake the entire container while staying secure. If i get another one or two Ill hang it right next to it and maybe get a Newtons cradle situation going lol

newtons-cradle-1.jpg


IMG_2091.jpg


IMG_2092.jpg
 
While the beast is a thing of beauty, and truly inspiring (seriously man that thing is awesome) I have decided to go with a cleaner simpler method... just beefing up the gauge of the wire and securely binding with a crimp connector.... I think it looks sharp and works great, I can move the whole rig up and down by pulling up the slack, and shake the entire container while staying secure. If i get another one or two Ill hang it right next to it and maybe get a Newtons cradle situation going lol

I like your style Bob! I could see a whole row of these things hanging from the joists and all swinging in unison!

The KISS principle is usually the best approach but we all stray from time to time... ;)

Unlike The Beast, these two stands are very practical and useful. Recently received the second FF and just completed the second stand yesterday. Now if I can only get both of these full before the holidays are over...

Two stands.jpg

:mug:
 
It seems that KISS is clutch, especially when it comes to brewing... that rig is not only simple... it only cost $4!!
 
Your rigs look great! I bought a FF for my brother for Christmas and we've been discussing a holder, would you share the dimensions of your wooden rings and the height? I also assume you like the positioning of the ring on the FF? I read where others wished they were higher for more stability. Oh, and why only one between two legs with the stabilizers? Thanks!!


Sent from my iPhone using Home Brew
 
Your rigs look great! I bought a FF for my brother for Christmas and we've been discussing a holder, would you share the dimensions of your wooden rings and the height? I also assume you like the positioning of the ring on the FF? I read where others wished they were higher for more stability. Oh, and why only one between two legs with the stabilizers? Thanks!!

Thanks!

I made the first stand and fermented my first batch in it. The first one didn't have any supports between the legs. Once I placed it in the fermentation chamber, I would have to slide it into position. It was fine as long as I grabbed the bottom of the leg to slide it but it would flex some when the fermenter is full and there was any sloshing inside.

When I made the second stand, I decided to add a few braces just for peace of mind. I was happy with how the FF sat in the stand so I made the rings the same size as the first.

The top ring is 10" ID and 13" OD. The bottom ring is 13" ID and 16" OD. The rings were cut with a router, a straight cutting bit and a scrap piece of 1/8" hardboard as a cheap circle cutting jig. The legs are 21" in length which gives a 3-3/4" space between the bottom of the collection ball and the floor. The legs are made from oak for strength and stiffness. The angle cut at the top and bottom of each leg is 4 degrees to account for the difference in top and bottom ring size.

I hope that helps!
 
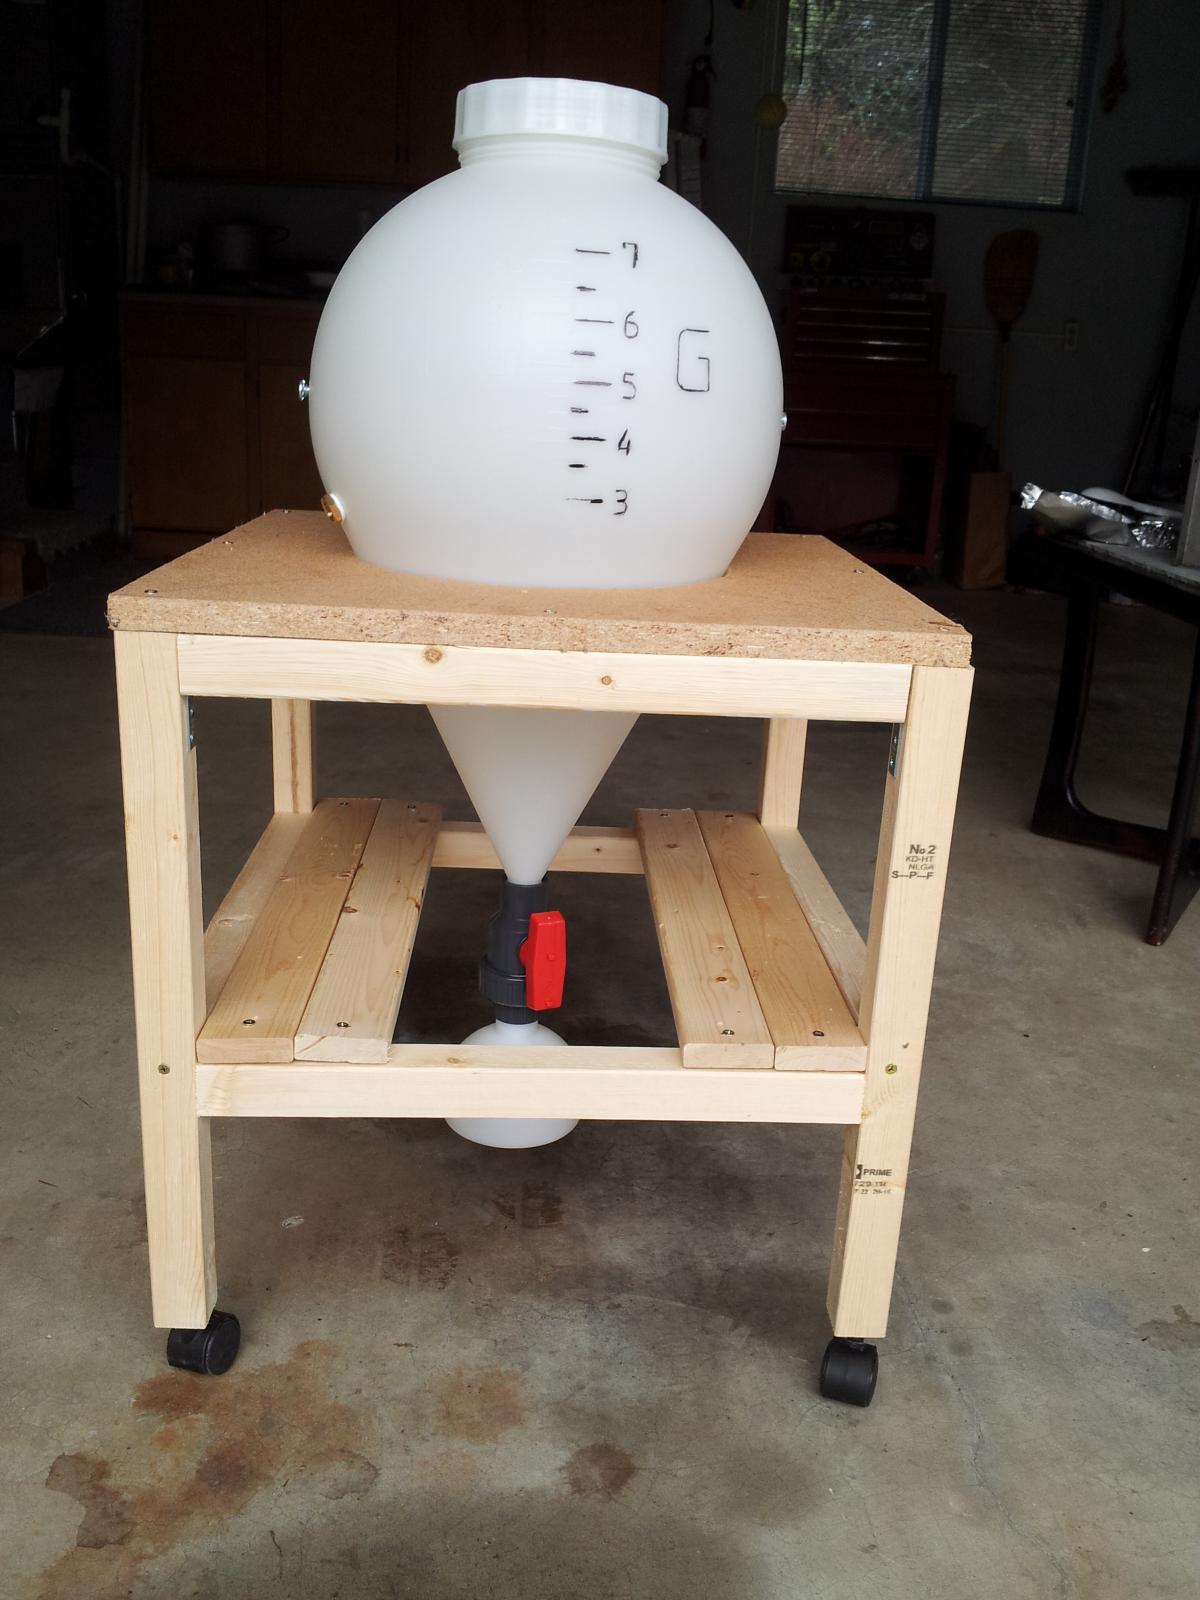
My answer to the conical stand was a five dollar find at Goodwill. The original table had a top and shelf made from 1x3s and no wheels. I got it home and replaced the table top with a piece of particle board I had laying around and cut a 10 1/2 or 11 inch hole in it. I really don't remember how big it was to start. I removed 2 or 3 of the 1x3s from the shelf to accommodate the ball and added the wheels. The wheels came off an old office type chair and have been in a drawer for some time. A very inexpensive stand.

In order to empty the conical to a bottling bucket I put a pulley on the garage ceiling and use a cable to lift it. I roll the table under the pulley, lift the thing out of the table, remove the ball, install the barb and tubing and drain it into the bucket.

20141208_104111.jpg
 
Here's the start of my FastFerment chamber. Still have to wire all the components but the box is almost there. I'm a little worried about the cabinet tipping over if I have the slides fully extended but I'll test that when I clean them up before brew day. May need to install a kick stand.

What is everyone doing for a blow off tube? The hole as is seems a bit small for blow off to me.

image.jpg
 
Thanks!

I made the first stand and fermented my first batch in it. The first one didn't have any supports between the legs. Once I placed it in the fermentation chamber, I would have to slide it into position. It was fine as long as I grabbed the bottom of the leg to slide it but it would flex some when the fermenter is full and there was any sloshing inside.

When I made the second stand, I decided to add a few braces just for peace of mind. I was happy with how the FF sat in the stand so I made the rings the same size as the first.

The top ring is 10" ID and 13" OD. The bottom ring is 13" ID and 16" OD. The rings were cut with a router, a straight cutting bit and a scrap piece of 1/8" hardboard as a cheap circle cutting jig. The legs are 21" in length which gives a 3-3/4" space between the bottom of the collection ball and the floor. The legs are made from oak for strength and stiffness. The angle cut at the top and bottom of each leg is 4 degrees to account for the difference in top and bottom ring size.

I hope that helps!

Excellent, that does help, thanks again. Glad to hear its sits well and as my brother will be sliding this into his upcoming fermentation chamber (soon to be built!) its good to know you're doing the same. His basement has an area that is elevated about 2.5' from the floor, so the chamber will be located about 2' in from that edge, then just pull out the FF, dump remaining trub / yeast and rack into the bottling bucket (he doesn't keg).

Leads me to three more questions, :)
- When you drop off the trub & yeast, say after 6-7 days, whether or not you harvest yeast, do you end up needing to dump off a bit more prior to racking into a bottling bucket?
- And, what's the thoughts on dropping the trub/yeast and the air that is brought through the beer upon re-opening? Any issue, or is the belief that the residual yeast still in suspension will just devour any additional oxygen?
- Finally, has anyone bottled directly from the FF? If so, how did it go and how did you carb it up?

Cheers! :tank:
 
Here's the start of my FastFerment chamber. Still have to wire all the components but the box is almost there. I'm a little worried about the cabinet tipping over if I have the slides fully extended but I'll test that when I clean them up before brew day. May need to install a kick stand.

What is everyone doing for a blow off tube? The hole as is seems a bit small for blow off to me.

You don't need a kick stand, you need to bolt it to a wall or the floor or something. And how are you going to remove a full fermenter when you need to elevate it to rack into a keg/bottling bucket??

I hope you have a cable hoist attached to the ceiling like Trailrider posted...
 
Excellent, that does help, thanks again. Glad to hear its sits well and as my brother will be sliding this into his upcoming fermentation chamber (soon to be built!) its good to know you're doing the same. His basement has an area that is elevated about 2.5' from the floor, so the chamber will be located about 2' in from that edge, then just pull out the FF, dump remaining trub / yeast and rack into the bottling bucket (he doesn't keg).

Leads me to three more questions, :)
- When you drop off the trub & yeast, say after 6-7 days, whether or not you harvest yeast, do you end up needing to dump off a bit more prior to racking into a bottling bucket?
- And, what's the thoughts on dropping the trub/yeast and the air that is brought through the beer upon re-opening? Any issue, or is the belief that the residual yeast still in suspension will just devour any additional oxygen?
- Finally, has anyone bottled directly from the FF? If so, how did it go and how did you carb it up?

Cheers! :tank:

Good. Glad to help...

I would do the following:

  1. Allow the wort to ferment until the hydrometer says it's done.
  2. Once fermentation is done, close the valve and do the first dump of the full collection ball. Clean & reattach the collection ball and reopen the valve.
  3. Wait a day or two. If the collection ball fills again, repeat the previous until you get a less than full collection ball.
  4. When you get a less than full collection ball, you're ready to rack into your keg/bottling bucket.

The consensus is; the bubbles that go up through the wort from reattaching an empty collection ball and re-opening the valve, does not add any detrimental amount of aeration to the wort.

Bottle carbing your beer is a whole other thing. Search "bottle carbing" and I'm sure you'll find lots of info...

BTW - Here is my chamber build if you need any ideas:

https://www.homebrewtalk.com/f258/my-diy-fermentation-chamber-build-499635/
 
a FF is in my future, but not my immediate future (I have no place to put it yet.) I like those stands in post 343. I wonder if they could be made from a cheap wooden barstool? I have a portable reloading bench made from a shorter rectangular stool.

I'm going to try bottle carbing some beer using Domino sugar "dots" (small sugar cubes.) They should be perfect for 12 oz bottles.
 
Good. Glad to help...

I would do the following:

  1. Allow the wort to ferment until the hydrometer says it's done.
  2. Once fermentation is done, close the valve and do the first dump of the full collection ball. Clean & reattach the collection ball and reopen the valve.
  3. Wait a day or two. If the collection ball fills again, repeat the previous until you get a less than full collection ball.
  4. When you get a less than full collection ball, you're ready to rack into your keg/bottling bucket.

The consensus is; the bubbles that go up through the wort from reattaching an empty collection ball and re-opening the valve, does not add any detrimental amount of aeration to the wort.

Bottle carbing your beer is a whole other thing. Search "bottle carbing" and I'm sure you'll find lots of info...

BTW - Here is my chamber build if you need any ideas:

https://www.homebrewtalk.com/f258/my-diy-fermentation-chamber-build-499635/

Once again thanks for the reply, this forum sure has changed home brewing since I last brewed in '99 (took a 14yr hiatus until Christmas '13) as the discussion and best practice sharing didn't exist on line then. What a great way to advance home brewing! I've picked up lots of tips, including my most recent using O2.

Check on first two points (though even at FG, I'd expect some delay for yeast cleaning duties?!), but the 3rd one, "if the collection ball fills again"? I figured it fills once you re-open?? Does the trub get "stuck"? As I (or more specifically my brother) hasn't used this yet, I'd expect it just fills right up, though I guess it could compact if too late. Why would it stop filling once you open the valve? And don't you connect the fill tube below the collection ball and thus need the beer to flow to fill a bottling bucket? Ever thought of putting in a racking arm, or is the bottom valve process just fine?

Yup, understand bottle carbing, the "old" way, by adding priming sugar in the bucket, but was curious if anyone bottled directly from FF and if so did they use tablets or some other mystery way I'm unaware?!? I figure one advantage of the FF was no need to rack not just to 2ndary but also possibly to bottling bucket. Saw a video where someone primed right in the FF but whoops stirred up the trub (no shock really!) that hadn't been purged. Would be nice to find a way to force carb (with a gun into the bottle?) but haven't heard that without first having carbed in a keg.

I like your chamber, very nice (and I saw it previously in searches!!), quite similar to our plans, though no window, maybe an upgrade! Looks cool though! We've got the STC 1000 controllers and all the hardware just need to get together and build it. Will post pics!

Cheers!:mug:
 
Just my 2 cents, ordered a FastFerment beginning of December, the one they shipped was slightly off-center where the lid screws on and would not seal at all. (this was after I had stayed up all night doing my first AG KristallWeizen. I called the customer service number and spoke to Mitchell who said they had recently made an adjustment to the molding process to improve this and he would send me a replacement for free. The new conical arrived a week later and there is a HUGE difference in how well the screw top functions and how well it fits. Gotta say I was deeply impressed by how they responded and corrected the situation. Many thanks!!!!

OK, TIPS for use based on two batches so far..

#1 TAPE, TAPE, TAPE, (then use more TAPE). The teflon tape is key to stoping the leaks, wrap clockwise with the grain, especially the 1 inch male end of the fermentor that screws into the ball valve. Make sure this is also screwed in as far as it can go.

#2 Do NOT pitch your yeast immediately after transferring wort/juice into the fermentor. Before you initially fill the fermentor, close the valve, take off the collection ball and put the hose on. Wait overnight or at least 3-4 hours, then PURGE the heaviest of the sediment by opening the valve, and THEN remove the hose and attach the collection ball and pitch your yeast.

If you are using Whirlfloc or Irish Moss, this is critical, since the solids that drop out will block the proper functioning of the collection ball and you will loose some clear wort/juice. Plus this gets rid of some nasty stuff right at the beginning.

Will order a second one as soon as I can find a place to mount it, I love the ease of removing the trub without having to rack!
 
Forgot to add, I got a cheap ($6) digital indoor/outdoor -min/max thermometer with a probe on a wire which connects to the display. This fits right into the brass themowell that comes with the fermentor, I use this instead of the dial thermometer that they sell as an accessory and it tells me min/max of the ferment temp!
 
Well these contraptions pretty much are sold out everywhere ,now some more reviews should start to roll in. Real curious
 
So far so good. The only different thing I did was I let my trub settle for 10 hours in hopes of emptying the collection ball of trub before pitching yeast. However, after 12 hours it looked like I had 3 gallons of trub and 2 gallons of wort. No trub was went into the collection ball. So, I just pitched yeast without dumping. After primary, the yeast ate a bunch of the of the trub or it compacted a lot. I left the valve open the whole time. My first dump smelled like unfermented wort. I reattached the ball, and opened the valve and the trub went into the collection ball leaving my batch at exactly 5 gallons. I reattached the ball and opened the valve. It looks like I have a ball full of wort and and about 2 inches of yeast above the top of valve.

Overall I think it will work great for the cost, will just take a little learning how to use it. Of course this thread should help and I probably should have read up a little more.
 
Check on first two points (though even at FG, I'd expect some delay for yeast cleaning duties?!), but the 3rd one, "if the collection ball fills again"? I figured it fills once you re-open?? Does the trub get "stuck"? As I (or more specifically my brother) hasn't used this yet, I'd expect it just fills right up, though I guess it could compact if too late. Why would it stop filling once you open the valve? And don't you connect the fill tube below the collection ball and thus need the beer to flow to fill a bottling bucket? Ever thought of putting in a racking arm, or is the bottom valve process just fine?

Yup, understand bottle carbing, the "old" way, by adding priming sugar in the bucket, but was curious if anyone bottled directly from FF and if so did they use tablets or some other mystery way I'm unaware?!? I figure one advantage of the FF was no need to rack not just to 2ndary but also possibly to bottling bucket. Saw a video where someone primed right in the FF but whoops stirred up the trub (no shock really!) that hadn't been purged. Would be nice to find a way to force carb (with a gun into the bottle?) but haven't heard that without first having carbed in a keg.


I did in fact bottle my first batch (Bavarian Hefe) straight out of the FF using the supplied racking hose. I added the dextrose solution to the FF, stirred it using a star san soaked paint stirrer on a power drill, then used the ball valve to carefully fill each bomber/growler. I tasted the first growler after a week, and it carbed up nicely, actually better than I thought given the 60 degree high temps around here lately. I figured why bother with the bottling bucket? Since this is an unfiltered wheat beer, I wasn't worried about trub/yeast getting into the final product. I did dump the ball twice prior to bottling. Obviously this method might not suit all styles, but it works for Hef! :mug:
 
I did in fact bottle my first batch (Bavarian Hefe) straight out of the FF using the supplied racking hose. I added the dextrose solution to the FF, stirred it using a star san soaked paint stirrer on a power drill, then used the ball valve to carefully fill each bomber/growler.

Glad it worked out for you. I assume when you stirred in your priming solution, you stirred very slowly and avoided splashing? When I think of someone using a drill mounted paint stirrer, I think of it wide open and creating a vortex in the liquid. That should be avoided so you don't aerate your beer prior to bottling.
 
Glad it worked out for you. I assume when you stirred in your priming solution, you stirred very slowly and avoided splashing? When I think of someone using a drill mounted paint stirrer, I think of it wide open and creating a vortex in the liquid. That should be avoided so you don't aerate your beer prior to bottling.

Yes, it's possible to set the drill to low gear and turn it slowly. It's easier for me to do it this way than to try and reach in with some other type of paddle and mix it manually, and I also think there's less possibility for introducing infection this way than transferring it to a bottling bucket. I have no proof of this, just my theory :)
 
Back
Top