Ebay Temp Control Install

Homebrew Talk - Beer, Wine, Mead, & Cider Brewing Discussion Forum

Help Support Homebrew Talk - Beer, Wine, Mead, & Cider Brewing Discussion Forum:

This site may earn a commission from merchant affiliate links, including eBay, Amazon, and others.

JasonO

Well-Known Member
Joined
Apr 19, 2011
Messages
84
Reaction score
5
Location
Darien
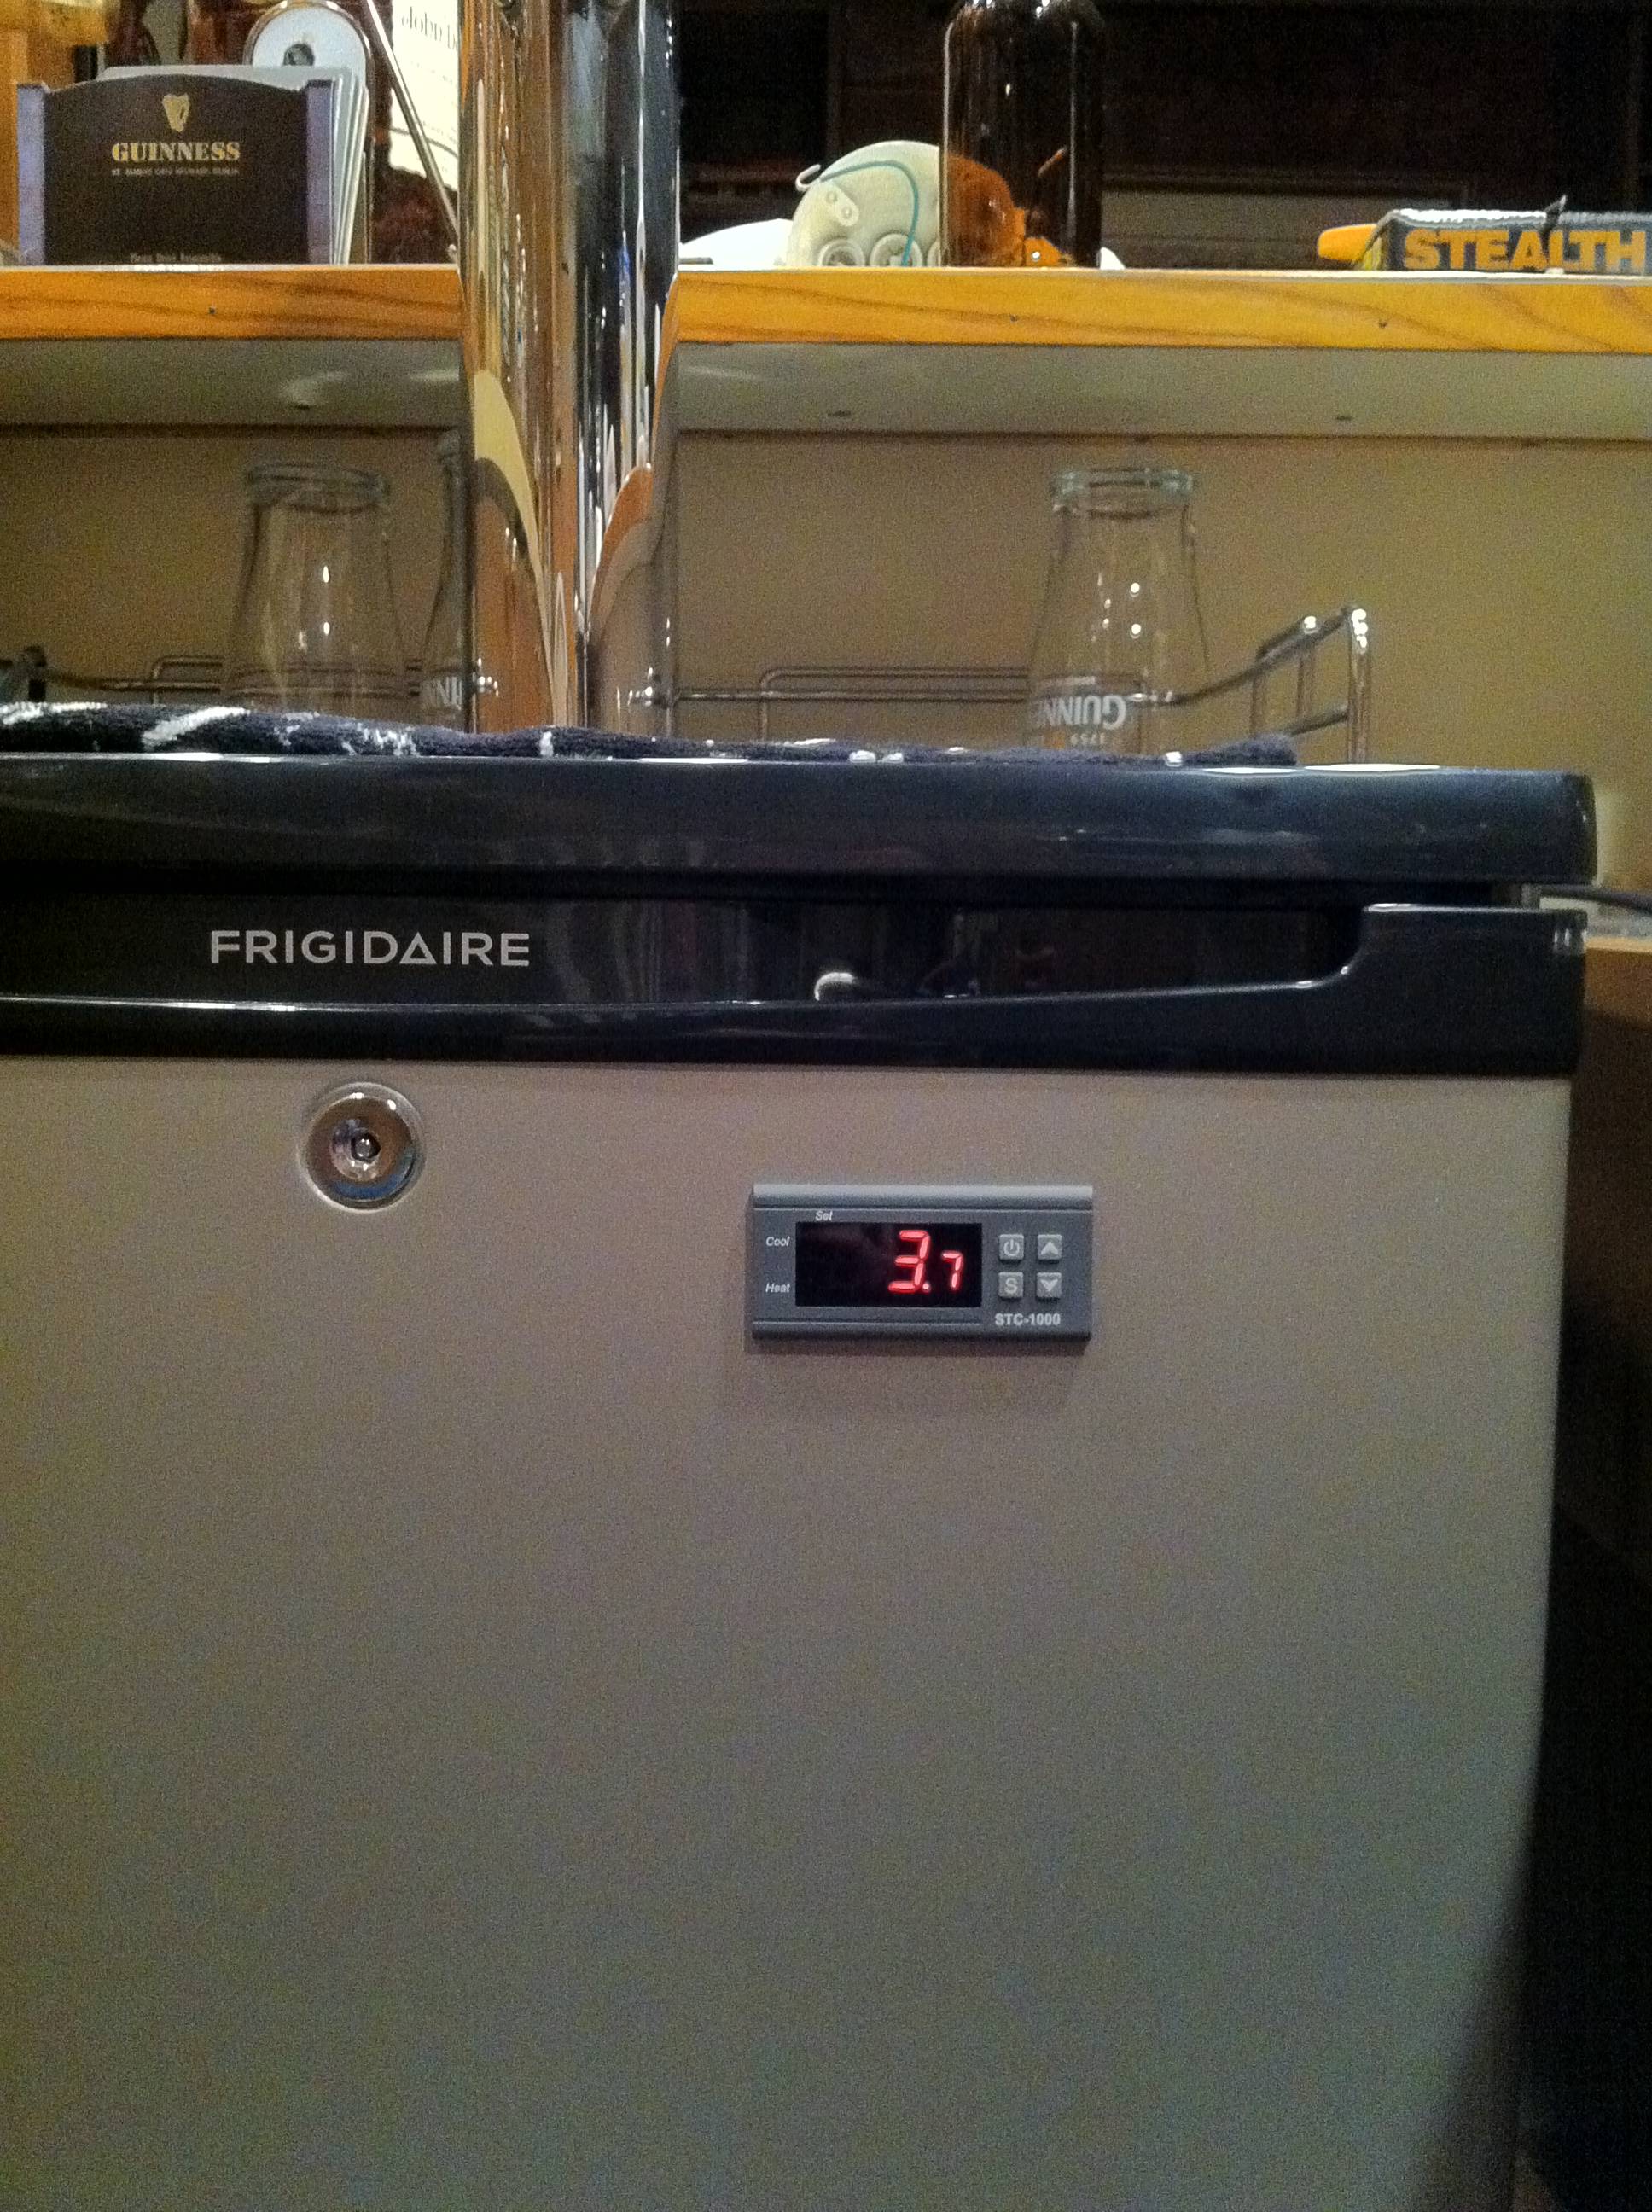
I Finally got around to installing my Ebay temp controller over the weekend. For $25 it's a great value!

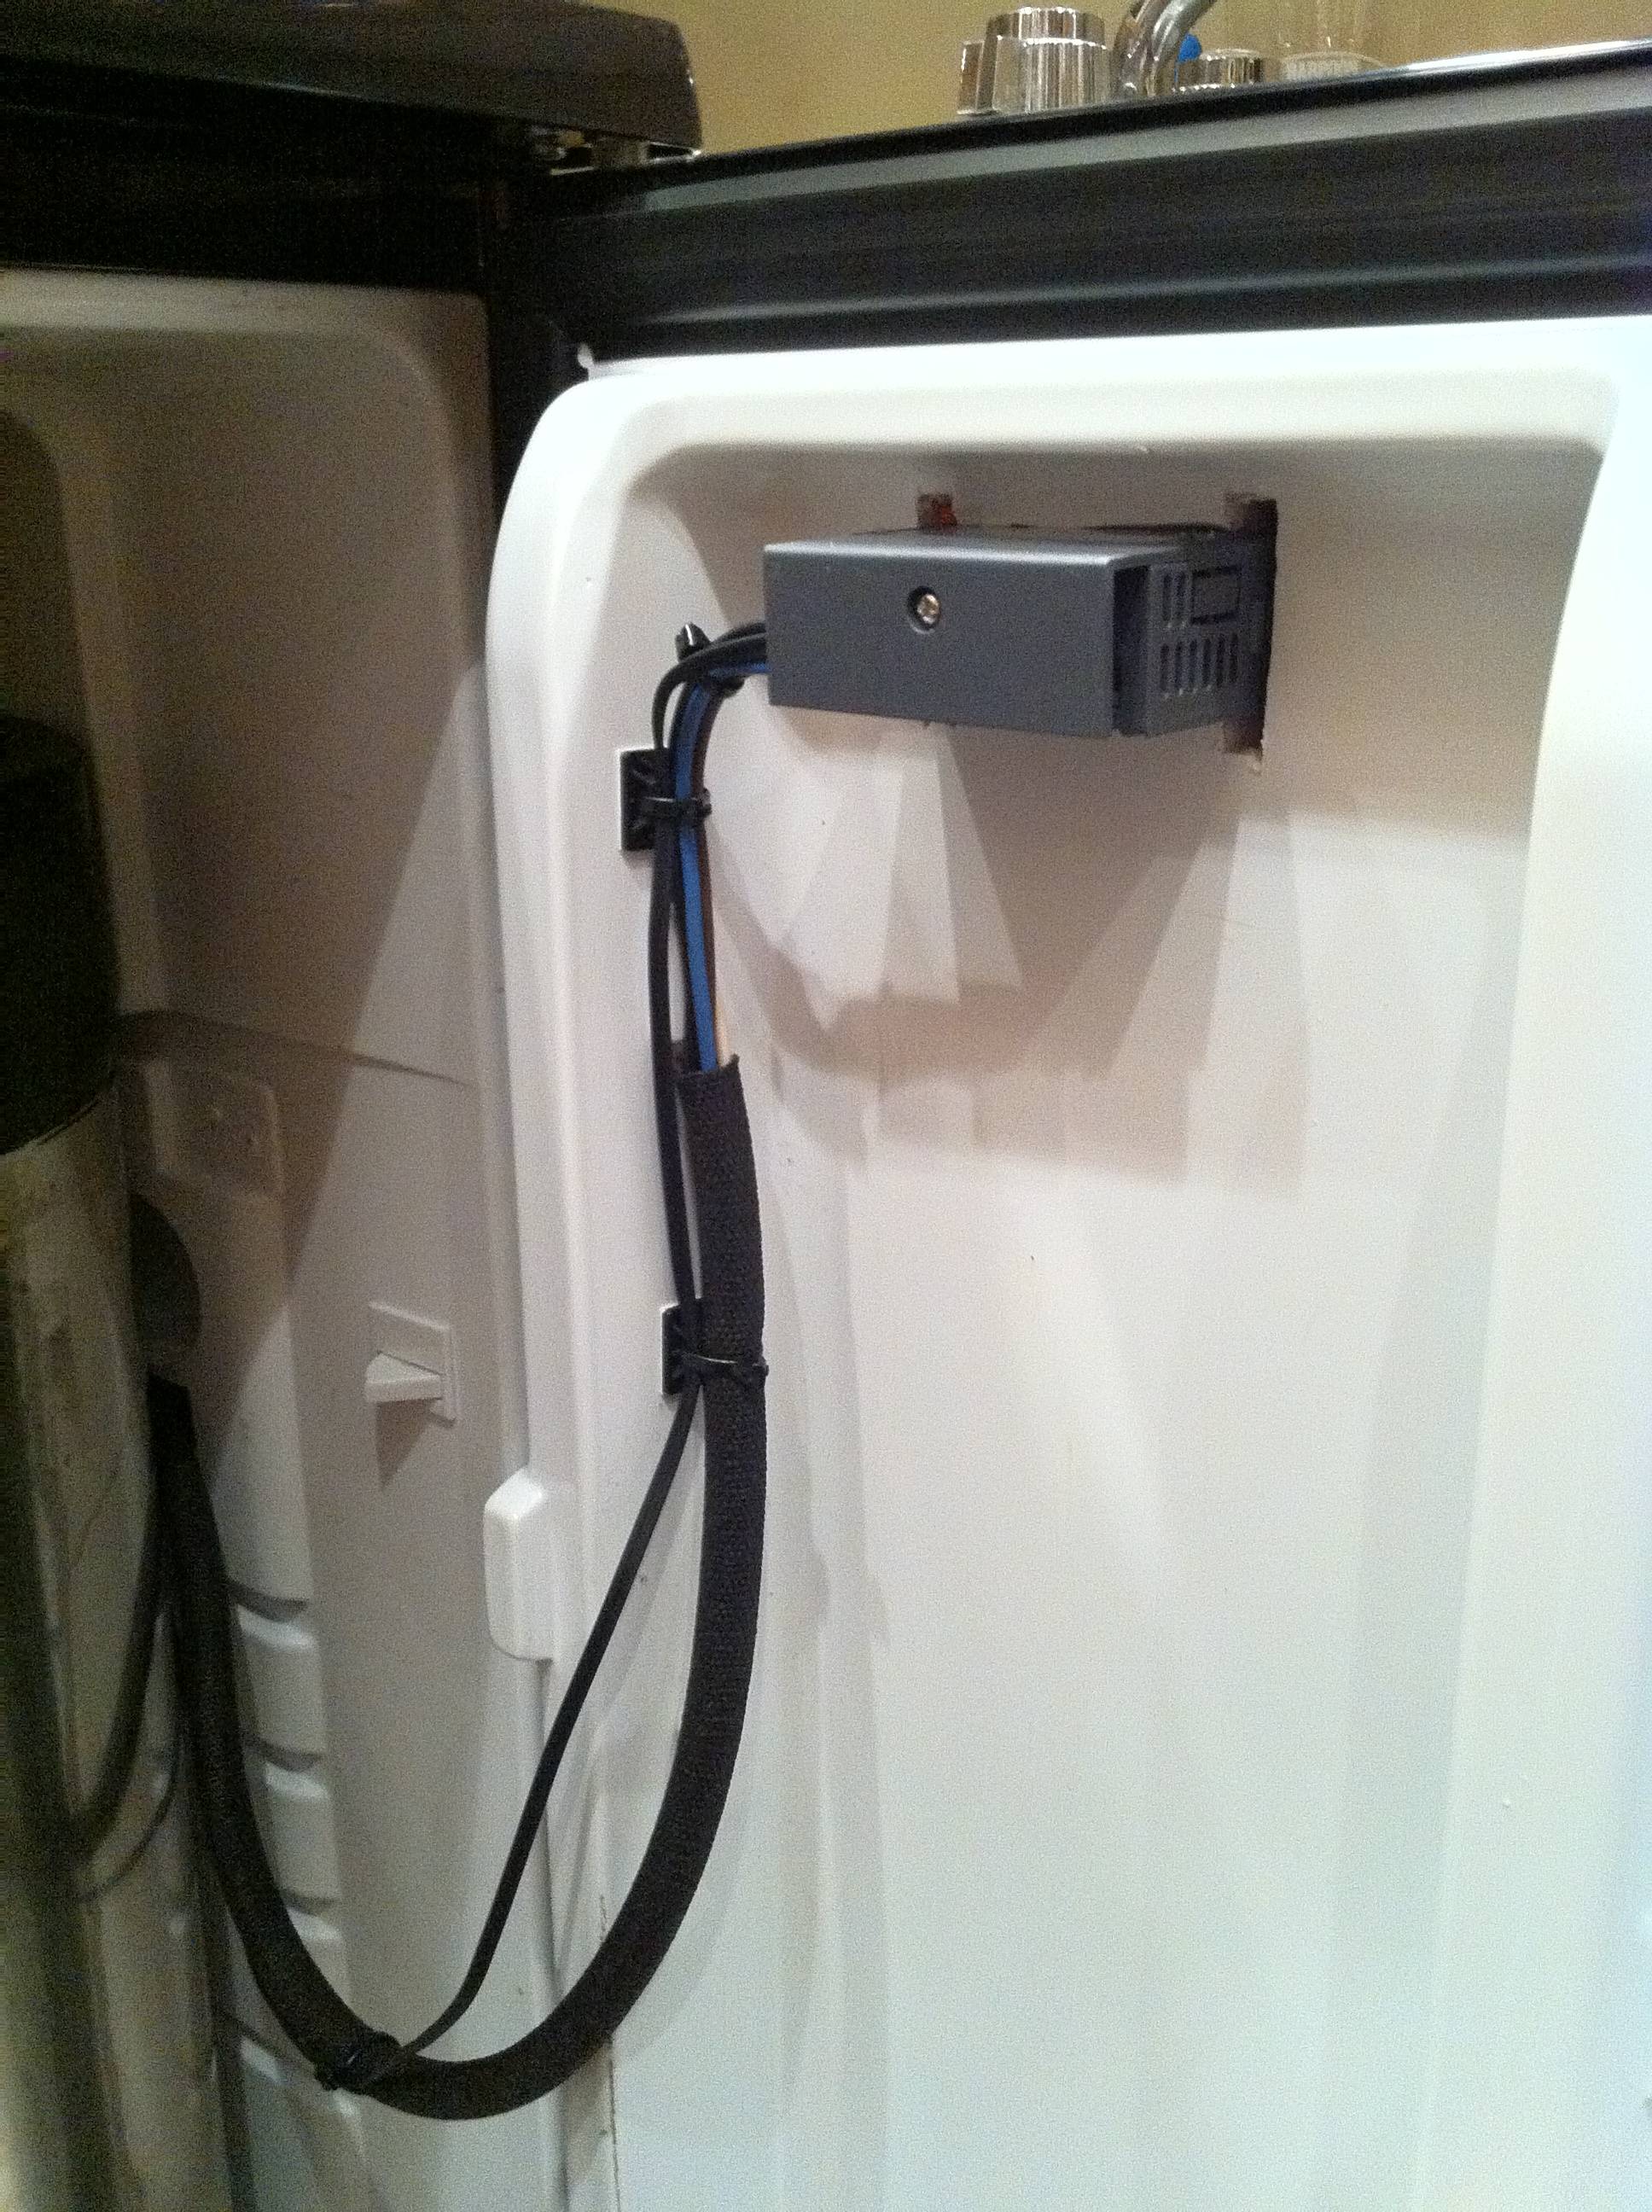
I removed the stock thermostat and extended the factory wiring inside the fridge to reach the door. I'm really happy the way it turned out. The only thing left is to make something to buffer the temp probe a bit.

yITzM.jpg

TnVc7.jpg
 
Very Nice! Would you mind sharing details of how you wired it up? I'm looking to do the exact same thing in my mini fridge.
 
Very Nice! Would you mind sharing details of how you wired it up? I'm looking to do the exact same thing in my mini fridge.

Sure thing, I'll do a quick write up with some more pictures tonight when I get home.

-Jason
 
As far as a buffer goes, I've found sand to work perfectly. I wasn't positive that you could submerge the probe, wasn't convinced on best placement inside fridge to free hang, so it was suggested to try sand, works like a charm. Just bury it in a small glass or jar (mines in Tupperware).
 
As far as a buffer goes, I've found sand to work perfectly. I wasn't positive that you could submerge the probe, wasn't convinced on best placement inside fridge to free hang, so it was suggested to try sand, works like a charm. Just bury it in a small glass or jar (mines in Tupperware).

Great idea! I too was not 100% positive the sensor would last submerged. I'll give that a shot tonight. At the moment I have it taped to my 5lb co2 tank.
 
Sure thing, I'll do a quick write up with some more pictures tonight when I get home.

-Jason

Yes!!! I will look forward to this I really wanna try this but I'm worried about wiring. I would love an in depth how to with pics
 
Very nice. Planning on this too. I have the same fridge and like how this looks. Did u have any clearence issues with the back of the unit and the keg?
 
Hey guys, I've created an imgur album with some detailed pictures of my setup. I've added some comments about the install to each photo.

http://imgur.com/a/XSIJP

Overall this was pretty simple, maybe a few hours total to get everything done. This was a great little project and works much better then the stock thermostat.

Cutting door:
I think this was the longest part (measure 3 times cut once). A Dremel tool with the reinforced cutting blade will come in handy for cutting the outside metal in the door. You will need to trim some extra on each side so you can use the clips to attach the controller.​

Wiring:
Everything is soldered and heatshrunk. I still need to cleanup the unused wires from the door switch.​

Jason
 
so if im seeing this right... you only have 5 wires running from your controller? I read your description but im still a little confused...

Also what connects the wires into the controller box... is that soldered or is there a crush screw or something?
 
so if im seeing this right... you only have 5 wires running from your controller? I read your description but im still a little confused...

Also what connects the wires into the controller box... is that soldered or is there a crush screw or something?

On the back of the controller there are screw down terminals that connect the wires. You can kinda see the green screw terminals in the 4th and 5th picture. there are 6 connections total, 2 for power, 2 for the sensor, 2 for the cold relay.
 
ok so your black and white wire go to the 3-prong plug that you plug into the wall... the thin black wire is just the temperature probe, and the brown and blue wire go to the screws on the 3 prong socket?

Wheres the 6th wire?
 
ok so your black and white wire go to the 3-prong plug that you plug into the wall... the thin black wire is just the temperature probe, and the brown and blue wire go to the screws on the 3 prong socket?

Wheres the 6th wire?

There are 2 conductors on the temp probe that is the 6th connection. The black and white wires were removed from the stock thermostat but yes they go to the wall in the end through the stock wiring.

-Jason
 
Ohhh I had no idea that you could use the stock wiring. So where are you running the brown and blue wire to? They go to the stock thermostat?
 
Ohhh I had no idea that you could use the stock wiring. So where are you running the brown and blue wire to? They go to the stock thermostat?

So I completely removed the stock thermostat. The blue wire feeds power to the compressor from the STC-1000. The brown wire (attached to the stock black wire) is the hot 120v wire for the cold side feeding the STC-1000 if that makes sense.

Yeah using the stock wires saved a bunch of time, basically I just replaced the stock thermostat not using the wiring for the light bulb and switch.

-Jason
 
Ok would you (or someone else) help me with the wiring for mine. heres the picture

attachment


ok so...

I disconnect the black and white wire from my thermostat and compressor and connect them to the first two pins on the STC-1000

I connect the next two wires to the probe for the sensor to the 3rd and 4th pin on the STC-1000

Then I disconnect the ??? and connect to the 7th pin on the STC-1000

Then I disconnect my yellow wire from the thermostat and connect that to the 8th pin on the STC-1000

The green wire appears to be a ground so i just leave it...
 
Very nice man, Clean and simple. I'm going to do this to mine because for some reason I cannot get mine to work with hoe I have it now. Nice work.

-Evan
 
Ok would you (or someone else) help me with the wiring for mine. heres the picture

attachment


ok so...

I disconnect the black and white wire from my thermostat and compressor and connect them to the first two pins on the STC-1000

I connect the next two wires to the probe for the sensor to the 3rd and 4th pin on the STC-1000

Then I disconnect the ??? and connect to the 7th pin on the STC-1000

Then I disconnect my yellow wire from the thermostat and connect that to the 8th pin on the STC-1000

The green wire appears to be a ground so i just leave it...

Hey Duke, looks like your picture link is broken. But what I did was split the black wire into 2. One goes to the power for the controller the second goes to the cold relay to power the compressor when needed.
 
heres the link again

thanks for all your help

Hey Duke, from the looks of it you need to take your black and white wires and split them.

For the black wire:
1 leg will power the the STC-1000 the other will go to the cold relay. Your Yellow wire will be the other wire in the cold relay.

For the White wire:
1 leg will stay the same to the compressor
the 2nd leg will go to to the power terminal on the STC-1000.

I think that should work.
 
The thermo in my fridge just has a black, white, and green wire, so I'm going to have to do some experimenting to figure out how to wire it up. Unless anyone has any ideas?
 
well black and white are universal... And i would think your green wire is coming out of the compressor? Then it would be the same as my yellow wire... in theory... Just my .02
 
So, my mini fridge required a little bit of fiddling to get everything running properly.

As it turned out, I had 3 wires running to my stock thermostat,
Grey=120V Hot from wall
Blue= 120V Hot back to Compressor
Green= Ground

The Grey wire I split to feed the 1st terminal on the STC as well as the cold relay
The Blue goes to the 2nd leg of the cold relay

Since the green wire serves no purpose after removing the stock compressor (STC-1000 has no ground wiring) I spliced it into the neutral line coming from the wall power on the rear of the mini fridge, and then extended that inside to the 2nd power terminal on the STC.

I also spliced on a 3rd 120V Hot line for when I want to add heating to the chamber.
 
I'll bring this thread back to life to see if anyone has an update. I'm planning to mount one of these through the door of my freezer and was wondering if anyone has had issues with moisture harming the controller?
 
This works wonderfully for me. Moisture hasn't been a problem for me. The only problem I have had is with the wiring. When opening and closing the door the wiring sometimes gets caught up on my kegs. And this also loosens the wiring in the back of the controller. I actually had wires fall out and touch and caused sparks. It was quite scary. I ended up finding terminal ends that fit in the controller a little better than just bare wires.
 
Back
Top