• Please visit and share your knowledge at our sister communities:
  • If you have not, please join our official Homebrewing Facebook Group!

    Homebrewing Facebook Group

Easy Steam Infusion Mash System

Homebrew Talk

Help Support Homebrew Talk:

This site may earn a commission from merchant affiliate links, including eBay, Amazon, and others.
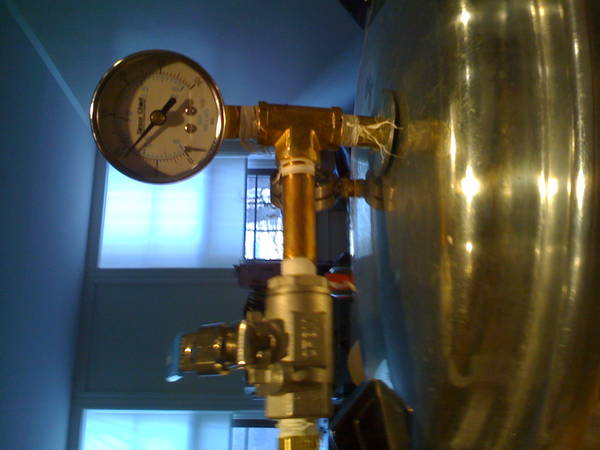
I just finished mine with a 12QT pot... this is awesome.... i'm limited to 15PSI perhaps i want to go to like 25? ;)

IMG_03131.JPG


IMG_0316.JPG


How come the hose fills back up with water when I shut the valve?
 
I figured thats what it had to be, is it worth worrying about a check valve at the entrance to the manifold?
 
More........... I have been reading about steam mash all vacation. cant wait to see the writeup on the SIRMS

I like the idea of a separate steam manifold.

Prost
 
yeah... today was supposed to be my first step mash, ended up being a single infusion...
 
it's nothing I'd be too worried about but if you're really concerned, just make a vacuum break near the high point on the hose. slide a 2" piece of tubing that has the same id as your tubing's od, so it's a tight fit. Drill one small hole near the high point of the steam tubing and slide the small piece over the hole. This will create a seal while you're steaming, then slide the tubing down to expose the hole after you shut off the steam. This will vent the vacuum, but will put air back in your steam line.
 
Flyguy, I am very confused. I printed out a list of the parts you bought to go to the hardware store and build my own. However, in your list you said you use a 1/4" copper T-junction fitting. In your Post you said (which would be a part on the list you left out) "I bent 3/8" tubing around a small pot to form a loop. I sweated a T junction to complete the loop." Your list mentioned nothing about the 3/8 copper to make the circle in the MLT. So you used a 1/4" T fitting with 3/8" copper tubing and how in the heck did you stretch 1/4" silicone tubing around 3/8" copper. I am almost sure this is something that I am overlooking as no one has seemed to bring it up in your post. AWSOME efficient build though.

P.S. I love tying fly's, just got back into it after 8 years. I fish in MD,DE, PA area.
 
Yes, that is correct. Fittings and pipe are measured using a different standard than soft tubing (one measures the inner diameter while the other is outer diameter). So yes, 3/8" tubing will fit in a 1/4" tee-fitting.

And silicone tubing is STRETCHY stuff. 1/4" ID silicone tubing will easily fit onto 3/8" copper tubing. You want it to be snug.

I believe that is all correct! If not, someone else will correct me if I am wrong, hopefully.

I love fly-tying as well. Like brewing, I haven't done much of it in the last 8 months though, due to my wife and I being swamped with work. :(

Cheers! :mug:
 
Where do you get that silicone tubing? The only thing i can find at home depot or lowes is stuff that looks like that but it says poly-something or other.
 
I got mine at McMaster-Carr, but I think Morebeer or other online HBS might sell it as well. I never had any luck finding it at home repair places, including plumbing shops.
 
The 1/2" silicone tubing from Morebeer is really decent quality stuff at a good price. I use it for transfer hoses with my recirc system. But it is a bit big for transferring steam. Did you see if they have smaller diameter silicone tubing?
 
I went to Lowes and got the copper tubing that fits into the Watts -A41 fitting, its 1/4in OD. How did you get 3/8 in OD copper tubing to fit into that Watts-A41?
 
I thought it might be fun to post a little video on the steam mashing setup I built. It has been a great addition to my brewery.
 
Last edited by a moderator:
Cool vid. How many batches before you dialed in the lag time with the thermoter? (stopping at 148 for a 153 mash?) is this the same temp spread no matter what target temp?
 
Cool vid. How many batches before you dialed in the lag time with the thermoter? (stopping at 148 for a 153 mash?) is this the same temp spread no matter what target temp?


I figured that out after the first attempt. :D

And really, I turn off the heat on the burner 5 to 6 degrees below my target temp and let the pressure cooker use up most of its steam finishing with shutting off the ball valve around 2 degrees below. Again, once you get your system figured out, it's pretty easy.

As you can see, once the steam gets cranking and you stir, the temp rises pretty quickly. That particular step in the video took me around 6-7 minutes to go from 122º to 152º.

What was your batch size in that video? Man, that mash looks to be very thin! What was your water to grain ratio? Would it work as well with a 10 or 12 gallon batch? I like the concept! May have to give it a try myself soon. I'll post back with my results. Time to go looking for a pressure cooker on Ebay I guess.
 
Steam heating works best on smaller batch sizes, but could be scaled up to larger sizes provided you have (1) a proportionally larger pressure cooker (so you don't run out of steam/water), and (2) you have an adequate heat source (which tends to be the limiting factor).

I got a 6 gal pressure cooker that I want to fire with a propane burner, but have been waiting on finishing my brew stand first. I am pretty sure I will be able to easily do 10 gal batches with that setup.
 
What was your batch size in that video? Man, that mash looks to be very thin! What was your water to grain ratio? Would it work as well with a 10 or 12 gallon batch? I like the concept! May have to give it a try myself soon. I'll post back with my results. Time to go looking for a pressure cooker on Ebay I guess.

I did 11.5 gallons of a blue moon clone. The mash ratio was 1.40.

I brought 14 gallons of wort to the kettle at 1.046. 91% eff!

I've been steam mashing for over a year and have 15 or so batches under my belt. After going back and looking at my sessions, I noticed that I got better efficiency with a ratio that was 1.25 - 1.5.
 
Had a couple questions for the people who use steam like this.

1. How big is your pressure cooker compared to your batch size.
2. How much water do you start with in the pressure cooker.
3. How much water is left when you're done.

Trying to get an idea of what size pressure cooker is needed for 10 gallon batches, a large pressure cooker is not a problem but the bigger the pressure cooker, the more heat necessary before it is ready, so if I need a 24 quart pressure cooker, then I'll probably need a small gas burner rather than electric.
 
I bought a 5 gal (20 L) pressure cooker for 10 gal batches. You could probably get away with something smaller, but with a sufficient heat source a big pressure cooker is going to make things a lot easier (and quicker).
 
What is a good size ouput from the pressure cooker- 1/4", 3/8"?

I am going to be running a solenoid valve and have my steam infusion automated, so I need to know what size orifice I need on the solenoid valve.
 
Thanks FlyGuy, was hoping you would say that, have a 5 gallon canning setup already so that is one less thing I need to buy.

I'm also really interested in how your SIRMS setup turns out, I've been brewing with a friend for years who uses a RIMS rig and was originally thinking of going that route when I built my own, but I think your write-up has convinced me that using steam is a much safer and more efficient way to go. Keep up the good work.
 
What is a good size ouput from the pressure cooker- 1/4", 3/8"?

I am going to be running a solenoid valve and have my steam infusion automated, so I need to know what size orifice I need on the solenoid valve.

I have only used 1/4" and that works fine, but I can't speak to whether 3/8" would be better or not. Sorry.
 
THanks FlyGuy... Have you used 1/4" on any 10g batches yet, as this will be the largest size I attempt? I am definitely okay just using 1/4" if you have had success- they are a bit cheaper :)

I have a 22qt presto pressure cooker I will be using, so I think the volume is fine. Thanks again.
 
Thanks FlyGuy, was hoping you would say that, have a 5 gallon canning setup already so that is one less thing I need to buy.

I'm also really interested in how your SIRMS setup turns out, I've been brewing with a friend for years who uses a RIMS rig and was originally thinking of going that route when I built my own, but I think your write-up has convinced me that using steam is a much safer and more efficient way to go. Keep up the good work.

It sounds like you are set, then. I'll be sure to do up a post when I finally finish my stand and SIRMS system.

Cheers :mug:
 
Definitely do that, and I will do the same...

My intent is to have a SIMS with recirculation just for the last 10-15 minutes of the mash.

Good luck.
 
Hello folks, new member here. Apologies for resurrecting this thread - it seemed like the most appropriate place for my question. I'm a long time lurker with grand plans for steam driven mashing using a pressure cooker.

I'd prefer an all-electric solution for steam generation, and I've got 220v power available. I've not been able to find any external heating in the 4000+ watt range except for band heaters which would get expensive.

There's another thread that shows a heating element built into a corny keg for steam generation. My thoughts run to modifying the pressure cooker to take a heating element. That probably means drilling through the side of the cooker and mounting the element there. And heck, let's drill another hole for a temperature probe while we're at it, so I can run it with a PID. Goal would be to automate the system to maintain pressure at some point below 15 psi.

To note, I'm speaking of modifying a 23qt aluminum pressure cooker already in my posession. I'd leave the other safety features in place: pressure relief valve & emergency pop out pressure relief valve (present on this model).

Given appropriate mounting and leak testing, do you think the structural integrity of the pressure cooker would be significantly affected? Dangerously so?
 
Is the concensus that a SS braid manifold will not work for steam injection, because there are too many holes/the holes are too big so that the all of the steam goes out of the first couple of openings in the braid leading to hotspots? Has anyone actually verified this? I think I can borrow a pressure cooker from my IL's and rig it up to test it with just a cooler of water, wonder if it's worth exploring.
 
Just a bump to see if anyone is certain that this will not work with a SS braid. I'm thinking of giving it a try with a MLT full of water to see if it has potential unless I get a few resounding NOs!!!
 
Back
Top