cyberbackpacker
Well-Known Member
Kladue on here is extremely knowledgeable about steam, I believe he does it professionally... maybe pm him and ask him. He is the steam guru. When you get an answer, then post it for the rest of us!

To test the system, I heated 5 gallons of water from 122 degrees F to 152 F. Using only steam for heat, I was able to raise the temperature of the water in the cooler in about 15 minutes. I was a bit disappointed, since Brewman was able to heat water with his system at about twice that speed.
I did some trial and error with finer hose (1/8" silicone tubing), and a manifold made from smaller 1/4" copper tubing (see below). While the smaller diameter tubing and manifold increased the pressure of the steam injection, it did little to change the heating times (in fact it took longer).

I discussed this with Brewman across multiple, multiple PMsand we decided that the bottleneck in my system was the heat source. Through some fancy calculations based on heat transfer in the cooler, Brewman calculated that I was delivering the equivalent of 2.4 kw of energy with this system, which is approximately the output of the burner on my stove. We also decided that a larger pot, which holds a greater volume of water, would be able to deliver more heat to the manifold because it has a greater capacity to store energy in the form of heat and pressure. I confirmed this with my system I had an initial rise in temperature that was very fast for the first few minutes of steam injection, and then the heating dropped to a lower but consistent rate (apparently as the pressure in my pot dropped and the stored energy was transferred). Brewmans system was presumably more efficient because he has a 4.5 gallon pressure cooker that can store 4 times the heat.
Bottom line: If you want faster heating, a larger pressure cooker and/or a hotter heat source (e.g., a gas burner??) is necessary. However, the heating time in my system seems reasonable for achieving a multi-step mash. I am going to try one tonight when I brew an AG hefe-weizen recipe, and I will report back with my success.


Last month I finally got all the parts I need to finish the build. Time has been hard to come by lately, though. I have the itch to brew and finish the build, but sometimes life just gets in the way.Thanks for writing this up fly, any update on the SRIMS?
Is there a concern with using too much heat under the cooker?
Yes, I let the pressure cooker come to full boil, purge the cooker to expel any air in the cooker, then hook up the transfer hose to the MLT. Once it is back to a full boil and 15 PSI, then it is ready to use.I was curious at what pressure do you open the valve at? 15psi?

If I am using it to sterilize equipment, then just an inch of water or so.
If I am using it for steam injection in the mash, then I put about 3 gals in it. You will never come close to using all of that, but it provides a lot of thermal mass so that you can really transfer a lot of heat to your mash tun at once.


what type of burner are you guys using? The info that came with my pressure cooker said not to use a "turkey fryer" burner, should I just ignore this?
Hello folks, new member here. Apologies for resurrecting this thread - it seemed like the most appropriate place for my question. I'm a long time lurker with grand plans for steam driven mashing using a pressure cooker.
I'd prefer an all-electric solution for steam generation, and I've got 220v power available. I've not been able to find any external heating in the 4000+ watt range except for band heaters which would get expensive.
There's another thread that shows a heating element built into a corny keg for steam generation. My thoughts run to modifying the pressure cooker to take a heating element. That probably means drilling through the side of the cooker and mounting the element there. And heck, let's drill another hole for a temperature probe while we're at it, so I can run it with a PID. Goal would be to automate the system to maintain pressure at some point below 15 psi.
To note, I'm speaking of modifying a 23qt aluminum pressure cooker already in my posession. I'd leave the other safety features in place: pressure relief valve & emergency pop out pressure relief valve (present on this model).
Given appropriate mounting and leak testing, do you think the structural integrity of the pressure cooker would be significantly affected? Dangerously so?
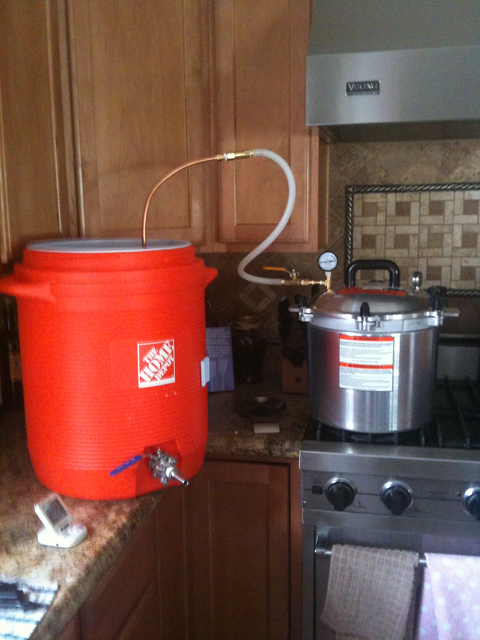

I'm ramping up to start doing AG, and really like the idea of using steam, so here's my setup so far...
I've got my march pump, another 10Gal HLT, and just got a 50qt pot that needs a weldless fitting.
Slowly but surely...
So UPS delivered an "All American 21.5 Qt Aluminum Pressure Cooker" today that looks just like yours. If you have a moment please let me know what hardware you used to add the valve to the lid. My wife cans so we'll both get to use it, I love multipurpose

FlyGuy said:[Disclaimer: Although this worked for me, I do not recommend tampering or modifying a pressure cooker in any way. Modifying or removing safety devices on a pressure cooker can lead to explosion and possible injury. Blah, blah, blah...]
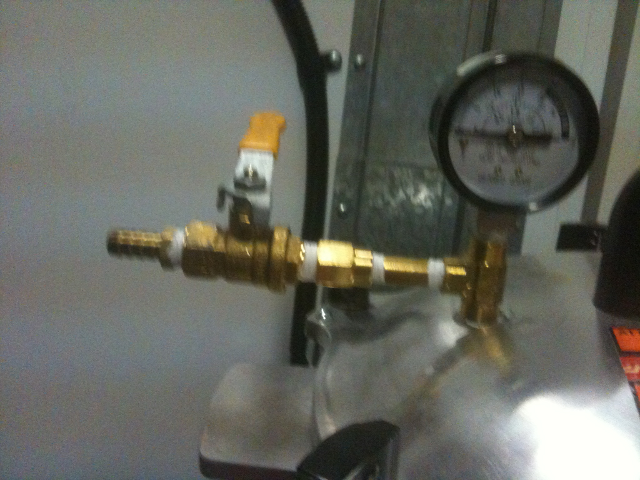
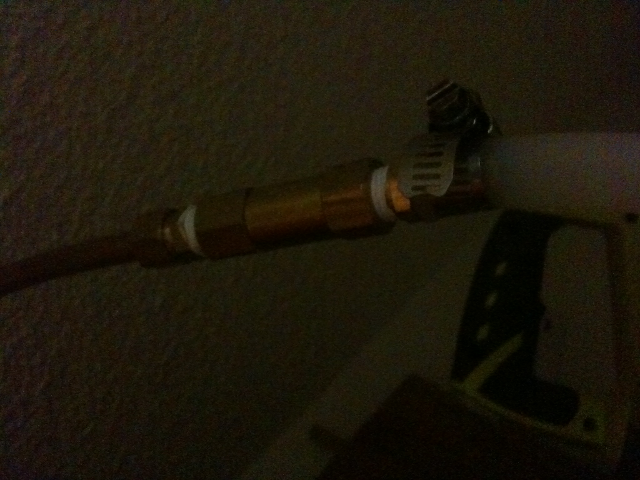
Pressure cooker: Pretty much any decent size pressure cooker (use AT LEAST a 1.5 gal unit) will work, although I wish I had gone with a much bigger unit (see below). If you are lucky, you might be able to unscrew one of the fittings on your pot, insert a tee junction, and run attach your valve to the pot this way (worked for brewman !; see here). The fittings on my pot were too small, so I tapped a 1/8” NPT thread into the lid, and screwed in my valve to control the flow of steam. Works perfectly. I also added a 3 inch piece of 1/4" copper tubing to the valve (it has a built in 1/4" compression fitting) to attach the tubing. A 3/8" inch hose clamp would be a good idea – mine held without it…. until I kinked the silicone tubing and it blew the hose right off the pot!
Steam manifold: I bent 3/8" tubing around a small pot to form a loop. I sweated a T junction to complete the loop. I then drilled about eight 1/16" holes in the tubing with a drill to allow the steam to escape. The silicone tubing can be stretched over the end of the T junction, and mine was snug enough that it did not require a hose clamp. A small thumb clamp can be added to the hose if you want to stop the flow of steam at the manifold end (useful to prevent backflow when the steam flow is stopped at the pot).


![Craft A Brew - Safale BE-256 Yeast - Fermentis - Belgian Ale Dry Yeast - For Belgian & Strong Ales - Ingredients for Home Brewing - Beer Making Supplies - [3 Pack]](https://m.media-amazon.com/images/I/51bcKEwQmWL._SL500_.jpg)


